
How To: Silver Wire Inlay In Guard The Easy Way
By Bjorn J, January 2024
Silver Wire Inlay
Have you ever wanted to try wire inlay in a knife guard for added effect?
Wanted to etch a piece of steel and have something show up as nice and shiny against the etched surface?
Then this article is for you!
** Disclaimer: This is a bit of a backyard blade smithing article and not “proper” silver wire inlay – far from it. But it works with very little specialty tools and I wanted to share it in case anyone else wanted to have a go as well. **
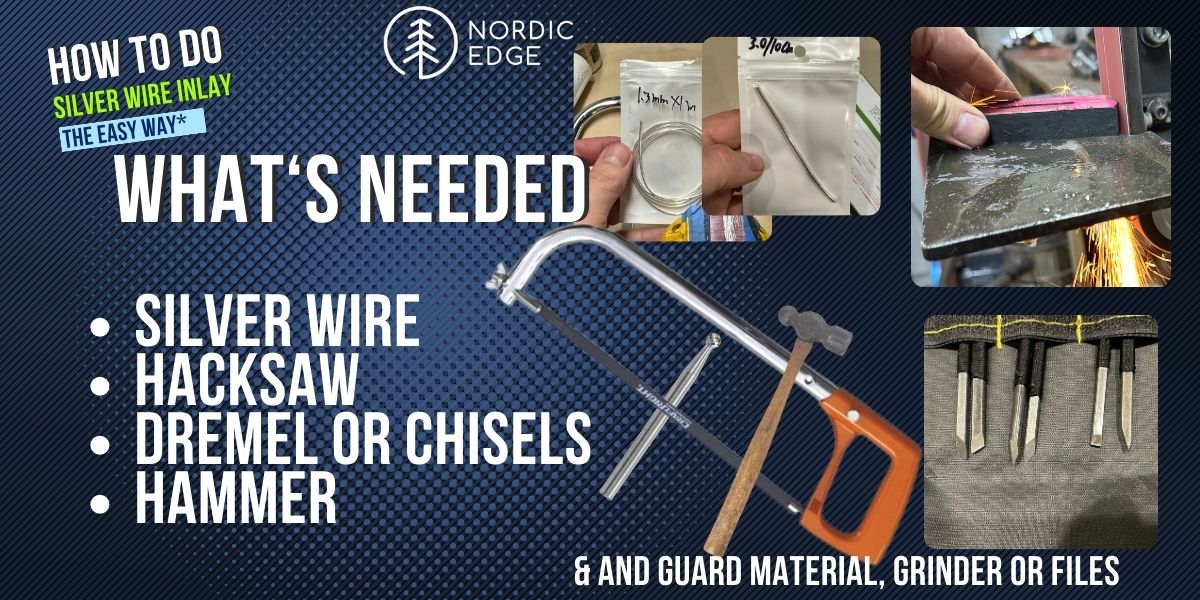
What is needed
- Guard to inlay into
- Hacksaw
- A way to undercut the slit
- Silver wire
- Hammer
- Grinder or files to clean up the guard
- Etchant (Ferric Chloride)
You basically cut a slit with the hacksaw then try to undercut this a bit sideways to make the slit bigger at the bottom than up where it starts.
This way the silver cannot get back out of the slit after it is hammered down into the slit, expanding into the undercut. Then grind away all marks and silver wire sticking out on a grinder.
Not really the proper way to do it
This is not proper silver wire inlay using a microscope, jeweller’s wise and precision tooling. This is a quick and dirty way to get a silver wire into a sword guard that actually works pretty well. And that on the first go!
If you experiment a bit with this process, I think it can look great on simple, straight lines and dots like we are doing here. For my viking sword project it seemed this would be a good fit.
Makers like Andrew Blomfield and Mert Tansu do inlays the proper way and have the right tools. I spoke with both regarding this project. It was Andrew who helped me come up with the process I ended up doing, using a hacksaw and undercutting a bit with a small chisel.
Both Mert and Andrew offered me to come and use their engraving setups (thank you, guys!) but I wanted to try something simpler. Something a bit more backyard without a lot of specialty tools that at least would give a straight line of silver in the guard.
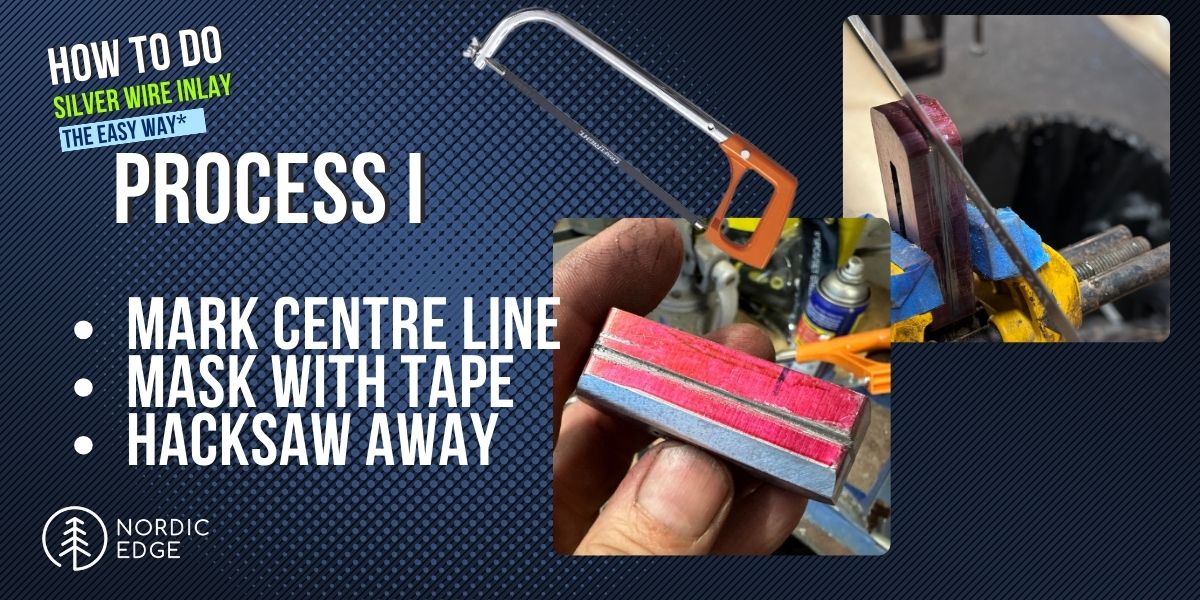
The process – hacksawing away
In my case I am making a Viking sword guard. I wanted to etch the guard when done to make it look aged and have the silver wire show up as a shiny line against the etched, mild steel. I ground the guard to almost final dimensions, before covering it in markup dye before starting.
- Mark centre line with callipers all the way around
- Add 2 layers of masking tape just outside of this line to not make as messy a cut as I did on my first go. (meaning you need to grind off less steel at the end)
- Clamp guard in vice, protected by a scrap piece of leather for protection.
- Slowly start cutting with the hacksaw on or near a corner
- Start both corners on every flat side, then slowly meet in the middle
- Hacksaw away until you get a good groove going
- Try not to make the corner cuts deeper than the flats (more on that later)
Hacksawing a straight line
It was not as difficult as I had thought to hacksaw a straight, deep cut. Starting on a corner and carefully pulling towards myself only until I had a proper cut started. Then starting to lean over towards the long flat side of the guard, and slowly making the cut longer and longer.
The hacksaw was a cheap one from Bunnings, I measured the blade thickness at the teeth to 0.67 mm which seemed perfect for the 1.3 mm silver wire I was going to use.
Where it went wrong
Hacksawing on a corner is much faster than on the long flat sides, and I ended up using the corner to help saw onto either side of the corner too. I should have sawed much less on the corner itself as I went too deep on a couple of the corners. Meaning the silver wire went completely into the slit at least once, where it really only should go 2/3 or so into the slit.
Another issue was that I was not able to 100% make the two straight lines meet nicely in the corner. When I continued the cut around the corner the height was not quite right in a couple of places.
In short, take your time around the corners and if in doubt do not start too deep.
Masking tape
My first attempt ended up scratched outside of the actual slit, but this all ground off with no issues so was not a big problem. On my next go I masked with blue masking tape and that made the clean-up grinding easier, removing even less materials at the end.
So masking was a good idea as the hacksaw blade slipped now and then and now just marked the tape rather than the steel itself.
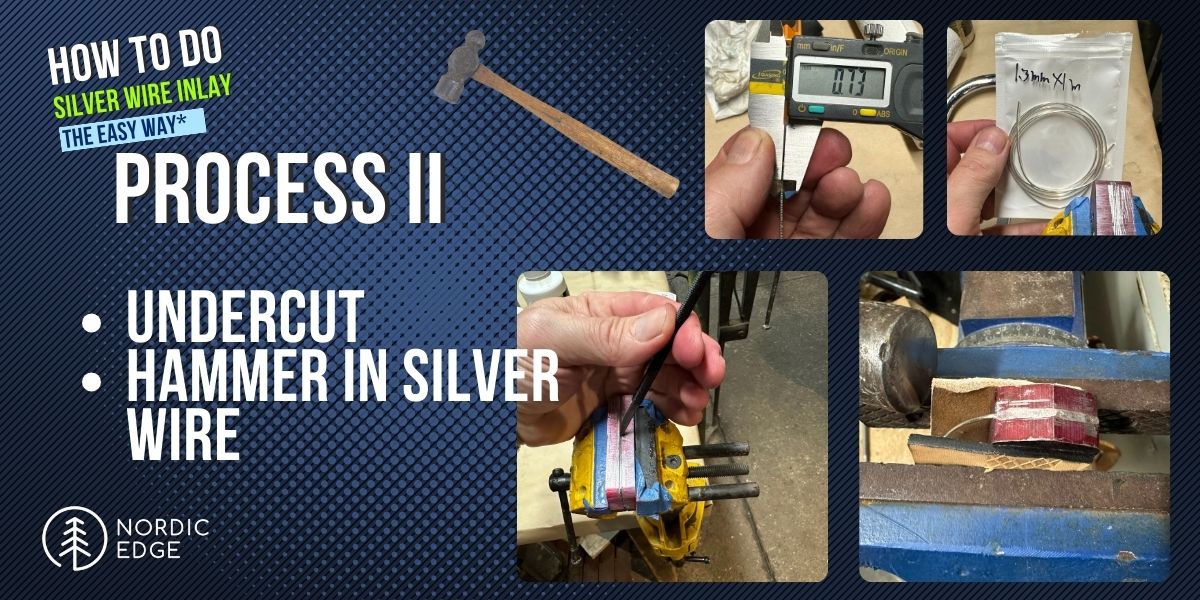
Undercutting the slit - chisel
I am not sure if this really is a critical step or not. In “real” silver wire inlay they use either a precision machine engraving tool to cut or engrave the slit, or hand chisels that cut out the channel or slit. Both options are then followed up with undercutting by chiselling in sideways in the slit. This raises the lip of the cut slightly while digging into the slit sideways.
The point of undercutting the sides of the slit, is that when the bottom of the slit is wider than the top if looking at a cross section, the silver wire cannot get back up after being hammered in. The soft silver deforms into the wider bottom of the slit, locking it in place.
Andrew Blomfield thought it might not be 100% necessary in this simpler version as the hacksaw will leave a rough cut both on the sides of the slit and in the bottom – so this step might be overkill.
But I had already bought a set of tiny chisels off the Internet for a total of $8 and was keen to try it out. Hot Tool Tip: Don’t buy tools off Temu. The chisels bent, I had to regrind the tip several times before polishing it up a bit but it kind of worked in the end. I doubt they were even hardened (?).
I think my rough undercutting was part of making the top of the slit a touch wider too which then gets hammered back down and helps to close the silver wire in.
Undercutting the slit - dremel
Another way to do this would be a carbide ball on a rotary tool. I only did this later when inlaying silver pins in 3 mm as my carbide ball tool on the Dremel was too big to fit down into the hacksaw slit. But this would also work well, get a tiny carbide ball and undercut the channel or slit sideways a touch.
Pure silver vs Sterling silver
I wanted to do gold inlay, but a quick look online at what gold wire costs quickly changed the project to be silver wire inlay!
Reading about silver wire and looking up options online, I learned there are two types:
- Sterling silver: cheaper but not pure. Can discolour in the etching or later. Do not use.
- Pure silver: More expensive, but softer and cleaner silver that will not discolour. Use this one.
How much silver to buy?
I ended up buying two versions, 1.3 mm round pure silver wire for the long straight lines and 3 mm diameter silver wire for the round dots. For this whole project of a Viking sword lower guard and upper guard with silver wire inlay as well as the pommel with both silver wire inlay and silver pin inlay I used about 500 mm of silver wire and most of the 10 cm piece in 3 mm.
I got the silver on ebay for $50 for 1 m of the 1.3 mm and 10 cm of the 3 mm diameter wire.
Hammer time
Then it was onto the actual hammering. This was way easier than I had thought! Clamping the guard in the vice in leather again, I was ready. A small ball peen hammer in hand, silver wire ready to go.
I started in a corner, laying the silver wire on top of the slit and giving it a little tap. Andrew had said I might need to clamp the wire down after hitting it into the metal, or it might pop up again. In my case it never did.
I hammered the silver into the slit, it overflowed and mushroomed nicely onto the guard. It was proper stuck straight away, it never came back out.
I had seen online that the “proper” way is to use a small tool with a polished face to hold down on the wire and hammer that tool. I did not, I just hit away at the actual silver wire with the flat side of the hammer and trying not to dent the guard too much.
Rounding corners was easier than expected too, except where I had messed up the hacksawing a bit and not been able to 100% meet up the two sides evenly.
If you are thinking I should have ditched this guard and started again – you are of course right. That is just not how I make knives ?
At the end when maybe 3 cm left before hitting the corner where it all started, I cut the silver wire with pliers and hammered it all down. Because the silver is so soft, it seemed to mostly just blend and form into a continuous ring which was a great relief. After working with steel, silver was a welcome change.
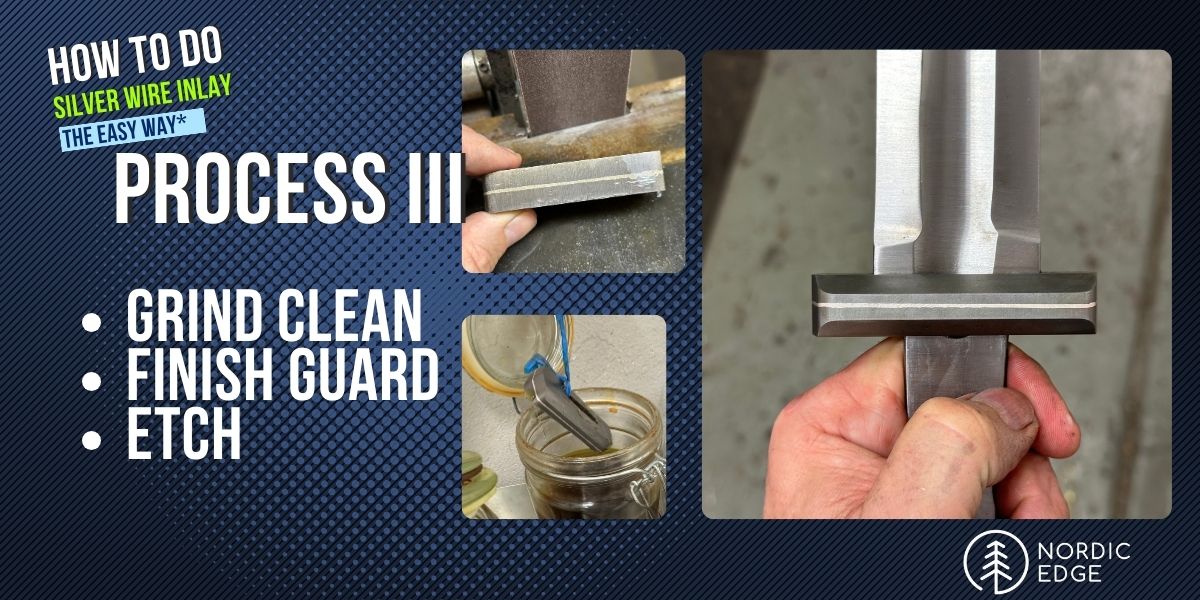
Time to grind clean
Even the first one where I had several marks and scratches from the hacksaw blade slipping, came out clean on the grinder. I touched all sides to the 2x48” grinder and then cleaned up more on the disc grinder to make sure the sides are really 90 degrees to the top and bottom of the guard.
This could of course have been done with hand files and then sandpaper if you have not got a grinder.
Finishing the guard & etching
The only work left in my case was bevelling the top and bottom of the long sides of the guard, so I did that on the grinder before etching in ferric chloride.
Cleaning the guard up with hot water and soap before wiping it down with acetone, then leaving it in the ferric chloride for as while.
The ferric makes the steel grey while leaving the silver nice and shiny. Exactly what I had hoped for!
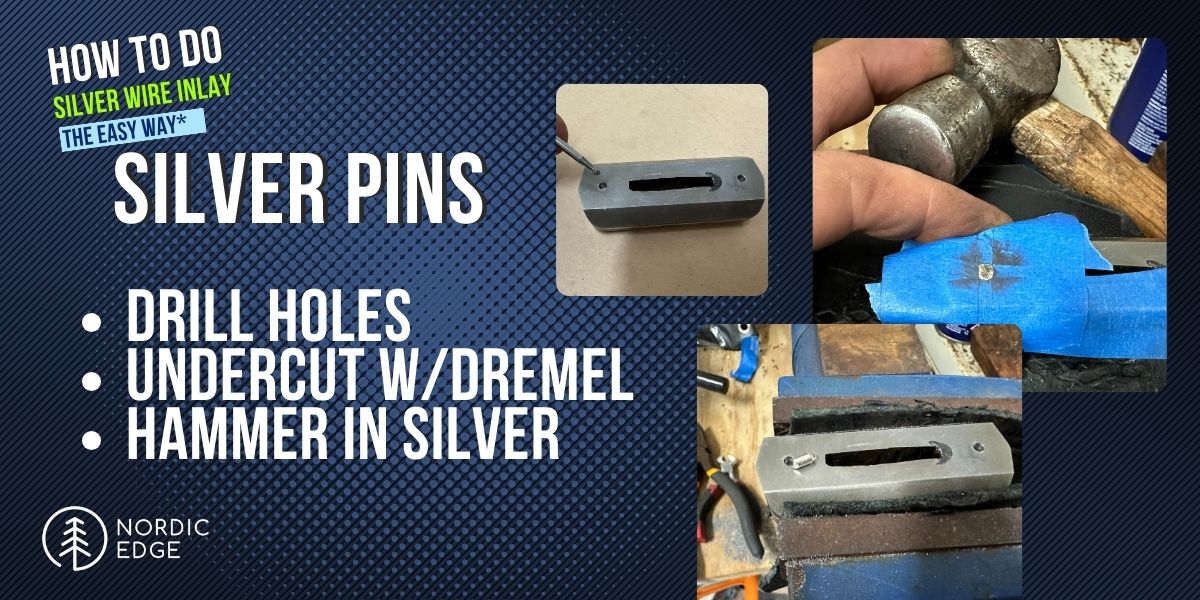
Silver pin inlay - optional extra
On both the guard pieces and the pommel, I also drilled some 3 mm holes. Then with a carbide ball tool on a Dremel the next step was to undercut the bottom of these holes. Basically, just setting the Dremel on very high speed (no idea if this is right but it seemed less jumpy) and then carefully inserting the carbide ball into the drilled hole.
At the bottom of the hole, I touched the carbide ball tool to the outside edge of the hole all the way around a couple of times, making the hole bigger at the bottom than at the top.
This undercutting later locks the silver wire into the hole, so the wire or pin cannot get back up.
This step made the carbide ball very hot, so I kept stopping every couple of seconds, dipping it in water to keep it cool.
Hitting some silver
The silver pins are just short 8-10 mm lengths of 3 mm diameter silver wire, these were peened in with the ball end of the ball peen hammer, turning the guard around to even out the direction of the blows. I placed the guard on a piece of leather on the anvil and hit the silver pin a couple of light blows. Turned the guard 90 degrees and gave it another couple of light taps, and kept going. Soon it was locked in place and mushroomed out over the guard.
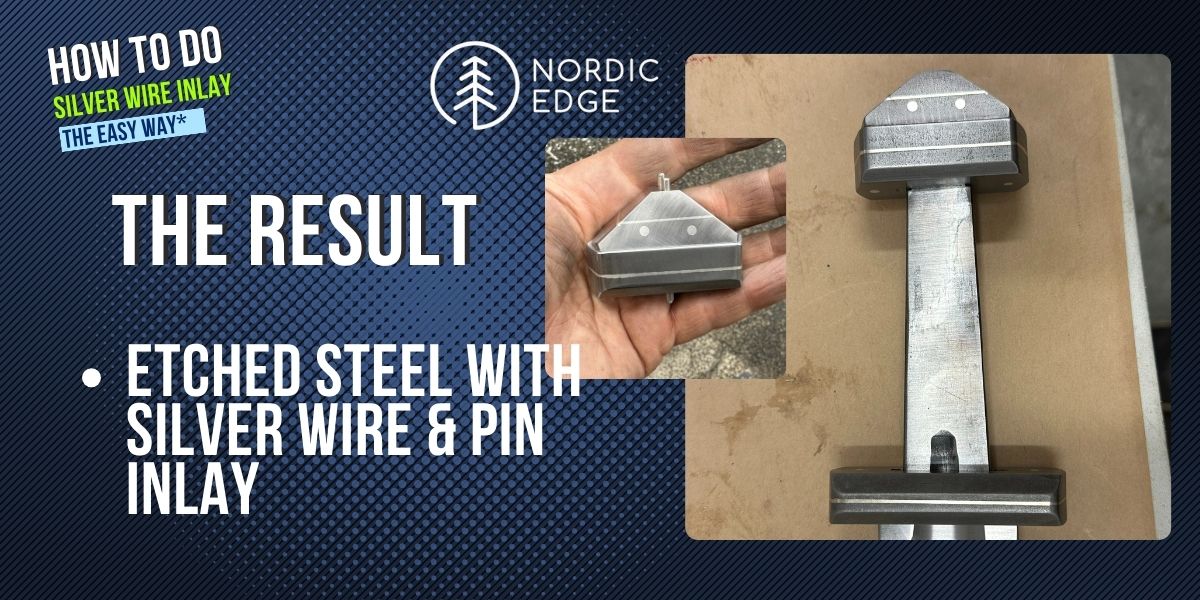
The result and final thoughts
I ended up quite happy with how this came out. The silver wire is nice and shiny against the etched guard, even thought it probably is easy to see it is not 100% straight and even on closer inspection.
I drilled holes through the upper guard and the pommel before peening these together with stainless steel 1/8” (3.15 mm) pins. The stainless steel looks very much like the silver wire in the end and might do the same job if wanting to have a go at this project without buying silver wire. Just be aware the silver is way softer and easier to work with.
Copper wire would probably be another great option to try here. Annealing the copper wire by heating it to red hot before quenching it in water and sanding off any oxide layer should make it soft and pliable. It should hammer in nicely and also give a good contrast when etched as the ferric does nothing to copper either.
So the backyard version of silver wire inlay works on simpler projects like this where all you need is a straight line (or shiny dots) and was great fun.
Thank you for reading along!
Bjorn
Recent Posts
-

The Etch Test: Ferric vs Hydrochloric vs Gator Piss
The Etch Test: Three Very Different Looks From One Steel One of the great things about knife making …3rd Jan 2026 -

Why Bed The Tang In Epoxy - Then Knock it OFF Again.
What is "Bedding the tang"? Bedding the tang means gluing a stick-tang blade into the handle block i …21st Mar 2025 -

Marble Leather - How to Dip Dye Veg Tanned Leather
This was my first experiment with hydrodipping or dip dying leather, and it came out pretty cool! I …14th Mar 2025