
How To Make A Knife Using Hand Tools

Samuel Hart did a great instructional picture-series on Instagram, and we wanted to share it here.
It covers how to make a knife including the blade, using simple hand tools and one of our Basic Knife Making Kits.
Check out Sam's Instagram for the original post here
Sam chose the Carbon Steel kit, this is the easiest to heat treat at home and the one we generally recommend;
The kit comes with
- 1084 Carbon Steel, a 330 mm piece big enough for a full-sized chef knife or 2 smaller blades
- Handle scales, in your choice of material (Sam went with Alder root scales)
- Pin stock for the handles, Sam selected 1/8" steel pins
- Vulcanised spacer material, this goes between the handle scales and the blade

After designing his blade profile, Sam cut the profile out. To speed up the process you could cut roughly to shape with an angle grinder and then go to files. Here Sam is using files. One advantage of using a known blade steel like 1084 is that it comes annealed, meaning as soft as it can possibly be made. So it can easily be worked with hand tools.
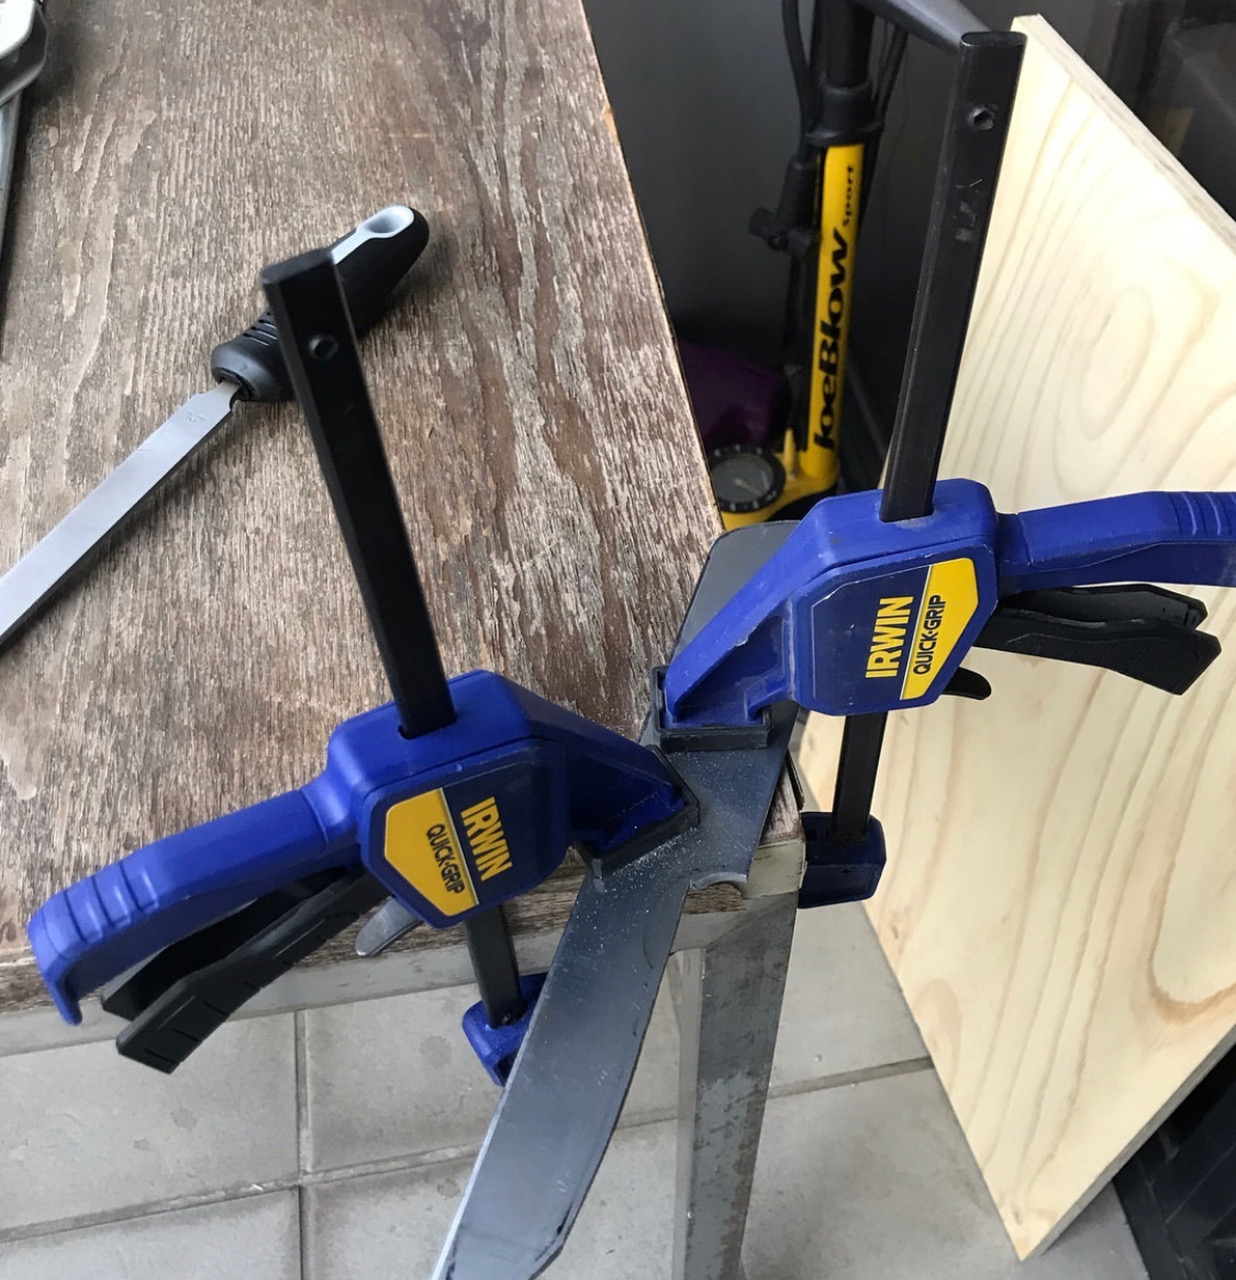
The next step is to file in the bevels, this is what will become the knife's edge. A great way to get an even bevel is to use a hand filing jig. This can be free handed of course, but making a T of wood and clamping the file to a steel rod that goes through an eye bolt, is a low-tech way of getting a much better result. (youtube link here)
(Bonus tip: get some children's chalk used to draw on the sidewalk and fill the file with the chalk. This stops small pieces of steel from sticking between the teeth and scratching the blade. Every 30 sec, flip the file over and lightly brush of the small steel shavings that are there, and fill the file again)
Leave the edge 1 mm thick or slightly less.
Do not go all the way to sharp, this will increase the chance of the edge bending during heat treatment.
Heat treating a 1084 Carbon Steel blade: First Quench to harden, then Temper to soften/strenghten.
- Heat the blade until it is non-magnetic. This is tested by having a magnet next to the forge/furnace and when orange to cherry red, touch the blade to the magnet. If not sticking, that is the temperature you are going for. Heat it up again to that colour.
- Quickly dip the blade in a container of Canola Oil you have pre-heated to 30-40 C. Unless it is summer in Australia and you can have a chuckle at the heating instructions.
- DO NOT BEND THE BLADE after the quench, if it is not straight. It is fragile, and will break.
- Sand off the black scale on one side enough to see some shiny steel. Not the entire blade, just a section 5-10 cm by a couple of cm so you will later see the tempering colours against the now shiny steel.
- Tempering: Place the blade in your kitchen stove at 200 C for 2 hours. Cool under the tap and inspect the tempering colours. As the blade has heated up, it softens slightly, becoming an actual usable knife blade. You want straw yellow to dark orange. Anything darker towards bluegreen is not a disaster but your stove is a bit too hot so remember that next time.
- Temper again for 2 hours (so 2 x 2 hours with a quick cool down between) Tempering is what takes the fragile, brittle and too hard knife blade down into usable range. It becomes less fragile, more springy and ends up a usable blade. Too hot tempering will leave the blade somewhat less hard, but a bent tip is much better than a broken tip so don't worry if going a little too hot.
- DRILL HOLES before heat treatment...this is probably a mistake you will make. Like all the rest of us :)
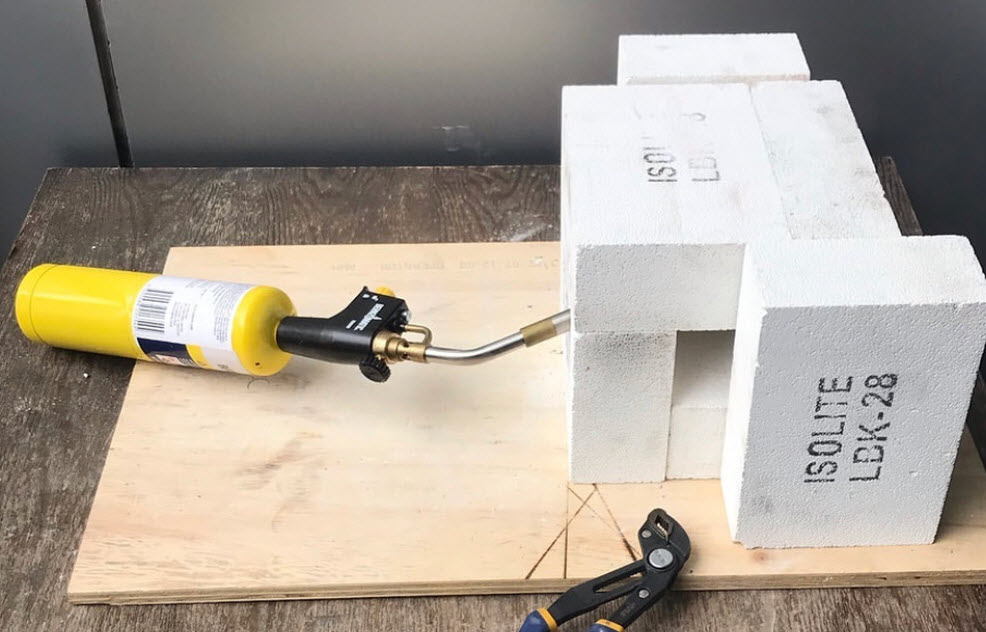
Sam is heat treating using a MAPP gas torch which can be bought from Bunnings or similar hardware stores. The forge is made of fire bricks. Often these can be obtained from places selling materials to build your own pizza oven.
The beauty of 1084 is that any way you can get the blade hot enough, will do. Holding a blow torch to it, putting it in an old charcoal bbq with a hair dryer pumping air through a pipe in the bottom will all work as the steel requires no hold time. Just get it hot, and quench.
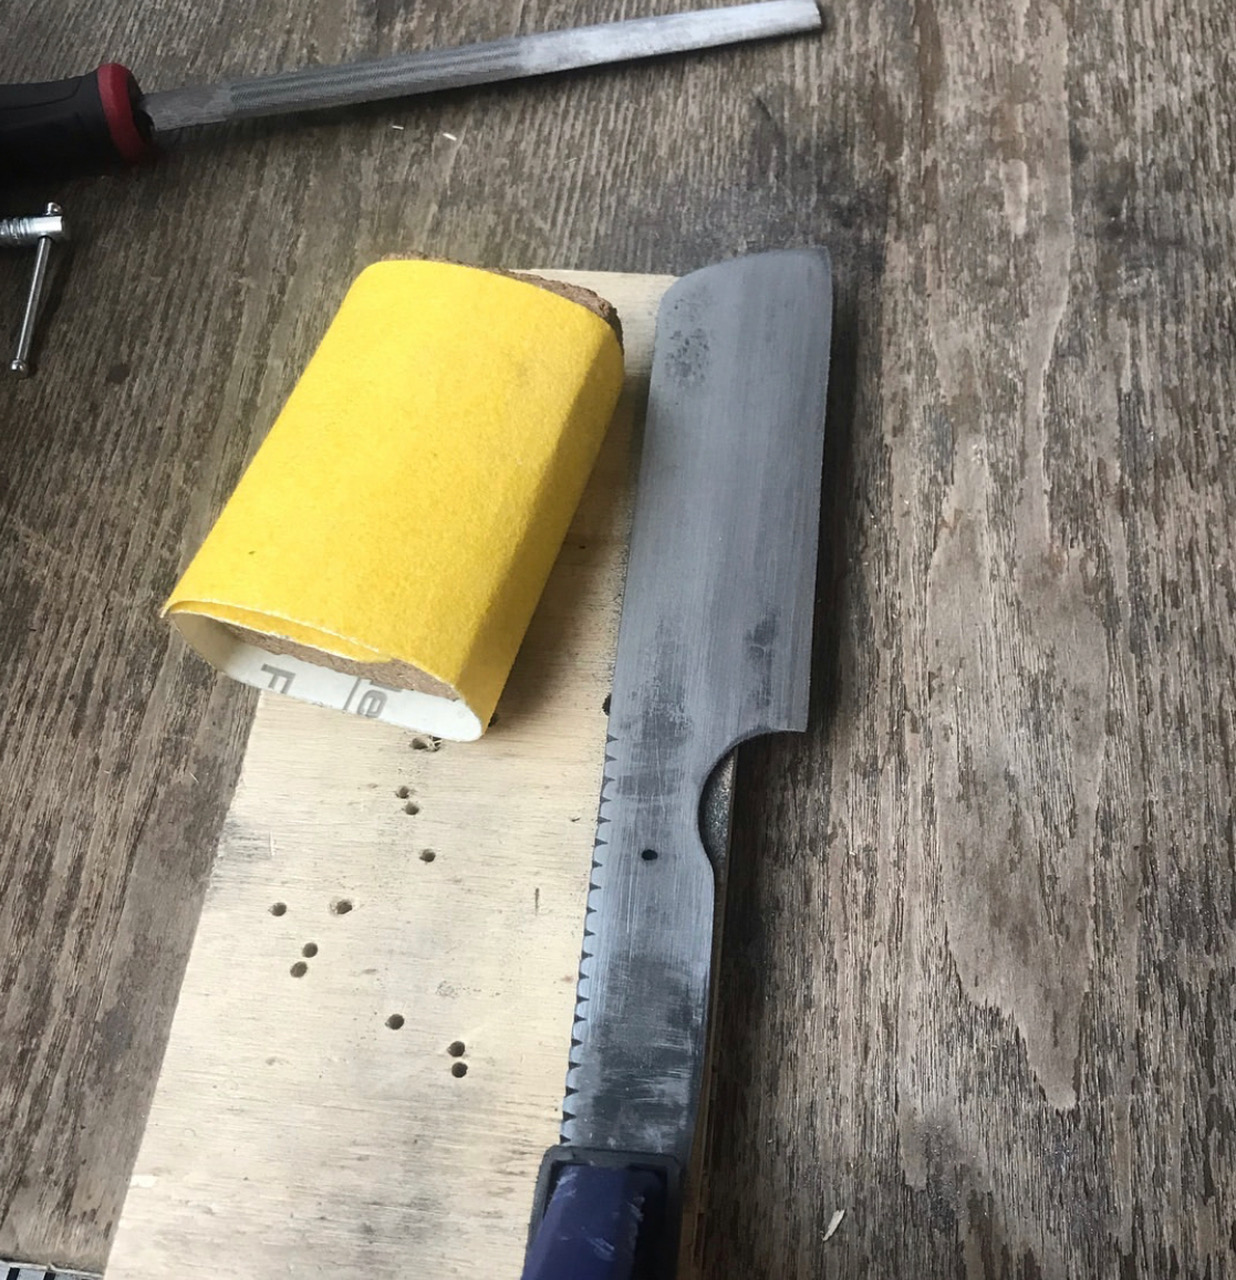
After heat treatment, you need to grind the blade again. This time to sharp if Scandi Grind, or very close to sharp if flat grind.
The hardened blade is ...hard to grind. The thinner the edge was before heat treat, the less hardened steel to hand file. But the thinner the edge was, the higher the chance for getting a wavy edge so start out with 1 mm.
600 grit is a good finish to aim for but this is purely up to your taste of course.
When the blade is completed, you are over on "kit knife making" where you attach scales on each side if doing a fulltang like Samuel here. Or if doing a stick tang, you need to look up those instructions on the "Instructions" tab.
In short:
- Glue to vulcanised spacers to the handle scales after flatting the scales on a piece of sand paper as these are usually not quite flat.
- Cut pin stock slightly longer than the handle/blade width
- Drill holes for pins through handle scales, using the blade as template
- Insert pins in scales (no blade yet) and clamp them together so you can shape the front of the scales without the blade. Make them round and even, maybe also thin them a bit towards the front.
- Wipe everything with acetone before gluing
- Use Max Strength Epoxy (not 5 min stuff) to glue everything together. Clamp together but not hard. You do not want to squeeze all the glue out.
- Acetone on kitchen paper is great at cleaning up epoxy before it dries from the blade.
- When removing any hard epoxy, use something softer than steel. Like a piece of brass with a sharp edge on it.
- When dry, using a belt sander or rasp and file, remove the material from the outside until you have the profile of the handle all the way around
- Now shape the handle to your liking. Thin, thick, round, squarish... up to you.

When you are happy with the handle, take it as high as you can in grits.
The higher grit sand paper, the better the end result will be. Our recommendation is to go to 1200 if possible as the wood grains really start popping when you get up there and the few minutes extra is really worth it.
A final step is to seal the handle if wood against moisture. We recommend Uncle Bjorn's Handle Finnish (or Finnish Finish as Jamie calls it) but Danish Oil or Tung Oil are also good finishes.
Even Linseed Oil will work if you want a traditional look, and enjoy having to do it again regularly.

The end result: A nice cleaver with file work on the spine, alder root handle scales and steel pins!
How cool is that! Using a chef knife you made yourself.

Thank you to Samuel for letting us use his photos for this WIP instructions.
If you want to have a go, here is the Basic Knifemaking Kit with Carbon steel
Recent Posts
-

The Etch Test: Ferric vs Hydrochloric vs Gator Piss
The Etch Test: Three Very Different Looks From One Steel One of the great things about knife making …3rd Jan 2026 -

Why Bed The Tang In Epoxy - Then Knock it OFF Again.
What is "Bedding the tang"? Bedding the tang means gluing a stick-tang blade into the handle block i …21st Mar 2025 -

Marble Leather - How to Dip Dye Veg Tanned Leather
This was my first experiment with hydrodipping or dip dying leather, and it came out pretty cool! I …14th Mar 2025