
Takefu + Norway Pine Cone = Coffee Etched Chef Knife
By Bjorn Jacobsen
Had a blast making these two chef knives before going to Norway in July 2023, here is the build article if wanting to see how it came together.
Components
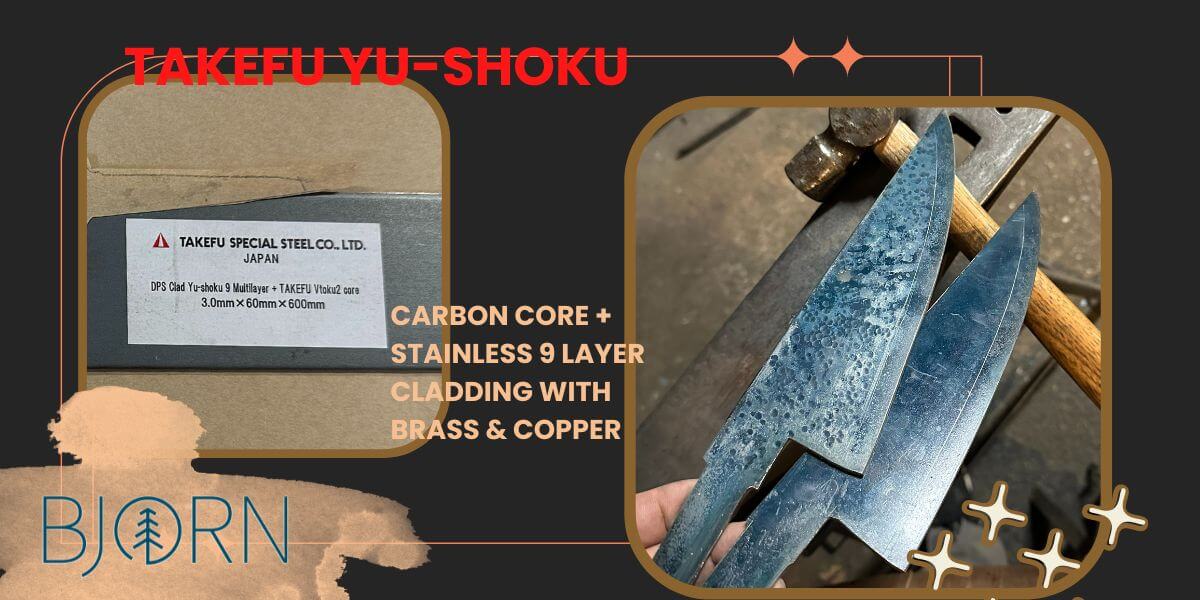
- Steel: Takefu DSP Clad Yu-shoku 9 Multilayer + TAKEFU VToku2 core
- Handle: Norway Spruce Pine cone stabilised, encased in orange resin
- Spacers: White G10
- Etch: Instant Coffee
So the edge steel is a Japanese carbon steel called V-Toku2 while the cladding is stainless steel with layers of brass and copper in between. This is another one where Jake Summerell from 116Blades was leading the way and helping with tips on his process for hammer texturing and etching the blade. To follow Jake on Insta, give him a follow here: LINK
Hammer texturing the steel
If the steel is ground as-is, the layers of brass and copper will be fairly straight lines. To get more pattern development, I marked a line 10 mm from the edge to not distrubt the thin edge steel of the san mai "sandwich". Then from this 10 mm line and up, a ball peen hammer is used to texture the steel.
Quiz: On the right photo you can see the hammer texturing went to the spine on one blade and only to the ricasso height on the other... which of the finished knives had hammering all the way to the spine?
Heat treatment and surface grinding
The profiled blades were heat treated at full thickness, there is no value grinding the mild steel side steel before heat treatment - they do not harden anyway. To make sure the blades were flat, they were surface ground with an 84Engineering Strap On Surface Grinder Attachment, a very handy piece of equipment that helps set up for accurate grinds.
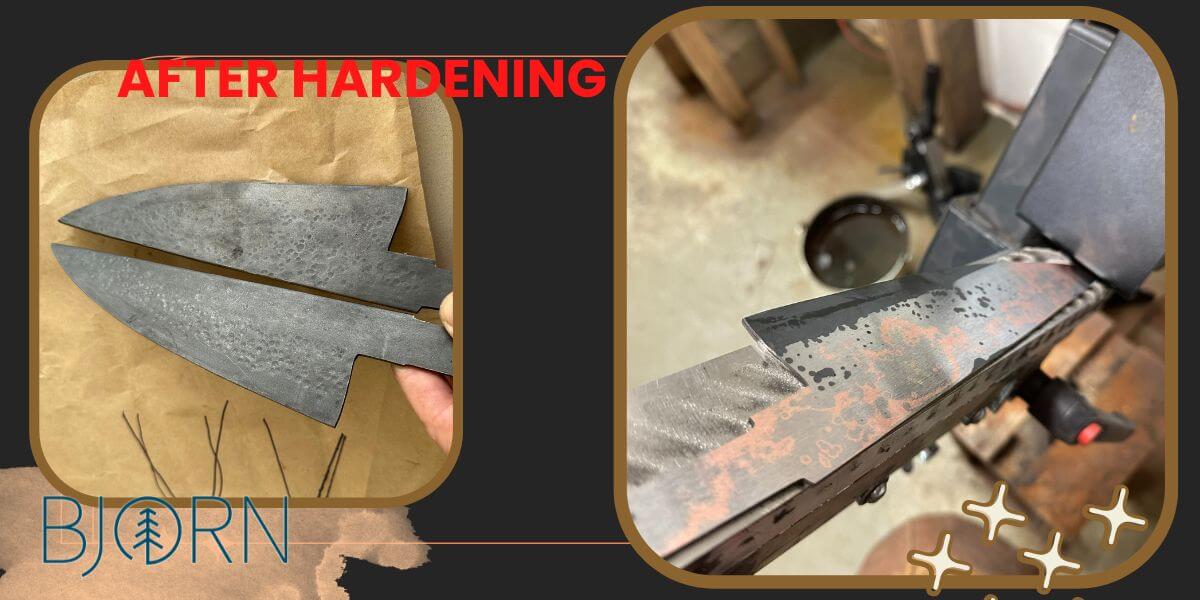
Grinding hardened steel
The advantage of grinding heat treated blades is that you know whatever you are left with - is what you are left with! There is no more steel to remove or straighten after heat treatment, just grind to final edge geometry in one go.
When grinding hardened steel it is important to not overheating the steel until it starts colouring up, as overheating the steel will ruin the temper. We do this by cooling the blade in water while grinding - and by having sharp belts and slowing down the grinder as the belts become finer. Cubitron or ceramic belts are great at ripping off steel, then aluminum oxide grinder belts for cleaning up and blending - at slow speed.
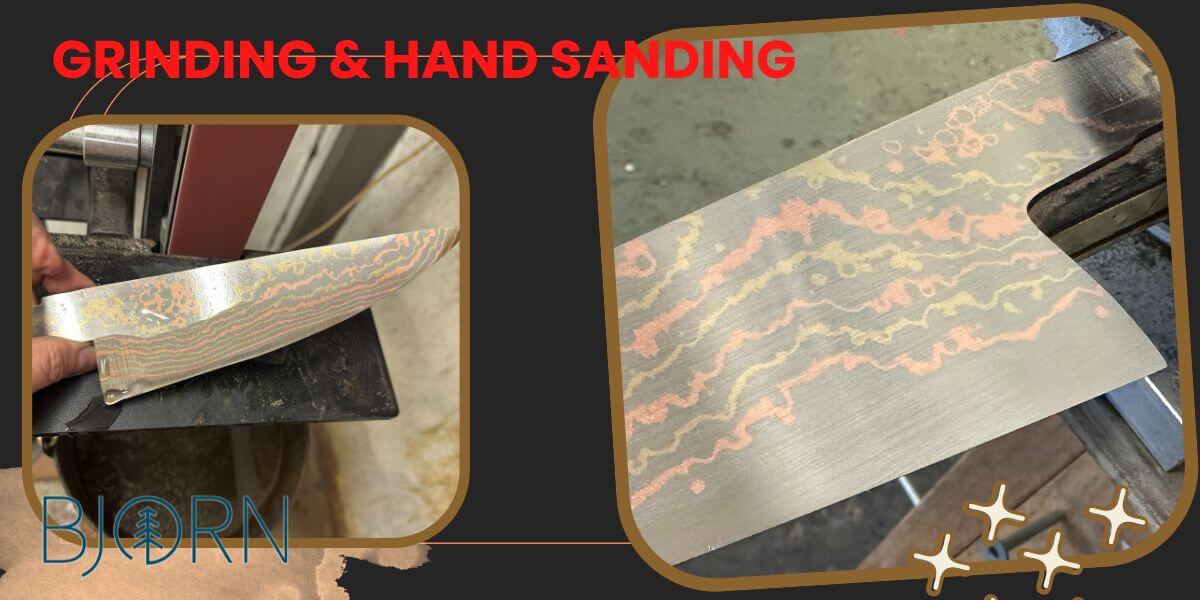
Hand sanding
When the blade is fairly flat and with one bevel from spine to edge, the blade is hand sanded to become really flat. Things might look good coming off the grinder but as soon as the hand sanding starts, the dimples show up!
Hand sanding is done first with a hard backing - in my case a handle block of G10 - to really flatten the blade.
After 180 grit and 320 grit on hard backing, I move onto soft backing for 320, 600, 1000 and 1500 grit paper.
In reality I do this as two different steps, stopping at 320 hard backing for grinding the tang and making the handle. Then later coming back to repeat 320 hard backing > soft backing.
For more info on the hand sanding process with changing angles and grit progression: LINK
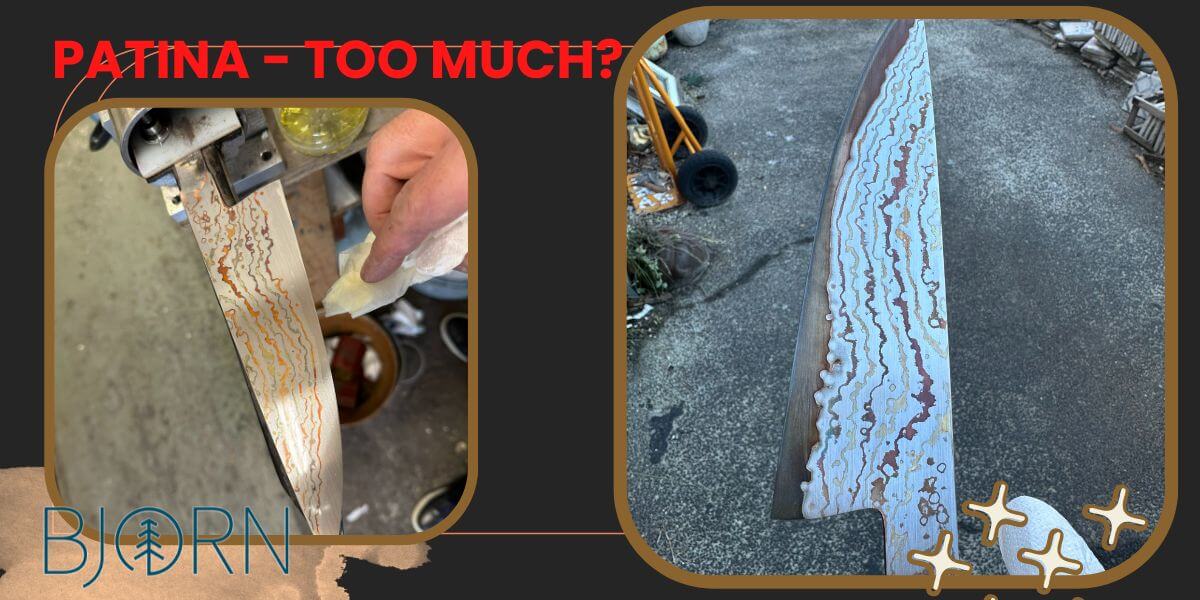
Patina - liver of sulphur
After 320 grit hand sanding, I wanted to see how the blade would look with patina, after having played with some bronze and copper patina on a different project. I used a couple of drops of Liver of Sulphur in some warm water, dipped a kitchen towel in the solution and wiped it onto the blade.
The effect is immediate, the copper changes colour and becomes more dramatic (!) looking. I also gave it a quick dip in ferric chloride which was a mistake..the copper started running down on the edge making a complete mess.
I did not like the patina look - not sure if this would be food safe either with the patinaed copper (?) so I sanded it all off again, back to the drawing board on this one.
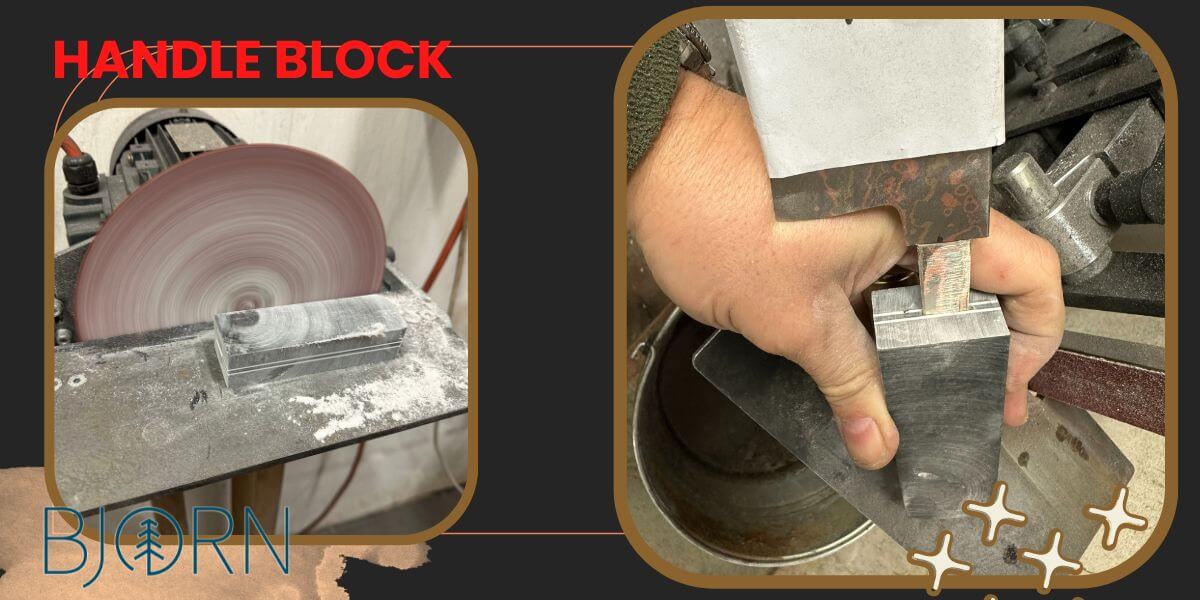
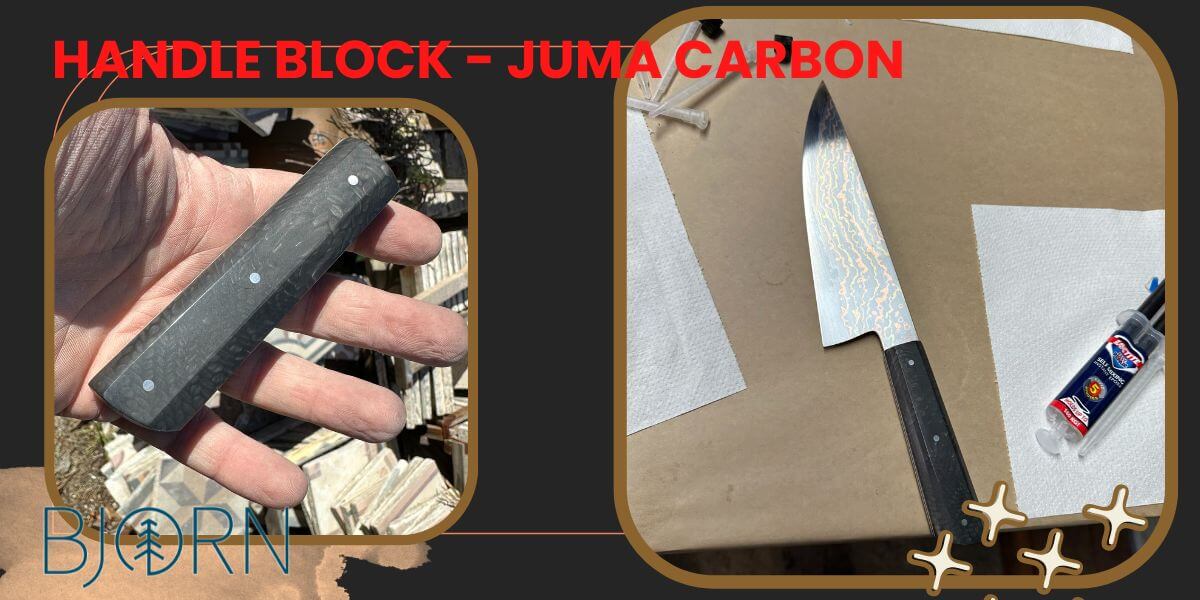
Handle block construction - German version
The first handle block is made from Juma Carbon, a synthetic material from Germany. Like the Juma snake and dragon pattern blocks, these scales have a 3D pattern all the way through. Using G10 spacers to make the centre section of the pancake construction handle block with a cut out section for the tang, the Juma carbon scales make up the rest of the block. Everything is epoxied together, then squared up on a disc grinder when dry.
There is always a bit of fitting required for the tang to fit well into the handle block, but the beauty of this handle construction is that there is no metal guard to have to fit, and the handle shaping can easily be done without the blade in the way.
Handle shaping
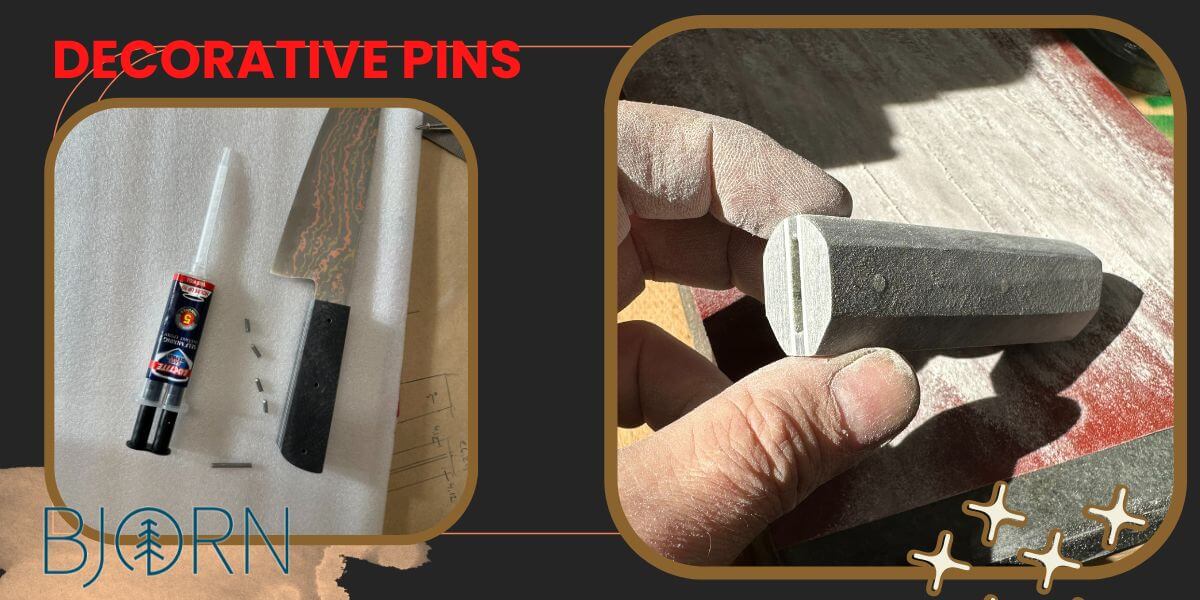
The handle had some decorative pins added, these are just for looks. The epoxy will hold the blade in the handle very securely, the stainless steel pins are here only added for looks.
Because the handle block was squared up on the disc grinder, it is easy to mark lines with a set of digital calipers and a sharp pencil to make matching lines on all sides, then grind to these lines before moving on to hand sanding the handle.
Polishing synthetic handle materials
The Juma Carbon handle materials and G10 take very well to a polishing mop. After hand sanding to 1500 grit, first brown compound > acetone wipe > green compound and the handle is looking nice and shiny! Each polishing compound goes on a separate polishing mop on the bench grinder, if having to ever take these off they go in separate bags to not mix grit/compounds between polishing wheels. The blade is then attached with epoxy and the knife is ready for etching and sharpening.
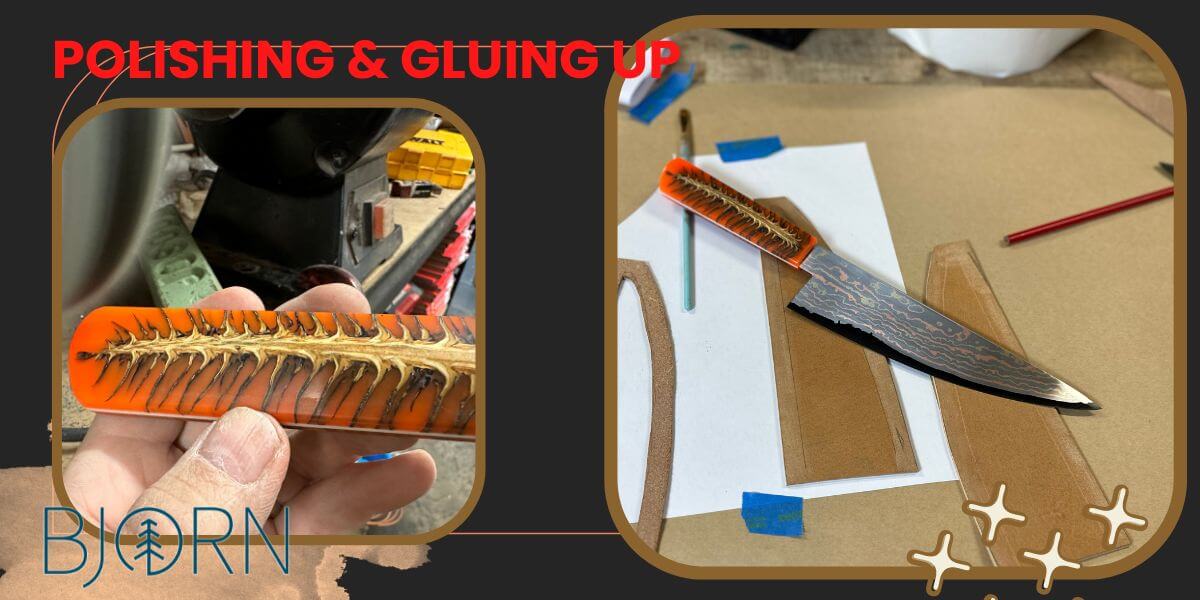
Handle Block II : Norway Spruce Pine
For once I was making two knives at the same time - so here is the second handle build too! This is the same handle construction where a pancake of G10 spacer sheets build up the core of the block with a cut out for the tang. Then a set of orange resin handle scales with a stabilised Norway Pine cone embedded make up the rest of the block. The pine cone block was already cut into scales, so if using the outside it looks like a pine cone and if using the inside, it looks almost like..a spine maybe?
I went for the inside :)
Again drawing lines and grinding to these on the disc grinder. On this one I made a 10 mm flat section top and bottom and then met the sides at the middle. So the sides are all angle, no flat section. A lot of back and fort to get the sides to meet up cleanly, but I think they came out ok when done so happy with the process.

Back on polishing and gluing up, this one got no decorative pins, the pine cone in orange resin is possibly too much visually for such a busy blade already but I just loved the colour and how the pine cone looked and went with it.
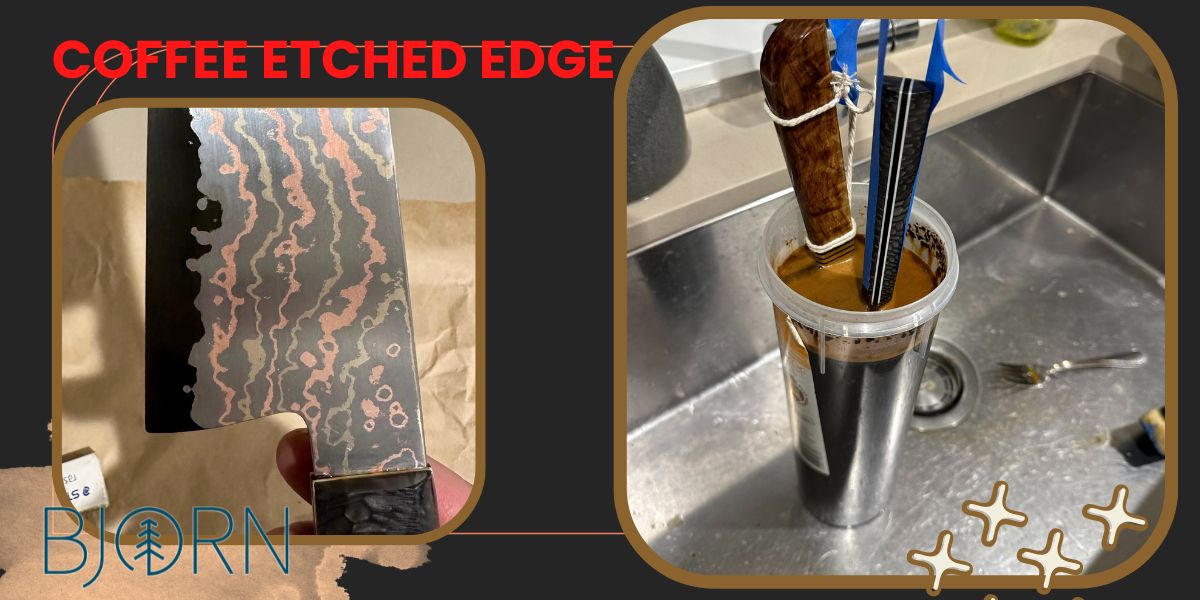
Etching knives in coffee
When both knives were ready, the coffee etch is what brings out the black edge steel.
Making a crazy strong instant coffee solution and leaving the blades overnight, this leaves a fairly robust dark etch while the stainless steel is not affected. I applied some axe wax on the blades after the etch to help protect the carbon steel.
The blades were black after an hour or so, but there is no harm in leaving them longer.
In the photo below I also etched another chef knife with carbon steel sides, this ended up too dark so I sanded that one back and went with ferric chloride instead. But for the stainless steel clad blades, coffee seems to be the way to go. (thanks to Jake again!)
Maker's Mark or Logo
With knives ready, sharpened and about to get sheaths done, it is time for the maker's mark.
When forging blades I prefer to hot stamp them, but with these blades it was easier to etch this one at the end. Using a vinyl sticker or stencil, an electric etching machine is used to add my maker's mark or logo to each blade.

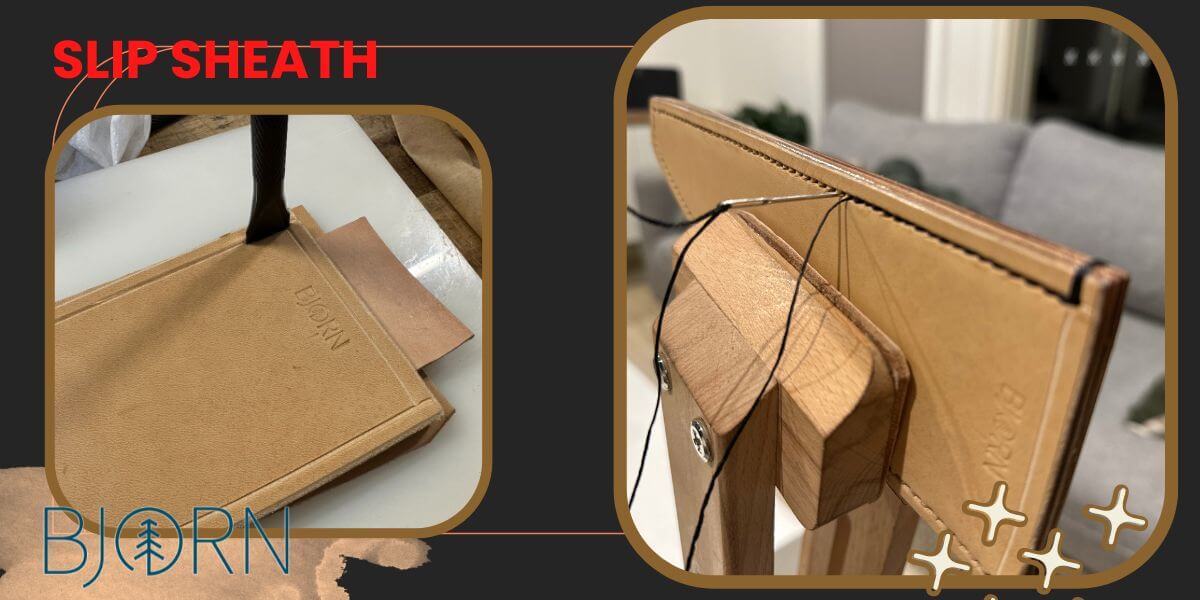
Sheath for a kitchen knife?
Lately I have started making leather slip sheaths for kitchen knives, it looks nice when handing them over - and I enjoy the leatherworking part.
These are simple to make:
- trace around the blade on the inside of the leather, I am using 3 mm veg tanned leather
- with digital calipers set at 12 mm, mark some points all the way around then draw this new outer edge with a pencil. Cut out with leather shears (easy) or with a sharp knife (also works)
- Use the sheath as a template for the other side so you get an exact match - think about which way you do this to end up with two outsides. This way both sides of the sheath look nice and smooth. (I have cut this the wrong way at least twice now..)
- Use a thinner leather for the welt, or cut it out in 3 mm and then thin it down if you don't have any thin leather. I used one of the sheath sides as a template to get an exact match also for the welt piece.
- The welt is the inside/middle layer of the sheath, this stops the edge from cutting through the stiching, and is also what gives the sheath the thickness or height enough for the knife to fit inside the sheath. The welt needs to be thin enough that the knife does not fall out.
- Use the calipers still set at 12 mm to mark around the welt and cut out the middle bit.
- Rough up all sides to be glued (the outer 12 mm on both outside pieces..on the inside) as well as both sides of the welt, then glue together and press or gently hammer with a clean hammer to get some pressure on there without leaving marks.

When the sheath has dried, I clean up the edges on the grinder. First a really rough belt to cut through without burning the leather. The thick 12 mm side gives enough space to clean up and shape the sheath and still leave enough room for stitching.
I keep the inside of the welt piece, inserting this into the sheath before punching to help keeping everything straight.
I punch on a punching board to not damage the diamond stitching irons but also put a scrap piece of leather underneath the sheath. Not only to help protect the tool but also because the leather marks so easily that some extra protection is good.
Hand stitching
Then it is stitching time again, out with the stitching pony and an episode or two of Letterkenny on the TV while stitching away. About 3 meters of thread is needed, and I go over all the holes with an awl before starting to make sure it is an enjoyable process. I love the smell of the leather and the process of hand stitching, another little part of this I really enjoy.
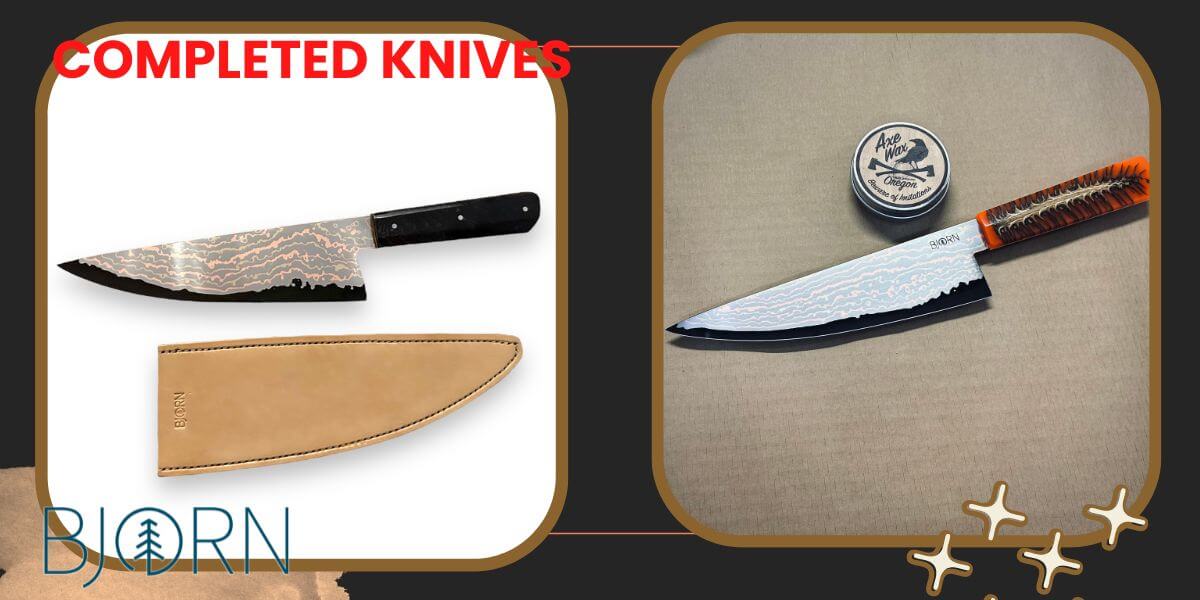
And this is the end result!
Two chef knives completed, with Japanese Takefu steel blades, handle scales in synthetic materials and etched in coffee.
Recent Posts
-

The Etch Test: Ferric vs Hydrochloric vs Gator Piss
The Etch Test: Three Very Different Looks From One Steel One of the great things about knife making …3rd Jan 2026 -

Why Bed The Tang In Epoxy - Then Knock it OFF Again.
What is "Bedding the tang"? Bedding the tang means gluing a stick-tang blade into the handle block i …21st Mar 2025 -

Marble Leather - How to Dip Dye Veg Tanned Leather
This was my first experiment with hydrodipping or dip dying leather, and it came out pretty cool! I …14th Mar 2025