
Takefu V-Toku2: Heat treatment & Hammer texturing
Takefu Specialty Steel, Japan
By Bjorn Jacobsen
Japanese steels are known as high-quality steel, often used in high-end chef knives. One of the oldest and most respected manufacturers in Japan is Takefu Specialty Steel, who make several versions of laminated steels for knife makers.
At the Melbourne Knife Show in May 2023, I picked up a couple of bars of Takefu steel after admiring Jake Summerell's beautiful chef knife in the 20 layer carbon steel clad V-Toku2 steel. Jake was not only kind enough to talk me through his heat treat regime and show which steel to buy, but even let me draw around one of his blades to use as a template. So anything good with the profile here is from Jake's original, anything that is looking a bit out of proportions is me grinding and making it a bit shorter and narrower than the original.
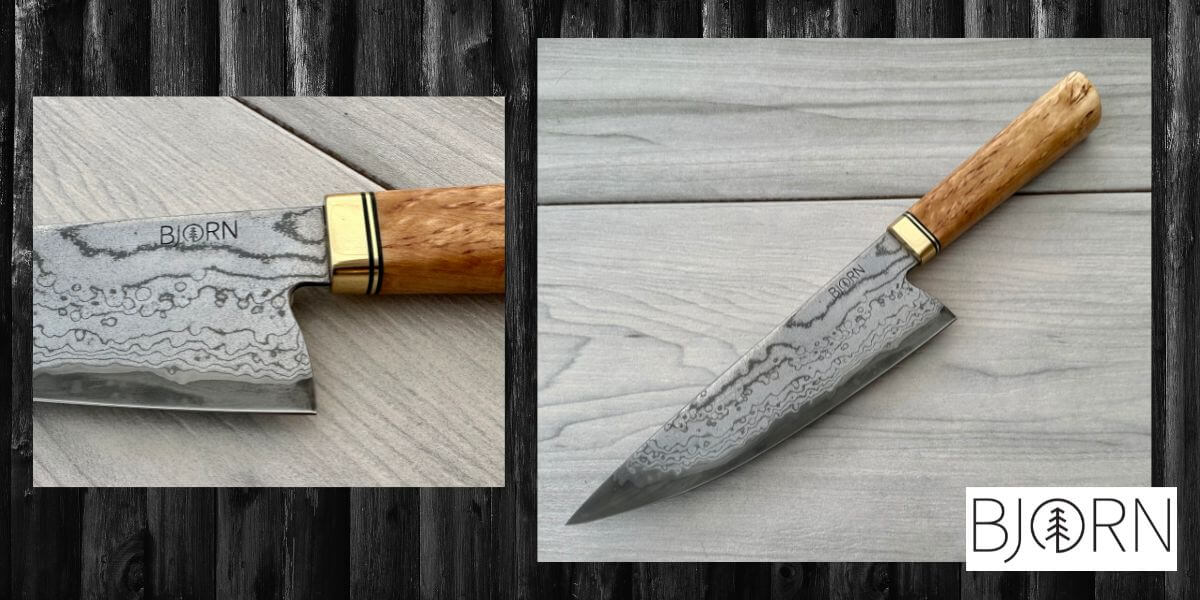
Takefu Suminagashi clad V-Toku 2
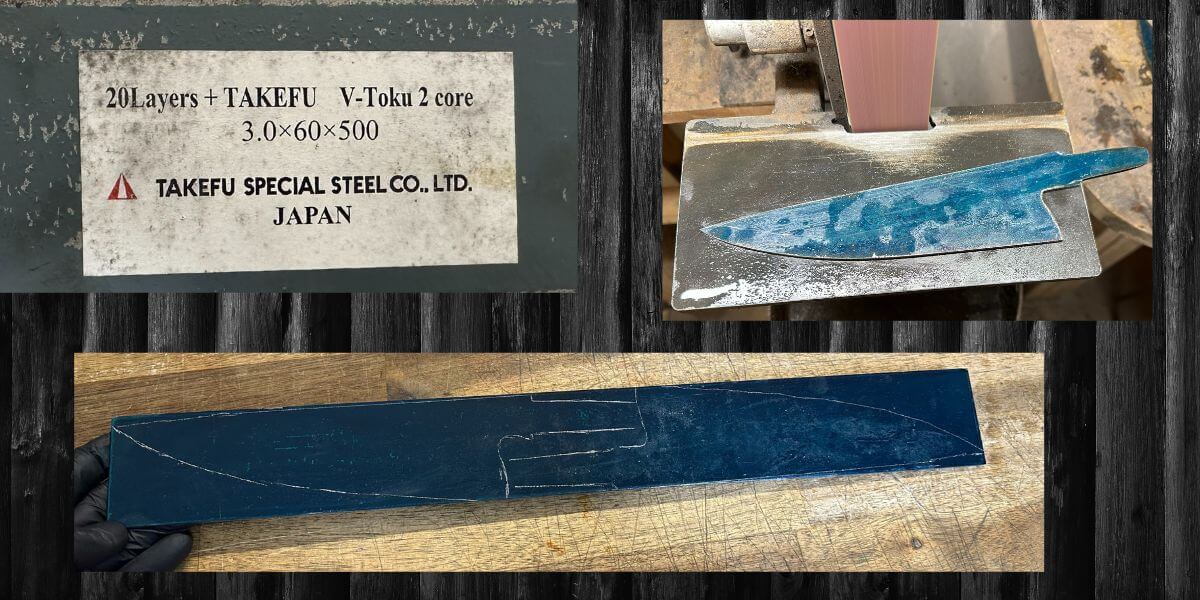
The blade steel in the middle of this san mai billet is Takefu V-Toku 2, a high-carbon, clean blade steel. This is sandwiched between 20 layer carbon damascus on each side. One bar of steel was enough for 2 blades with a bit of creative angle grinder cutting, before profiling them on an 84Engineering grinder. 20 layers + Takefu V-Toku2 Core in 3.0 x 60 x 500 mm from Takefu Special Steel Co., LTD Japan.
Hammer texturing
The 20 layer carbon damascus sides can be ground as-is, but for a bit more exciting pattern, Jake suggested to hammer texture the sides. So following his advice, I scratched on two lines with a set of calipers; one line 10 mm from the edge, and one line following the edge line still but at ricasso heigh.
With the back of a ball point hammer, I textured the area between the two lines. I the final photos you can see where the blade was hit vs left alone in how the pattern changes.
I did this step before heat treatment, straightening the blades again with the flat side of the hammer before heat treatment.

How to heat treat V-Toku2
Takefu is very good with instructions, providing a printed description with every bar.
As I am going to give away these knives to "non knife people", I thought it be safer to temper higher for a softer blade than what a Japanese knifemaker might do, for a less hard but somewhat tougher blade. Following Jake's advice agin on tempering. The Takefu document says tempering "from 120 C" so 180 C still is within their recommendations.
- Hold at 750 C for 30 mins
- Hold at 815 C for 10 mins
- Quench in warm oil (50 C)
- Temper at 175-180 C for 2 hours x 2, cooling in water between cycles
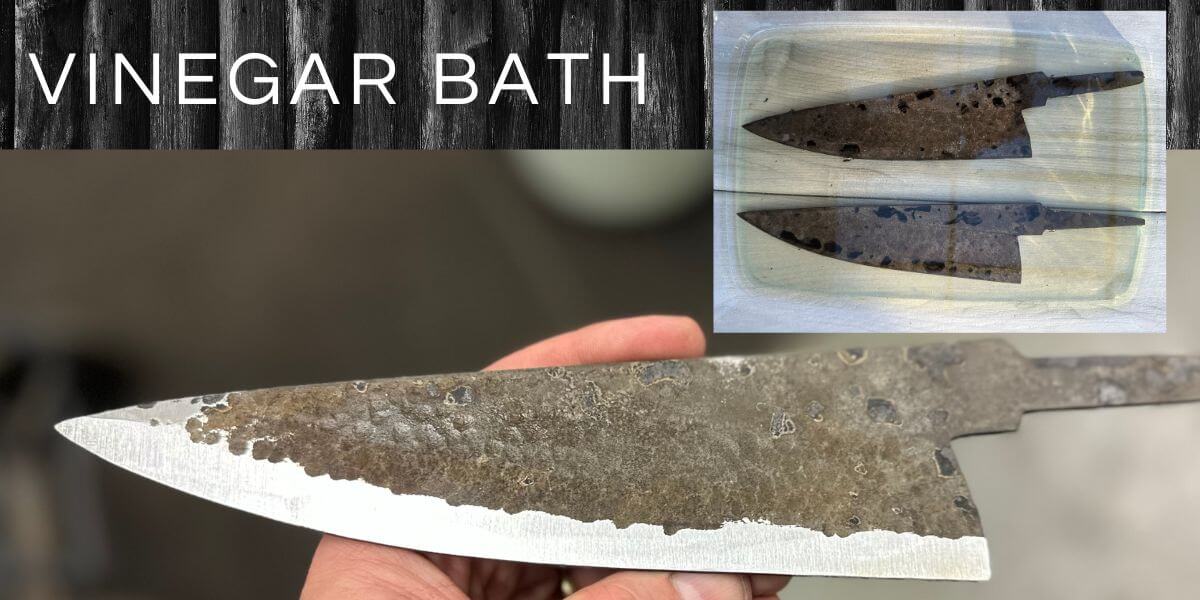
Vinegar bath to remove scale
The below is not necessary if wanting to keep the black forge scale on the top of the blade - or if grinding all the way up to the spine like I ended up doing. At the time I was thinking of keeping the rougher texture at the top of the blade, so wanted to gently remove the forge scale.
Leaving the blades in a vinegar bath overnight removed most if not all of the forge scale, preparing the blades for grinding. Leaving the vinegar container outdoors is a good idea to not stink up the kitchen :)
Grinding with ferric nearby
To grind the blade I scratched a centre line with calipers after filling the edge with sharpie.
With the blade spine resting on the tool rest I grind off the corner only of the blade, until almost touching the centre line. This sets the edge thickness I want, before going onto grinding the actual bevels.
To quickly hog off most of the blade sides, the blade spine is rested on the tool rest, holding the blade with both hands and leaning it into the belt. I am hogging out metal from the corner left from taking off the first "45 degree corner" down towards the spine, almost a full flat grind. At least to the ricasso height. Without touching the upper corner of the flat side, that would remove the last bit of edge left. Not sure if that made sense in writing but it is a quick way to remove metal without having to worry too much about hitting neither the spine or the edge side with a coarse cubitron belt in 60 or even 36 grit, or overheating the edge area.
Quickly grinding bevels:
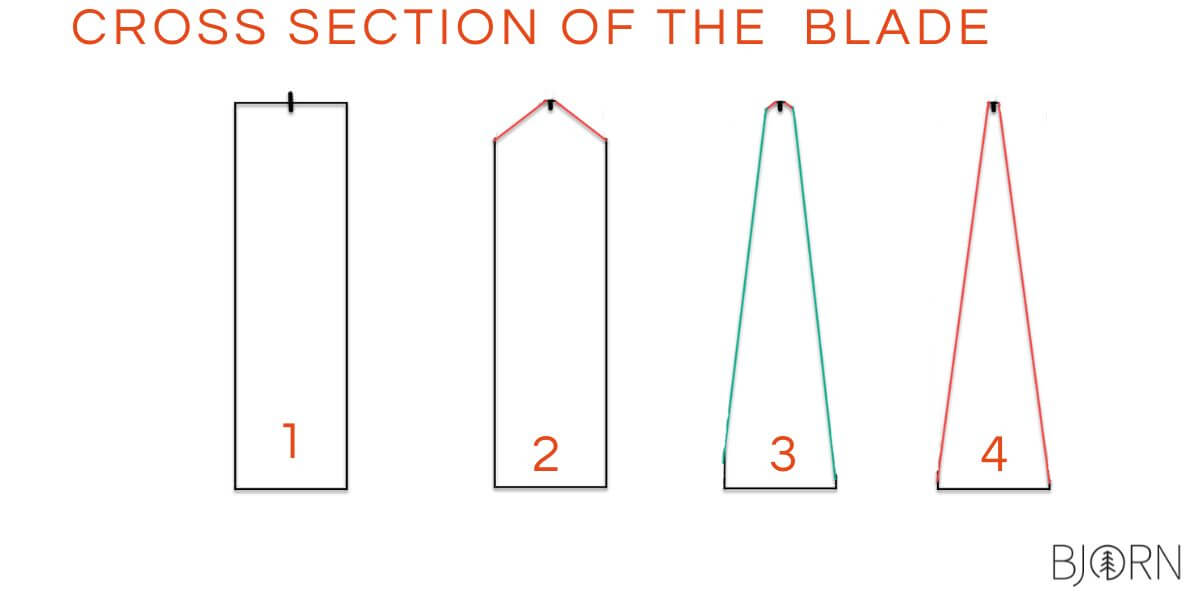
- Mark centre of edge with 1 line, or 2 lines close together
- grind corners off, leaving sliver of edge at centre of edge (black section between red, angled lines)
- HOG OFF metal on the sides, avoiding overheating the hardened blade. Avoid hitting the spine (black section at bottom below green lines) and avoid hititng the edge (red line on top of green, angled lines)
- Slow down and blend it all in until you have one plane or flat surface from thin sliver of edge to spine, or as close to the spine as you want to go. Step 4 is done on a 120 grit Cubitron belt, stel 2 and 3 on 36 or 60 grit Cubitron or Ceramic belts.
- Refine: Then step 4 is repeated with a 180 grit alu oxide belt to continue blending in, at low speed.
Grinding San Mai steel - expose enough core
When grinding san mai blades, I tilt the blade back and forth in the light and can usually see where the cladding ends. But when going onto finer alu oxide belts, I like to still have the ferric chloride there and can do a 5 sec etch now and then to clearly see where the cladding ends.
The goal is to expose edge steel the entire length of the blade, at a fairly uniform height -then trying to match that on both sides. A good tip from Kevin Slattery on grinding san mai is to keep alternating between the sides, to help keeping it straight.
If the side steel is left thicker on one side it can pull the core steel that way, bending the blade. So it makes sense to grind both sides at the same time, both for keeping the blade straight and also for managing the height of the exposed blade steel matching on both sides.
Partial hand sanding before guard fitting
I like to hand sand only partially before making the handle. I often get some minor scratches on the blade from the process of fitting it into the guard, clamping it in a file guide to grind the tang etc and would rather clean it up properly at the end.
Hand sanding process
- Grind to at least 180 grit on the grinder, blend in as much as possible. I often do a touch of 320 grit as well. Alu oxide belts and slow speed is the key here.
- Optional: Disc grinder is a great tool to really cut down on hand sanding time, if you have it. Again, super slow speed (7-9 Hz), short spray of adhesive on the back of the paper to keep it on for the couple of mins max of life time before swapping paper.
- Hand sand: Hard backing is key, a block of G10 or piece of steel or aluminum. Wrap 180 grit rhynowet paper around the hard block and sand away. San mai is great, having mild side steel being easier to hand sand but pay particular attention to the edge steel, being harder and needing extra work.
- Hand sand until you cannot see any scratches other than the lines from tip to ricasso from the 180 grit, ending with one-way only from ricasso to tip to avoid any j-hooks when changing direction to go back from the ricasso.
- Inspect closely in good light, are there any scratches other than the 180 lines? If so, keep going.
- When happy: Soft backing and 180 grit again. In my case I have a scale of G10 with veg tan leather glued to each side. So I keep taking 1/3 of rhynowet paper, wrapping around the soft backed block and sand again for a while.
- 320 grit: When swapping grit, I only use soft backing from now on, no more hard backing needed. I also change direction, meaning I now stand on one side of the blade (rather than in front of the tip), and sand at an angle across the blade.
- This is to make sure that when I am done with 320 grit, all lines are at an angle cutting across the blade. If I tilt the blade back and forth in the light and see lines going up and down straight from tip to ricasso still - it means those lines are 180 grit lines that are not removed yet - back on more 320 grit paper!
- When all lines are going across the blade at 320 grit - I stop the hand sanding.
- (later after the handle is ready, before gluing up I go back and clean up again with 320 if getting any marks from the file guide, before going to 600 back and forth ricasso to tip again. In this case I went all the way to 1500 grits, the 1000 and 1500 grits with soft backing taking very little extra time now the blade was flat already)

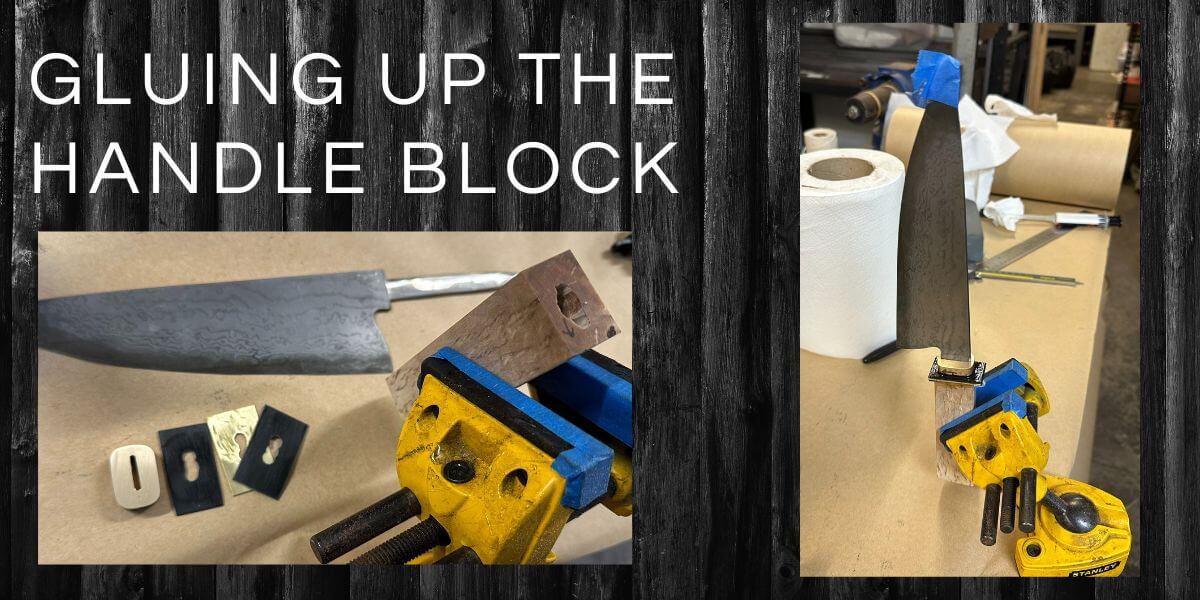
Handle and guard
Making the guard for a chef knife can be tricky, the blade being thin and the tang even thinner. Drilling holes in a straight line and cutting out the material between them with a dremel or small file is time consuming, but quite satisfying when done and you get a good fit-up.
In the below photo the tang is already grind using a carbide faced file guide, I took some of the ricasso length for the tang, feeling the tang was a bit short from fitting two blades onto the steel billet.
The front section is a brass bolster, then black G10 spacer, then a 1 mm sheet spacer of brass, and another black G10 spacer piece. The main section is a block of stabilised curly birch drilled and "broached" to size until the tang fits all the way in.
The guard and handle block are glued together with 5-min epoxy, pulling out the blade before the glue sets. So no epoxy was added into the handle block, only on the acetone-wiped guard and wooden block itself.
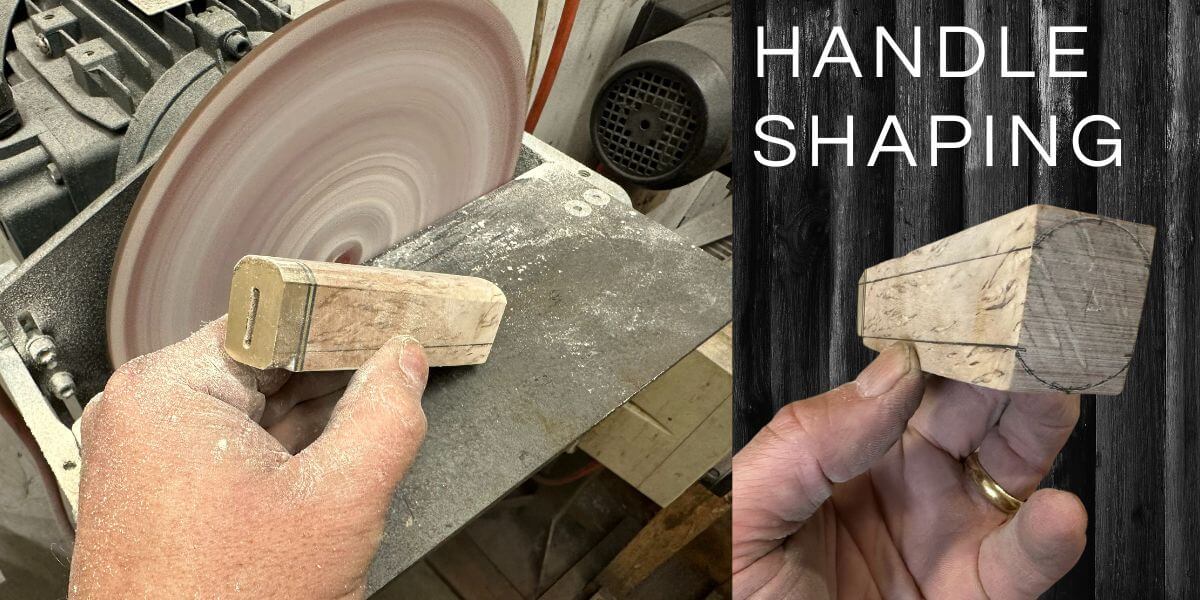
Handle shaping - without the blade
The advantage of not gluing the blade in is that the handle can be shaped without the blade in the way. This is a lot easier to get symmetrical as you are freeer to move the block around - especially if having a disc grinder.
Using a surface plate and height gauge (best) or just digital calipers (ok), lines are drawn on and ground to to make the handle symmetrically tapering towards the guard in both side-on view, and from the top.
Having the disc grinder is a massive help on this step, as on the belt grinder it is very easy to go too far. Or at least I tend to do that on the belt grinder, overshooting the pencil lines while on the disc grinder I seem to have much more control.
In this case the sides are flattened, then lines drawn down from the top and bottom on the flats, then rounding to these lines.
I go to 320 grit on the disc (180 > 320) then onto hand sanding as high as possible. In my case that means 1500 grit rhynowet then micro-mesh pads which has their own "grading" 1500 - 12,000 leaving a glassy, shiny handle even before the UBHF handle finish is applied!
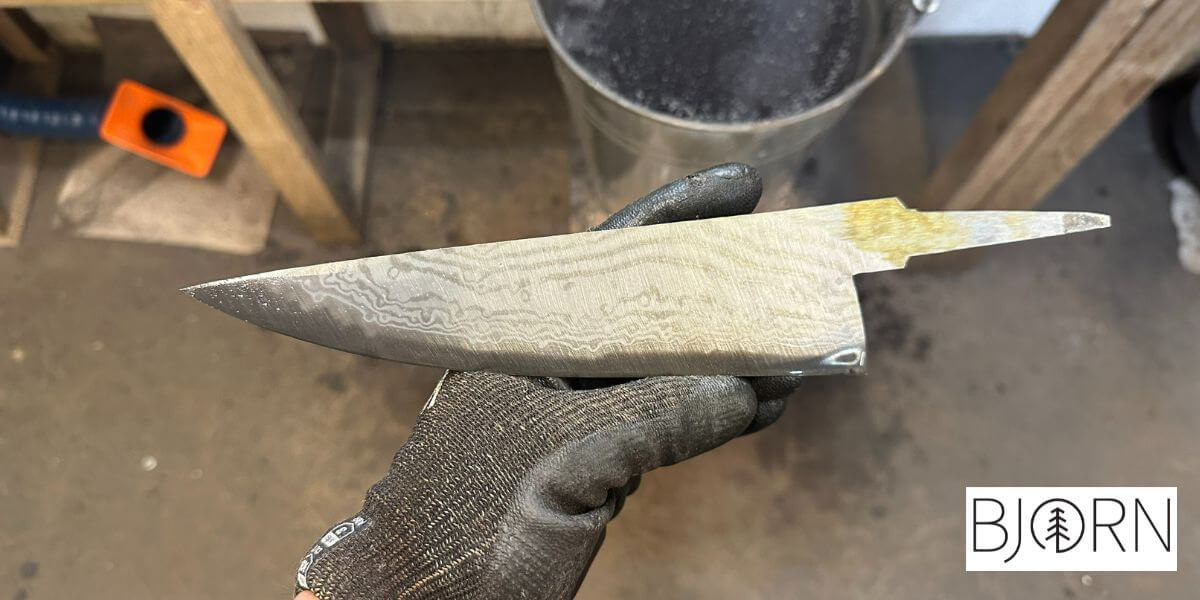
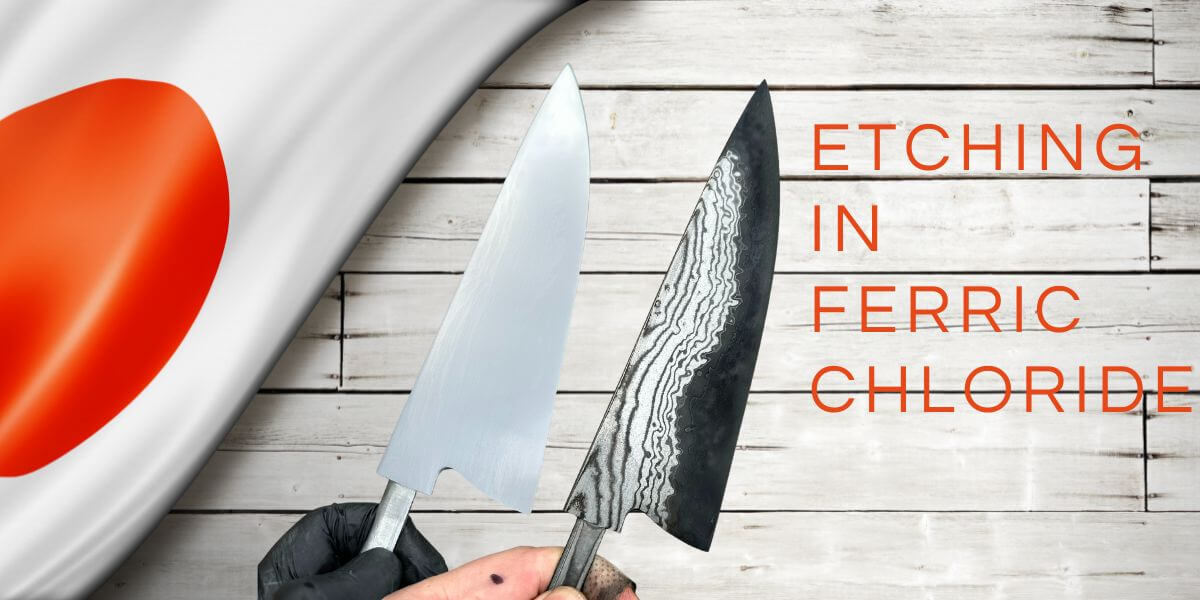
Etching the blade
Now this is where the specialty steel from Takefu comes alive! Up until now it has not been much different than if using a "monosteel" as in the blade is from 1084, 14C28N or whatever. But the Takefu steel is a san mai of blade steel in the middle and 20 layers of carbon steel damascus cladding on each side.
To get the pattern to pop, the blade was left in ferric chloride for 15 mins. This was again thanks for Jake Summerrel's advice on how to work this steel. In the photo below you see how dark the edge steel etches.
As this one is a gift and I don't want to give it away and the receiver wonder why the black washes off, I scrubbed the blade hard after the etch. Giving up some of the nice contrast for a more hardy finish, leaving the edge steel more grey than black. Had this one been for sale I would maybe have left it black for more impact.?
Etching the maker's mark
With everything now ready, my maker's mark is etched onto the blade using av vinyl stencil and Gelandangan's marking machine. I used to do this with just an old power supply but the result is much better with Darwin's machine as it has 2 stages; etch and mark. So first it etches down into the steel, before filling this back in with a black oxide to make the logo pop more.
Attaching the handle
Now both blade and handle is finished, and the blade is glued in with 5 min epoxy, I use loctite from bunnings because these come with a mixing nozzle that fits into the tang slot, helping getting epoxy down into the handle block.
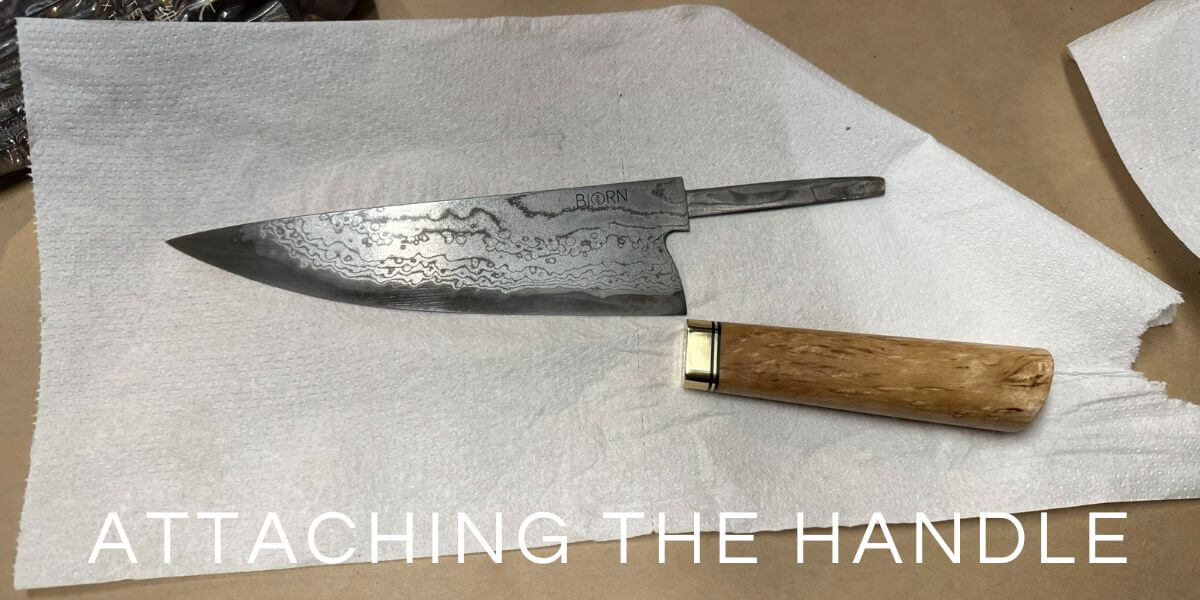
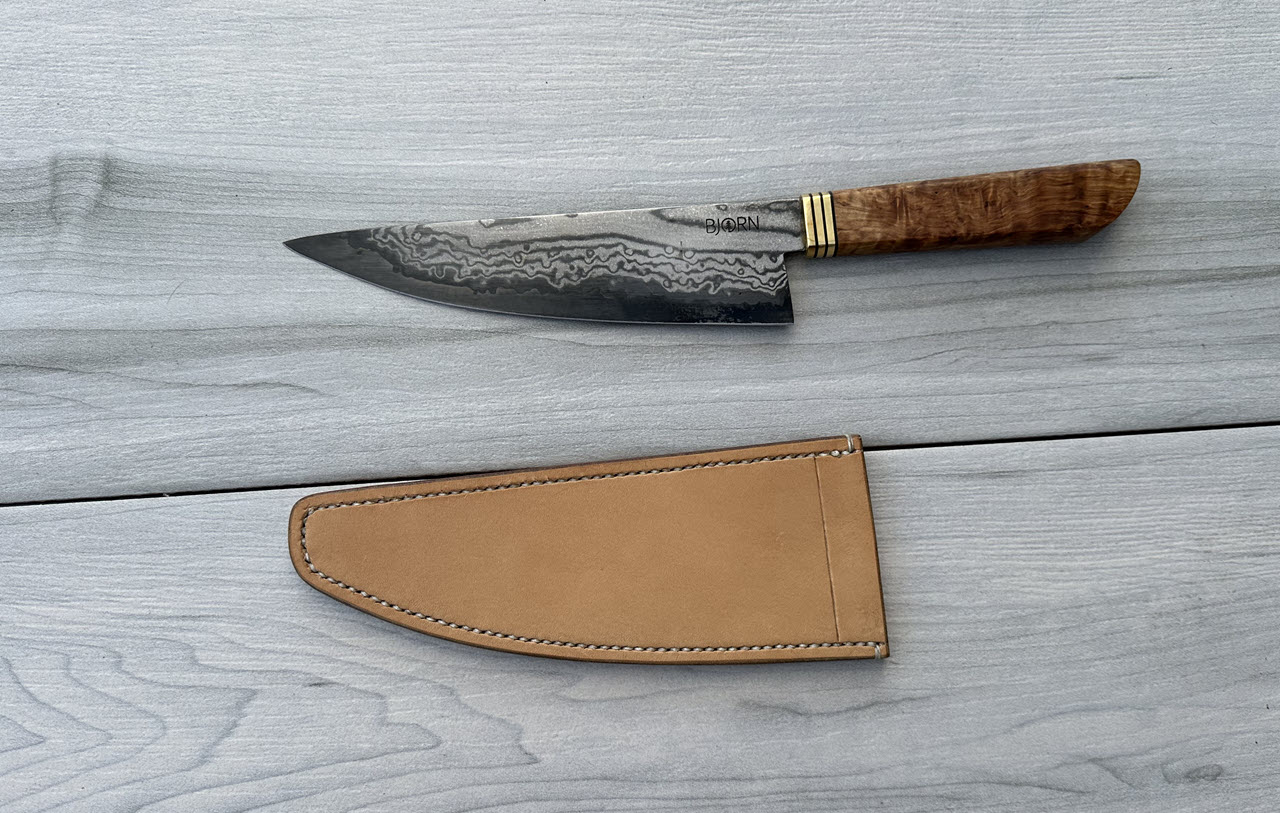
Knife is ready!
And here is the final result, blade in Takefu Specialty steel, handle in brass and curly birch.
I enjoyed making this one, first time working with Takefu steel and I like how you can see the pattern change between where I hammer textured the steel and the top of the blade where I did not hammer it.
I made 2 chef knives from this bar, following the same process but with a slightly different handle. Here is the other one;
Recent Posts
-

The Etch Test: Ferric vs Hydrochloric vs Gator Piss
The Etch Test: Three Very Different Looks From One Steel One of the great things about knife making …3rd Jan 2026 -

Why Bed The Tang In Epoxy - Then Knock it OFF Again.
What is "Bedding the tang"? Bedding the tang means gluing a stick-tang blade into the handle block i …21st Mar 2025 -

Marble Leather - How to Dip Dye Veg Tanned Leather
This was my first experiment with hydrodipping or dip dying leather, and it came out pretty cool! I …14th Mar 2025