


Description
How to build the MG Santoku Kit
Hayden has been in the workshop again, working on another video showing how to build the knife kits.
This time he is doing the MG Santoku Kit with G10 scales: LINK.
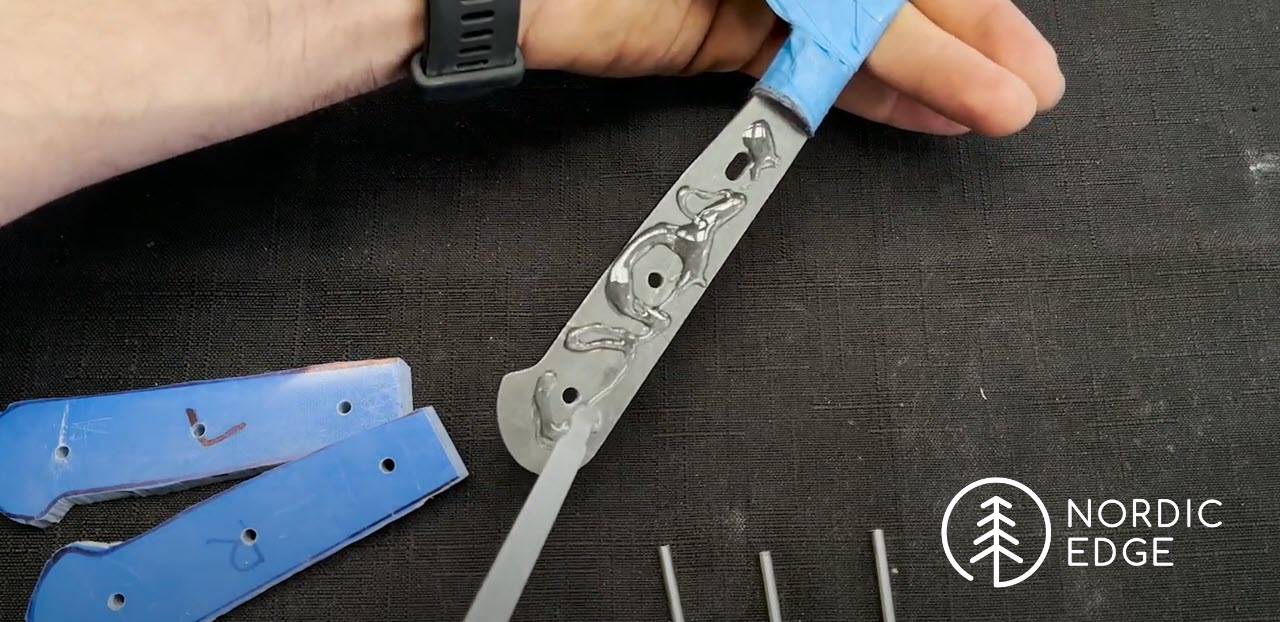
The MG blades are made in Spain from Stainless steel, and what makes them quite unique is that they have integral bolsters forged as part of the blade. The bolster is the thicker bit between the blade and handle, and is here not attached after the fact, but made in the actual knife steel, as part of making the blade.
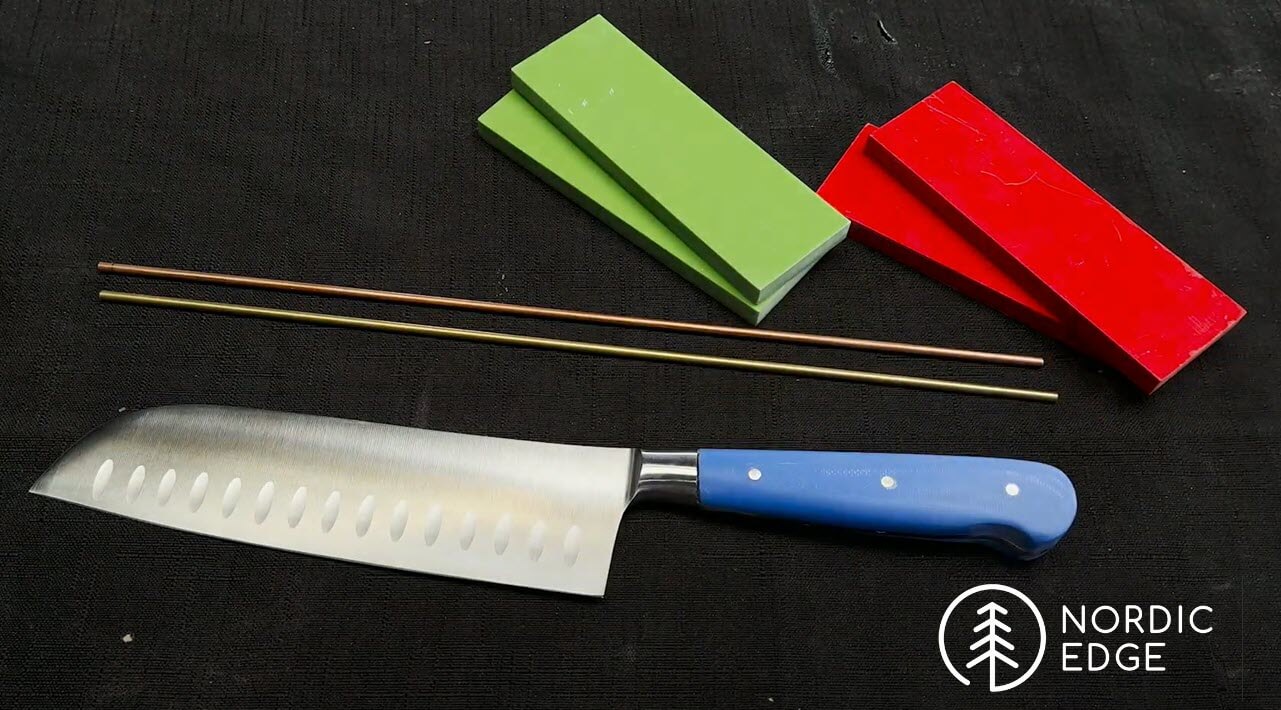
The kit comes with the 170 mm Santoku blade, handle scales in G10 and pin stock for the handle.
G10 is a synthetic material, very strong and not affected by moisture - not a bad choice for a kitchen knife.
**Safety notice: Always wear a dustmask when making dust, and wear clothes you can get dusty and then wash straight after the work - do not leave dusty clothes around. Always take care when handling tools or sharp blades, it is not much fun if stressing and getting nicked. In this case we are working with G10 which is a fiberglass/resin product and is harmful to breathe in. Some react to the dust from G10 as well so long sleeves is recommended **
Below is the video showing the process using only basic tools:
And here are the steps in photos so we can add a little more detail:
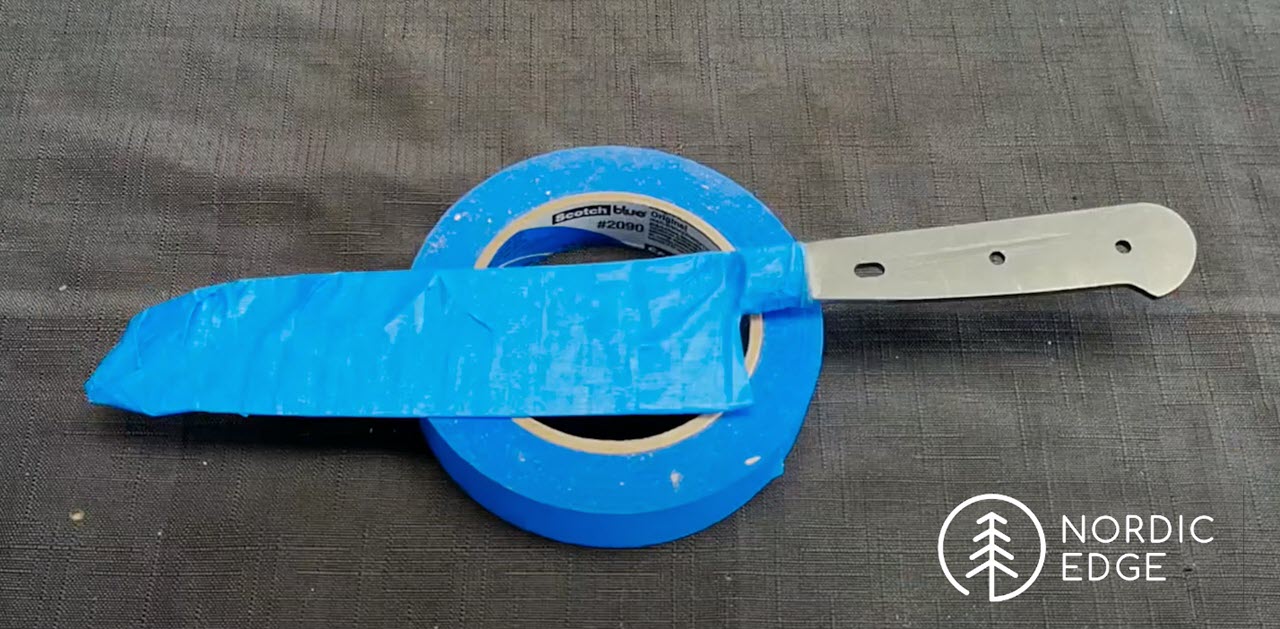
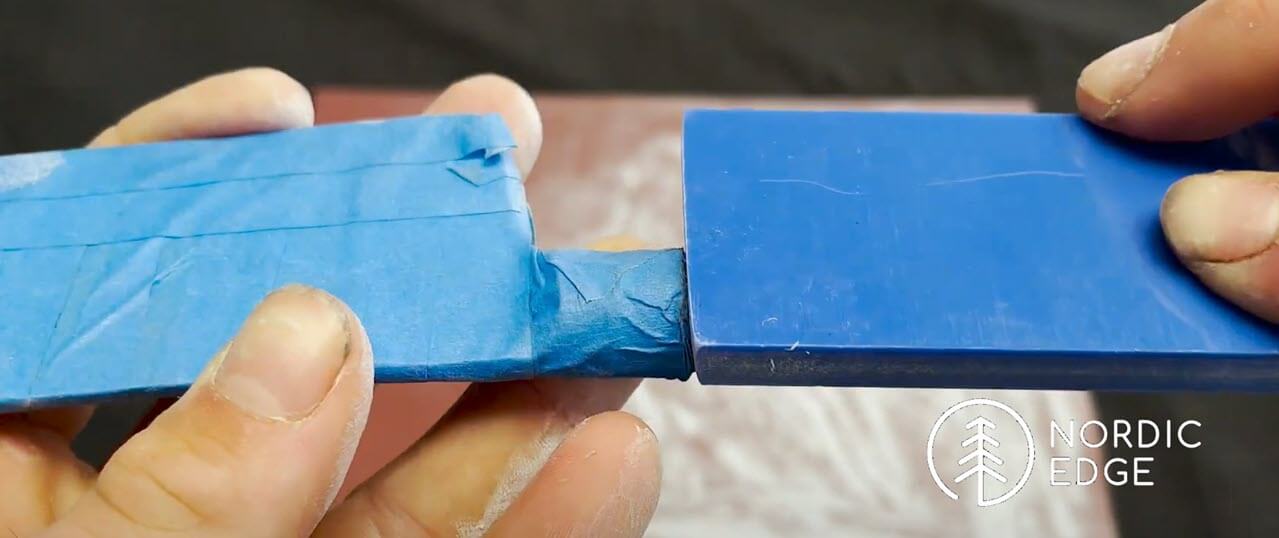
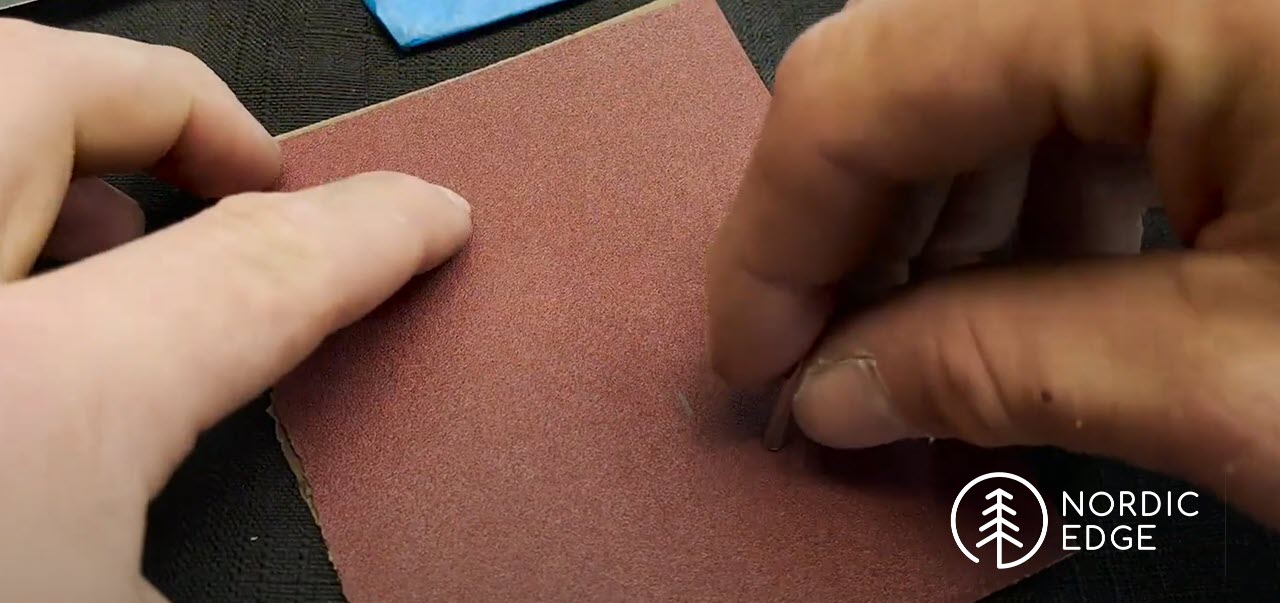
Tape the blade to protect both your fingers while working on the project, as well as protecting the blade from being damaged while you are working on the handle. If using a belt sander it might pay to make a thin cardboard sleeve rather than just some masking tape, as a sanding belt will eat through masking tape way to fast. (ask us how we know..)
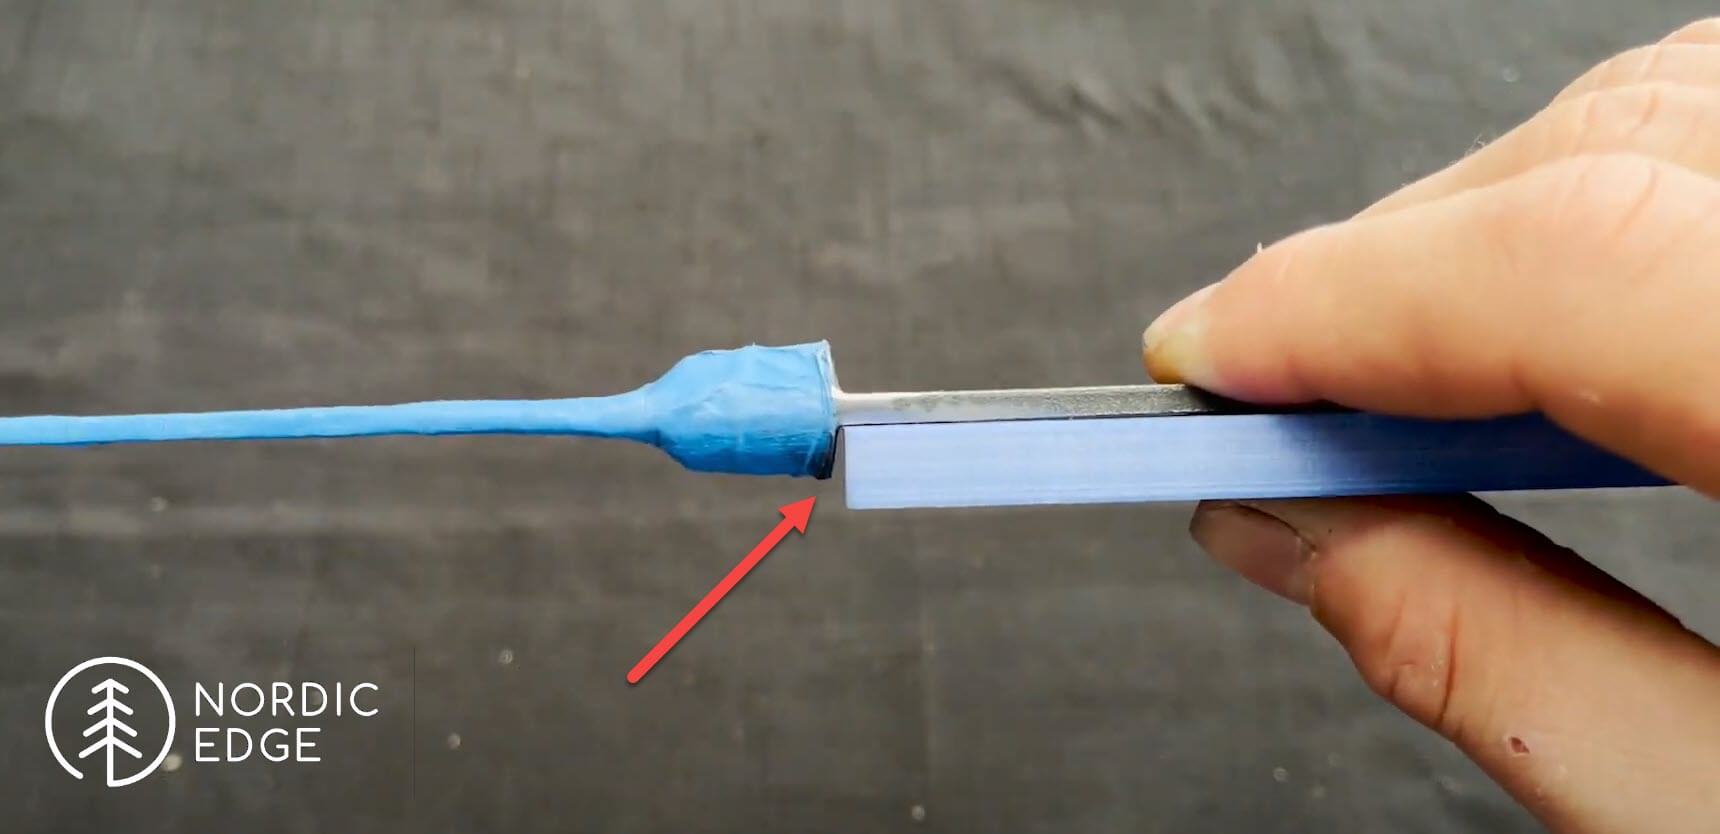
The MG blades have a higher difficulty level than most of the blades we have at Nordic Edge: the integral bolster.
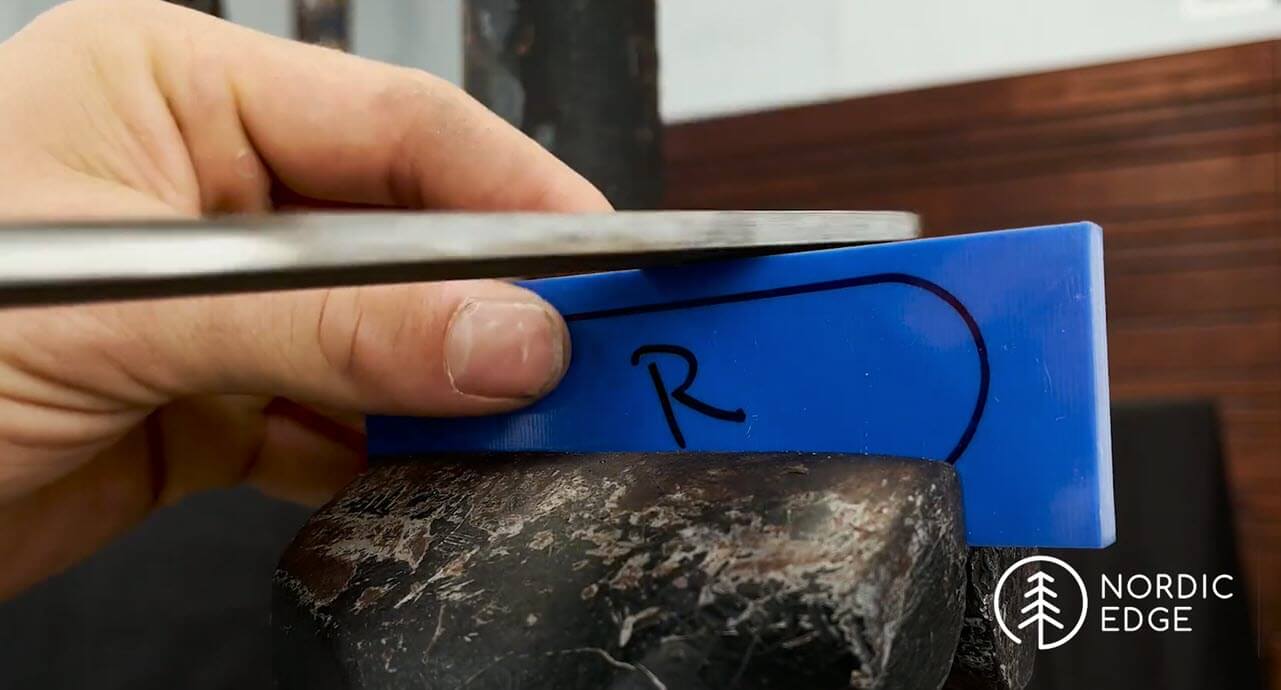
The bolster on these blades is sloping towards the blade, away from the handle side (see photo below).
This means it is more complex getting the handle scales to fit all the way up to the bolster than what is normally the case.
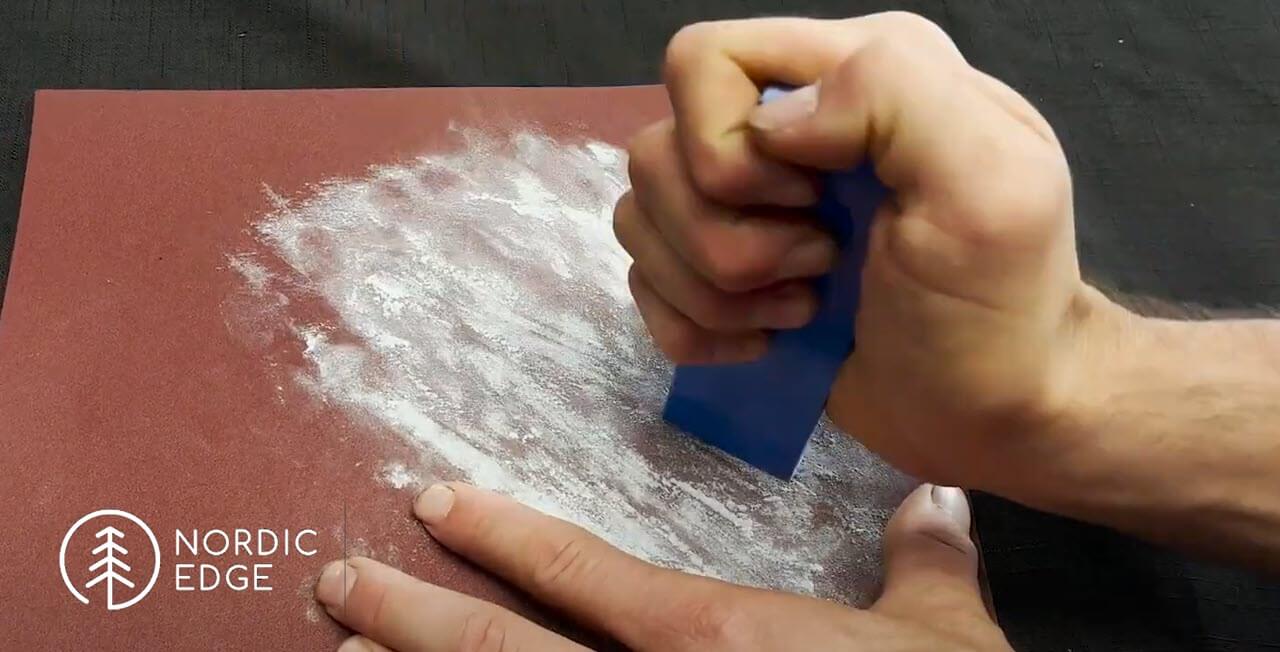
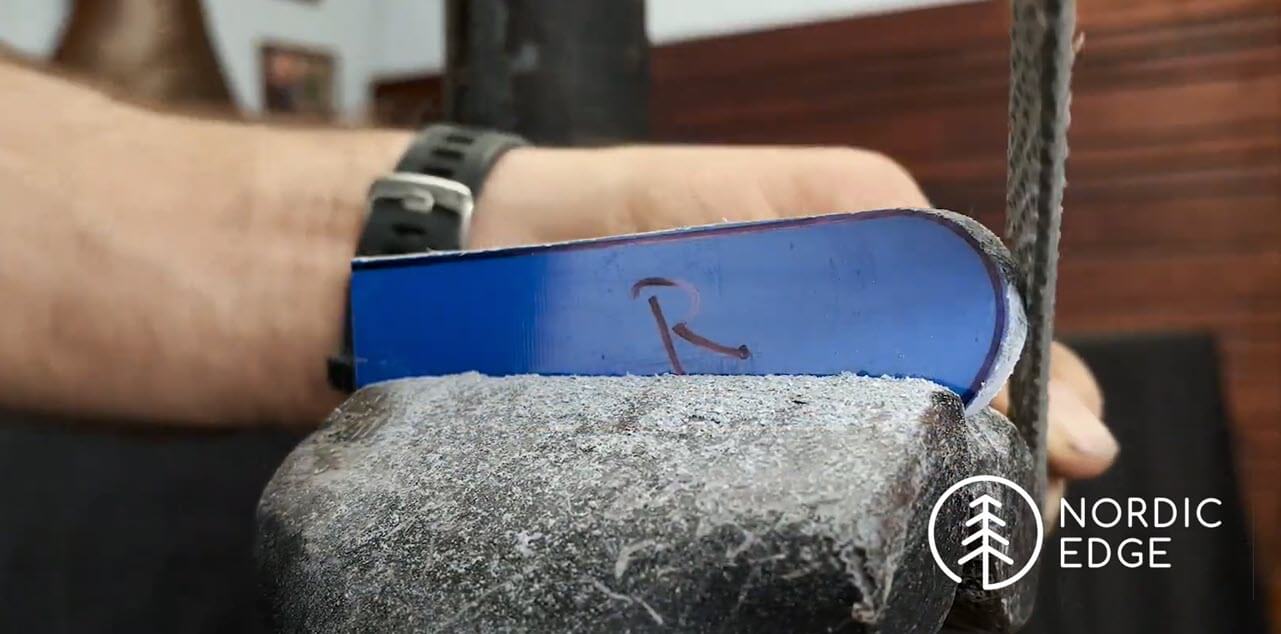
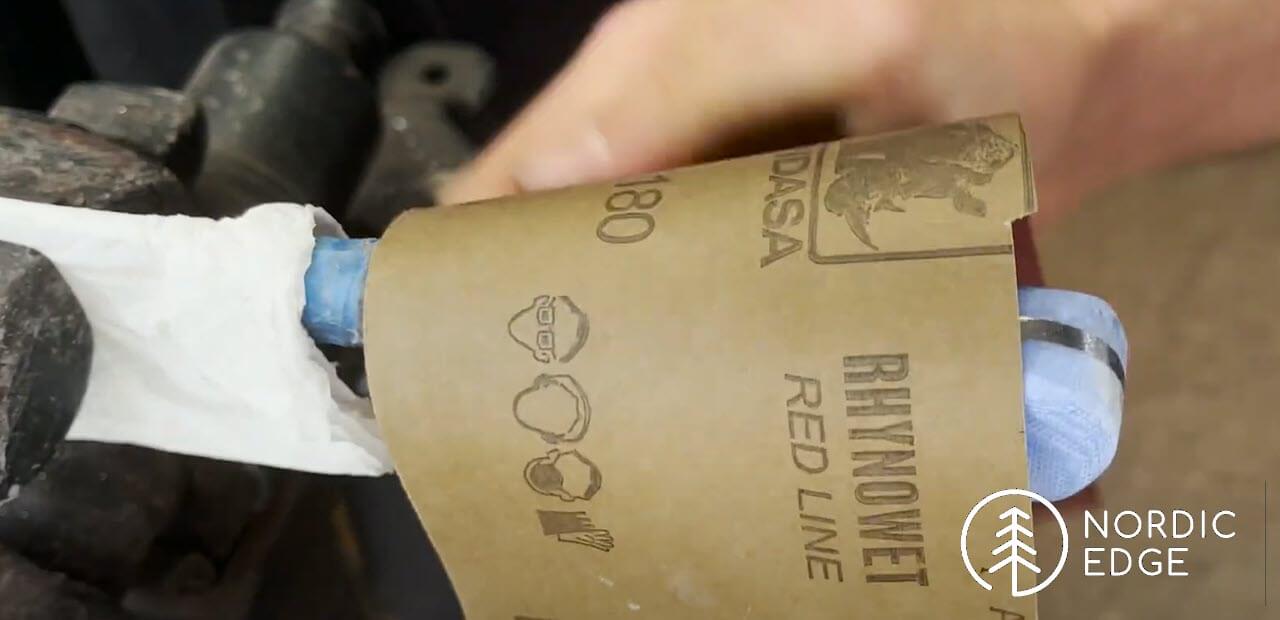
To deal with the added challenge, Hayden is -wearing a dustmask and working outside - here sanding the front of the handle scale on some coarse sandpaper (rhynowet 180 grit in this case). He is holding the scale at an angle and testing often on the blade until he get the angle needed.
Another way to do this could be to clamp the scale in a vice and with a file removing material, until the scale fits tight up against the integral bolster.
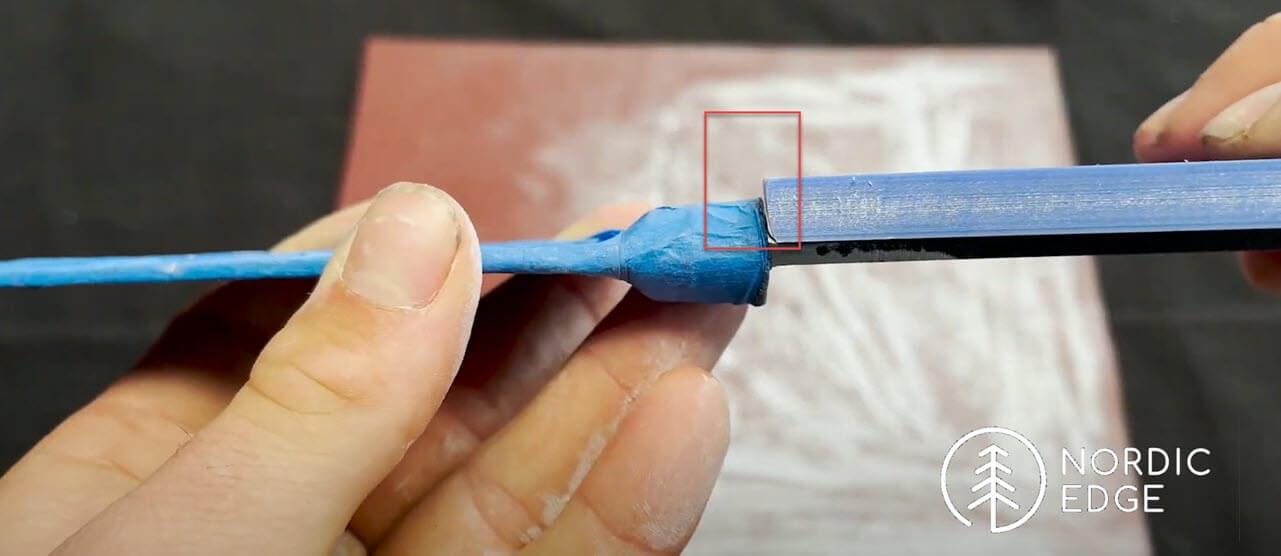
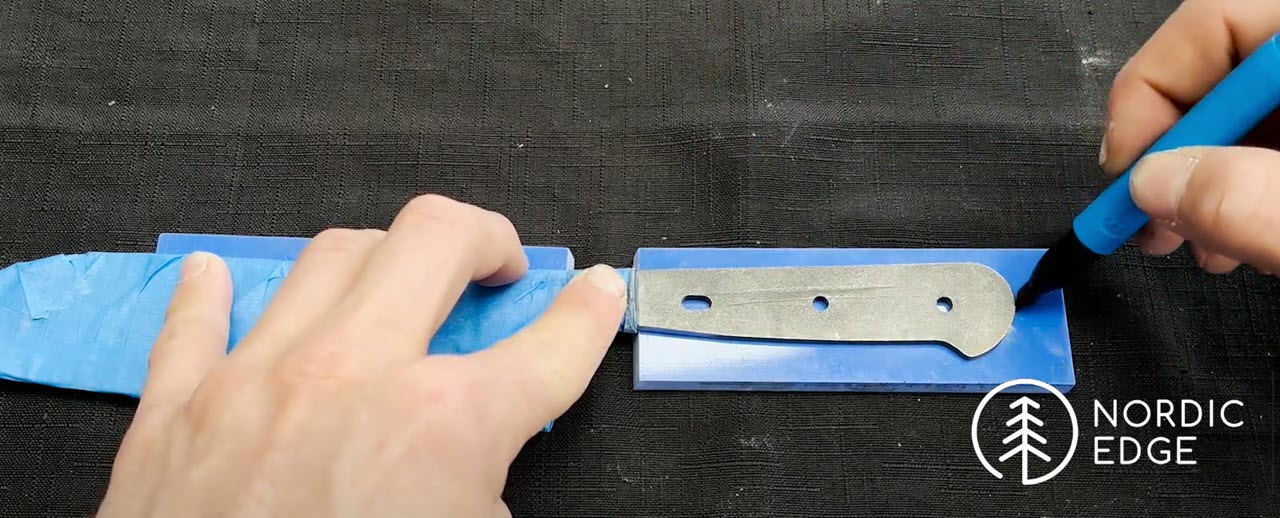
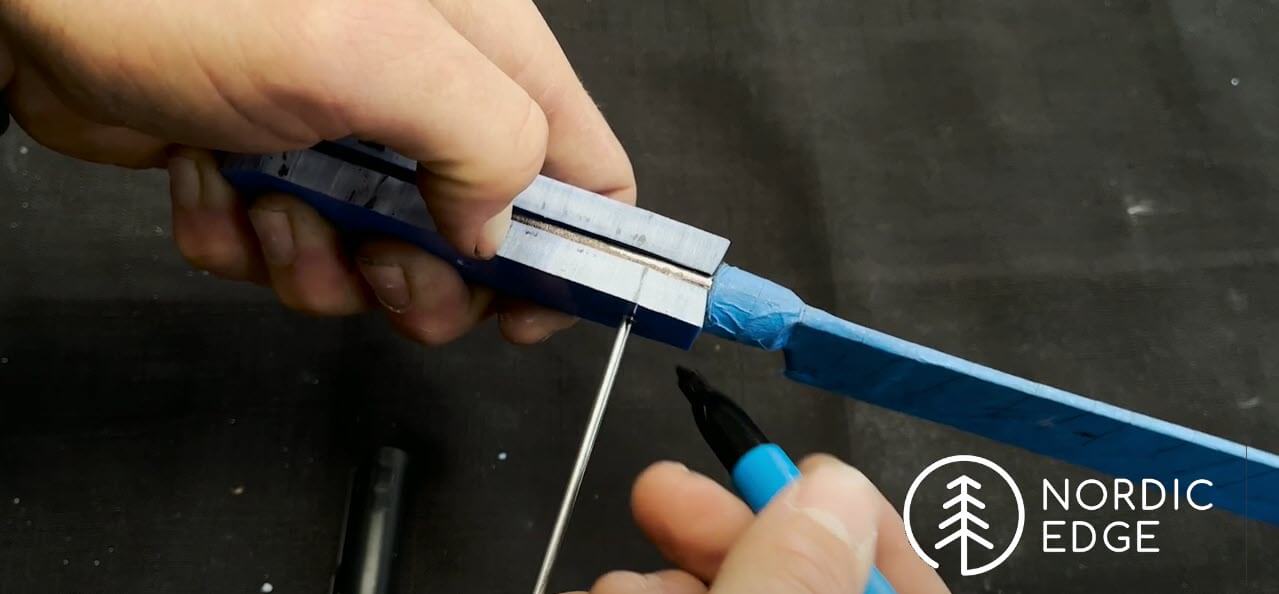
Here the handle scale front has been angled to get a good fit;
Pressing the handle scale up towards the bolster, Hayden is drawing around the handle/tang shape with a pen.
Shaping the scales before attaching them to the blade is not required, it just makes the shaping afterwards a bit easier. When rough shaping the scales, this can be done with a belt sander, rasp, file or similar. You just want to remove most of the extra material without going too close to the blade.
In the below photo you can see Hayden using a rasp, guessing the file took too long :)
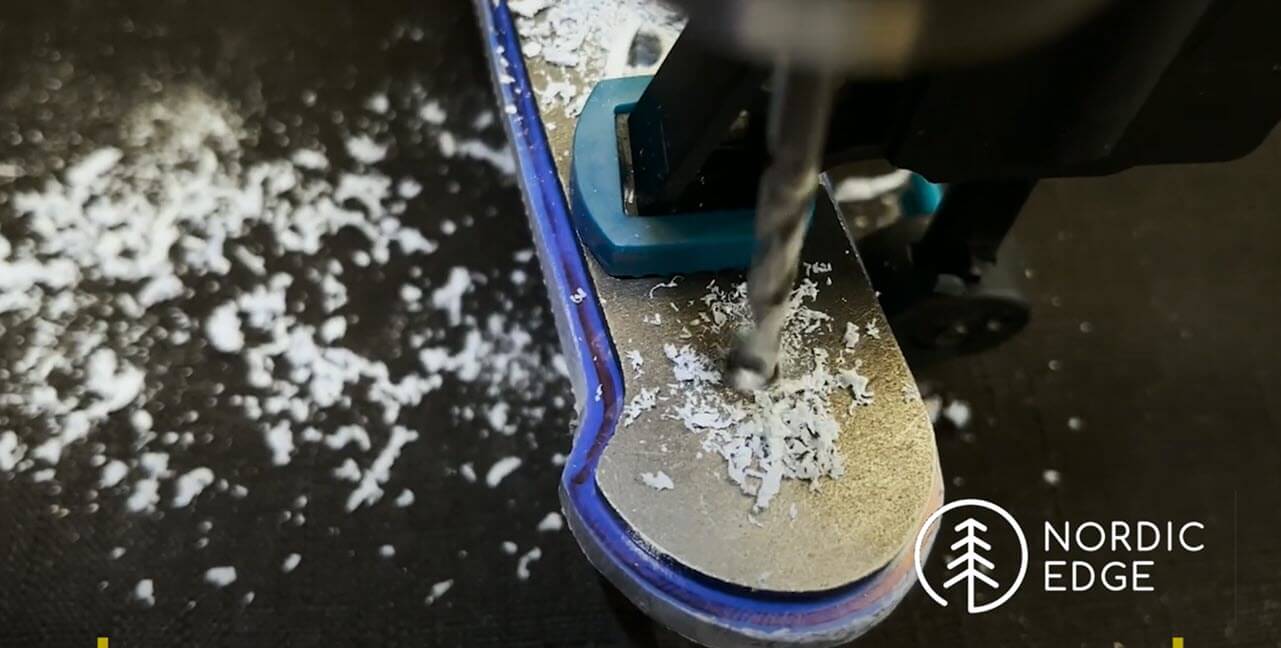
Drilling pin holes is done with a drill bit the same size as the pin stock, in this case Hayden selected stainless steel pins in 1/8". He has clamped the blade to the scale, pressing the scale hard up against the bolster and is drilling through the blade into the scale.
Pro tip: As soon as you have drilled the first hole, insert a pin to clamp blade and scale in place before drilling any other holes so help stop anything moving.
When using wooden scales, sometimes you need to drill holes that are very slightly oversized to not create sideways pressure on the scales that might lead to cracking. But with G10 which is such a strong material, using the same size drill bit as the pins is ok.
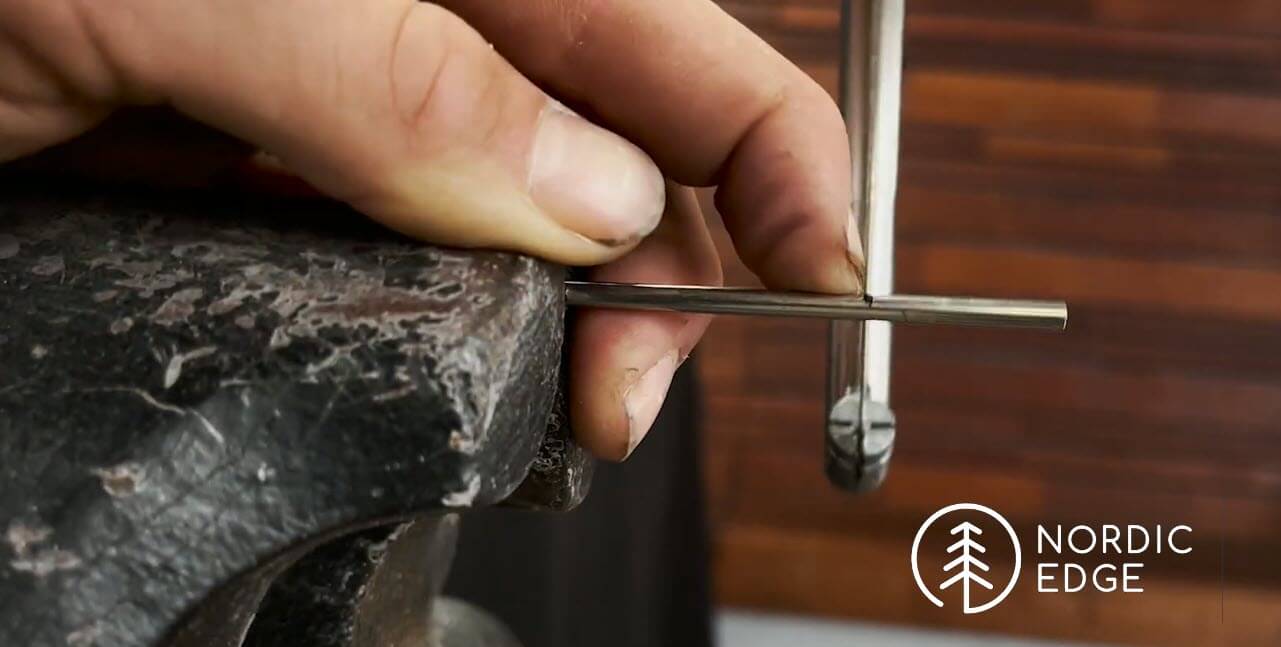
Hayden is here showing how he is measuring the length of the pins and then cuts them off with a hacksaw, slightly overlength. This step can also be done before drilling, if you want to use the pins in the first holes drilled.
Cutting the pins to length with a hacksaw is fast and easy, a dremel with a cut-off wheel is another option.
Here the blade, rough shaped scales and pins are ready for glue-up
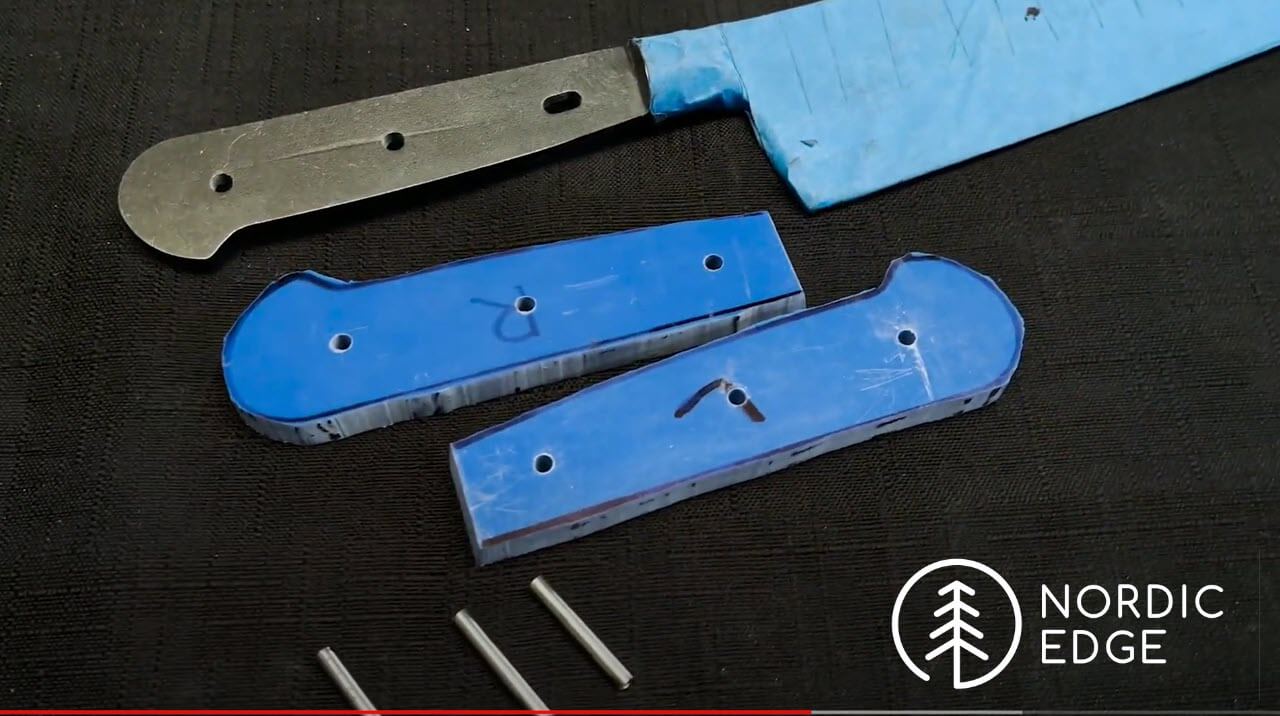
Before using the pins, it is a good idea to round the edges a little bit on some rough sand paper. This helps them go into the scales easier without any sharp edges stopping the pin going in while the 5-min epoxy is setting.
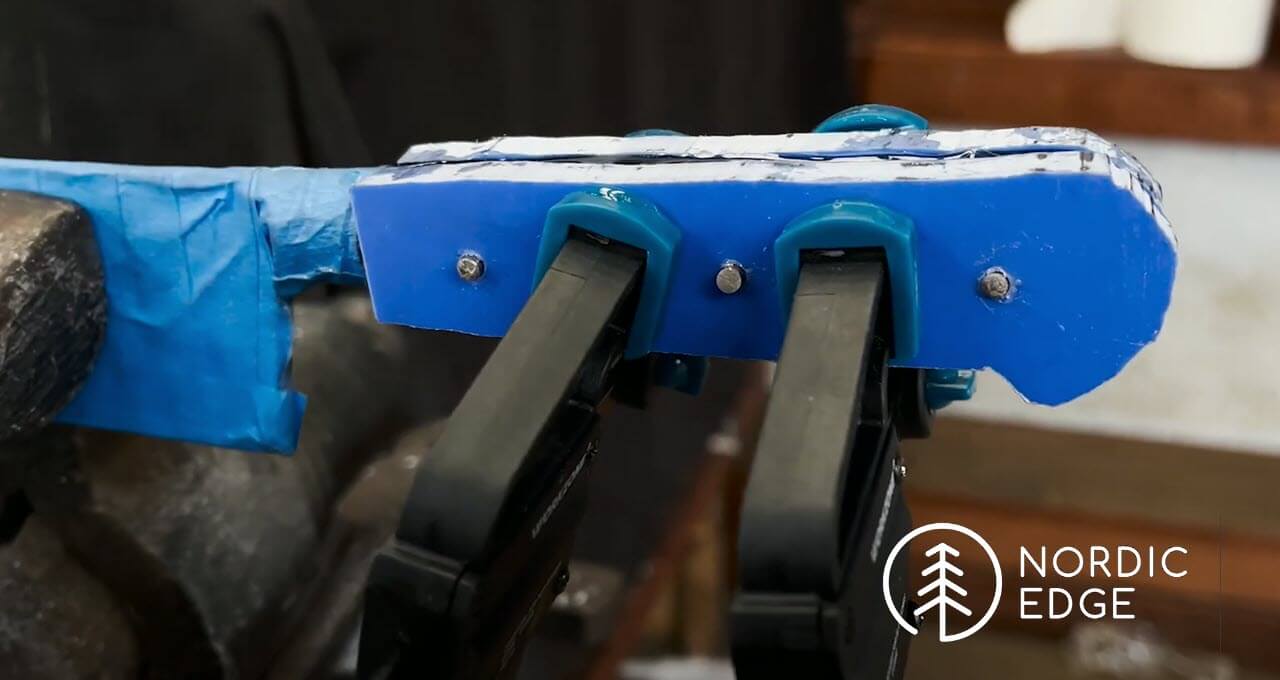
After wiping the blade tang, inside of handle scales and pins with some acetone, Hayden is here gluing up with 5-min epoxy. Any two-component epoxy like Araldite or similar from the hardware store will do the job. Hayden is using locktite 5-min epoxy due to the ease of the mixing nozzle but you could easily mix this on a piece of cardboard and applying on all surfaces before clamping together.
Pro tip: whenever possible, use the slower "max strength" or 24-hour epoxy over the 5-min versions. It seems to set a bit harder, and more importantly it gives plently of time to clean up any excess glue or glue before it sets.
The 5-min stuff is tough enough and makes it a bit faster of course, you can generally start working on the the handle after 30 mins or so with the locktite one we use.
Glue on the scales, add some glue on the pin holes and insert pins. Clamp not too hard - you don't want the glue to just all shoot out again.
When the glue is dry, it is back on handle shaping.
This is your final handle shaping so consider how you want the overall flow of the handle.
Do you like a handle that thins towards the blade? Or swells out into a wider palm section and then comes back in again near the end of the handle? Rectangular or oval when seen from the back?
Do not stress this step, if running out of time it might be good to put the project aside for when you have time to complete the handle shape: this ist he bit that will be the final result of your work.
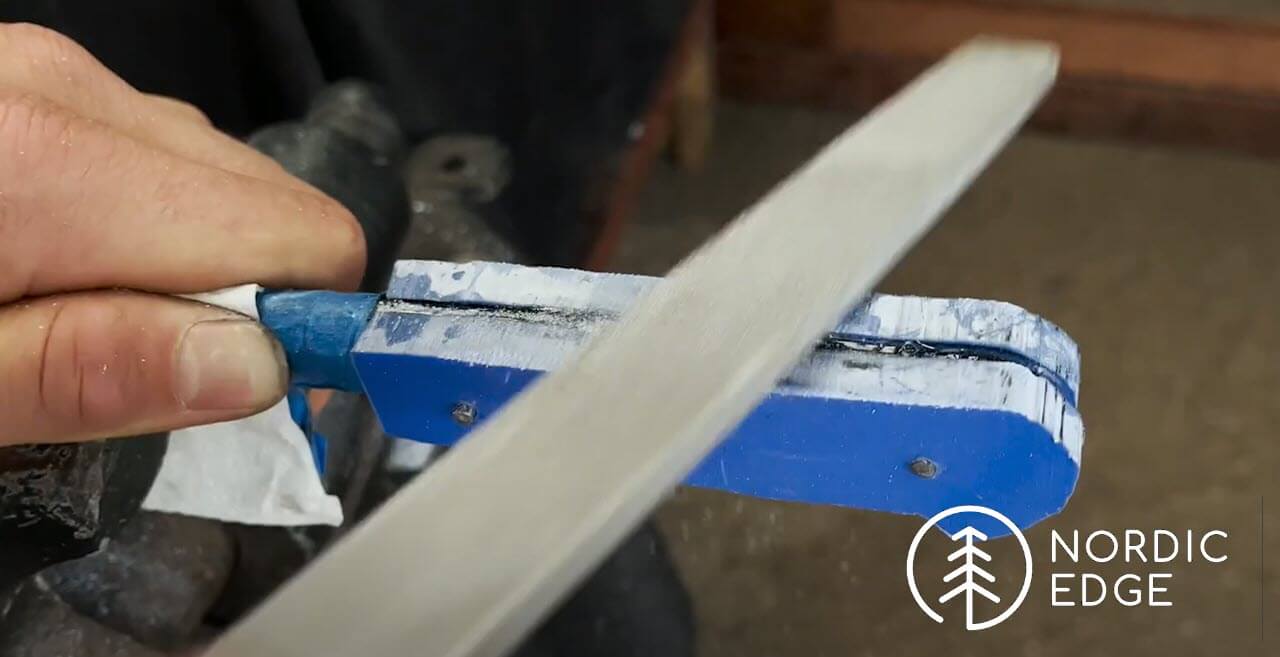
You need to keep filing or sanding until you have shiny steel the entire way around the handle/tang. If you do not keep going long enough, you will be left with an indent in the handle where you see the epoxy rather than the steel tang.
Don't worry about scratching the tang, it is part of the process; grind the profile of the scales down all the way aroudn until you have clean, shiny steel and no epoxy left on the tang or handle. Only then can you do the final shaping of the handle. Afterwards when sanding the handle, the tang will be sanded as well and you will remove these scratches but the less you file on the tang the better of course - filing hard on the tang will change the shape of the handle.
Pins: The pins need to be file down flush to the handle scales, and then again later when shaping the handle to your final design. Then again when sanding the handle, as the pins will be harder than the handle material and often left sticking up above the handle as high points.
Pro tip: To get flat, fush pins wrap the sand paper around something hard like a file or other piece of G10 or brass and sand hard on the flat of the pins every grit before changing to a finer grit.
Pro tip 2: Inspect closely the face of the pin before changing grit on the sandpaper - it can be easy to miss and then when the entire handle is at a high, glossy finish you spot the scratches in the face of the pin and have to go back to a coarser grit.

After the tang is shiny metal all the way around, you have shaped the handle to your design, you have made sure the pins are flush with the scales - take a minute to review critically the result.
Hold the handle up against other similar knives to compare dimensions, the flow, any swelling or thinning for evenness between the two handle sides.
Pro tip: In the beginning we often make too thick handles, take some time to handle it and make sure it is comfortable in the hand with no sharp edges or corners that should be softened. Is the handle the same thickness on both sides at each pin, the front and end of the handle?
When happy with your design, sand to as high grit as you decide is the right look for this handle. We almost always go high - to 1500 grit - thinking after all that work, the handle material should be allowed to really pop but this is possibly more true for a natural material like wood than for G10 :)
G10 can be left rough for more grip, or sanded to 800 grit and polished with a polishing mop for a shiny, uniform look.
And here is Hayden's result! A MG Santoku chef knife to use for years to come, with his own handle design.


")


