
3 hour project: Forged spearhead candle holder
By Bjorn Jacobsen, Oct 2022
I was supposed to work on my bowie build for the #townsbowiebuildoff challenge this week, but felt like forging instead. I had 3 hours Thursday night, here is what I did;
Last week I watched this great video on youtube by a Swedish blacksmith called Philip Lufolk where forged a spearhead and made it into a candle holder. I have wanted to do it since watching the video, as my only attempts so far on anything similar have not been great.
At the St. Ives medieval faire a few years ago I made a spear out of a piece of leaf spring and did not make the handle section very well. Another time I made a couple of arrow heads which is the same process just on a smaller scale,and they worked out ok, but a bit too thick, so I was keen to try again.
Here is a short video clip of how it went:
And here are some photos of the process, with my comments;
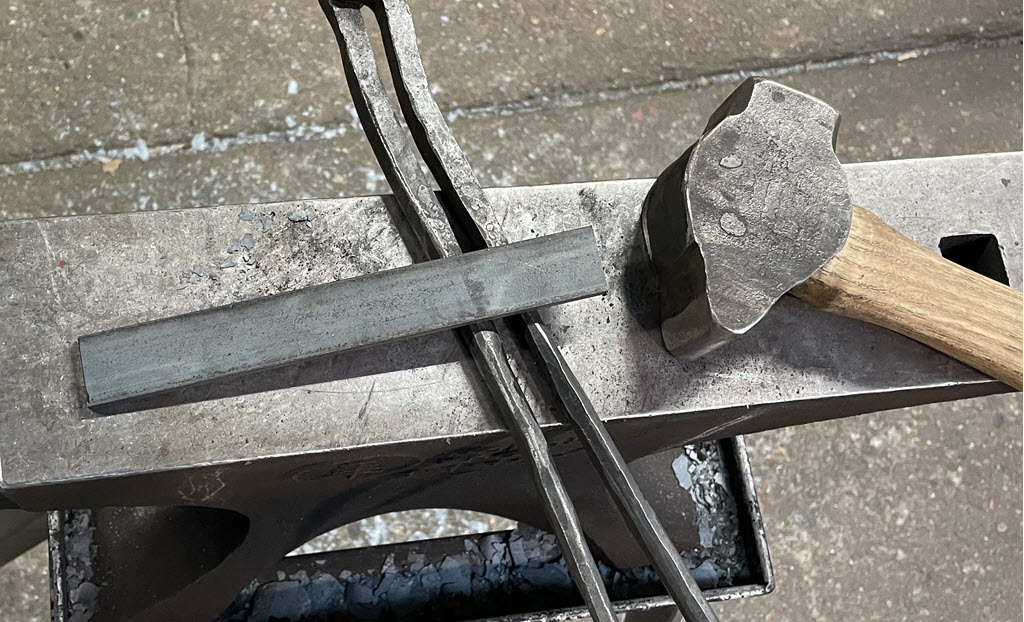
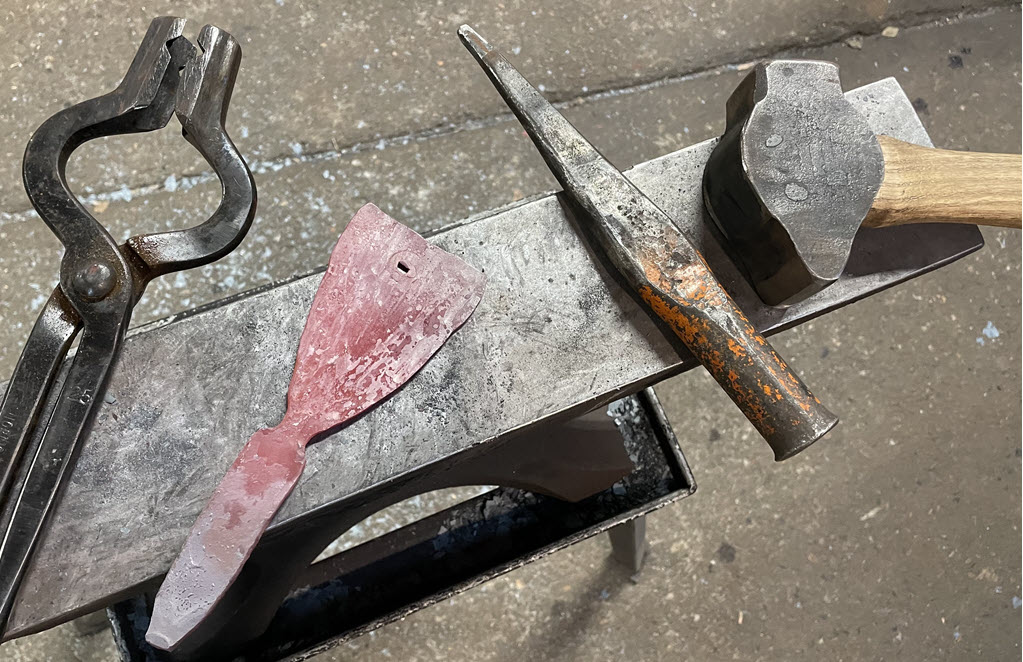
Following Lufolk's video, I used the same material, mild steel in 25 x 5 x 180 mm. Mild steel is very forgiving to forge, easy to move and as this is never being used as a spearhead, I did not have to worry about the lack of hardening.
I thought it would be clever to make a point at the end that would be the tip before dealing with the handle..this was a mistake. A problem with making a tip from bar stock is that it can be easy to fish-mouth the end. You need to hit the corners into the material until you get a point. I thought if I dealt with this while the other end was easy to hold on to, it would be clever..which it wasn't :)
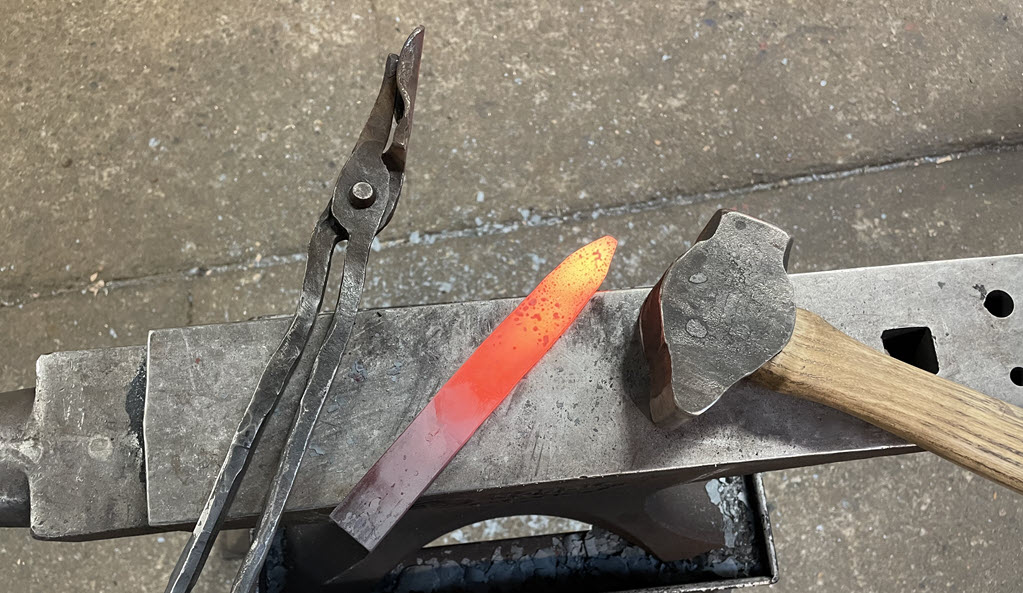
As as soon as I had made the tip, I had to hit the tip to upset material in the other end to thicken this end up. So the lesson here is; upset the end first by cooling 3/4 of the bar in water and hit the hot end down into the anvil BEFORE doing anything to the other end. When upsetting the length of the bar will start to bend, so the process is:
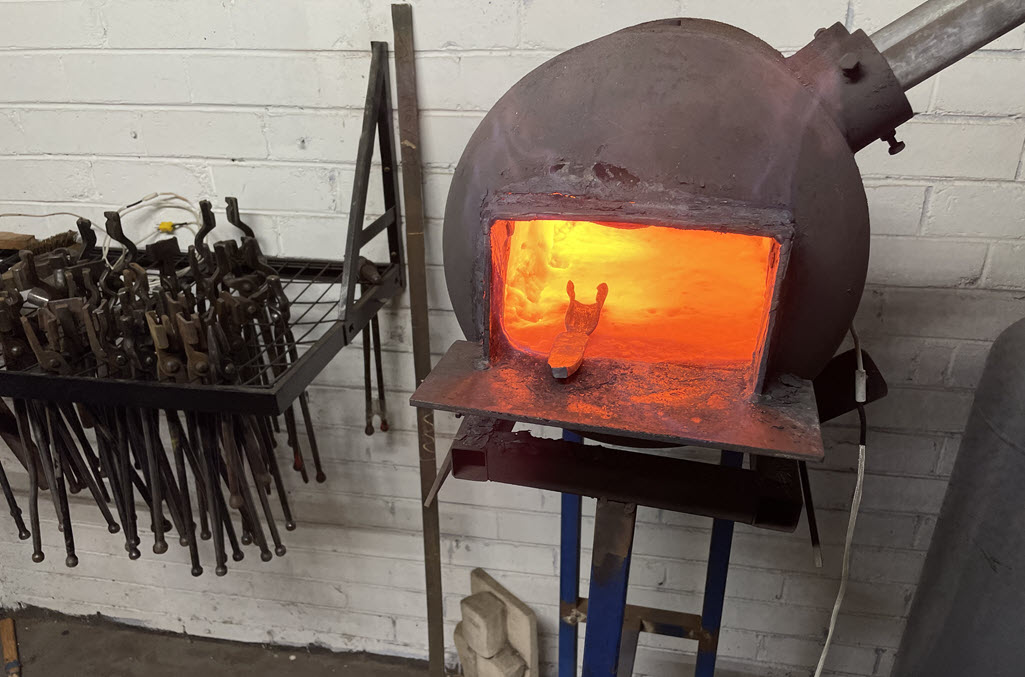
- heat the end to up which in a gas forge means you will heat more of the bar than needed
- quickly cool 3/4 of the bar in water to make it bend/fold over less
- place the hot end down on the anvil and hit the other short end
- when it bends, flatten by placing the flat side down and hit it flat before going back to hitting the short end again
This took a couple of heats before the end section was a bit wider and quite a bit thicker than it started out. By creating more metal to peen out, there is more metal for the collar section.
Below I have upset the end, necked it 80 mm from the upset end using a guiljotine tool from Sam Town's Etsy store: LINK.
By holding it by the blade end and placing the collar side just after the step down on the anvil, the collar end is forged into a wedge or fan shape. This is to preare for the peening or widening of that section;

In the below photo the collar section has been peened out. The wider this is done, the bigger can the collar holding the candle be. Going too thin here will be weak to hold on to while forging the blade section, while leaving it too thick might not give you enough material to fold a proper collar. The below is where I ended up, which by a stroke of luck ended up matching the candle I found when finished!
Getting the collar nice and round took several heats. I got it to come together but the end was not very round. The neck would also keep bending and I was worried it might snap if I bent it back when cold. This is another reason to forge mild steel rather than blade steel - it can be quenched in water!
So I would quickly dip the bit I was not working on in water before forging, meaning the neck would stay straight, or the collar would not be messed up by holding it with tongs and hitting the blade part.
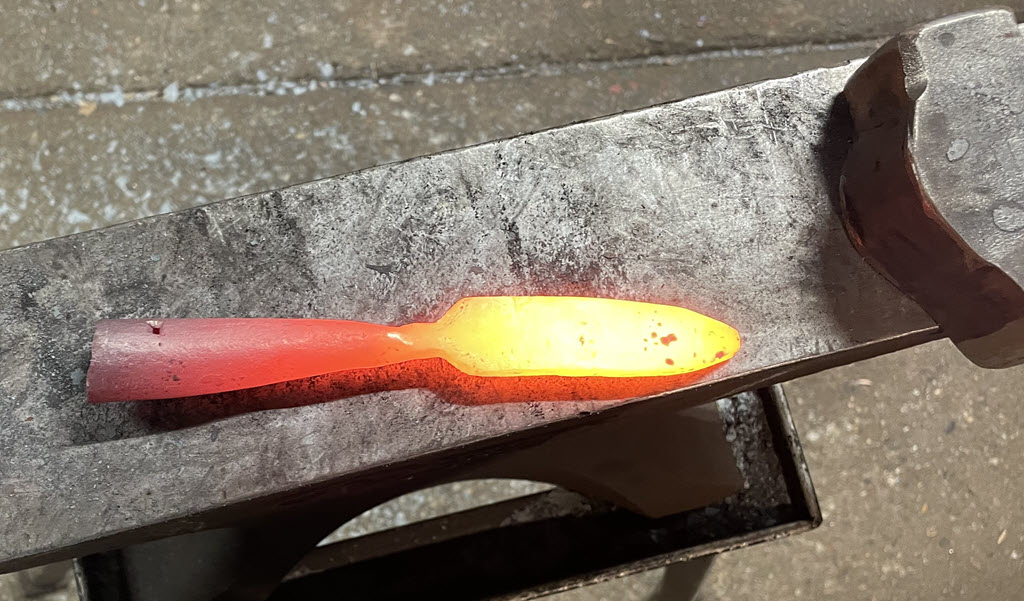
What worked well in the end was to cool the spear to just above the neck and clamp the blade bit in the vice. Then hammer a round steel drift down into the handle section to make the top of the handle collar round. In the photo below you can see how the handle collar is not straight on the blade but this was easy to fix by clamping the blade in the vice and twisting the handle collar with a set of tongs.
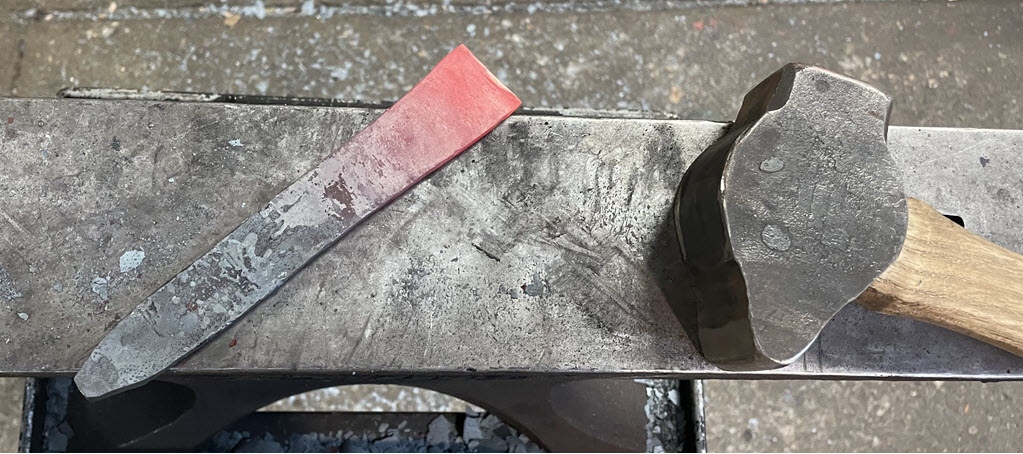
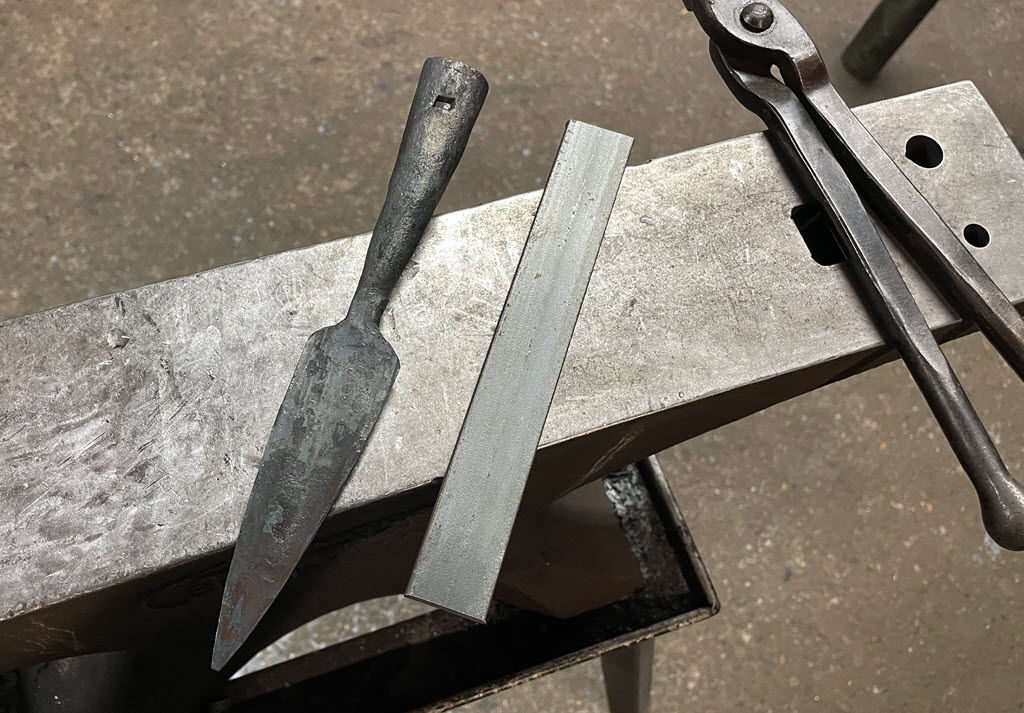
Here is the finished forged spearhead next to a piece of steel in the same dimensions it started out as.
I am really happy with it, thinking the dimensions look much better than my last attempt and it came up straight after a bit of straightening by placing the blade in the vice and straightening the collar with tongs.
The edge sections of the spearhead were not as straight as in the below photo - I flattened them a touch on the grinder before finishing up the forging and then scotch briting the edges and top of collar to make them a bit shiny as contrast to the forge scale flats.
The foot of the candle holder is made from a piece of curly birch. I sanded a disc of wood to a rectangle and rounded the corners before flattening it on some sand paper. Sanding all sides up to 1500 grit rhynowet, before digging out my micromesh kit and quickly going through the soft pads from 1500 > 12,000 grit. It only takes a minute or two extra at those high grits and it really makes the grain pop when done.
At 600 grit I wiped on some mahogany colour leather dye on the top side only and sanded on, repeating the 600 grit before moving on. I like adding some leather dye to light coloured woods with striking grains, it helps them pop much more. When sanding off the dye again, the grains more parrallel to the surface gets the dye sanded off (lightening) while the grains going into the block retains the dye to increase the contrast in the wood.
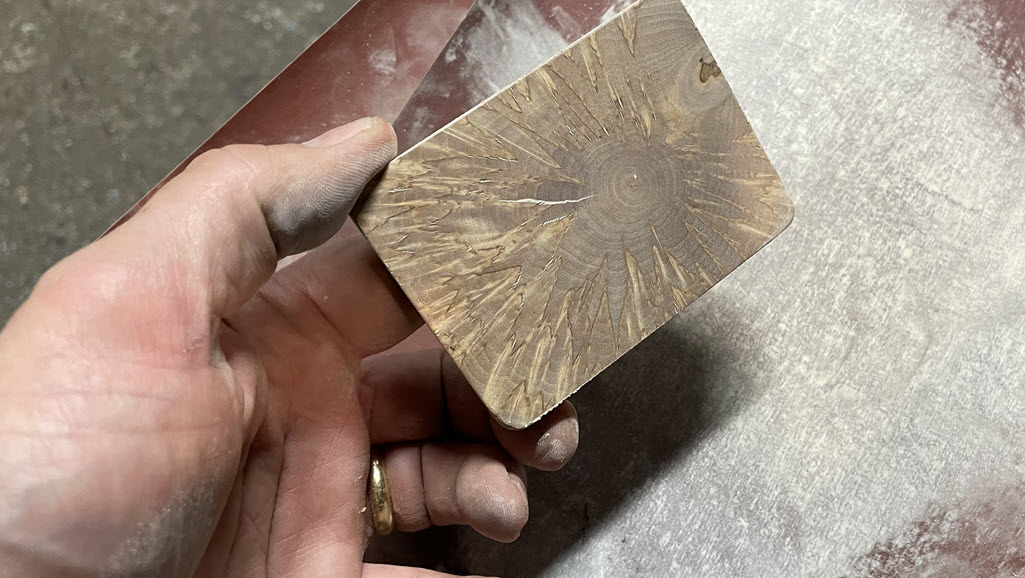
After a wipe with acetone to get rid of dust without raising the grains, I applied some Nordic Wood Wax to both the spearhead and block of wood. This is a new mixture I have been playing around with for a while, really happy with how it is coming along. Graeme and Mick used it on the last spoon carving workshop as well with good results.
Here is the spearhead in the curly birch holder, most of the leather dye sanded off again, leaving some darker tones and contrast in the wood.
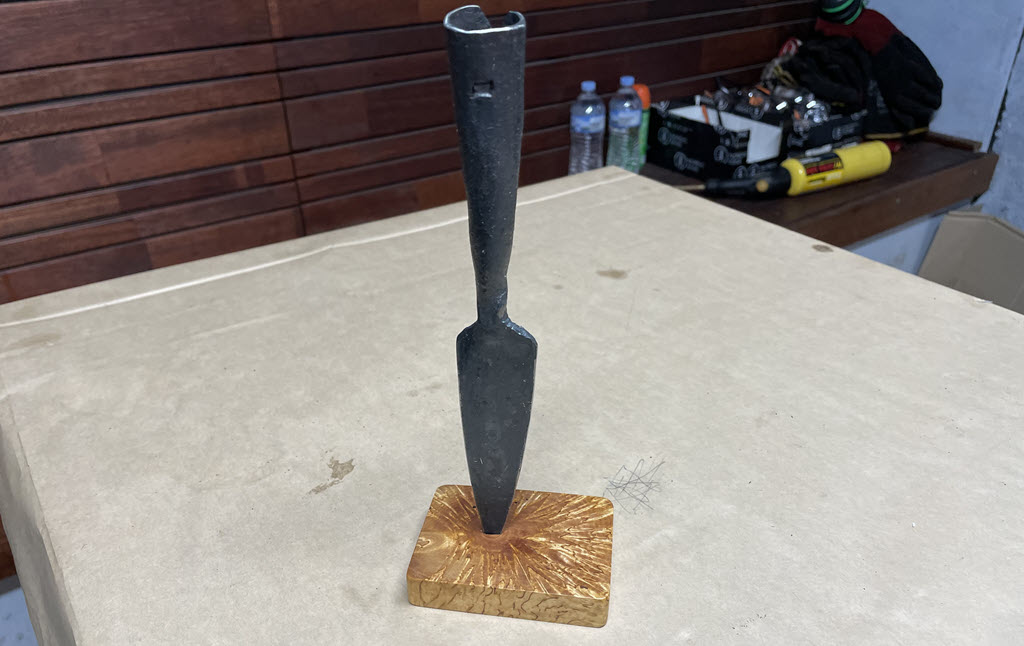
Had to take it home and put a candle in it. The single candle I found left over from last Christmas fit perfectly! Overall I am pretty happy with my little 3 hour project, and fun to be able to complete something in one session.It is one of the reasons I really enjoy blacksmithing, being able to make something and see the project take shape in a single session as opposed to the knife making where it always takes several sessions or weeks even to complete a project.

Recent Posts
-

The Etch Test: Ferric vs Hydrochloric vs Gator Piss
The Etch Test: Three Very Different Looks From One Steel One of the great things about knife making …3rd Jan 2026 -

Why Bed The Tang In Epoxy - Then Knock it OFF Again.
What is "Bedding the tang"? Bedding the tang means gluing a stick-tang blade into the handle block i …21st Mar 2025 -

Marble Leather - How to Dip Dye Veg Tanned Leather
This was my first experiment with hydrodipping or dip dying leather, and it came out pretty cool! I …14th Mar 2025