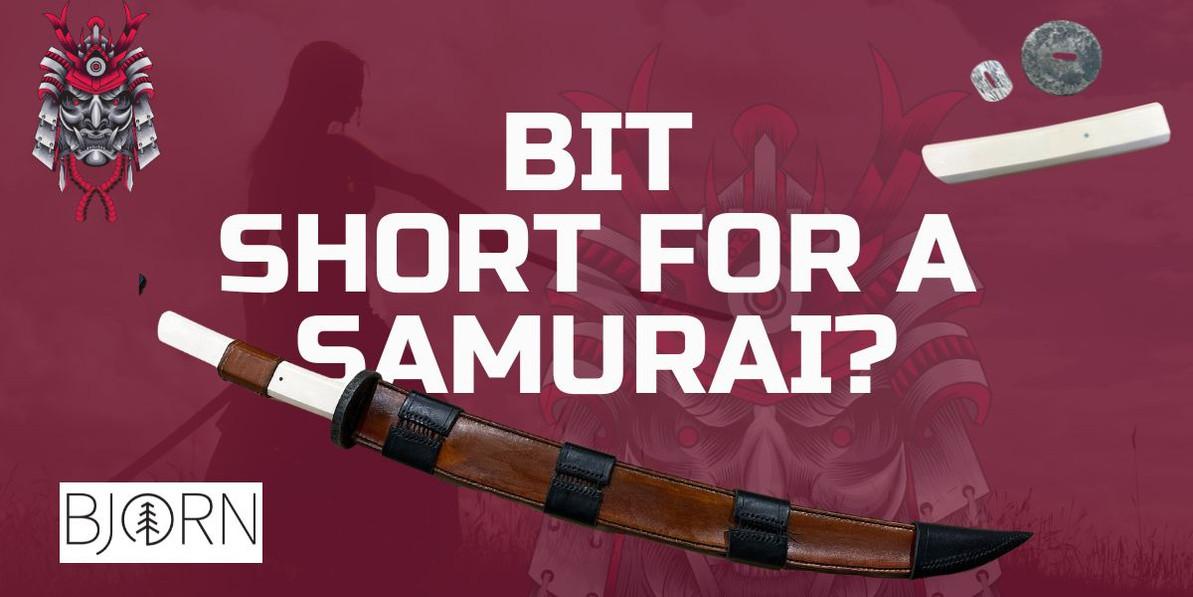
Bit Short For A Samurai?
-- or "no samurais allowed in Melbourne? "--
By Bjorn J, May 2023
Going to my first ever knife show
The Melbourne Knife Show 2023 was my first ever show as a maker. I have been to many shows with Nordic Edge but this was the first time I got a table and had things I had made myself on the table.
The Melbourne show is the only Guild show in Australia, having run for over 30 years. This is the story of a short sword that was going to be the "centre piece" on my table. But it did not work out that way, and here is the story;
Forged damascus sword
I wanted to have something cool as a bit of a centrepiece, thinking it was finally time to do something with the rest of a bar of damascus steel from Jezz at Oblivion Blades I've had for a while - and decided to make a sword!
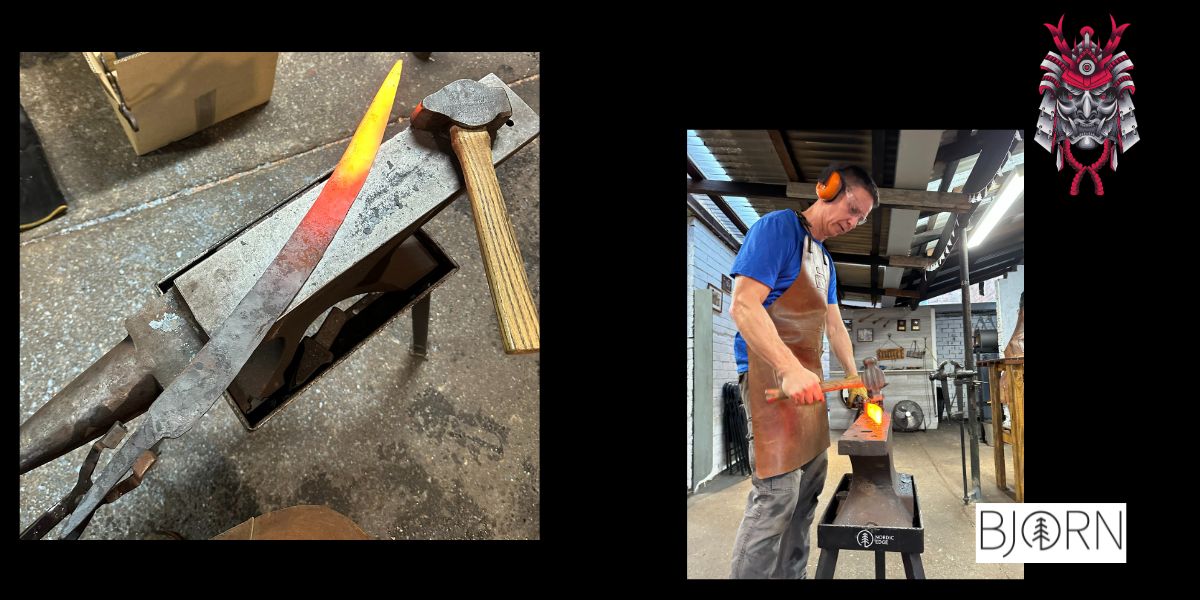
This was using what was left of a 30 layer carbon steel damascus billet, and I knew I would be short of steel, so I thought I'd just draw it out as far as I got and see how far that would be. Usually I cut the corner off to make making the tip a bit easier but this time I had to forge the tip to retain as much steel as possible.
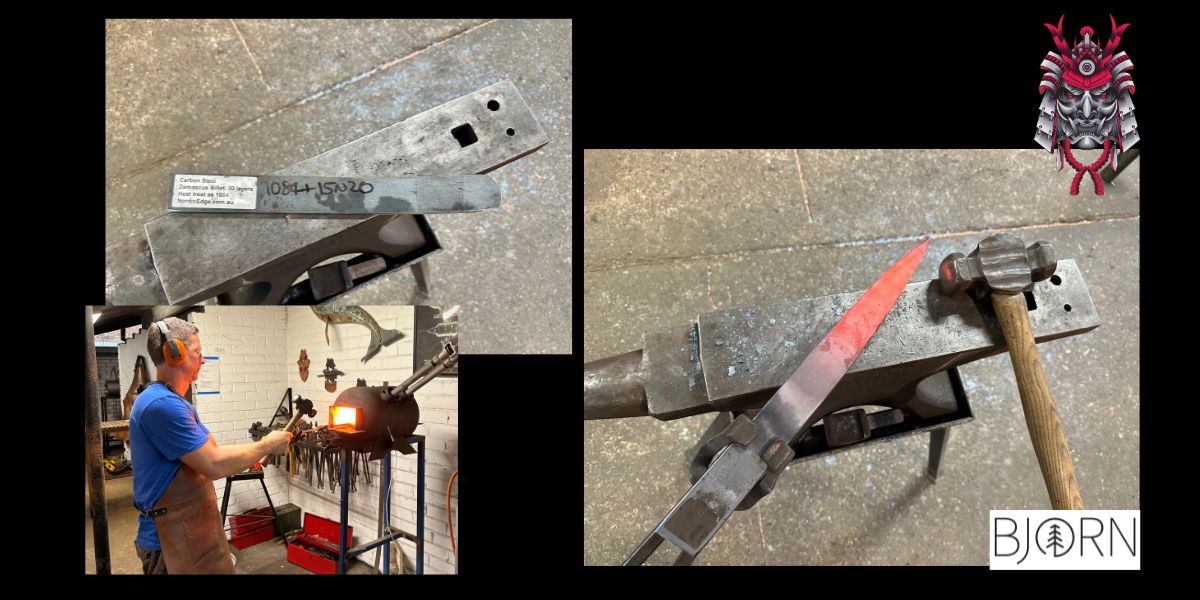
Forged to shape
Had there been more steel I would have gone with a thicker tang, more like a proper katana but I went long and thin here thinking to keep as much steel as possible for the blade. I ended up forging it twice, after leaving it straight the first night and then later regretting it, forging it again to get the bend back in.
I forged it as close to shape as I could to get as much as possible out of the bar, with a fairly thin edge and thin point...would this survive the quench?!
The good news was that the blade came out straight, very happy with that one!
Failed bronze attempt
While forging the blade, I was experimenting on a sample piece of 1084 with casting bronze into my maker's mark. Lachlan Scowcroft from Valhalla Blades was kind enough to give me a big bar of bronze he cast, some time ago and this seemed a cool way to use it.
I ground the 1084 roughly flat, put on some borax and heated it in the forge, then stamped it with my maker's mark and put it back into the forge.Then adding some bronze and more borax, melting it and quenching it. When grinding it flat and etching in ferric chloride it came out pretty cool looking.
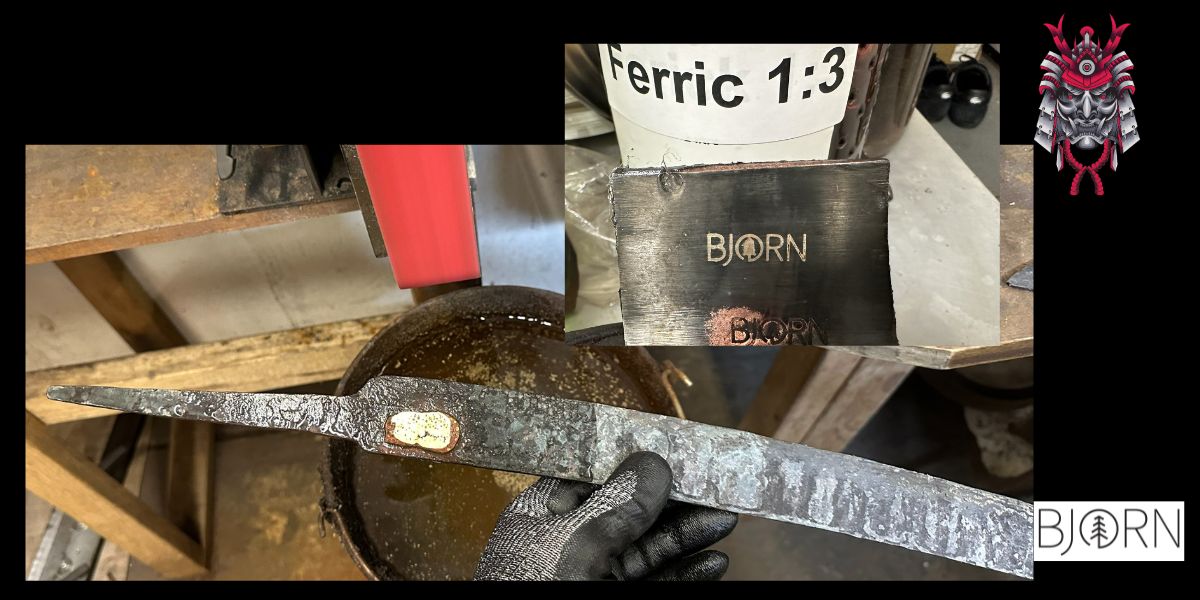
So I repeated this on the forged sword, thinking it would look cool against the etched damascus..but it failed.
Maybe I should have ground the damascus flat to remove scale first? Maybe I used waay to much bronze? Guessing borax stops more scale from forging but does not remove all the scale already there from the sword being forged for a long time? Either way, when done I had this big blog of bronze on the sword which when grinding it, all fell off in a big blob :)
hand sanding is dangerous?
After grinding it was onto hand sanding. First with a hard backing, in my case a block of G10 with 1/3 sheets of rhynowet sand paper wrapped around it. Then after it was nice and flat, I swapped for a soft backing block which is a piece of G10 scale with leather glued to both sides.
Grit progression was 180 with hard backing, then 180, 320, 600 with soft backing.
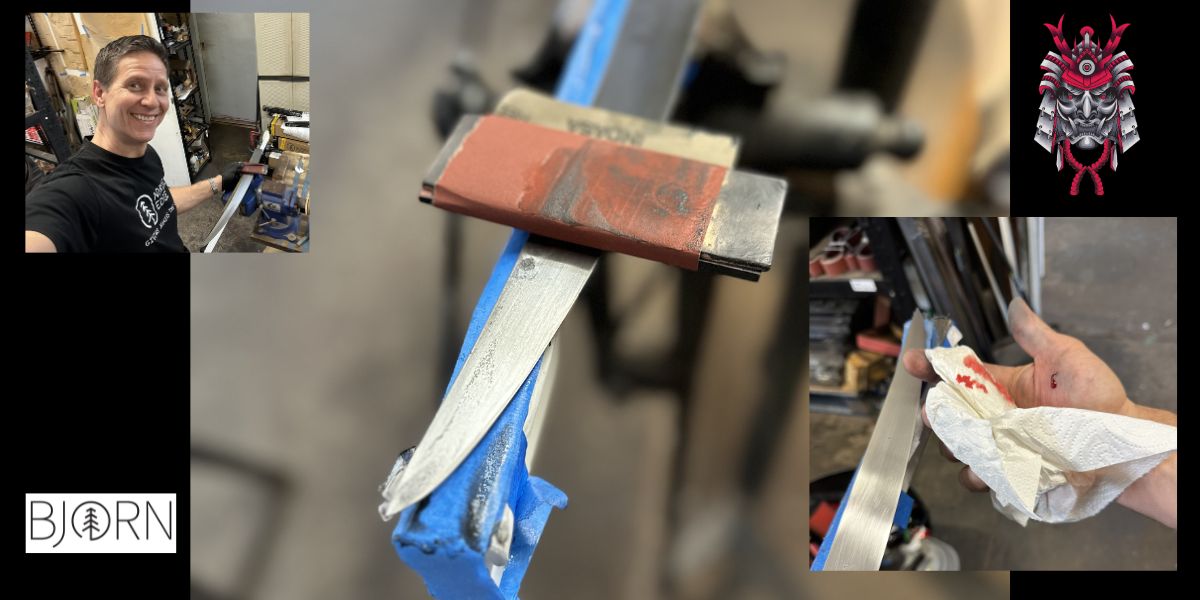
One thing to note when hand sanding - which I find a bit boring at the best of times - is not to zone out. Hand sanding a 550 mm long blade is a bit of work, and having already ground the tang a bit thinner than the ricasso for easier guard fitting, the tip stood up a bit from the board I was hand sanding on.
I would not recommend thinking of something else, slipping off the tip of the sword and then sanding back on..
Liver of sulphur patina and bench vice attachment
Now this is not much of a real samurai sword, it is too thin and the tang is more a stick tang than the thick tang used on Japanese swords. There is also no brass bit at the front of the guard that the wooden insert in the sheath sits into, I made a simple copper spacer piece instead.
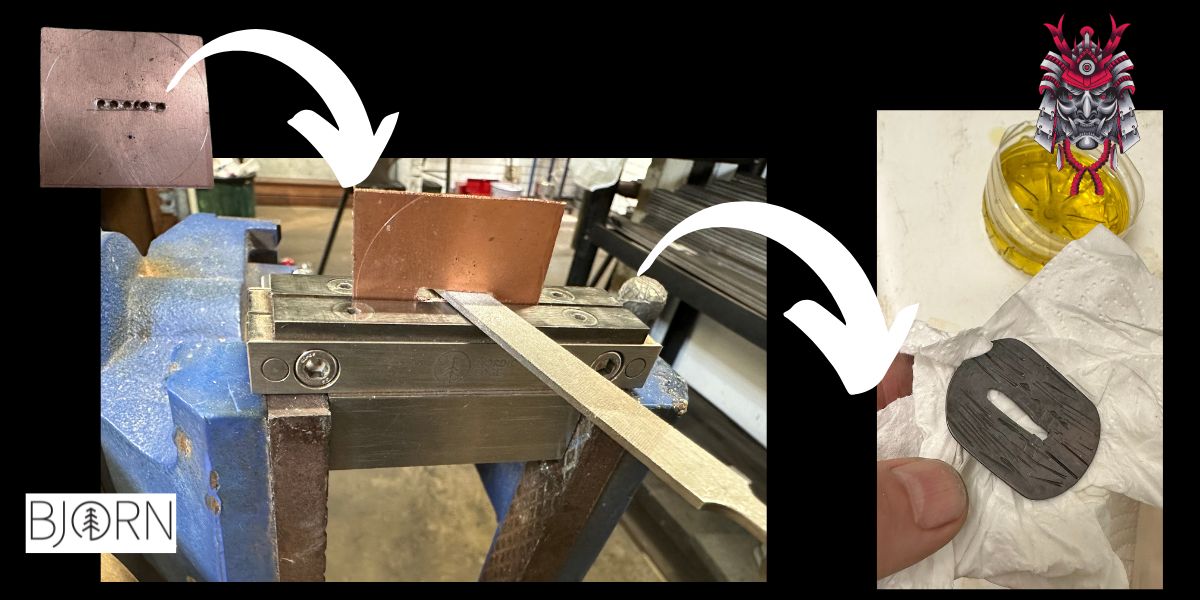
Drilling holes in the piece of copper and clamping it in my file guide, and the file guide in a bench vice again to make hand filing easier, I filed to the scribed lines. (the bit that screws in to the underside of the Nordic Edge file guide is another little product we have "invented" at Nordic Edge some years ago for our file guides, check it out in the middle photo below)
I find it really useful when doing shoulders of stick tang blades, or for guards, anything that needs to be hand filed is made easier when held in a bench vice rather than just holding the file guide by hand.
The patina was done with something called "liver of sulphur" which smells rather .. let's call it egg-like!
You mix a few drops in warm water and pop the copper piece in it, and the copper gets a pretty hard-wearing, dark patina. This was also done with the copper pin in the handle when we got to that stage. It looks cooler in real life than in the photo, a dark colour but with copper tones coming through when the light hits it.
I had also marked the spacer with a cold chisel to give it some more texture before sanding it.
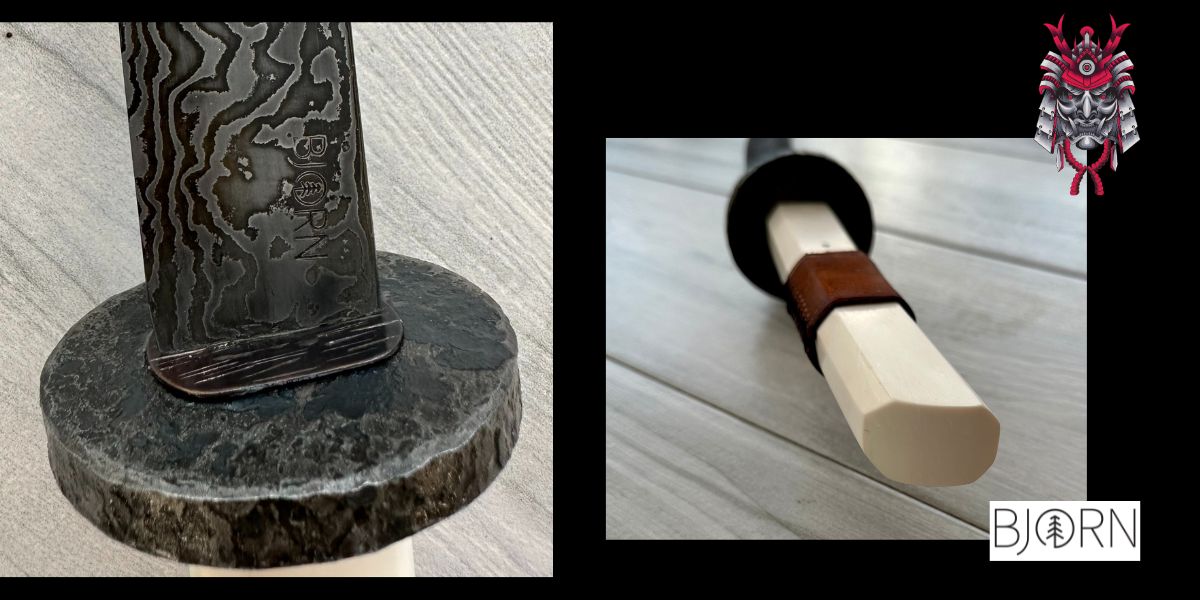
Boiling a tsuba
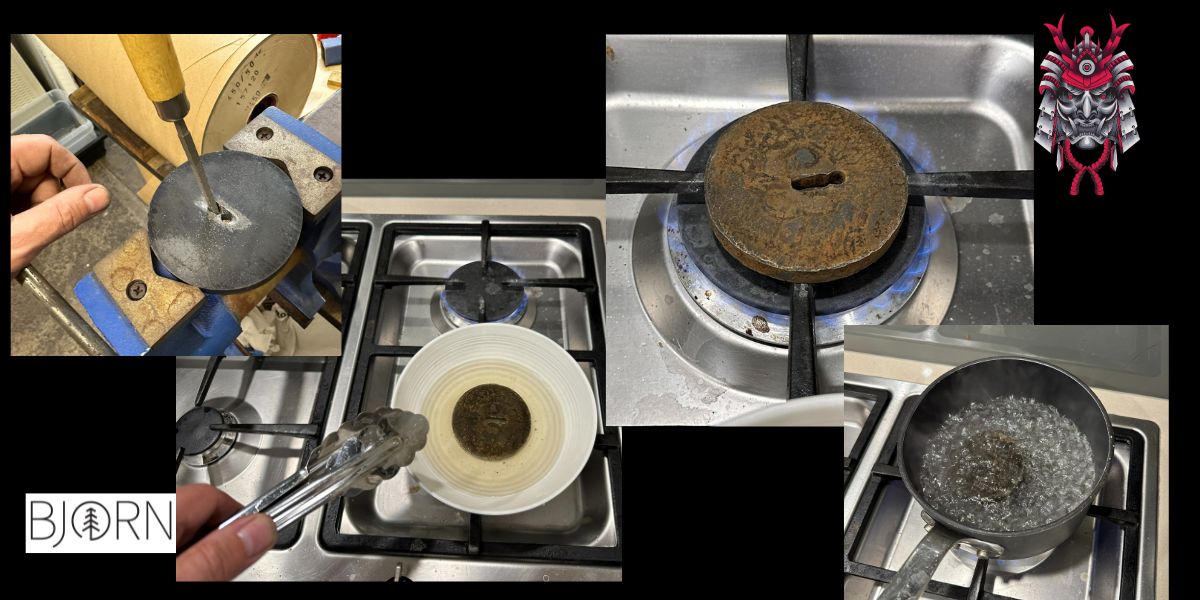
Having watched Walter Sorrell's video on how he force-rusts, then boils a wrought iron tsuba for a sword, I wanted to try too. Not being able to get my hands on some wrought iron in time, I went with a 10 mm piece of steel I had lying around, grinding a disc, drilling and filing the tang slot to fit the sword.
Then I left it in the forge for 30+ mins to scale up, textured it a bit with a hammer around the edge and on top, before leaving it in the forge for a while again to force some texture into the steel piece. Some scotch brite grinding brought out the highlights and removed the scale.
Then onto the rusting bit
I made up a salt and water solution and dipped the steel tsuba in the solution, then onto the gas burner to heat it up until it dries and starts rusting. Then back in the salt water > burn > rust > scrub with steel wool and force rust > boil again. Walter used hydrogen peroxide in his mix to help force-rust the piece but as always I am doing this at night with no prior planning so used what I had :)
After 2-3 rounds of dipping in salt water and heating on the gas burner it was boiled for 10 mins before starting again. I probably spent 45 mins or something on this step and it went darker from the boiling.
This worked as in it turned the rust black, but maybe I just did not do enough layers. When everything was said and done, I am not sure if it would look much different if just having left it black from the forge and then scotch briting some highlights into it?
When forging bottle openers and wanting them black, I have had good effect from heating and dunking in water to get the scale off and then spraying with WD-40 and heating with a gas torch again to turn them black. Half the fun of making stuff is playing with techniques, textures and materials, isn't it?!
Onto the handle
The handle is made from two blocks of Juma Aged Ivory, a man-made synhtetic ivory from Germany. Because this is inspired from Japanese swords if more light and thin as a sabre, I wanted a Japanese style handle meaning. Reading online this seemed to be about 50% of the blade length. My blade is 550 mm long plus spacer and guard so half as long as that would be 280 mm but that just looked too long for me. Having a bit of a play drawing different options I went with a 200 mm long handle. This is long enough to be two-handed, when playing with longer blocks it just did not look "right" to me. I was playing around with using just one block and making it a one-handed sword as the blade is light and thin as a sabre which is a one-handed sword but felt it did not look right either.
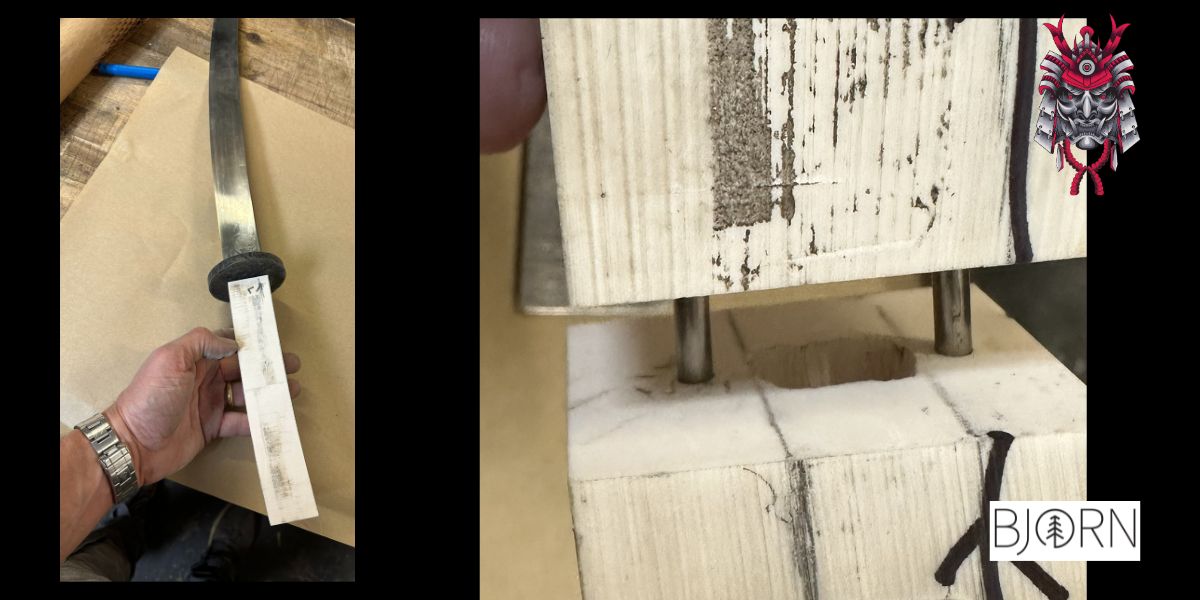
A single block seemed a bit short so I ended up making a 200 mm long handle by joining two blocks. First I drew the tang onto the sides of the blocks and drilled and rasped this out with a broach until the tang fit.
To make the joint stronger, I also drilled 2 holes for stainless steel pins to be glued in.
The left photo below is showing the 200 mm handle, that should be long enough?
Curved handle
To get the curve flowing into the handle from the blade, I placed the handle along the spine, upside down. Meaning the start of the handle was at the start of the blade, touching the guard. The end of the handle was 200 mm up on the blade, towards the tip. Drawing the line from the spine onto the handle block makes the handle curve be a natural continuation of the blade curve.
The handle shape is pretty simple, thinking the handle needed to be as wide as the blade and rectangular in cross section for easy indexing in the hand. You should not need to look down to know where the edge and spine are, a tall thin handle with the corners cut off and gently rounded seemed to feel "right" to me.
The "indexing" bit simply means that if the handle was round, it would be harder to know without looking where the edge is. The handle can twist in your hand, while a rectangular handle is taller than wide and easy to "index", clearly letting you know where the top and bottom sides of the blade are.
Fittings are done
Fittings are now ready, the copper spacer and copper pin have the patina added. I made a little test piece to make sure the liver of sulphur would not discolour the aged ivory substitute and was happy to see it had no efffect on the Juma.So I dripped the liver of sulphur solution onto the handle pin and it instantly went dark.
The handle pin is a fake pin, glued in from each side - ssh..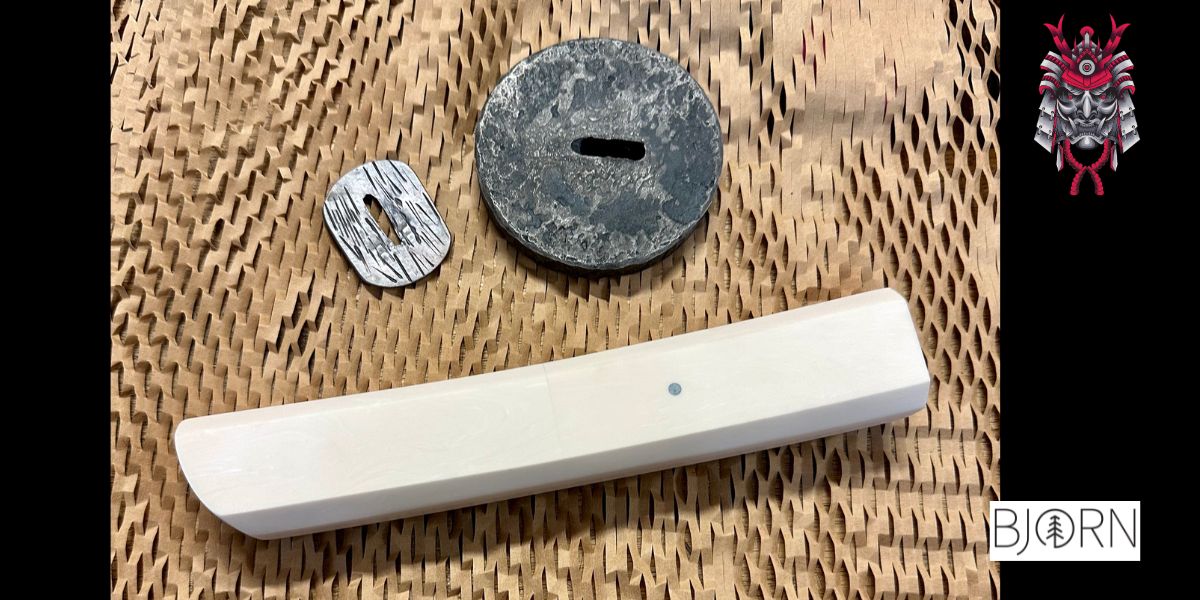
Leather collar
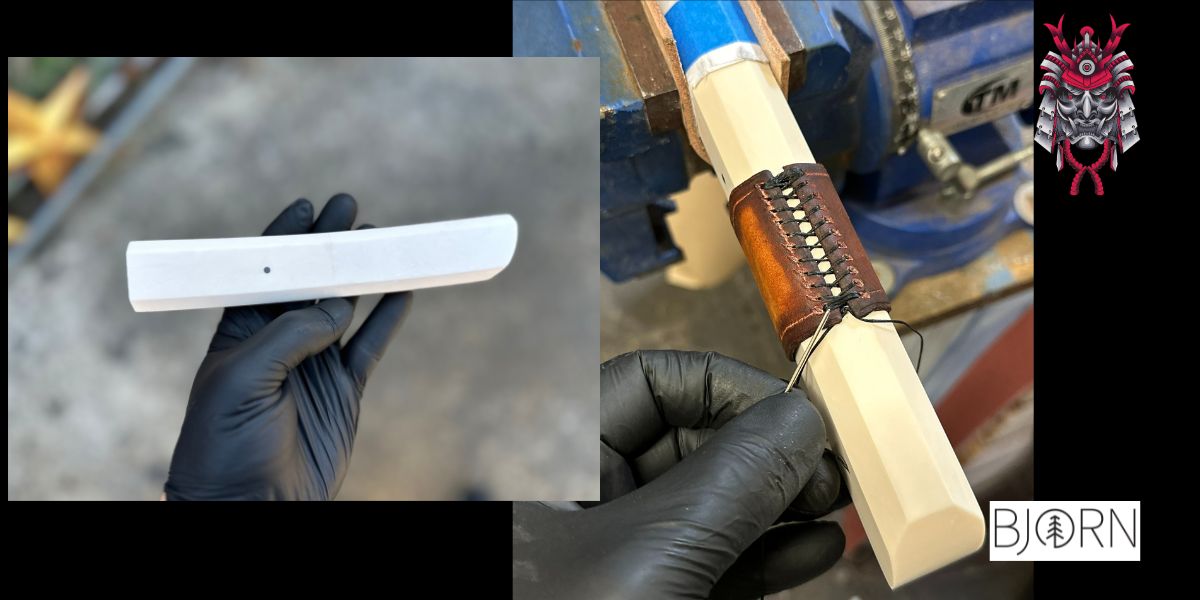
In the photo above you can see the joint line from the two handle blocks. To make it worse I also ground close enough when making the curved top of the handle to make visible through the block, the top of the first stainless steel pin. So I decided a leather collar with baseball stitching might look cool here.
Wetting a 50 mm wide veg tanned leather piece and moulding it around the handle after airbrushing it with dye, I sowed it onto the handle while wet so it can shrink-fit onto the handle as it dryes.
Etching the blade
This is starting to really come together now! The blade was already hand sanded and ready for final finish treatment. The carbon steel damascus is made from 1084 and 15N20 by Jezz from Oblivion Blades, and even when grinding it I could see the pattern coming through a bit when moving the blade back and forth in the light.
But to really make the steel pop, it needed to be etched. Because the two steels are different alloys with different other elements added in addition to iron and carbon, they will react with the etching in different degrees.
The reason 15N20 is popular in damascus is because it has about 2% nickel in it, this nickel is enough to resist the etching so it is left shiny while the 1084 without nickel is etched and becomes darker.
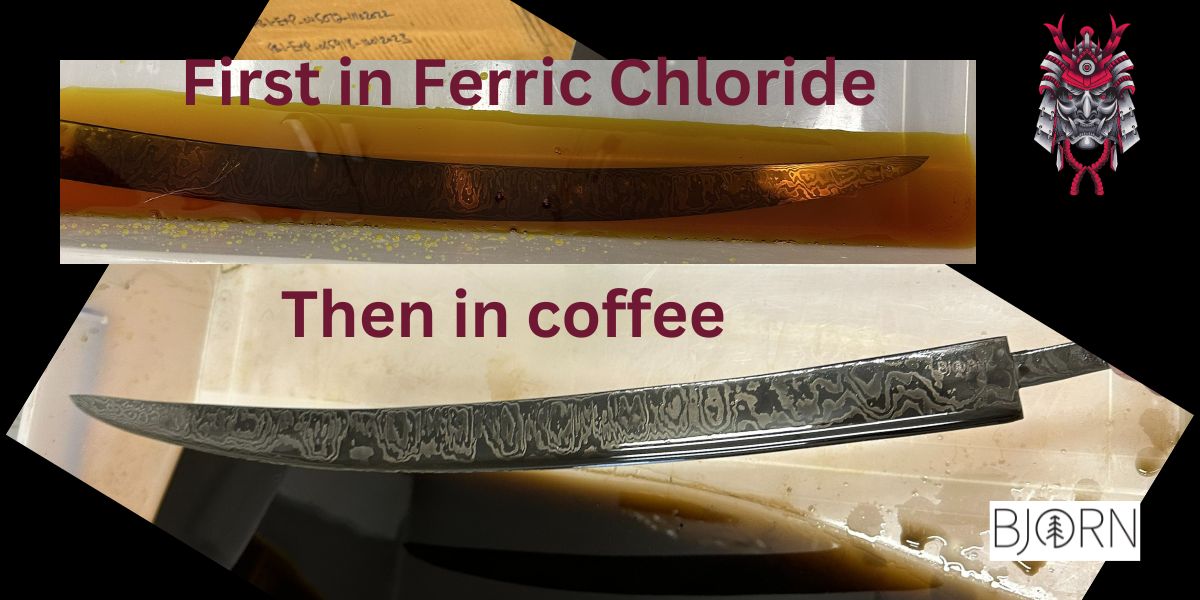
In the below photo you can see the blade lying in the ferric chloride 3:1 mix, before being scrubbed with steel wool to remove the layer of oxide that builds up. Then back in the ferric for 10 mins or so, back to scrubbing. The last time the oxide layer is not scrubbed off, before the blade is left in coffee for a couple of hours.
The coffee is a much weaker etchant than the ferric chloride, but it makes the dark steel go more black.
Pro tip from Jackson Rumble at the last Guild Knife Camp was that he now rather than ferric was using cold coffee in the fridge, leaving the blade for 1.5-2 days, another technique to play with. Jackson said he got more play in the etch with more shades of colour than the stronger ferric etching solution. Jake Summerell from 116blades also has stunning damascus contrast in his blades, he uses 4:1 ferric so there is much to learn and experiment with here.
My process
- wear nylon gloves
- clean the blade with dishwashing liquid in hot water
- wipe clean with denatured alcohol, pad dry with paper and let the alcohol evaporate
- place in ferric chloride, in my case a plastic crate standing on edge to get a long enough container
- 10 mins, rub with 0000 steel wool, back in ferric. Repeat for cycles with rubbing at the end
- 10 mins with no rubbing of steel wool, just leave it to hang off a bench with some cardboard under to catch the drops while pouring the ferric back into the glass container we normally use and get the coffee ready
- warm water, instant coffee (loads of coffee), blade into solution
- leave for 2 hours, check if steel is black. You will see the difference in colour. If not black, pop it back in and check later. If leaving it overnight and the whole thing goes black, don't worry as you cna gently sand the high spots shiny again.
- when ready, leave blade hanging off the bench again to not rub the oxides while getting rid of the coffee and rinsing the container.
- Mix baking soda and water in the container, blade back in to neutralise the etch/ph.
- Optional: If wanting to shiny up the highspots being the 15N20 steel that did not get eaten away by the etching like the 1084 steel did, you need to use a hard backing. So I gently sanded one way from handle to tip with some 2500 grit sand paper using the G10 block as hard backing. The hard backing makes sure you only sand the highspots you want to be shiny and not the deeper valleys which would wear away the dark colour we worked so hard to get.
- Leave to dry without rubbing the blade. I patted it dry with some paper, blowing it dry with a compressor would been better.
- I gently hit it with a gas torch to heat it up enough to melt the Nordic Wood Wax I rubbed in liberally and gave it a polish with an old t-shirt.
Glued up
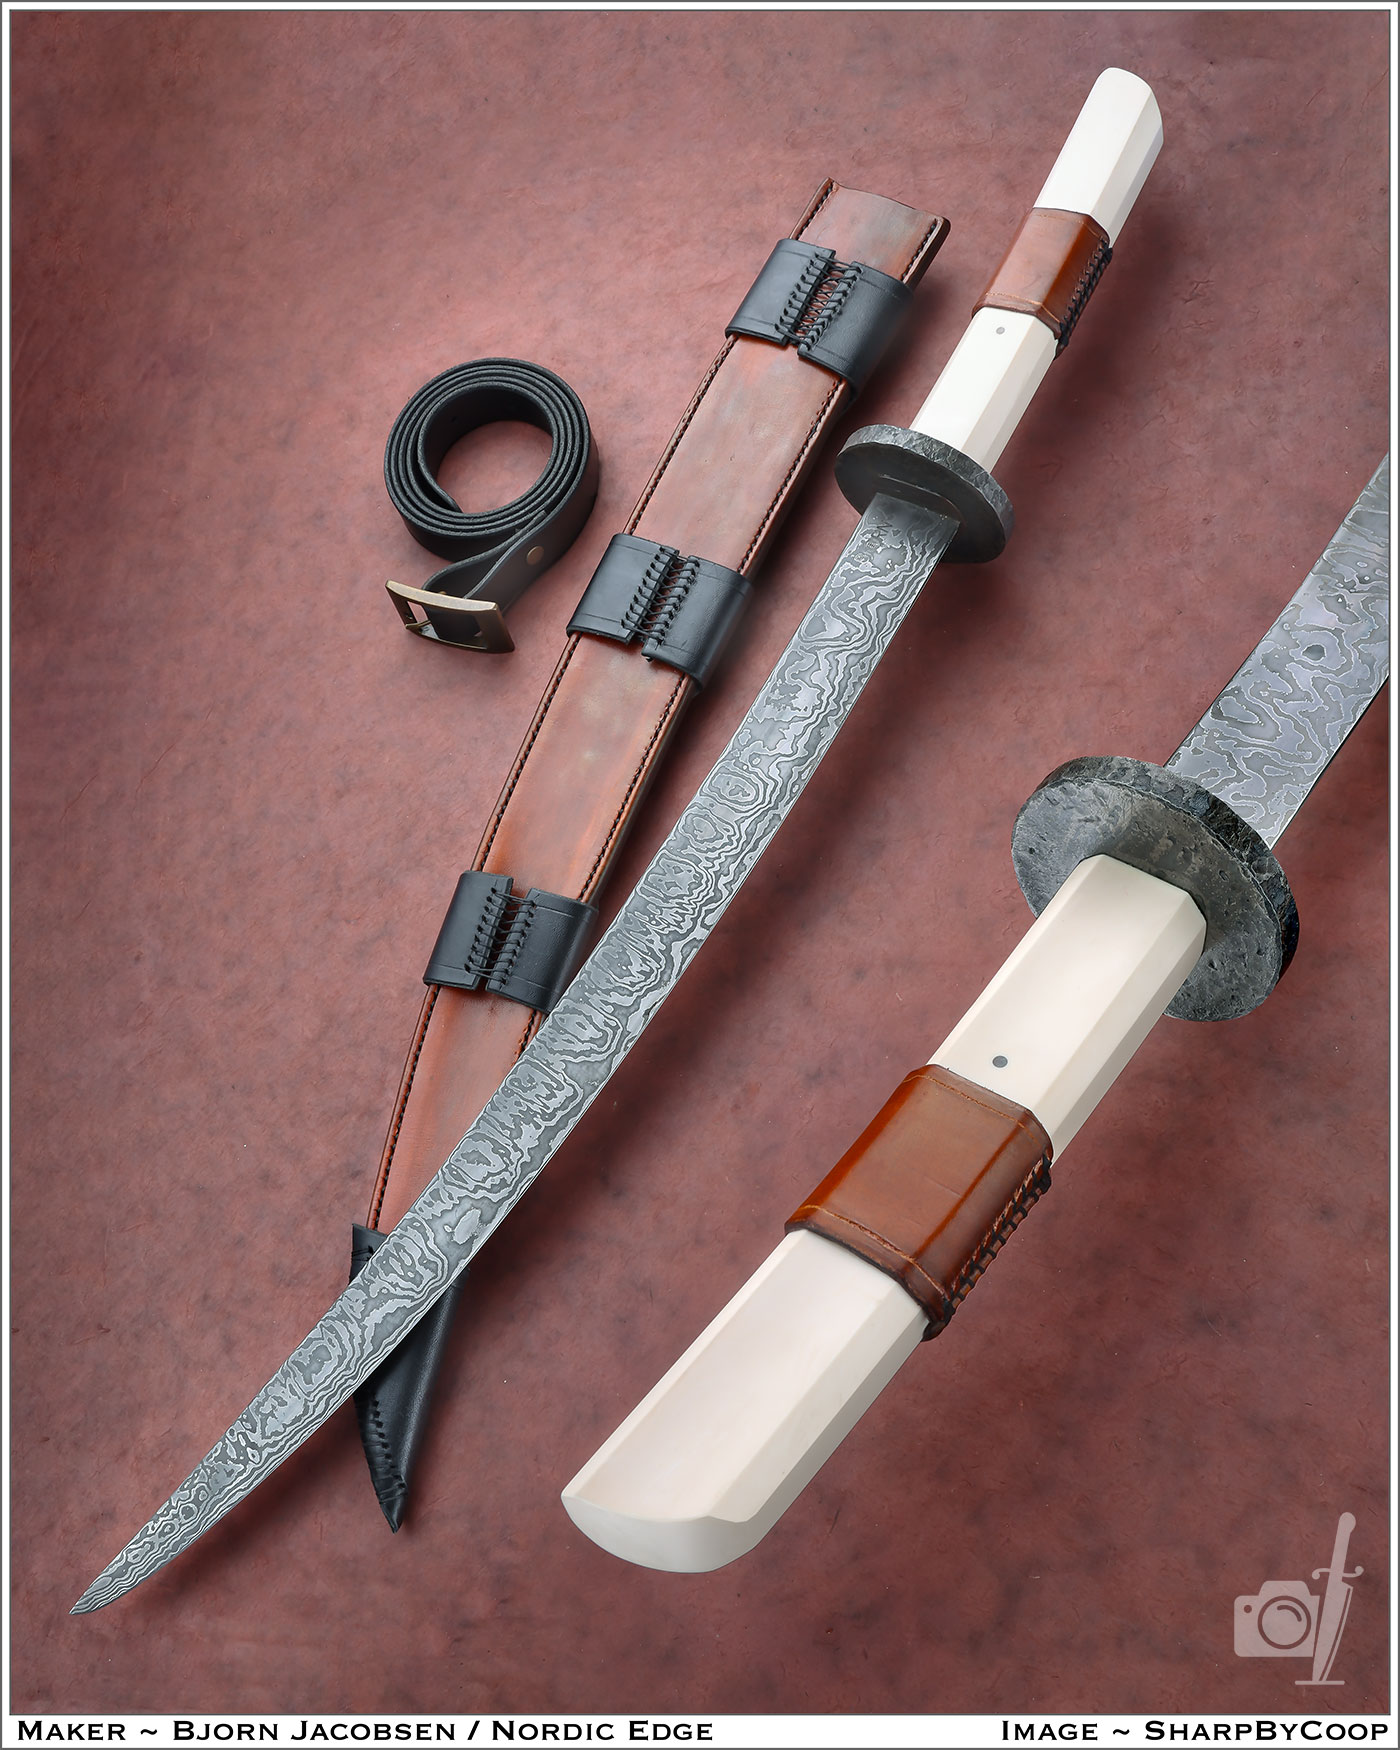
After gluing the blade into the copper spacer, steel guard and handle here it is!
I think the etch went really well, and the patina on the copper spacer makes a nice element between the thick guard and the blade. 10 mm thick guard is maybe a bit of an overkill but it also brings the weight down towards your wrist and away from the front of the blade, so it feels light and nimble.
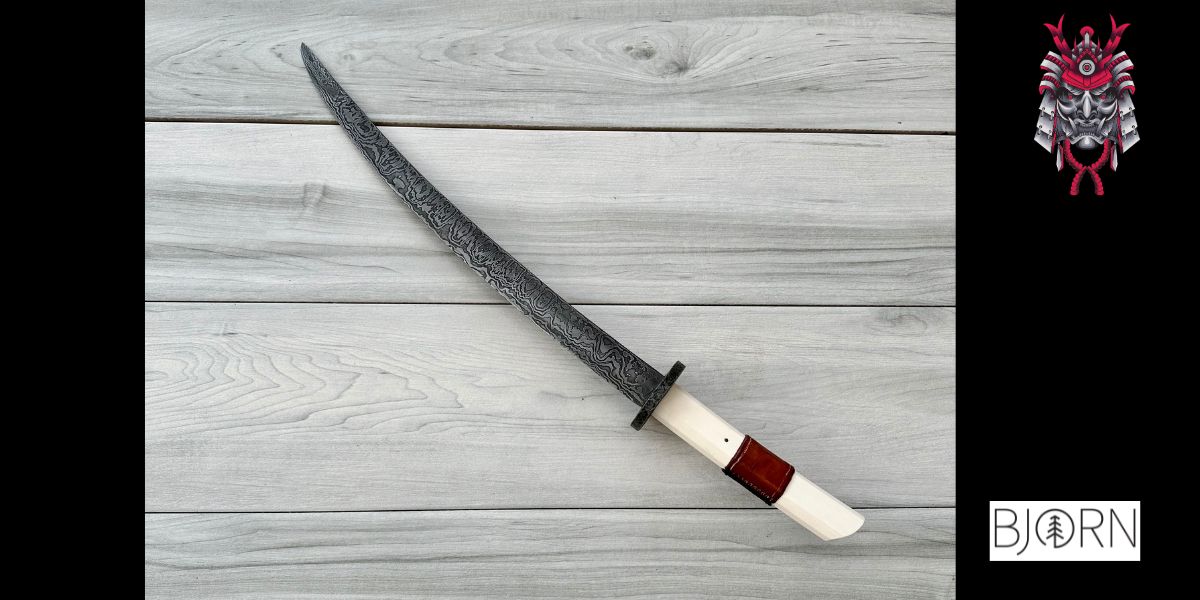
Bit short for a samurai?
Here is a photo of the completed short sword, it is hard to tell how big it is from this photo. It somehow looks almost like a miniature sword but I promise the thing is 760 mm long! I was not too worried, as I had arranged for proper photos to be taken at the Melbourne Knife Show - this was after all why I was working late nights to finish it. It was going to be my centre piece at my first ever knife show as a maker.
Leather sheath
Quickly running out of time but not wanting to lug around a short sword without a sheath, I wanted to make a leather sheath for it. Two veg tanned leather pieces for front and back, both with the topside out, and one middle layer of black veg tanned leather made up the sheath.
Having a great time with my cheap airbrush pen off ebay, I dyed the sheath with saddle tan brown and then some red dye in the middle line of the sheath. I finished off the outside edges with a light spray of black, waited for it to almost dry and gave it a hard rubbing to help blend the colours a little more.
Hand stitching is hands-down better than hand sanding
While hand sanding is enough to make me question why I make knives, hand stitching is an awesome exercise. After gluing all 3 layers together and trimming the sheath on a belt grinder, I marked a stitching groove and punched holes.
Then onto the process of hand stitching the sheath, with two blunt saddling needles and black thread. I really enjoy leatherwork, the smell of the leather, the quiet process of using two needles and an awl to make the sheath. I now have a stitching pony which is a massive help, rather than just holding it by hand as I used to. The stitching pony is a model I sit on, clamping the leather sheath in the jaws and stitching along.
It is important to always start from the same side, in my case the left. So the left needle goes through and I pull the thread towards me tight to not piece it as the right needle is passed through, back into the same hole. Then the left thread is pulled up and to the left, and the right thread down and to the right. Repeat again and again, while the house is quiet and just feeling how I unwind and relax. We are all a bit too busy, I think so anything that makes you unwind and slow down a bit is a good thing.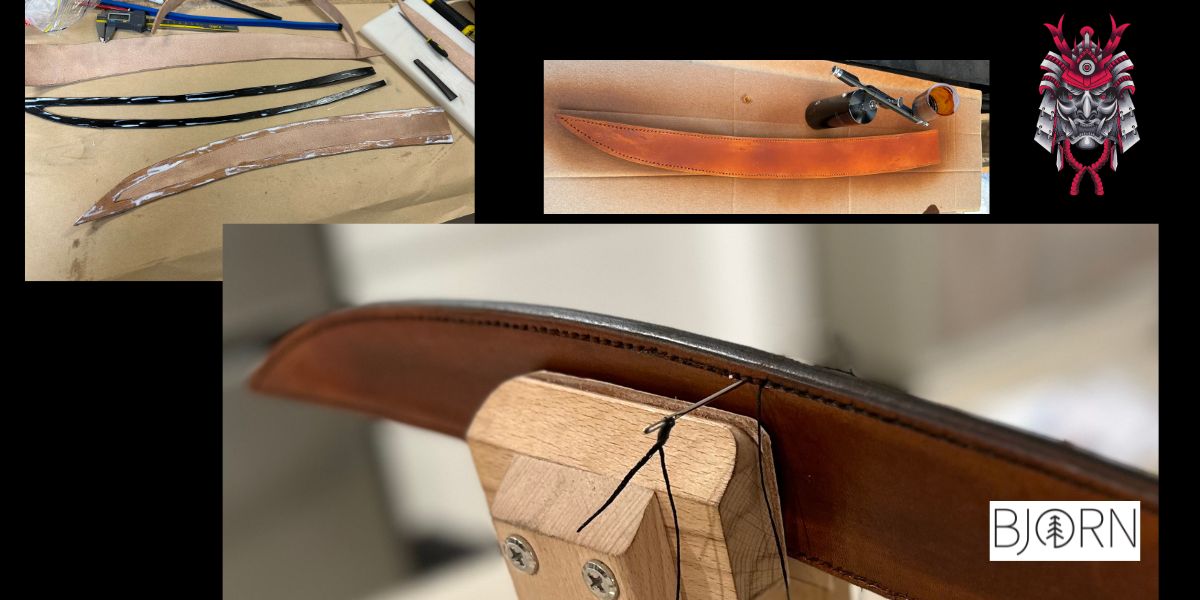
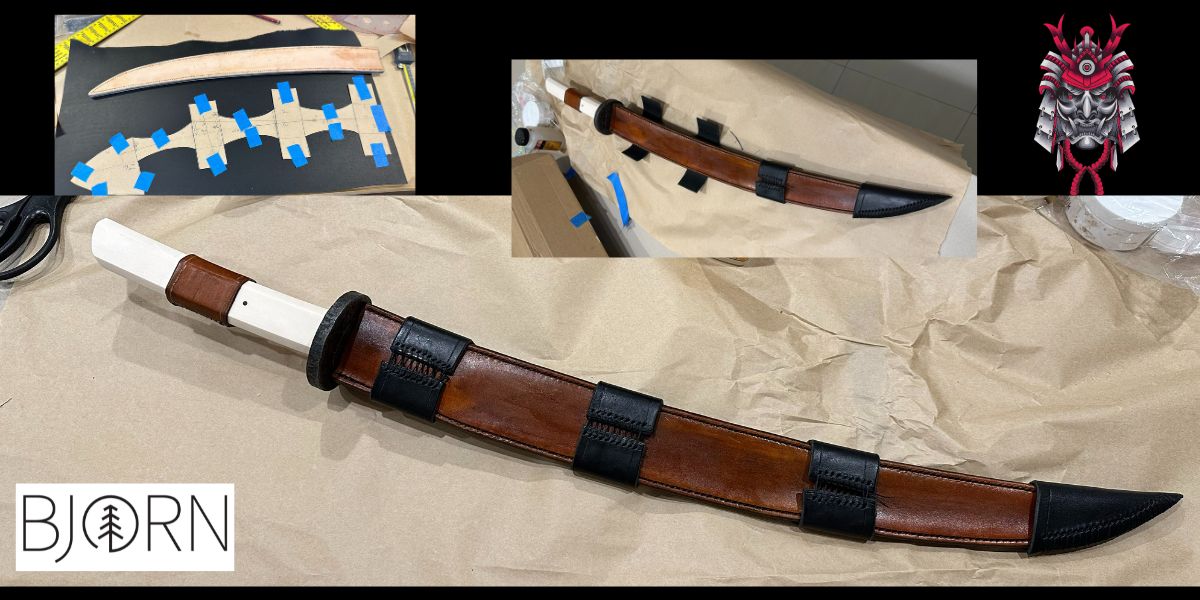
The leather sheath was still a bit floppy, so I thought it might be cool with an outer bracing. A lot of drawing on butchers paper working out how to cut it out in one piece was quite a fun exercise actually!
After some drawing and measuring I ended up with a piece of black veg tanned leather that would cover the tip and then after 100 mm long breaks come around to the front in 50 mm sections. I rounded the back of the brace between the sections coming arund the sheath thinking these would be awesome for making a carrying solution later.
No samurais in Melbourne?
Everything was ready, Melbourne show was the coming weekend! Then Jamie "SausageMan" Bishop forwarded me a PDF showing what you are not allowed to own in the state of Victoria. Turns out swords are on the list (!).
Now, I think it is a positive to have laws stopping people from having items made to hurt other people, like studded gloves and whatnot. But I had not considered that this would include swords, thinking of it more as a collector's item and not really something anyone would run down the street with, needing to be on the list.
So the sword stayed at the workshop and never went to the Melbourne Show. The nice photos never got done, hence the photo making it look like a miniature sword is the only one I got so far, but that might change at some point :)
Anyway, I had a lot of fun making this thing, and probably will have some more fun trying to figure out how to do a carry rig for it. I made a 20 mm black leather belt with antiqued buckle, thinking maybe a shoulder carry solution would be fun? Who knows, will let you know how it goes. This is probably the most fun I have had making something over the last couple of years, together with the pirate bowie. Just awesome to make something a bit different and not at all useful, just playing with techniques without feeling it has to be "right". Mostly I make chef knives and I love that, but good fun to do something different now and then.
Thank you for coming along for the build story,
what do you think of the samurai sabre build?
Bjorn
Recent Posts
-
The Etch Test: Ferric vs Hydrochloric vs Gator Piss
The Etch Test: Three Very Different Looks From One Steel One of the great things about knife making …3rd Jan 2026 -
Why Bed The Tang In Epoxy - Then Knock it OFF Again.
What is "Bedding the tang"? Bedding the tang means gluing a stick-tang blade into the handle block i …21st Mar 2025 -
Marble Leather - How to Dip Dye Veg Tanned Leather
This was my first experiment with hydrodipping or dip dying leather, and it came out pretty cool! I …14th Mar 2025

