Build Article: Damascus CuMai Knife
Build article on the Damascus Core Cu Mai Knife:
- Steel
- Heat treatment
- Grind
- Etching
- Handle shaping
- Sheath texture, dye and finish
Special steel
This blade is made from damascus cored cu mai (or cumai) made by Dane Standen at Standen Knives. Dane very kindly donated a billet of this steel for the Destruction Challenge and as we just started stocking it, so I was keen to try it out!
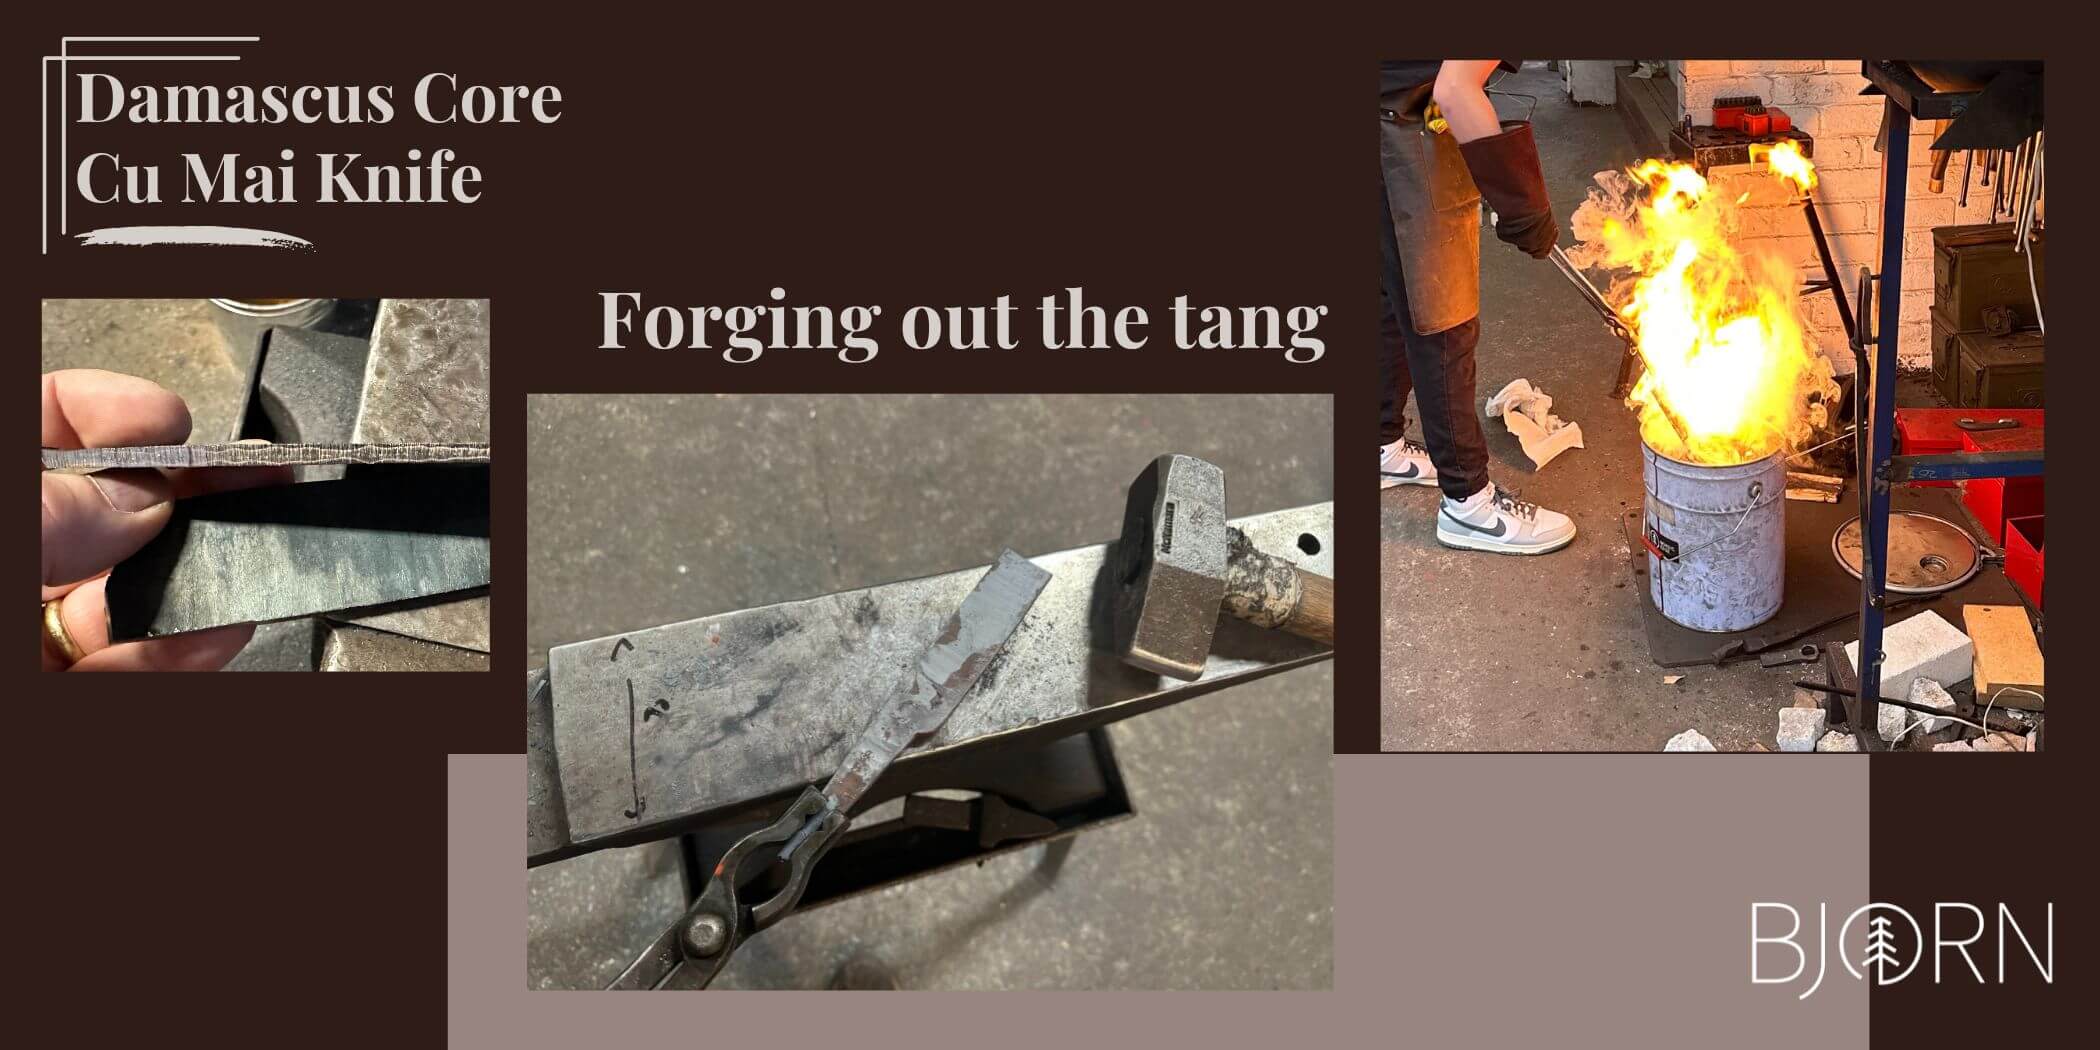
Forging steel with copper - nope.
Laminated steels with copper are often recommended not to be forged to shape. There is a risk of the copper and steel delaminating, cracking apart at the joints.
The metals will move at different speeds during the quench, too long at too hot can even melt the copper if not careful, so the below is not recommended.
Only forging the tangs
Having only a 150 x 50 mm piece, I cut it lengthwise and then forged the tangs out to make the blades long enough. This worked, but the steel did delaminate a little near the end that was forged.
As the core tang is damascus (1084 & 15N20), then 15N20, then copper and then the final jacket is 1084, I did not mind if it delaminated a bit as it was still more than strong enough.
But had this happened near the tip it might have caused issues, so I was glad I had only forged the tang out and left the blade end alone. Thinking this would be better not only from a risk point of view, but also for the final pattern or look.
In the first photo above you can see the copper is already nice and wavy, you do not need to hammer texture these for pattern in the final blade.
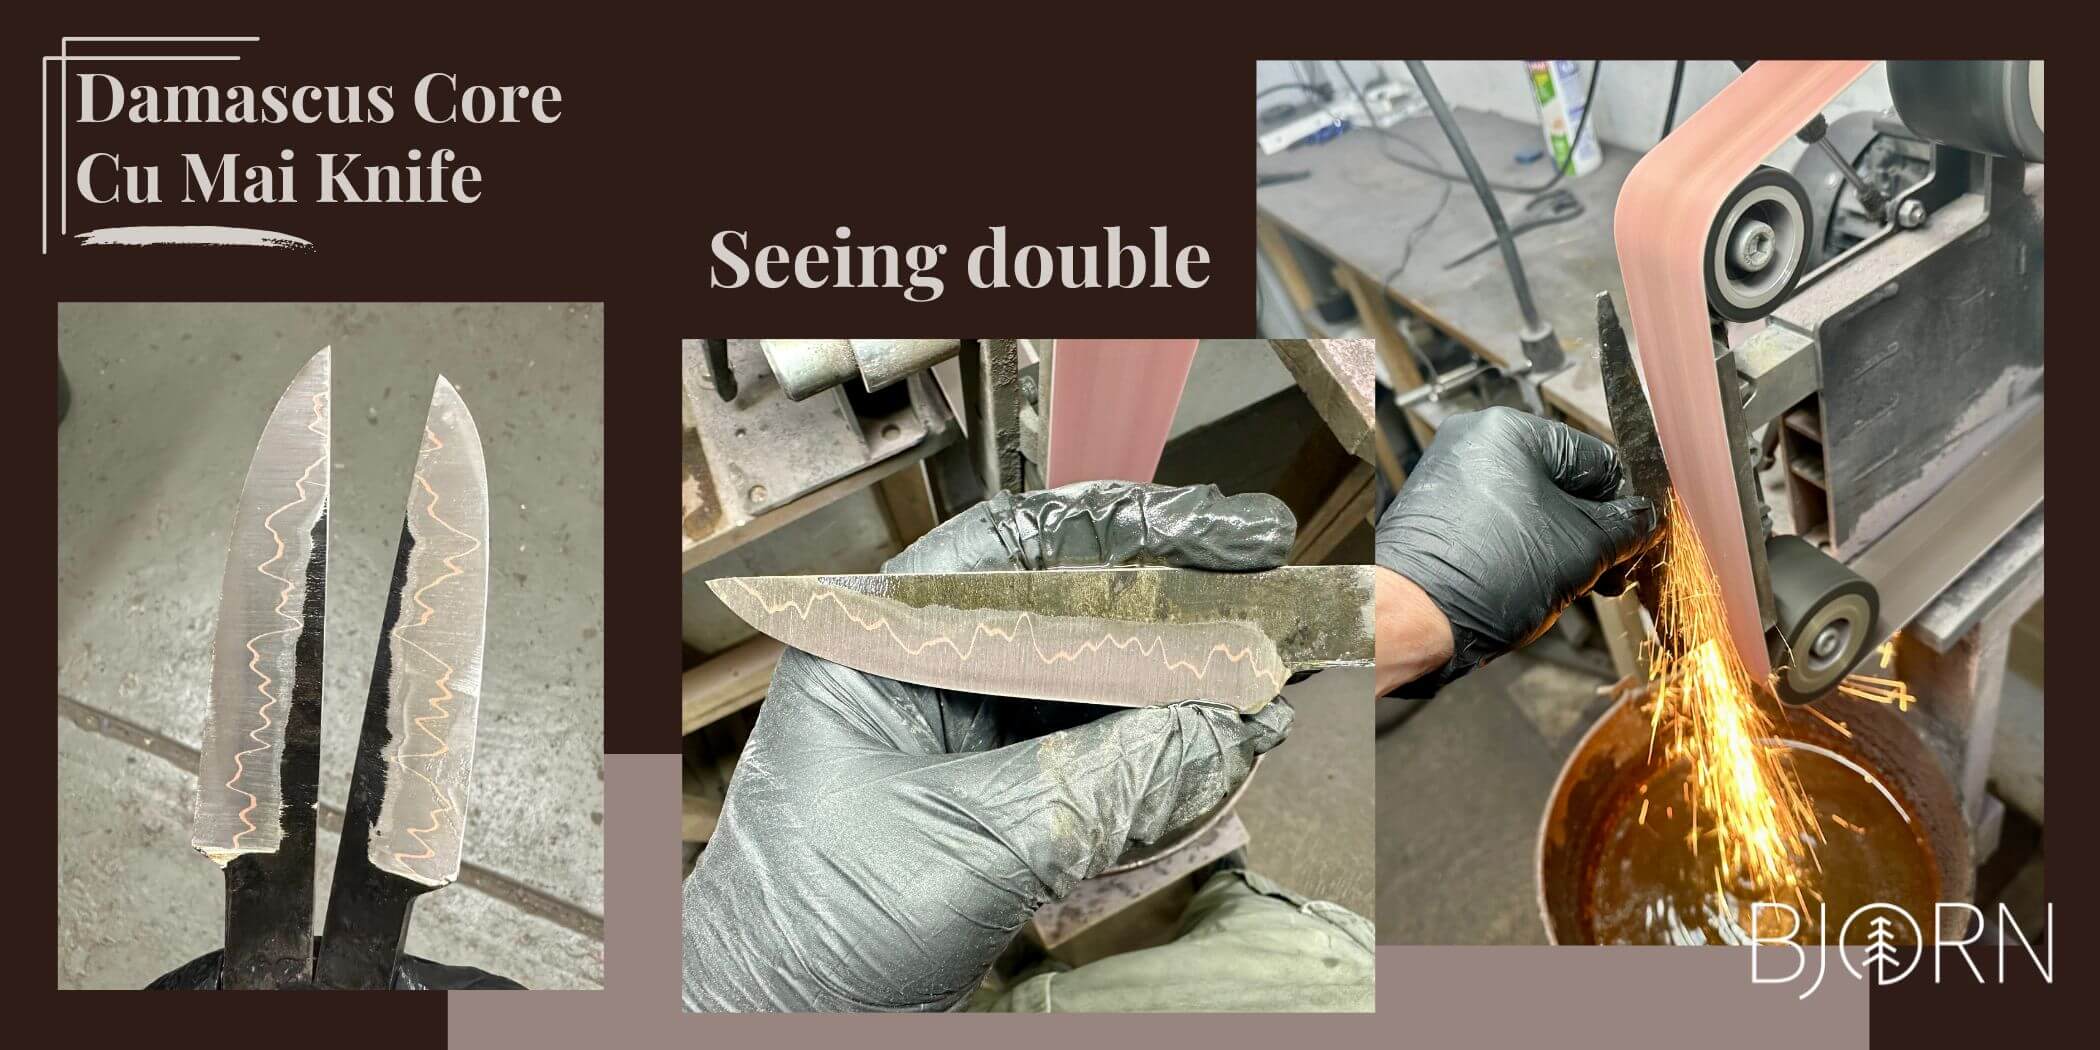
Heat treat as 1084
Because the edge is damascus made from 1084 and 15N20 (a very similar steel but with 2% nickel to remain shiny after etching), I heat treated the blades as 1084:
- normalise at 875 C > black heat x 3
- quench from 815 C into warmed up quench oil
- temper 200 C x 2 hours, dipping in water in between
How to deal with san mai steel during heat treatment
Because the steel is layered/san mai, I ground a hard 45 degree corner off on all sides, to reduce the chance of the blade splitting in the quench. Was this necessary when the steels are that similar...probably not but it certainly won't hurt.
Grinding after heat treat
The two blades were profiled and ground after heat treatment.
This is often clever with san mai/layered steels due to the metals might move at different speeds during the quench, as well as often the cladding is mild steel and there is nothing to be gained by grinding before heat treatment.
In this case all the steels move at similar speeds - and all are blade steels - but I still did it all after the quench.
I enjoy knowing I can grind to final dimensions in one go, and not having to worry about the blade warping in the quench after grinding off too much to correct it.
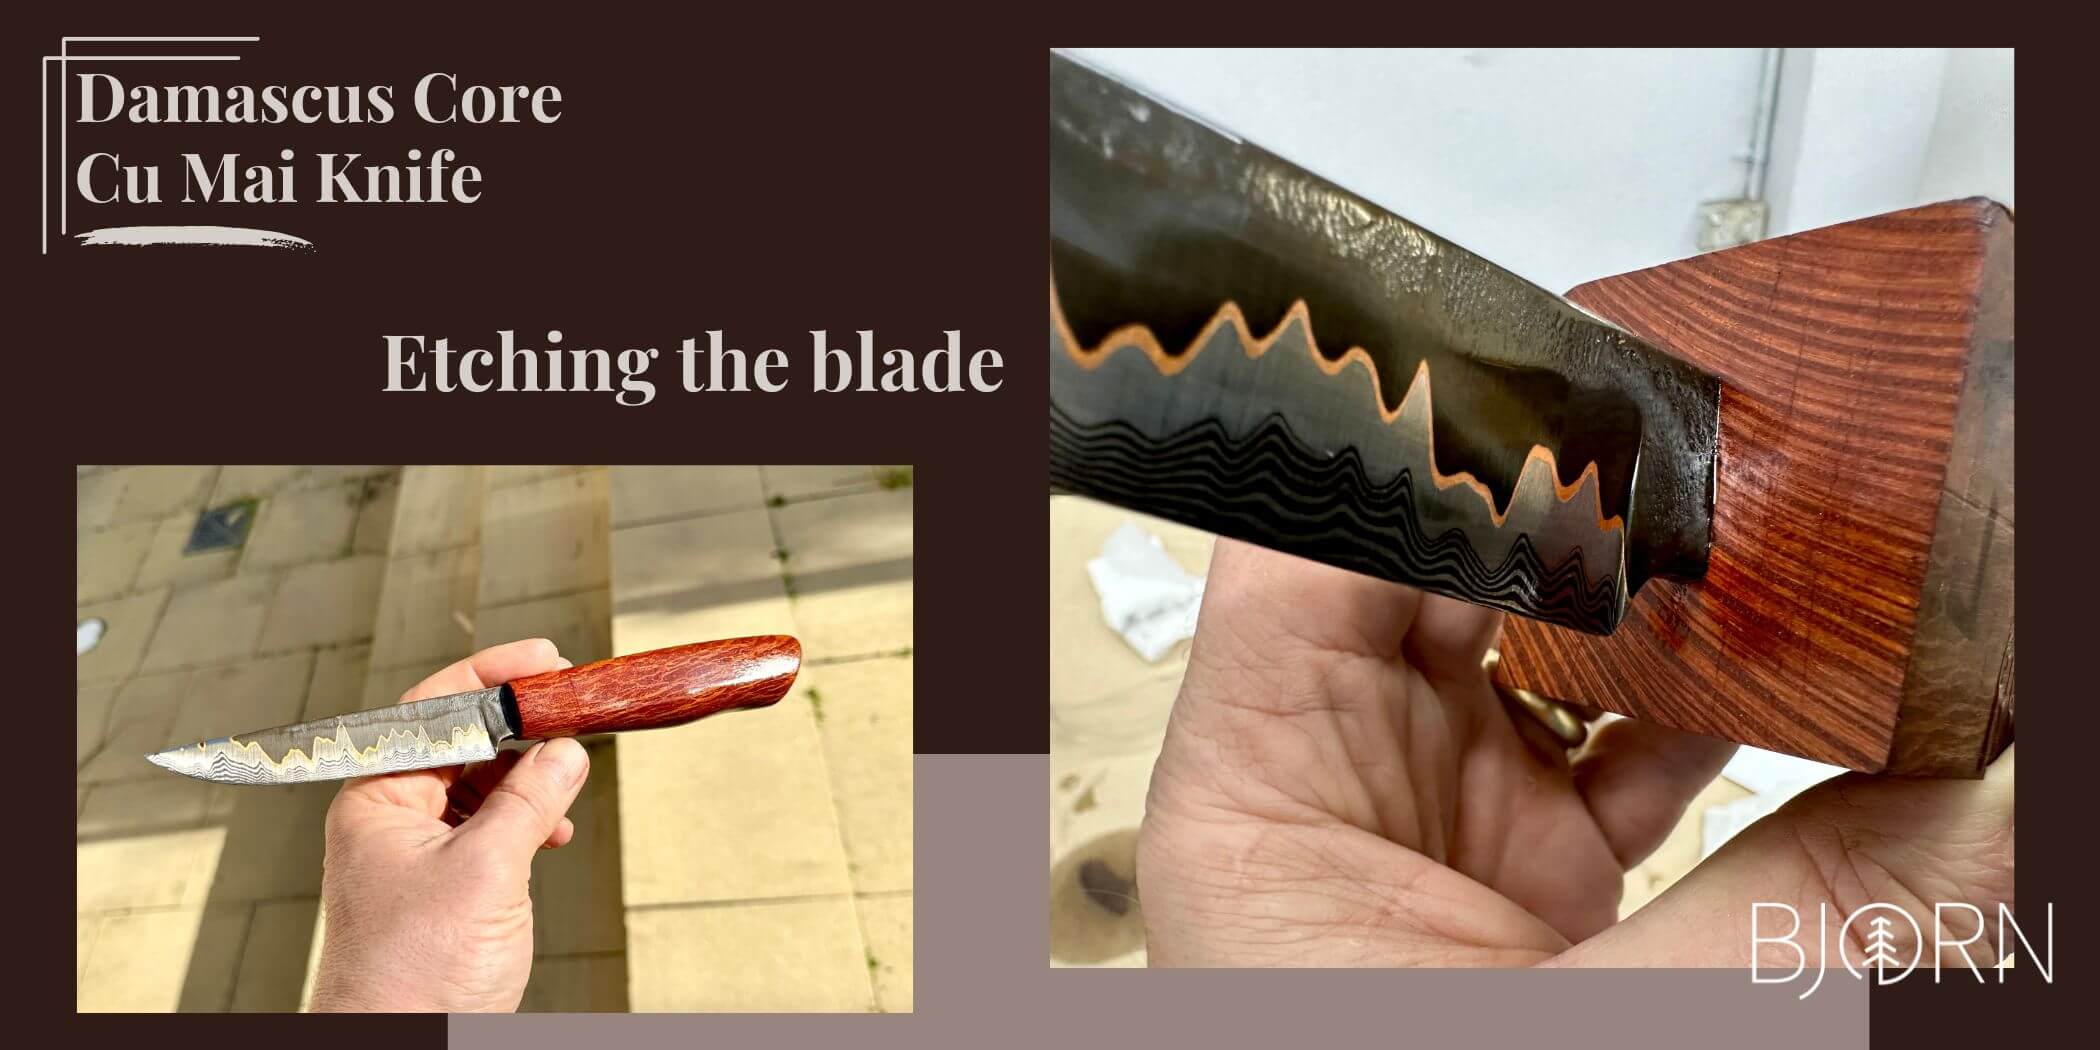
How to etch cu mai
After the blade is ground, it is time to reveal the pattern!
First the blade got a 15 min etch in ferric chloride, then it spent the night in instant coffee to really set the black colour.
The 15N20 between the damascus core and the copper has some golden tones I did not expect, not sure if it was the steel or me. I hand sanded one of the two blades to 1000 grit and tried again to see if it could be about finish but this did not make a difference.
I really like the look, was just surprised from the additional colouring and expected the 15N20 to come up brighter. I guess this is part of the fun with damascus and san mai, there are so many variables at play.
Copper in Ferric Chloride
One thing to note with copper in steel is that it will contaminate (destroy) the ferric chloride. Etching steel in ferric that has had copper in it a couple of times, will leave a copper film on the blades you etch that did not have any copper going in.
This can look kind of cool on it's own but be aware that any steel with copper should ideally be etched in a separate ferric batch that after not too long will not be usable anymore.
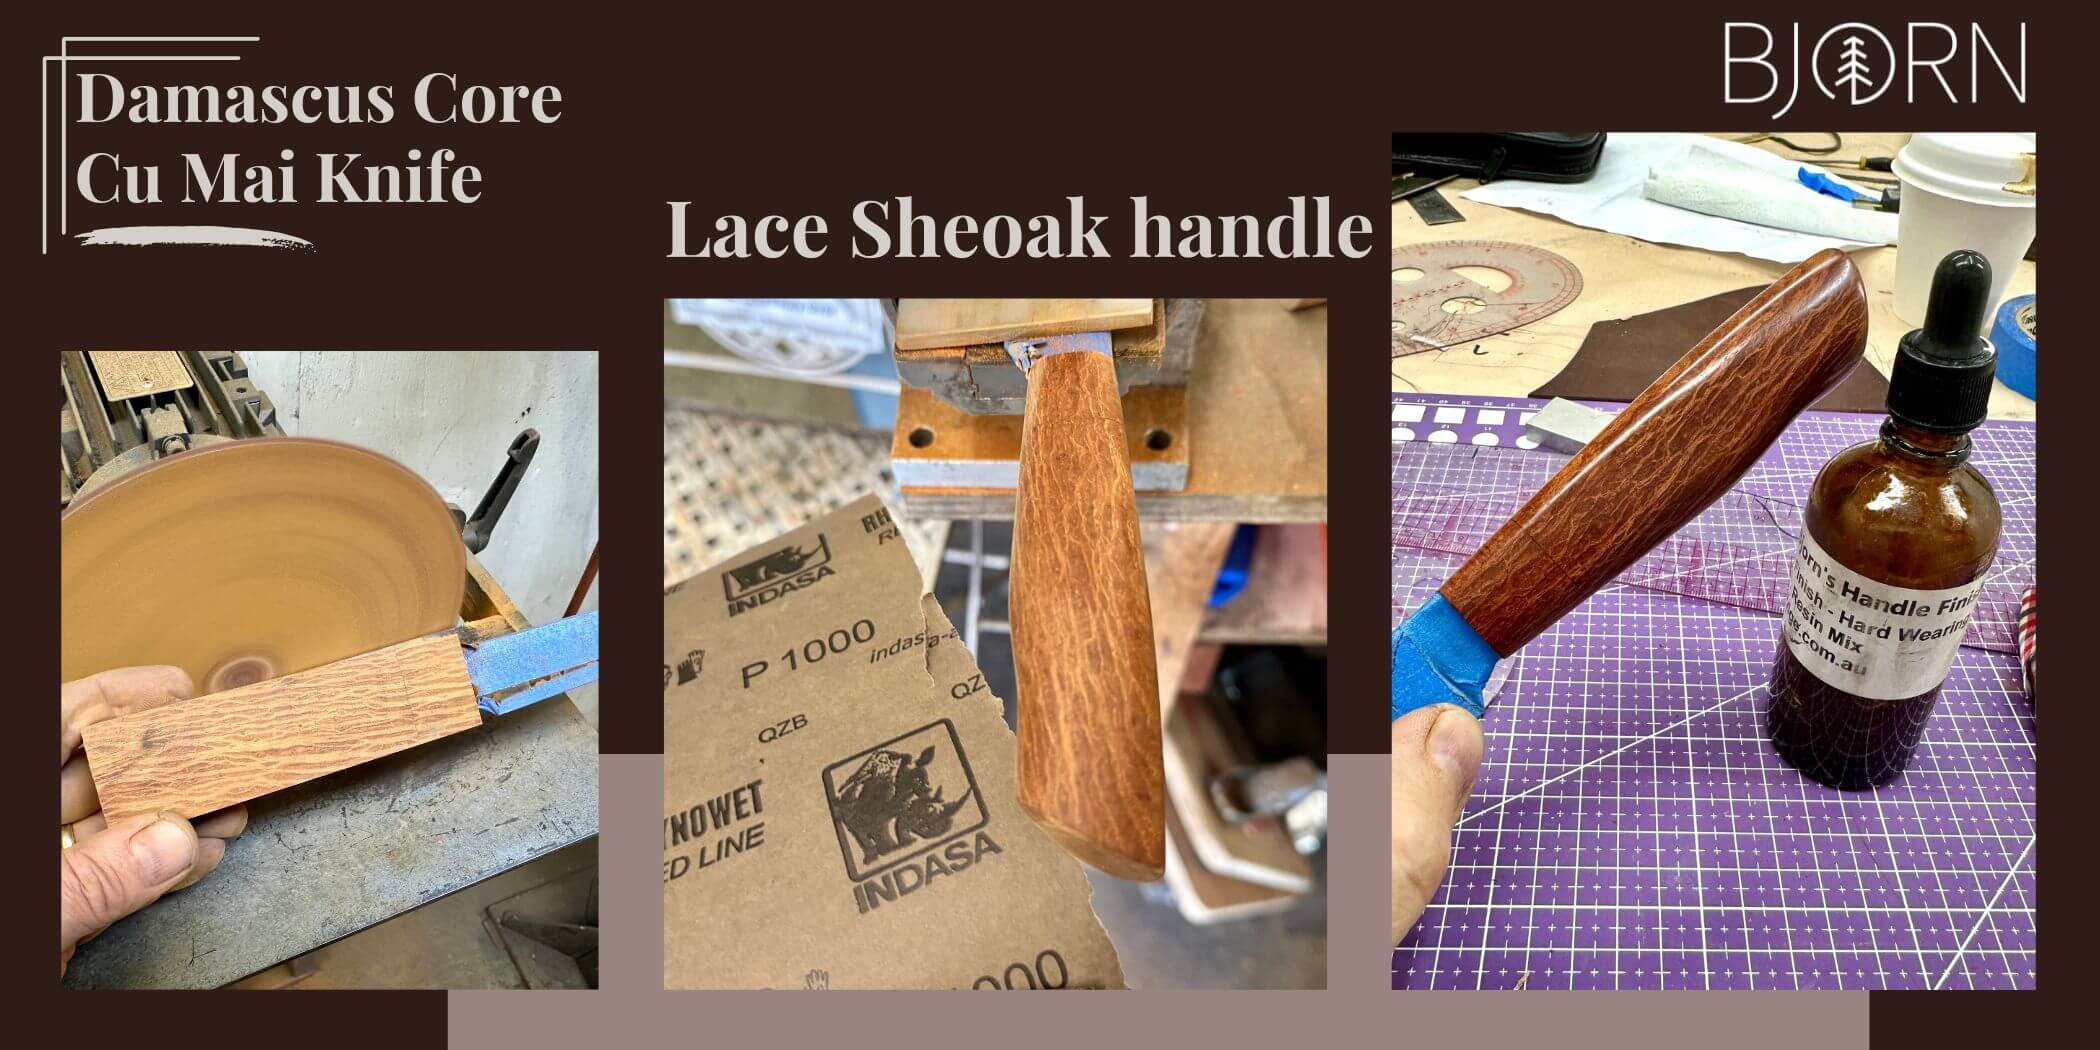
Lace Sheoak handle
Sheoak (casuarina) is a common tree here on the East coast of Australia, and now and then you can find pieces of "lace sheoak". The lace bit meaning the grains have this stunning lace-like or wires running though the grains. I have had this block of lace sheoak for a few years and looked at it in the goodie-bag now and then but not really found a project for it until now.
Quick show of hands:
how many of us have a big bag or drawer of special handle materials we know we will probably never get through, yet keep adding to it?!
Fitting the tang to the block
To fit the blade to the block, I first sliced about 30 mm off the end and marked out the tang.
The tang itself had been ground using a nordic edge carbide faced file guide to get even shoulders and a slightly undercut tang, to make the fit-up better looking.
Drilling holes and then rasping to shape with a broach (tang hole saw), the blade soon fit the front piece (bolster) of wood.
From there it is easy, drill a couple of holes and again use the broach to saw/rasp out the webbing between the holes until the blade fits.
Squaring up the block on the blade
After gluing the blade and handle block up, the next step after the glue is set is to true up.
The blade can easily be glued in slightly at an angle, or the block might not be as squared up as it looks.
So placing the ricasso of the blade on a 1-2-3 block on a granite surface plate, I used a height gauge to find centre of the spine and mark this down the block. Then adding a 10 mm line above and below this line for a total of 3 lines.
Repeating this on the edge side, then grinding the block to these lines before doing anything else.
The result is a handle block that is now aligned with the blade, or squared on the blade if you will. This makes handle shaping not only easier but more fun.
Now the block can be profiled knowing any line I draw say 6 mm down from the top on one side, will match the other side perfectly.
Comfortable hande shape
My process is to first profile (side view) and then tapering towards the blade so the butt end is wider than the blade end. Then I start drawing lines X mm down from the sides and grind to these, leaving a symmetrical rounded shape I think feels good in the hand.
Slow speed on the disc grinder makes this process really enjoyable, giving me much more control than the belt grinder. I use 180 grit rhynowet paper on the disc and go really slow. Then when done the taped blade go in the blade vice, and strips of rhynowet with masking tape backing are used to round and even things out from 180 to 1500 grits.
Handle shaping process:
- Grind tang with file guide
- Fit blade to tang
- glue together
- square up on blade
- profile / side view
- draw lines with calipers and pencil
- rough grind on Shop Mate grinder
- grind to exact lines with disc grinder at SLOW speed
- hand sand to even it all out, round spine and belly
Finishing the wooden handle with UBHF
The handle was hand sanded to 1500 grits and then finished with Uncle Bjorn's Handle Finish (UBHF).
This is an easy to use handle finish that dries really quickly, leaving a thick, hard wearing layer on the handle to protect it from use. First you apply the undiluted handle finish as pore filler and wait 20 mins before doing it again.
Then it is polishing time, with a good squirt of handle finish on a lint-free piece of fabric (old office shirt or t-shirt) before adding a drop of oil from bottle #2 and polishing away. I usually go for 5-10 of the polishing layers after 2 pore filling layers.
Sheath time
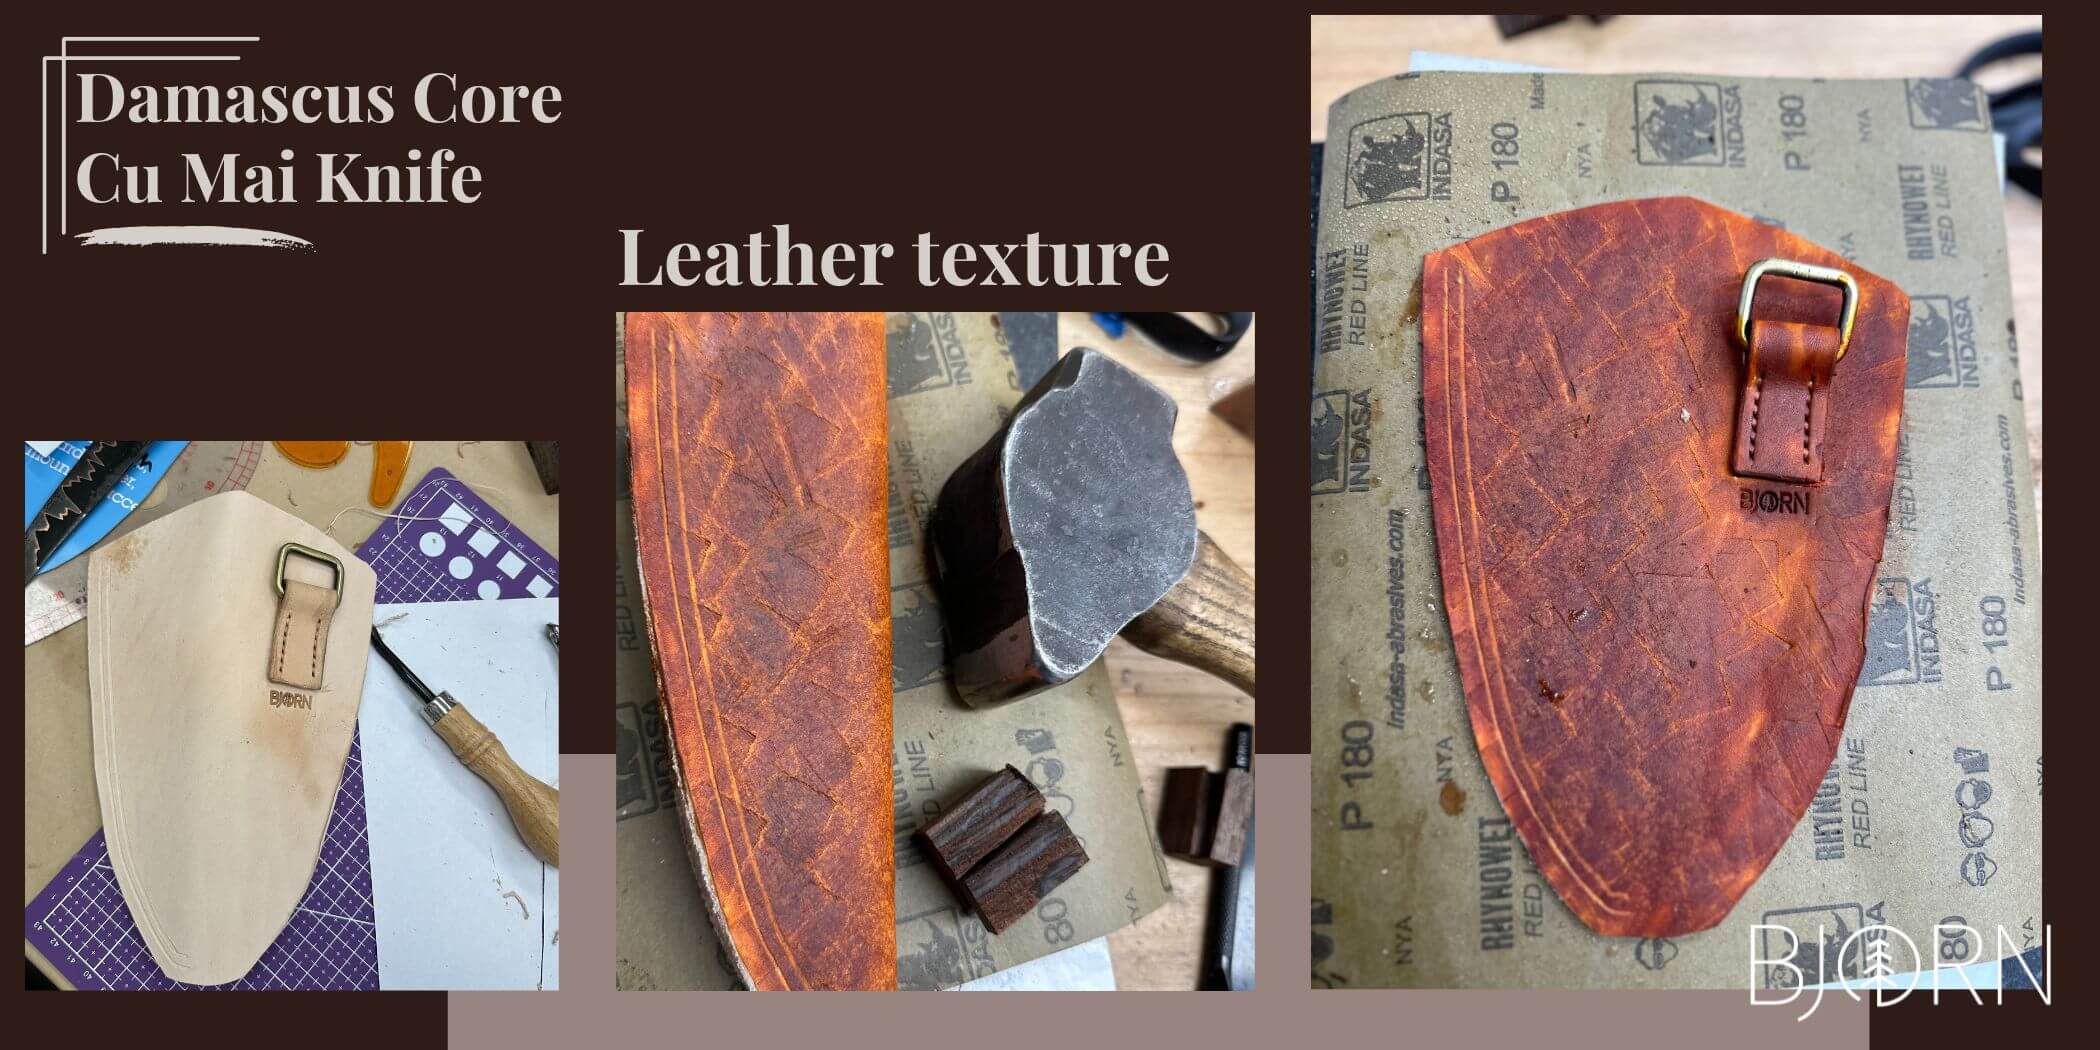
The sheath is made in 3.5 mm vegetable tanned leather, with the dangler in 2 mm leather. The thinner leather bends a bit easier and I use that for the piece attached to the sheath for the antique brass square ring, as well as the actual "dangler" in leather that goes on the belt.
Playing with textures
I never really wetted the leather this time, only giving it a light spray on the inside when it came time to bend it, and a good couple of sprays where I stamped it with my makers mark.
But when it came to do some texture, I sprayed it lightly and then hit a broken piece of wenge wood into the leather with a hammer.
The corners of the block of wood make some cool textures and ridges, it was the first time I did this and I thought it worked out ok.
Order of operation is important
As always it pays to have a think through before jumping in. I almost forgot to stich up the part holding the antique brass square ring before gluing the sheath together! That would have looked pretty awkard later..
In my case it meant:
- cut out sheath shape
- mark, rasp, glue on piece that holds the antique brass square ring
- when glue was set, punch stitch holes in this bit only
- mark 12 mm welt shape on inside of sheath
- cut out welt in leather, rough surfaces with rasp, glue in welt in one inside of sheath
- cut welt to shape a couple of mm too large outside the sheath edge
- spray with water and texture sheath (if stamping instead, do this before adding welt)
- dye with English bridle
- spray middle inside and fold over, let dry overnight
- glue up sheath
- grind edge to shape
- stitch groover along even outside edge
- punch stitching holes
- air brush second dye on edges
- stich up
- burnish edge
- apply finish
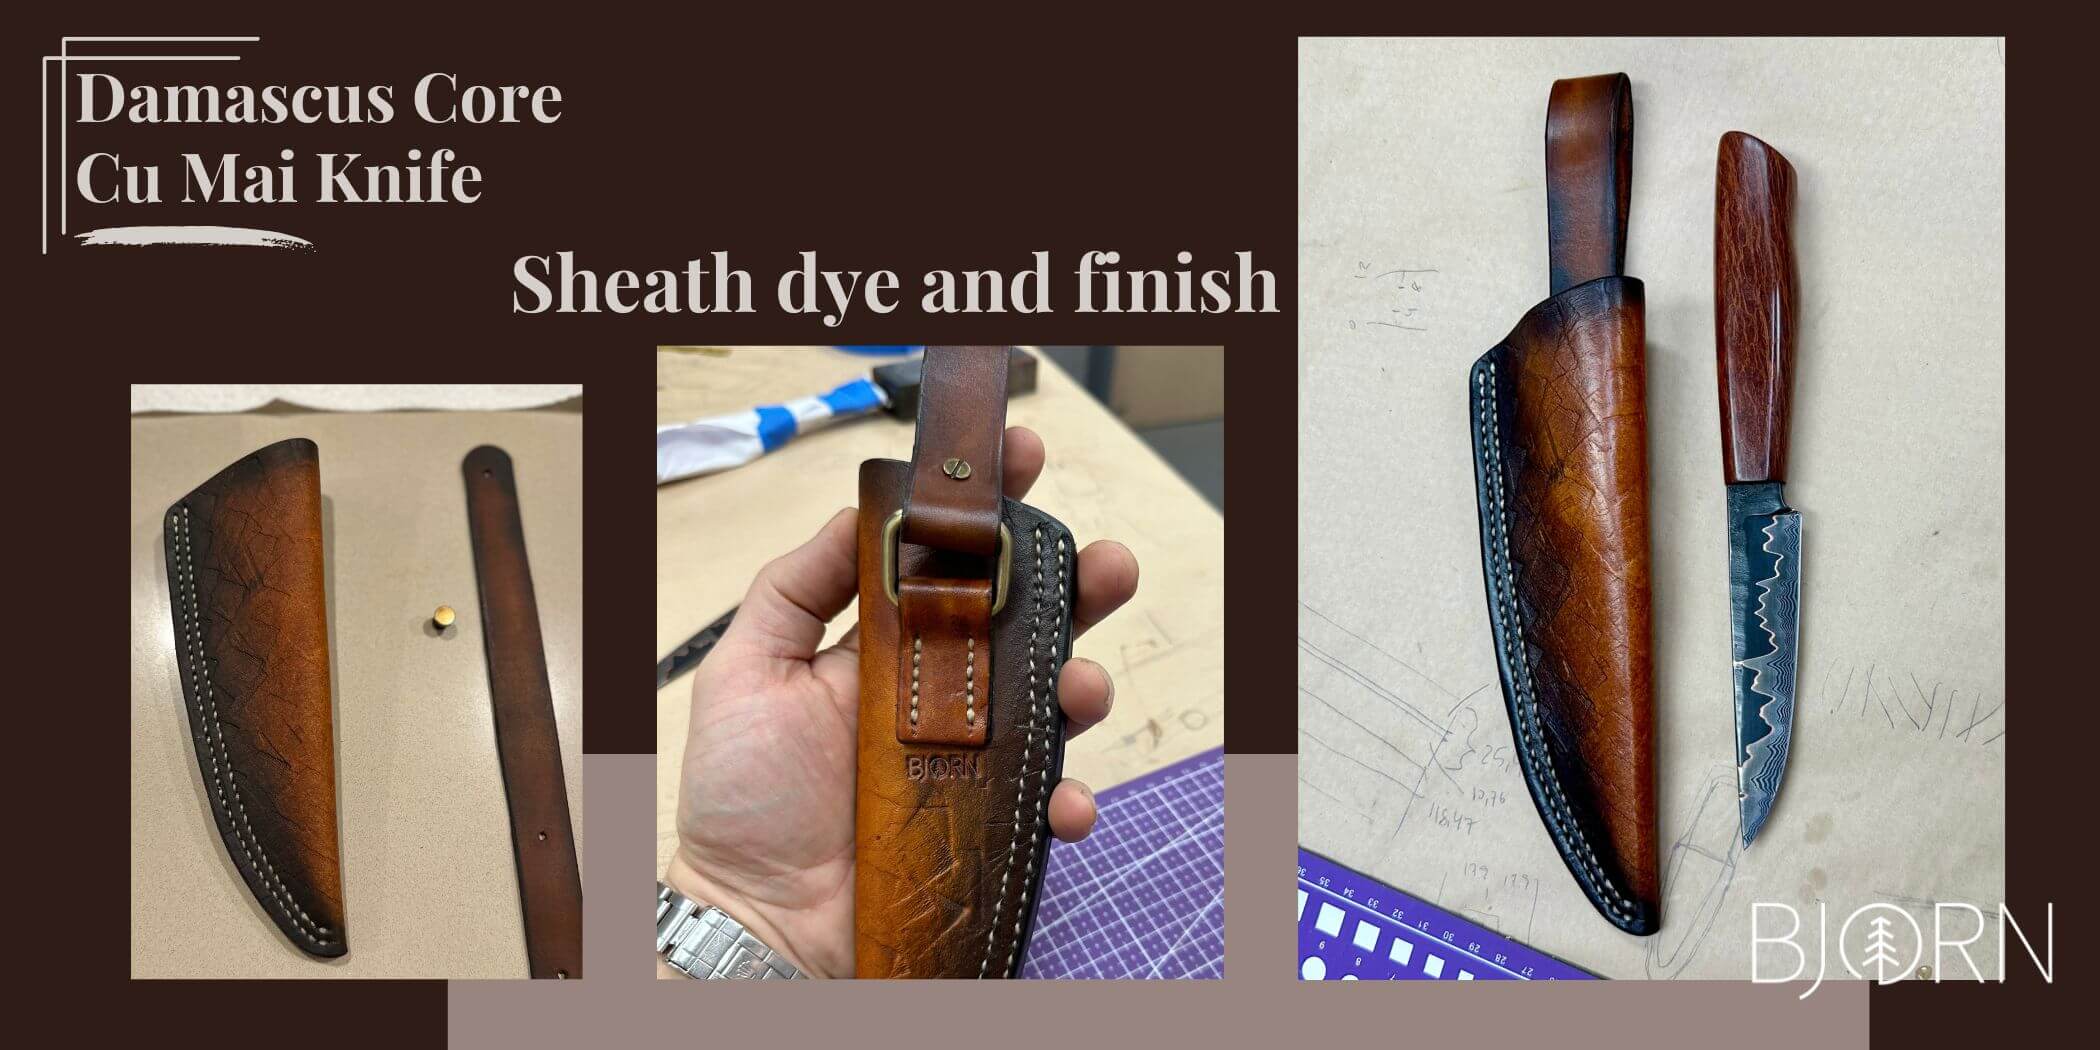
Fiebing's Pro Dye: English Bridle
For dye, I first rubbed Fiebings Pro English Bridle dye all over the outside and half of the inside with a woolen dauber. One single coat with a bit of a second overlay where it looked too patchy or light, but mostly leaving it uneven after that first coat.
The next day when it had dried, it looked quite different than in the above photos, really pale and yellowy. But I knew it would be darker and richer in colour when rubbed and had finish applied so left it with that single coat of dye.
Applying dye in several layers is an easy way to make it more even, but it also makes it quite a bit darker, it can be hard to tell from the dry result the next day how it will end up in the end.
Grinding to shape
After gluing the sheath up the next day, I took it to the grinder and evened up the edges. I use a zirconia belt on slow speed to even up the end without burning the leather, then go to alu oxide belts 180, 400 and 600 again at really slow speed. I also remove the lip that is created with the abrasive belt, even though I go over it with an edge beveller later before burnishing.
This grinding process makes the 3 layers of leather (2 folded and the welt) become one surface, and also cleans up the top of the sheath where the welt was sticking up above the sheath.
Stitching holes
Only now do I punch stitching holes, as there is a clean even edge to mark the distance from. I use a Pro stitching groover for leatherwork to cut out 2 grooves in the leather, as I wanted a double stitching line. This cut out groove is optional, but I like how it gives the stitches something to sit in, as well as draw the line for stitching holes. I went with 5 mm and 9 mm from the edge.
The actual stiching holes are punched with diamond stiching chisels, before going through each hole with a diamond stitching awl to make sure each hole is big enough for the needle.
I prefer to also go over the holes with an overstitching wheel, this helps set each hole lower than the surrounding leather.
I much prefer to punch all the stitching holes in one go after the sheath is glued up rather than individual layers and then trying to match them up.
Fiebing's Pro Dye II: Cholocate
After stitch holes are done the sheath is air brushed with another, darker dye colour. In my case I use a cheap re-chargable battery operated air brush I got from ebay for $50, it works great. In this case I used Fiebing's Pro Dye in Cholocate colour, I think it is a nice rich brown that contrasts well without being all black.
How to use a stitching pony
The actual stitching is done with synthetic thread and a stitching pony. Because each hole is awled before the stitching starts, there is no need for pliers to pull the needle through and the diamond shaped holes will close up nicely around the thread.
The sheath is clamped in the stitching pony and the thread with one needle in each end inserted into hole number two from the end closest to me and evened out so half the thread is on each side. Then I stitch back to the first hole before turning around and stitching away from myself.
I sit on the stitching pony to hold it down, stitching away. This is one of my favourite parts of the knife making process, it is quiet and dust free!
Finishing the stitches
After stitching I roll the overstitch wheel again over the stitches to even them out a bit, before also hammering the seam with a smooth hammer. This helps the thread fill out the holes more, making the seam a bit wider and more prominent.
Burnishing edges
Tokenol or gum tragacanth is applied to the edges before they are rubbed hard with a wooden edge slicker to burnish the edges and make the smooth and shiny.
Sealing the sheath
To give the leather some life back after the dyeing, I liberally add carnauba creme and let soak in for a few minutes before rubbing with a piece of an old t-shirt. I do this twice before letting it dry and when dry I do two coats of resolene which helps with some moisture protection as well as a nice glossy finish.
These two steps together gives the leather some life back and makes the leather look darker and a bit shinier.
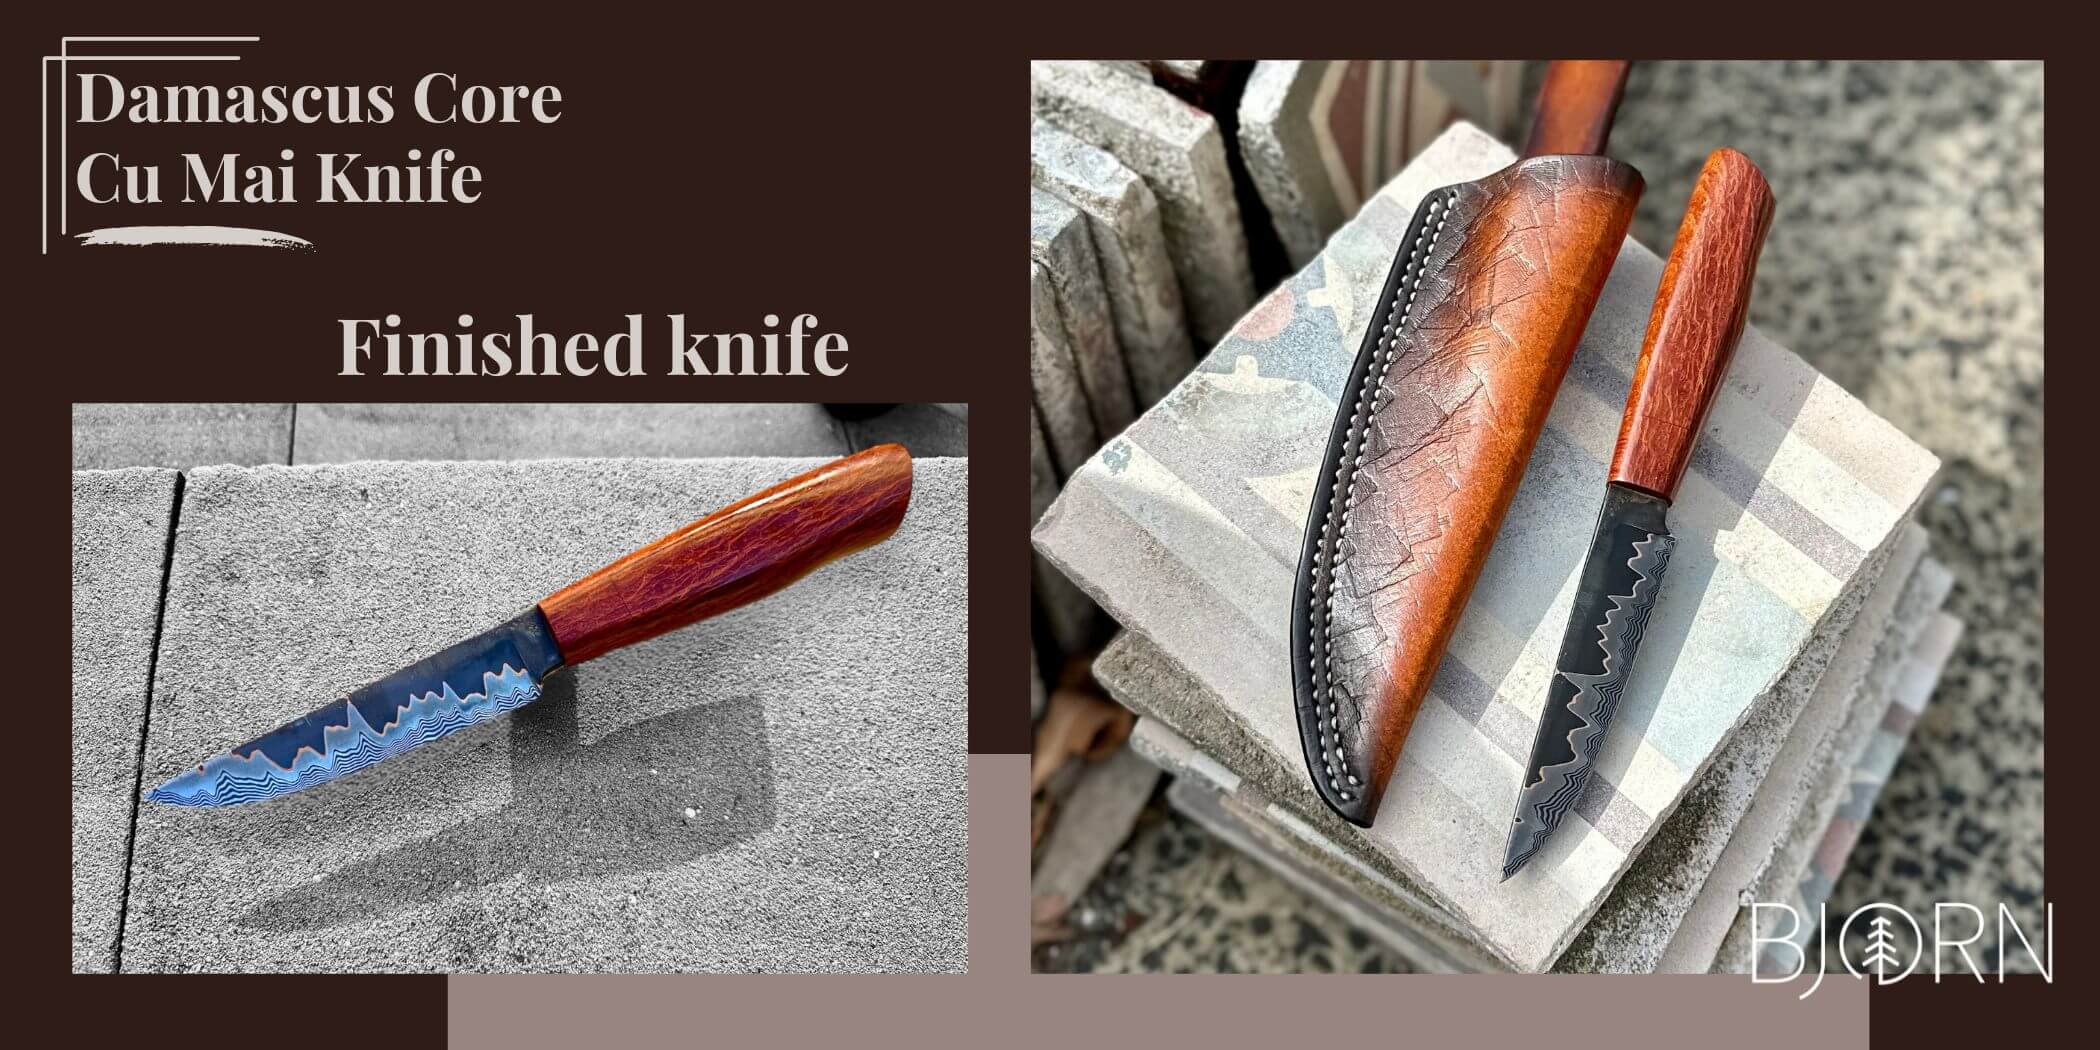
Finished knife
And here we have it, the finished knife and sheath!
I like the textured sheath and the contrasting thread colour. It kind of matches the handle colour too?
Thank you for reading along, hope you like the build article.
Bjorn
Recent Posts
-
The Etch Test: Ferric vs Hydrochloric vs Gator Piss
The Etch Test: Three Very Different Looks From One Steel One of the great things about knife making …3rd Jan 2026 -
Why Bed The Tang In Epoxy - Then Knock it OFF Again.
What is "Bedding the tang"? Bedding the tang means gluing a stick-tang blade into the handle block i …21st Mar 2025 -
Marble Leather - How to Dip Dye Veg Tanned Leather
This was my first experiment with hydrodipping or dip dying leather, and it came out pretty cool! I …14th Mar 2025


