
How to etch and stonewash stainless steel: AEB-L
Easy process for stonewashing a stainless knife blade with Ferric Chloride and a cardboard tube!
By Bjorn Jacobsen, Oct 2022
Etching blades is something usually done with damascus steel. The etching affects the different steels in the damascus at different degrees, creating the visible patterns between the different types of steel that makes up the damascus. For instance 15N20 with 2% nickel is resisting the etch more than 1084, creating a more shiny layer.
But also single steel / monosteel blades can be etched. For instance to combat a patina on a kitchen knife by creating a more uniform grey or dark finish from the get-go. Or to create patterns with lemon juice or mustard.
Etching steel in Ferric Chloride is an easy and quick way to get a uniform etched patina, and this also works on stainless steel but will need longer etch times.
Summary: Etching AEB-L in Ferric Chloride
- Clean blade
- Etch 10 mins x 3
- Scrub with fine steel wool after each etching cycle
Etching stainless steel
Here we are covering an easy recipe for etching and stone washing a stainless steel chef knife blade in AEB-L. The process will be the same for other steels, but the etch time will be much shorter for carbon steels like 1084 or 01, and may differ for other stainless steels.
Ferric Chloride
The most common etchant used by knife makers is probably Ferric Chloride, commonly used to etch electronic circuit boards. This can be bought for instance on ebay (LINK), and is diluted in water in a glass container. (like a spaghetti container with steel wire closure and glass lid from a $2 shop). The exact solution will affect the time it takes to etch but seems to not be too important, we just mixed the half a liter bottle of Ferric in the spaghettic container and fill it up with water.
Ferric is an acid when mixed in water and you should aim to not touch it, even if the solution is not very strong*
(*disclaimer, we are not chemists and offering this as our experience only. Wear PPE like gloves and glasses whenever handling chemicals)
Etching process
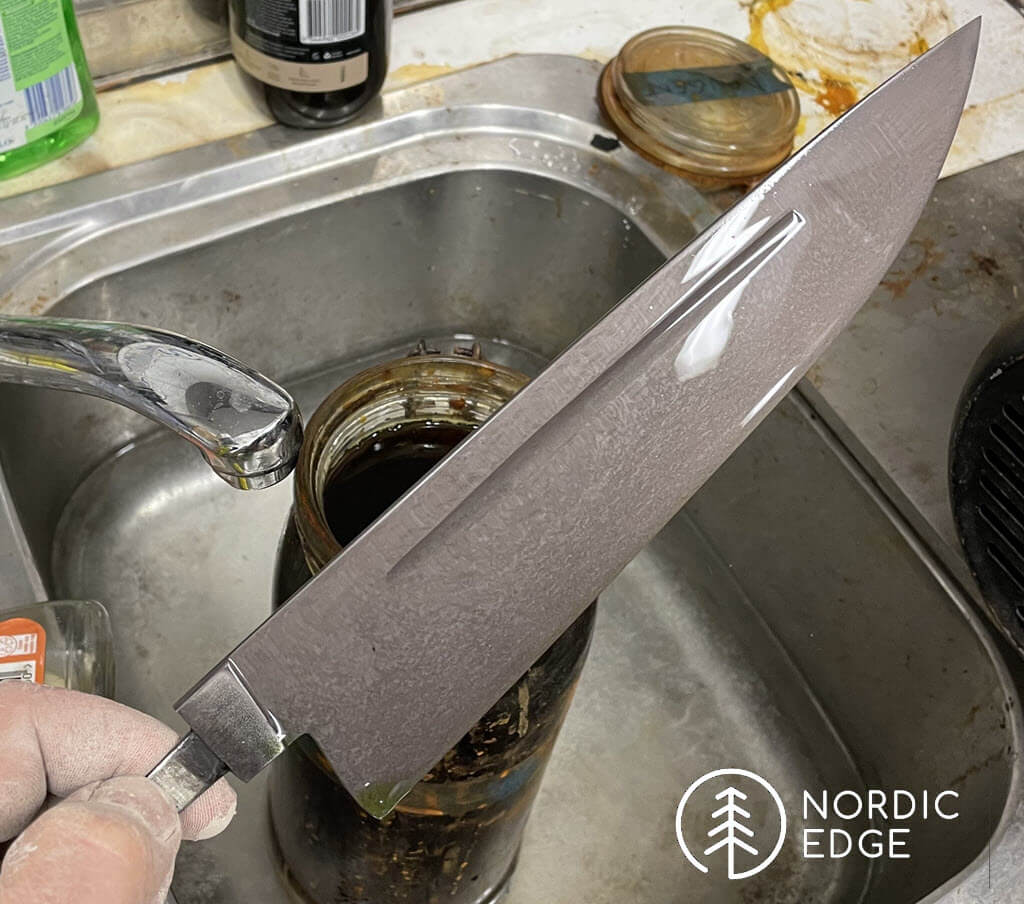
Here is the blade we are going to etch, a kitchen knife blade in stainless AEB-L steel: The blade is sanded to 1000 grit already and the tang is fitted to the handle block. We covered the tang with reneissance wax before etching but this seemed to be eaten away and the tang did etch, without any visible issues - it removes so little metal that the blade/handle fitup did not seem to be affected.

The blade is wiped with denatured alcohol (or use acetone), then washed under very hot water with some dishwashing soap. While the blade is hot, place it in the Ferric chloride without touching the blade at all, hold it by the tang. We placed the container of Ferric Chloride in the sink partially filled with hot water also, to help speed up the etching.
Etching time 10 mins x 3
After 10 mins of etching, the blade was pulled out and scrubbed hard with 0000 (super fine) steel wool under the running kitchen tap. We did not neutralise the solution in any way other than flushing the blade with water while scrubbing with the steel wool. The 10 mins was just a random time for our solution of ferric chloride before we checked and the blade was etched, not a time we had decided on. One source on youtube said it took 40+ minutes with his setup to get a good etch on AEB-L.
Etching time will depend on your steel grade and solution of ferric chloride - check every 5-10 mins.
We etched the blade 3 times, so 2 more etching cycles of 10 mins each and scrubbing pretty hard with the steel wool in-between.
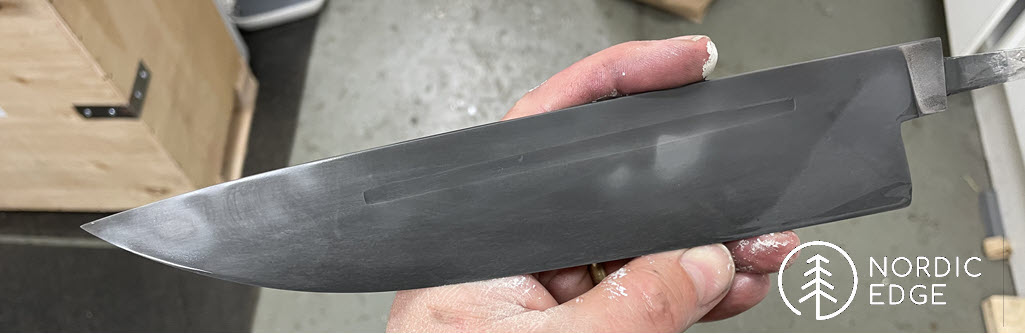
Here is the blade after the first etching round:
Rubbing with steel wool
After each etching cycle we scrubbed the blade pretty hard under running water before rinsing it well and putting it back into the etching solution.
We are no experts but have read that a weak solution and long etching process gives more details than a strong solution and a shorter etch. Some use a different etchant, for instance a strong solution of instant coffee works well on carbon steel blades but will probably not do much on this stainless AEB-L blade.
Neutralising the solution with baking soda or windex is probably a good idea, we just kept rinsing it for a while before drying and oiling the blade.
Here is the blade after 3 x 10 mins etching cycles, it is an even dark grey colour, the blotches in the photo are from the blade drying out while the rest of the blade is wet. After the last etching cycle, we again scrubbed with steel wool and rinsed the blade really, really well under the tap. Rubbing with steel wool removes the surface oxide layer building up as a black coating, exposing the steel underneath so the etch can continue.
Etched blade ready
Here is the blade dry and oiled really well before most of the oil is wiped off again;
The 3 x 10 mins etching cycles has made the blade a nice, uniform dark grey colour.
If wanting this finish, you are done already!
If wanting to move on to stone washing your blade, keep reading..
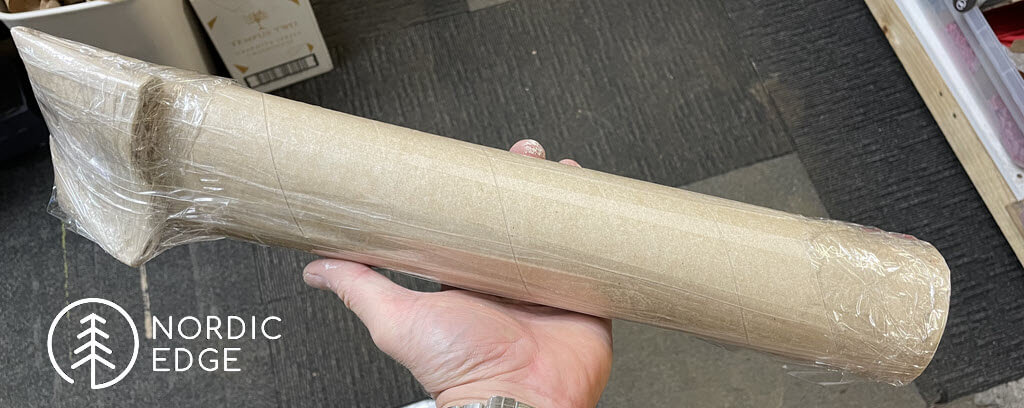
Stone washing in a tube
Not being able to find a plastic bottle with wide enough mouth for the 240 mm long and 50 mm wide blade, we went for a cardboard packing tube. One end had a plastic cap in it, and it was already taped all around.
We filled the tube about 10 cm or so up with pebbles and some dirt, just a couple of handfuls. Then a squirt of dishwashing liquid and a touch of water. The lubricant helps holding the dust down.
Expecting the cardboard tube to leak, we started shaking it..but nothing came out! Guess the tape held it all together, or did the dirt soak up the liquid? Either way, it worked well!
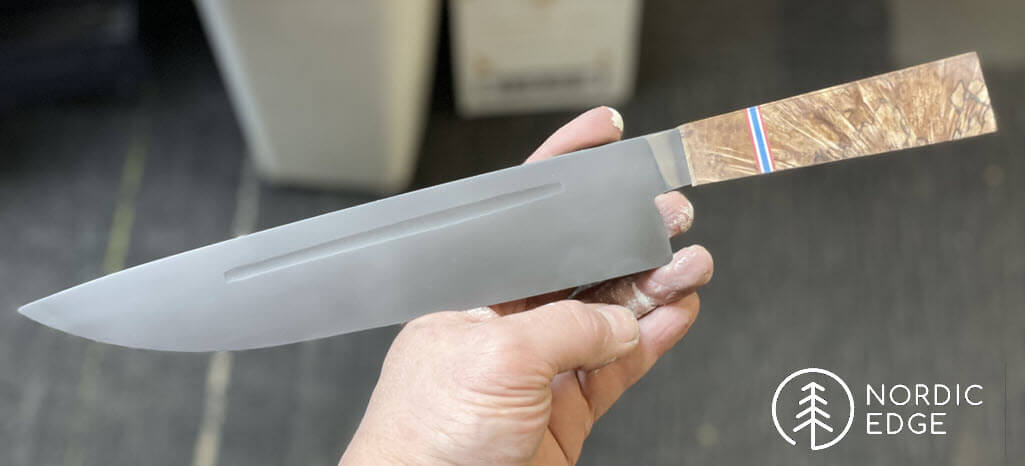
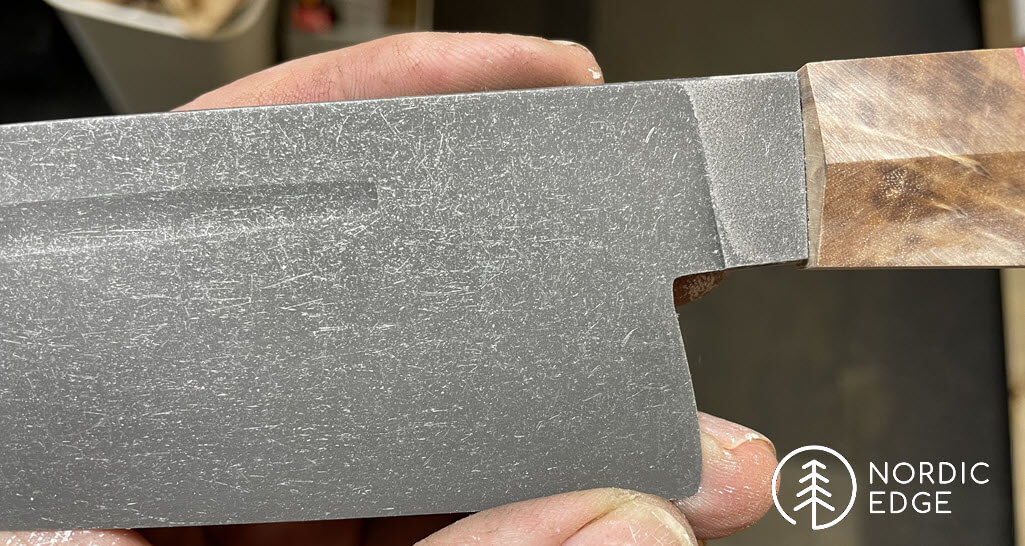
After a couple of minutes of shaking time spread out over 2 or 3 sessions, we guessed at the blade being finished and opened the cardboard tube. The blade now has a fairly uniform pattern of bright scratches against the grey etched surface;
How to modify the stone washing pattern
The smaller the stone washing medium, the more uniform the pattern will be. Meaning if using sand, dirt or something else with a small grain size the scratch pattern will be more uniform. Larger pebbles or rocks, crushed up bricks or something else with more sharp edges will give larger, brighter scratch marks. In our case we used a couple of handfuls of rocks from the yard, maybe 20-50 mm in size as well as some dirt and smaller pieces that came along with the handfuls of rocks.
Just like with the etching, it pays to stop often and check out the pattern if having a particular look in mind.
One thing we will do differently next time is to not shake on the long way, from tip to tang. We should have just kept shaking on the short ende. We ended up with a few long scratches from tipping the tube on it's head and shaking it the long way (not in the photos).
Only etch hardened stainless steel
Reading online, stainless steel that has not been hardened does not etch at all we have seen claimed. Not having tested this, we would still recommend doing a test etch before comitting a blade. But the test etch should be on a hardened piece of steel, finished to the same grade of abrasive paper as your blade for a good comparison.
In summary: Etching and stone washing stainless steel
- Stainless steel will etch in Ferric Chloride, just taking longer time
- AEB-L: Etch for 10 mins, scrub with fine steel wool to remove oxide build-up
- Repeat for a total of 3 cycles x 10 mins + steel wool
- Neutralise the acid with baking soda bath or similar or just rinse very well under running water
- Scrub with steel wool to remove the black oxide layer one last time
- Stone wash in small pebbles/rocks + dishwashing liquid + little water for 2-3 minutes
- Wash well, dry and oil
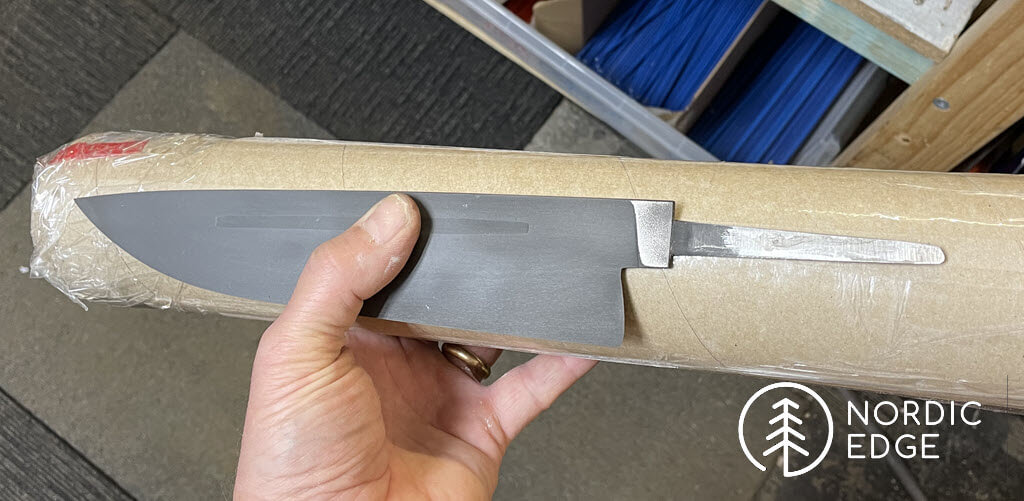
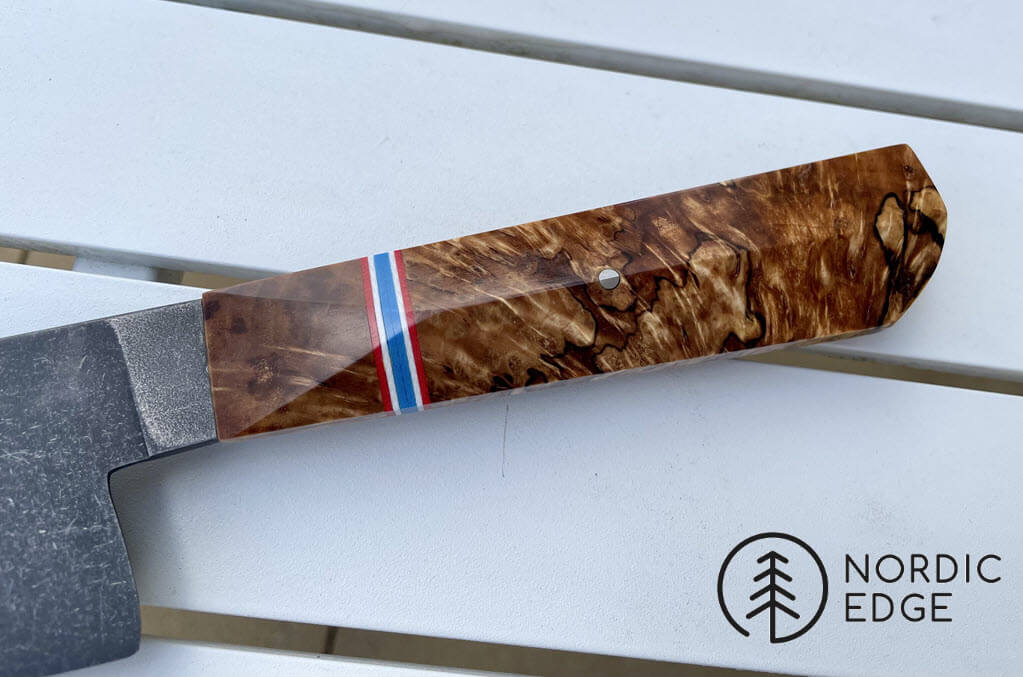
And here is the completed knife, a chef knife with acid etched and stone washed AEB-L blade, and handle in stabilised spalted birch root, G10 spacers and stainless steel pin. The handle shape is inspired by Tristen Knight who makes some awesome knives, trying to follow his lead on the handle ending in a sharp line in the middle of the handle pin.
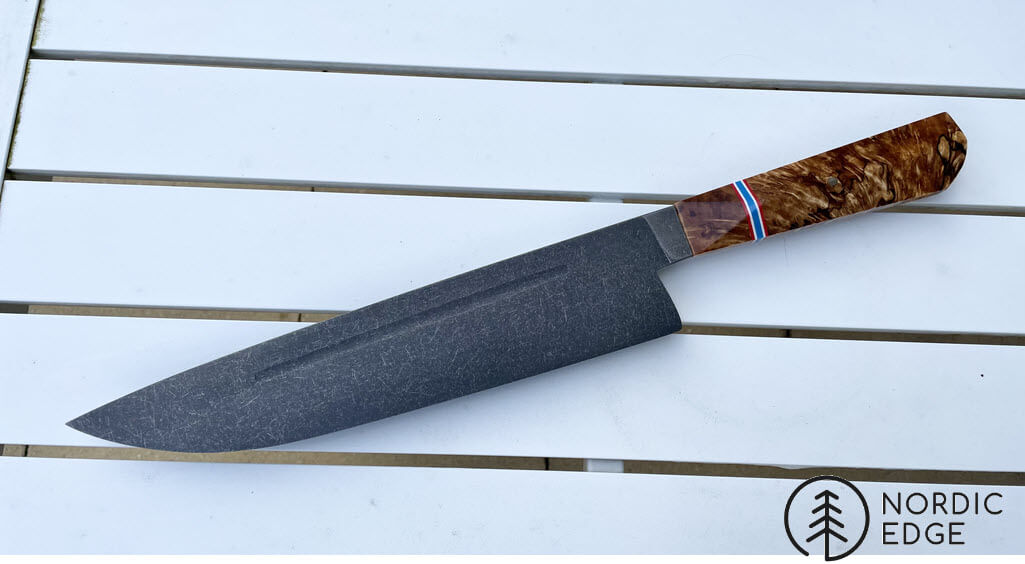
Blade is 240 mm, handle 120 mm.
Recent Posts
-

The Etch Test: Ferric vs Hydrochloric vs Gator Piss
The Etch Test: Three Very Different Looks From One Steel One of the great things about knife making …3rd Jan 2026 -

Why Bed The Tang In Epoxy - Then Knock it OFF Again.
What is "Bedding the tang"? Bedding the tang means gluing a stick-tang blade into the handle block i …21st Mar 2025 -

Marble Leather - How to Dip Dye Veg Tanned Leather
This was my first experiment with hydrodipping or dip dying leather, and it came out pretty cool! I …14th Mar 2025