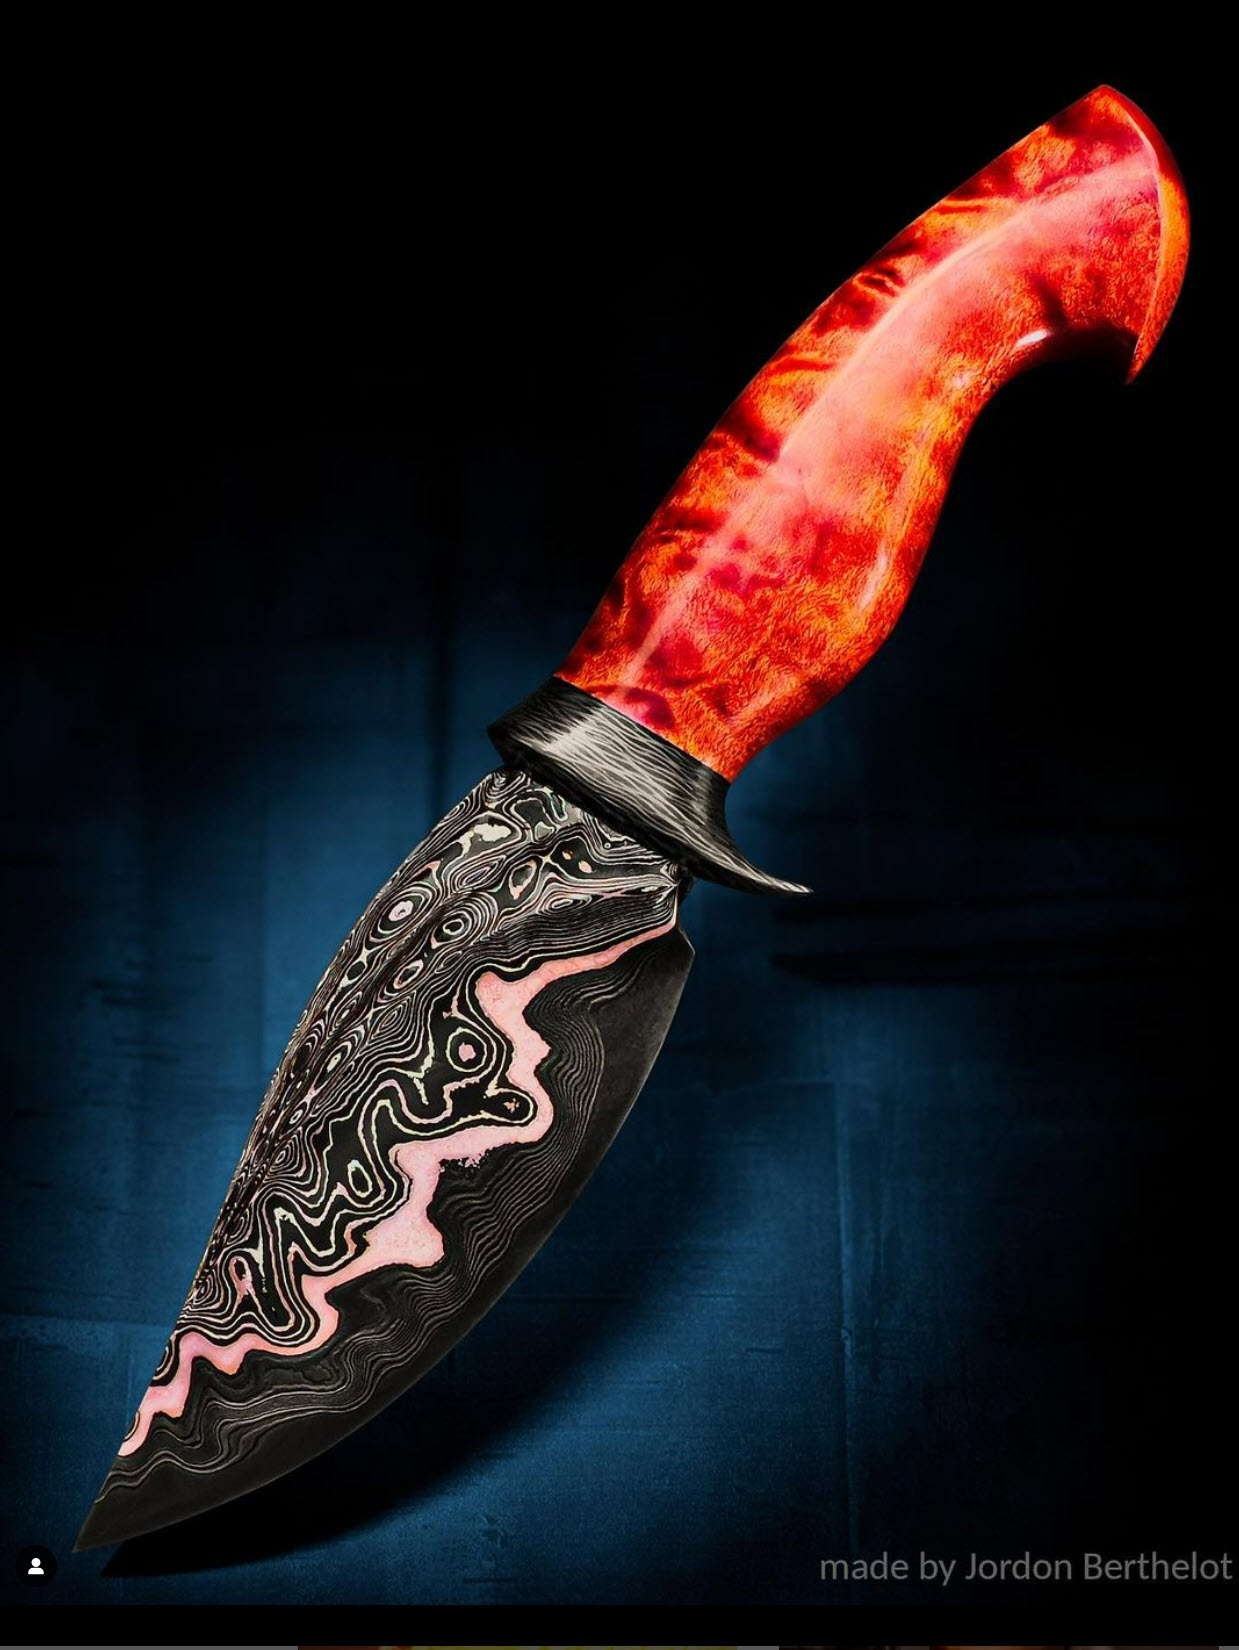
How to get Baker Forge & Tool steel to REALLY pop
Coy Baker and his team in the US make some amazing looking specialty steel for high-end makers:LINK
These bars are made for stock removal to not distort the pattern, and to avoid any risk of the elements with lower melting temperature melting at the higher temperatures of forging.
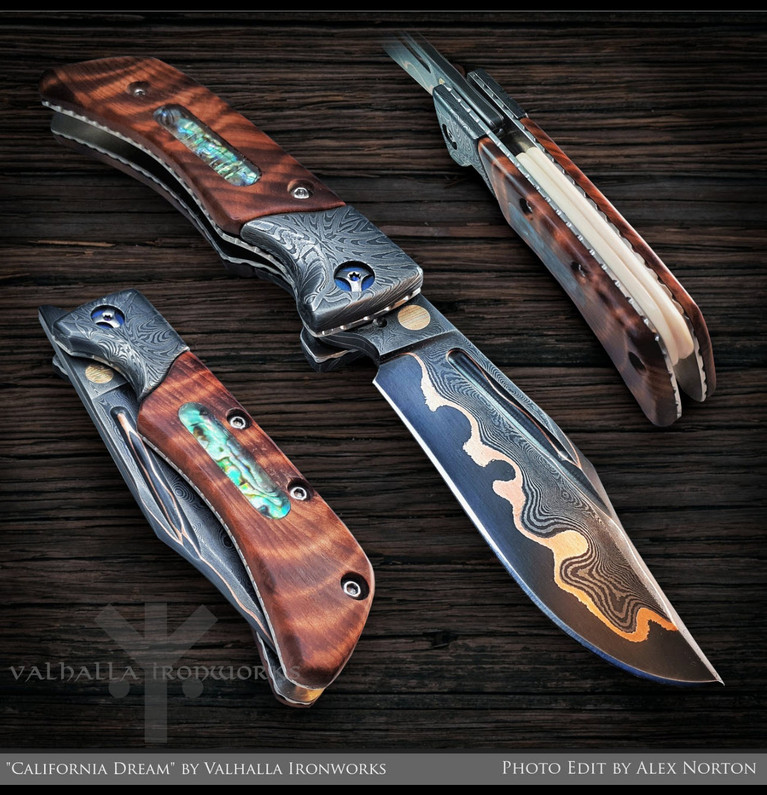
To really make these pop, the blades need to be etched and then worked to create additional contrast.
Alex Norton from Valhalla Ironworks is one of the Australian makers who get amazing results with the Baker Forge & Tool steels. Alex is the maker who introduced us to Coy Baker before Blade Show 2022 and the reason why we are lucky enough to have these steels for sale at Nordic Edge. The photo on the top of the page is by Alex.
This is the process Alex suggests:
- Sand entire blade to around 800 grit
- Clean blade thoroughly
- Do a ten minute etch in 1:3 ferric mix
- Scrub blade hard with extra fine grade steel wool
- Polish blade with 1200 grit sandpaper
- Keep repeating steps 3-5 until I have the desired etch depth
- Polish only high spots of blade with 2000 grit sandpaper
- Buff high spots with white buffing compound

Second method: The Dakota Wilson method: LINK (also copied in below)
Polishing - for post heat treat grinding, start with a 60 grit belt. Then move to 120, 220, 400, then an ultra fine scotch brite belt if available.
From here you will be able to start hand sanding. I typically start with 220 grit to remove any and all final scratches from the previous belts.
Then I move up to 400 grit, then 600 grit.
Here is where the distinction between a satin and mirror polish comes in.
If you want the core to get a deeper black etch, stop here at 600 grit for now. And only use a very fine scotch brite pad for final surface conditioning before etching.
For a mirror polish, continue up in grit to 1k, 2500, then finishing at 3K.
I suggest acquiring a 5K grit Trizact polishing pad from your local hardware store or Amazon. This will be a true lifesaver for getting the most contrast from the Mokume gane cladding.
Etching - use a mixture that consists of 30% ferric chloride, 30% muriatic acid, and 40% distilled water. This is a very stout mix but has proven to work wonders for this kind of material for me and many other makers.
Clean and rinse your blade as usual.
Now it’s time to etch your blade.
For the first cycle, you will only want to etch for about 30 seconds.
I suggest keeping the blade continuously moving in a circular stirring motion while in the acid to avoid “copper bleed” that occurs from copper oxides building up on the blade.
Then remove the blade, neutralize the acid with windex, and grab your 5K grit polishing pad. This polishing pad is meant to be used while the blade is still wet from the windex.
GENTLY wipe down the entire blade with the 5K grit pad to eliminate any leftover copper bleed. This also polishes up the nickel layers and enhances contrast between the copper and nickel layers.
This fine polishing may make your edge turn from a deep black to a dark grey, this can be easily fixed by simply repeating this process two to three times. The black oxides will build up after a few etch cycles and will become more resistant to the 5K pad.
More cycles will give you a bit of depth to the Mokume gane cladding, as well more depth to the Damascus core( if using Damascus core).
To get a final polish and to bring out the contrast of the core if using Damascus, simply use the 5K grit polishing pad with windex as lubricant to polish the steel. The Damascus will build depth and contrast with the Mokume the more it is etched. So be sure to monitor the etch to find your preferred “sweet spot” for etch depth.
Recent Posts
-
The Etch Test: Ferric vs Hydrochloric vs Gator Piss
The Etch Test: Three Very Different Looks From One Steel One of the great things about knife making …3rd Jan 2026 -
Why Bed The Tang In Epoxy - Then Knock it OFF Again.
What is "Bedding the tang"? Bedding the tang means gluing a stick-tang blade into the handle block i …21st Mar 2025 -
Marble Leather - How to Dip Dye Veg Tanned Leather
This was my first experiment with hydrodipping or dip dying leather, and it came out pretty cool! I …14th Mar 2025


