
How To: Norwegian Knife Making - handle fitting, shaping and finishing
Article by Bjorn Svensson in Norwegian, translated to English by Bjorn Jacobsen Oct 2022
Bjorn Svensson is a Norwegian hobby knifemaker who wrote this excellent article for a knifemaking group in Norway. He has kindly allowed us to use it in Australia. If there are any inconsistencies or lack of clarity, this is due to the translation and not the original article.

Bjorn makes knives in his home town of Risør, one of the oldest towns in the south of Norway.

Here is the first half of Bjorn's article, about how he makes the knife handle. The second part with the carved sheath will be a Part II at a later time:
Make your own knife
I am going to try showing the steps involved in how I make a knife handle, step by step with some photos and explaining how I do each step. The knife is going to be made from a forged blade from Asbjørn Solheim, and with handle in curly birch. There will be no bolster or front bit, showing here how to make the handle in a single piece mostly with hand tools.
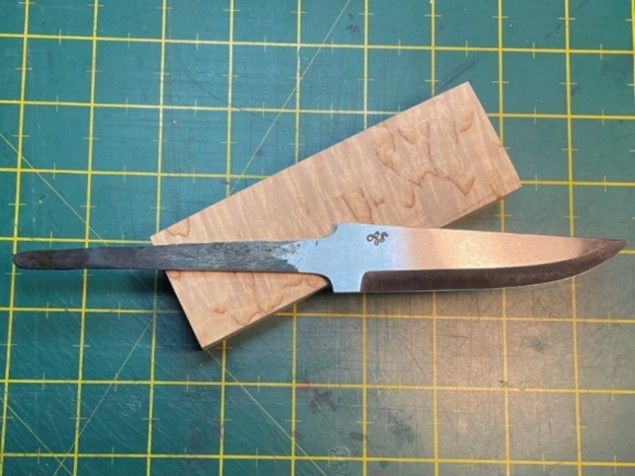
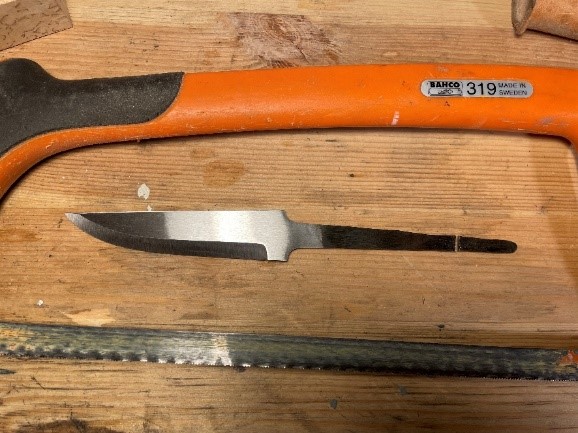
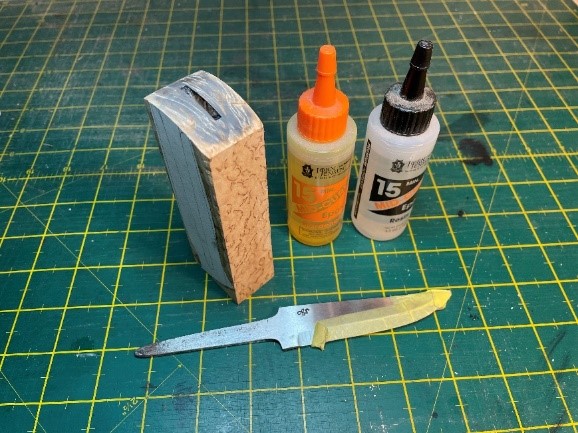
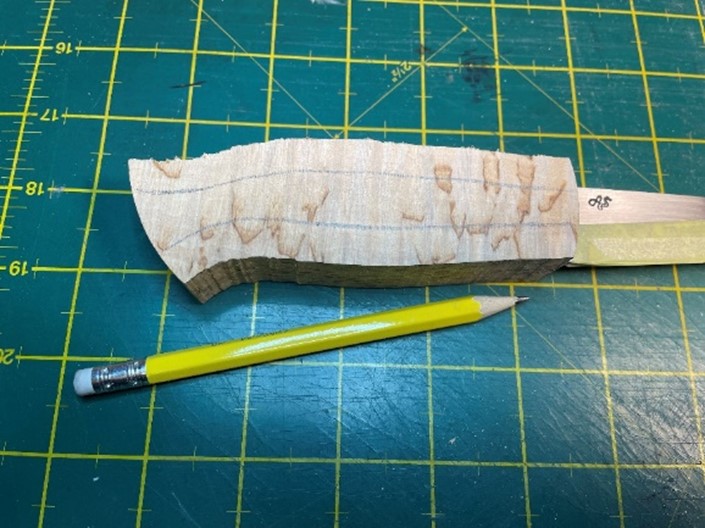
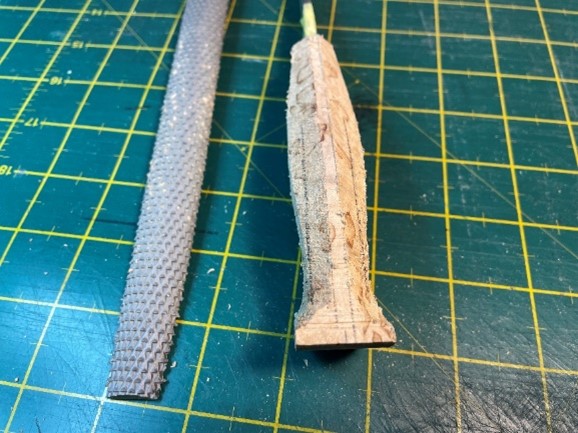
The knife blade and handle block are ready to start the project. The blade is a traditional Scandi grind blade forged from carbon steel.
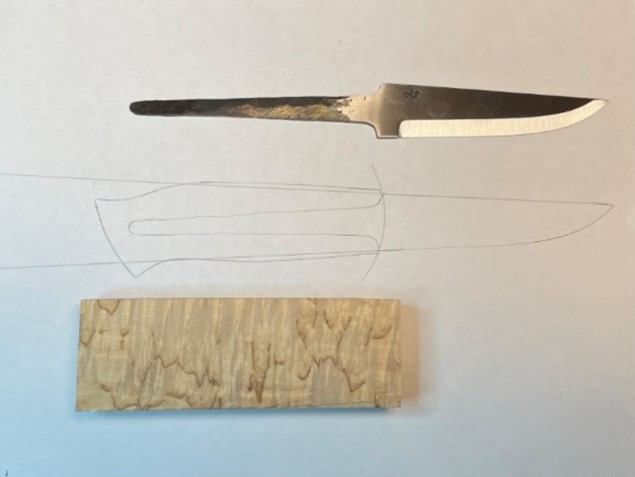
I start by drawing the blade on a sheet of paper, including the tang. Extending the lines from the end of the blade both on top and bottom of the blade to the left past where the handle will go, helps with establishing where the handle will sit heighwise. This way I find the handle placement ends up looking better. The handle shape itself is a fairly straight handle with a fall near the end for a comfortable, secure grip.
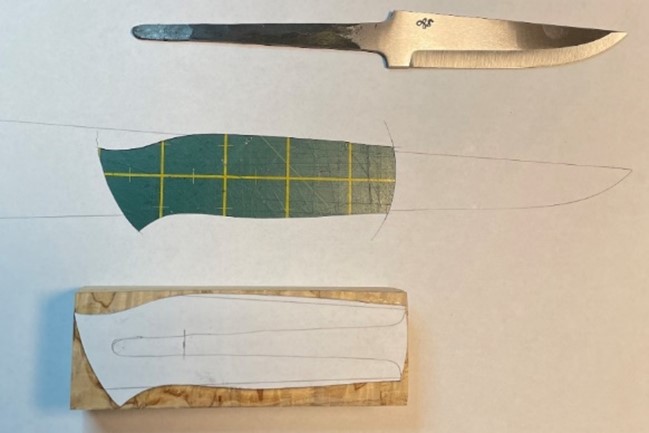
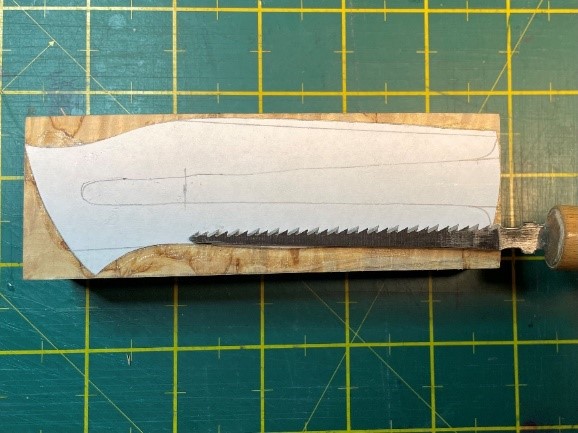
I cut out the drawing of the handle profile and glue it to the handle block.
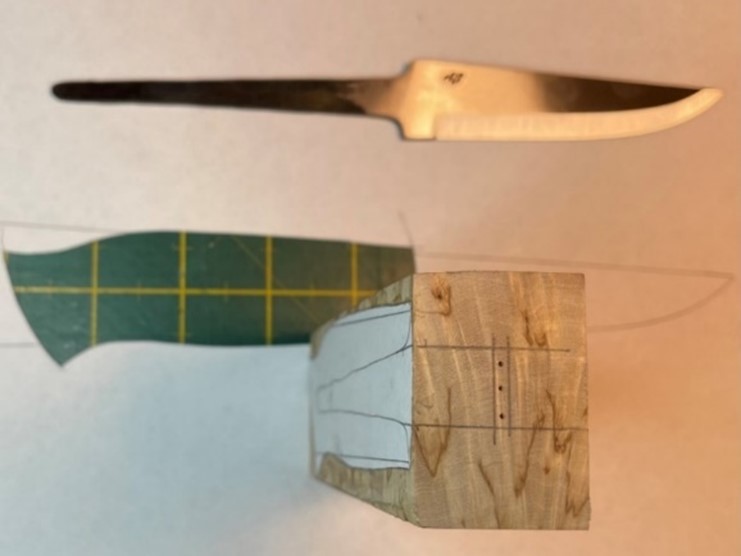
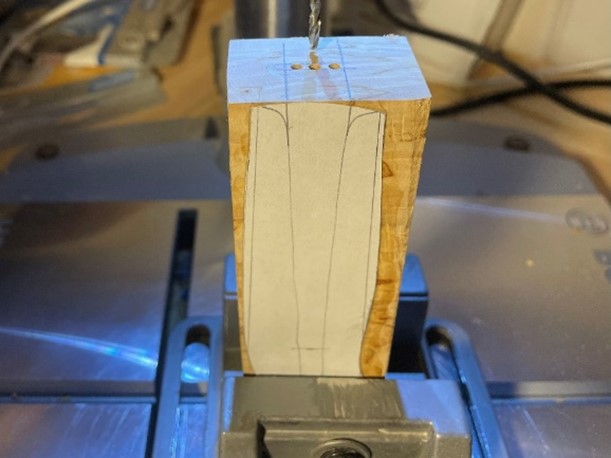
Marking the lines from the tang up and onto the front of the block. As well as marking the centre of the block, slightly thinner than the blade. In the photo you can see the pencil marks of where the holes for the tang will be drilled.
Drilling the block
To drill the holes for the tang, the 2 outside holes are drilled at an angle, just inside the pencil line drawn for the outside line of the tang. The hole in the middle is drilled straight down.
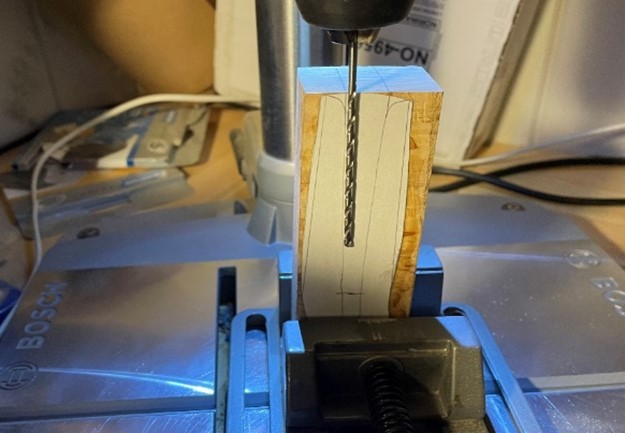
It is helpful to mark on the drillbit with a piece of tape or a sharpy, in case you might overshoot the mark. In this handle block I am drilling 3 holes with a drill press which is easier than using a hand drill, but this also works if you have a steady hand and a good aim.
The tang hole saw is just about long enough!
Getting started with the tang hole saw can be a bit difficult, but as soon as it gets further into the material this is a brilliant tool and makes fast work of removing the material between the 3 holes. Now that the tang hole is rough shaped, we can start working on the blade.

Working the blade
The first step is shortening the tang so it will fit in the handle block. The tang is not hardened on this blade, and was easily cut off with a hacksaw.
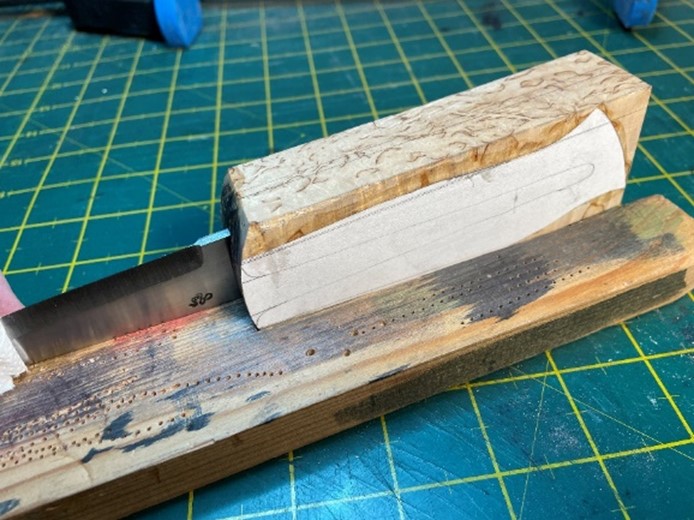
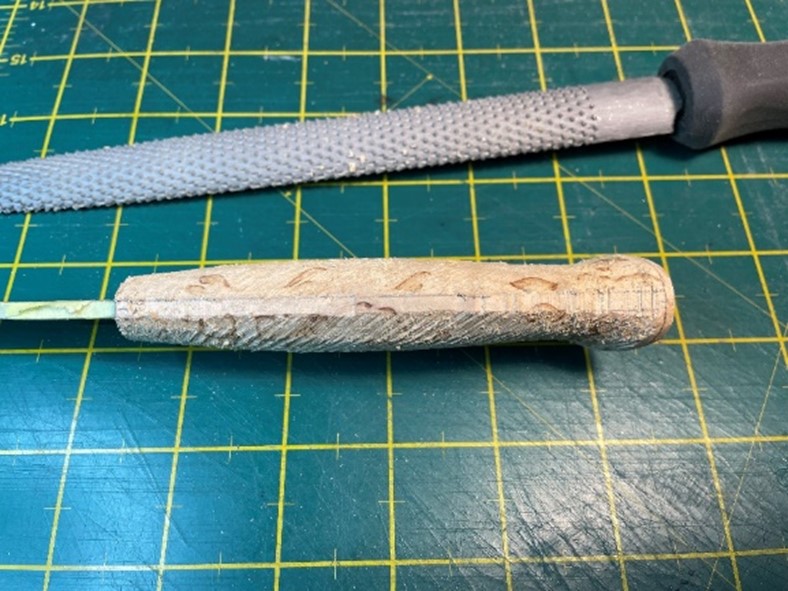
We are now ready to start the actual work of fitting the blade tang into the handle block. I am here using a small steel rasp with a thin blade and coarse teeth. This is a perfect tool for the job, cleaning up the sides of the hole after the tang hole saw and just long enough to reach all the way to the bottom of the hole.
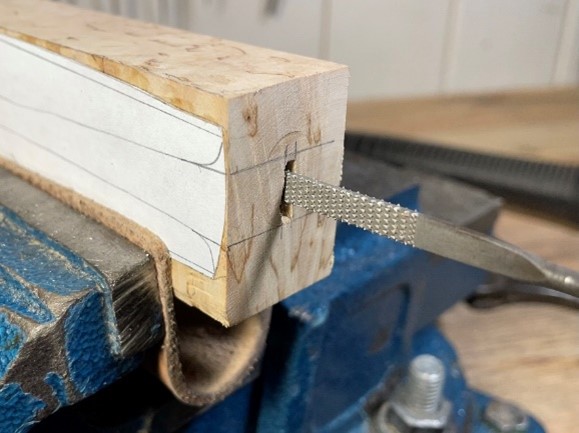
It is important to not rasp away too much material by rushing this step. Fitting the blade in a single block is more work than when using a bolster or front piece, so take the time needed on this step of the process. In the below photo I have fitted the blade almost all the way in. I keep testing with the blade and rasping little by little, taking care to not make the hole wider than it has to be.
Drawing lines with a sharp pencil is a good way to not rasp away too much material before checking again with the blade.
When the blade shoulders are inside the handle block, I shape the front of the block to the finished shape. In this case I want a gently rounded front.

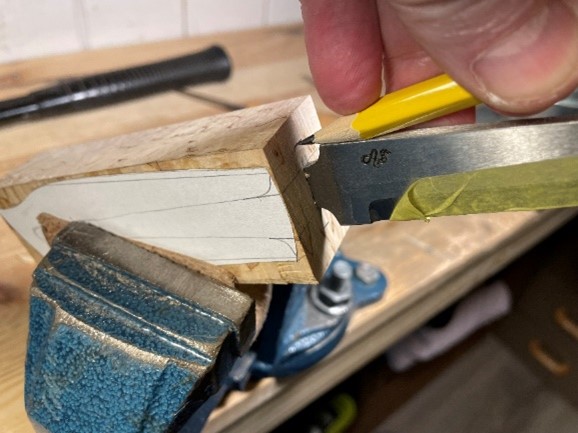
So far we have only dealt with the tang itself, but I also want the blade top and bottom to sit slightly into the handle block for a really tight fit. Inserting the blade into the handle block as far in as it will go, I carefully mark with a sharp pencil how far up and down past the existing hole the blade will go.
Using the small rasp, the tang hole is extended top and bottom to the pencil marks. This is another point where I take the time required to get it right, testing with the blade and rasping little by little until the blade fits. Notice how rather than filing the blade shoulders square, I fit the rounded shoulders into the handle for a stronger transition between blade and handle. Going too hard here can lead to tear-outs where a piece of the wood tears out leaving a visible mark in the surface so go slow and steady.
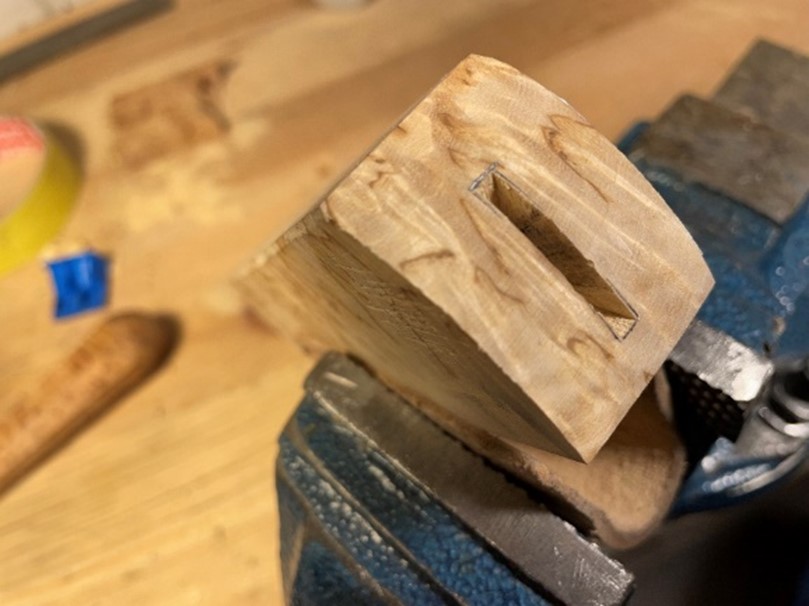
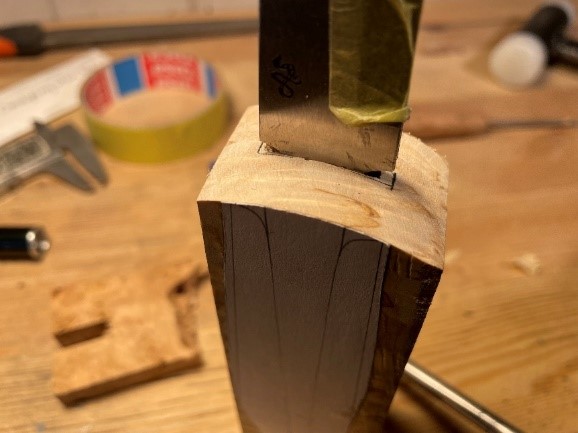
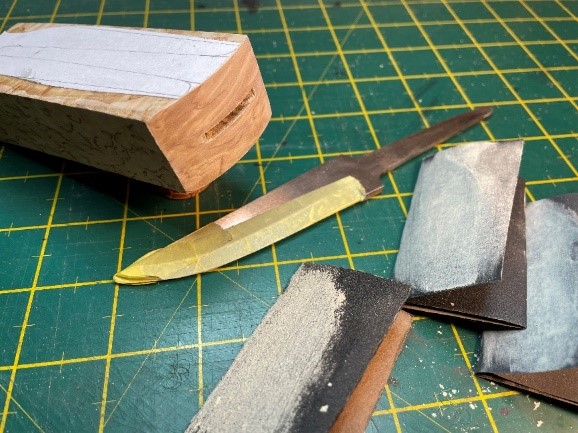
The blade is now fitted all the way into the handle.
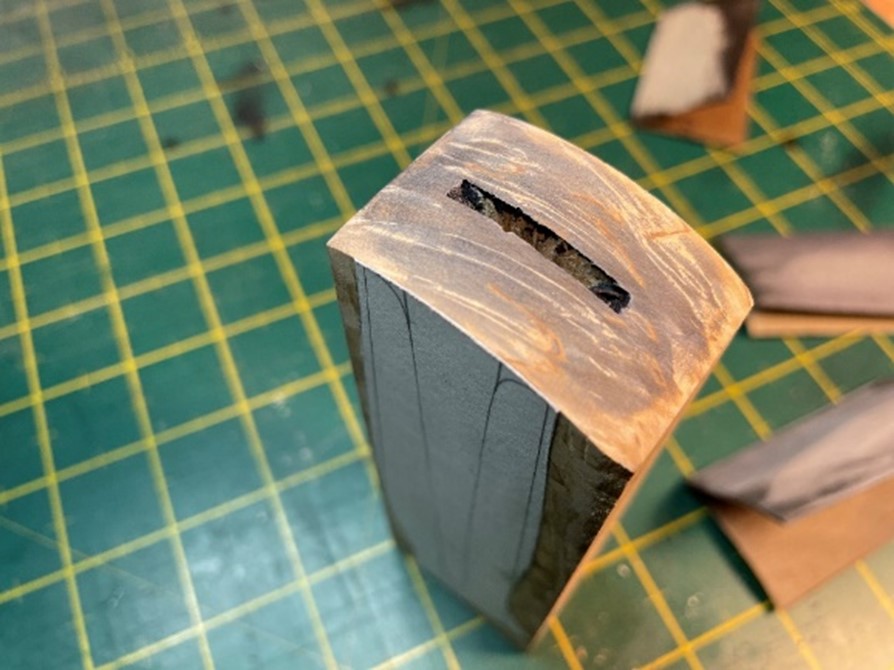
The front of the handle block is now finished before the rest of the handle is shaped. The front of the handle is sanded to 400 grit, stained and sanded again to 600 grit.
The front of the block is stained and sanded now rather than later when the blade is attached, to avoid scratching the blade. (Editor's Note: In Norway they use "beis" to stain the wood, this is powdered woodstain mixed with water to achieve the colour needed. Leather dye also works well to stain curly birch)
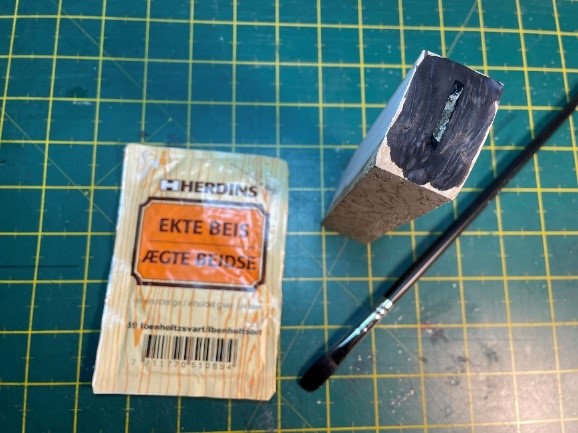
I am using a black stain which is absorbed into the grains of the curly birch. When sanding the wood with fine sand paper (400 and then 600 grit) only the top, flatter grains are sanded enough to remove the stain. The "curly" grains going into the block retains more of the stain, increasing the contrast in the wood. I will discuss the staining process a bit more when we get to that step of the whole handle.
Everything is here ready for the glue-up, the tang is wiped with acetone and glued into the block with a two-component epoxy.
The knife is clamped up and the epoxy is allowed to set securely. Any spilled epoxy is wiped off with acetone.
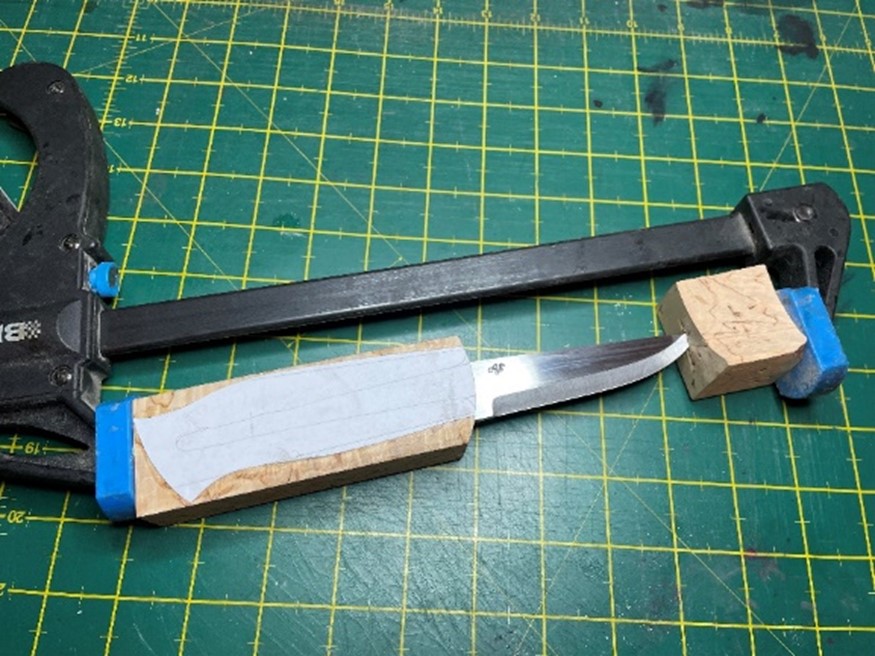
Checking reference lines
When the glue is dry, I check that the reference lines from the handle drawing is still matching the top and bottom of the blade. If the blade had been fitted at an angle, this is the time to correct the lines.
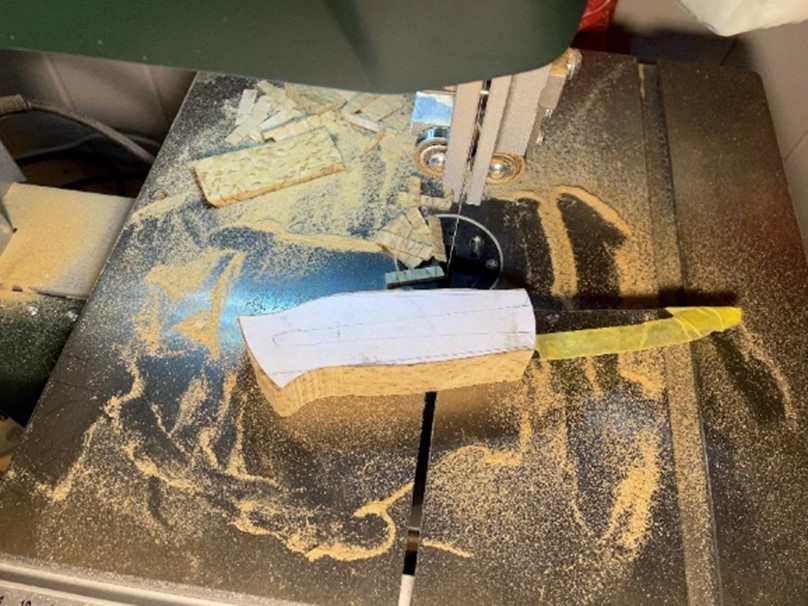
I am using a bandsaw to remove excess material, this could be done by handsaw or rasp as well but using the tools I have to speed the process up a little bit.
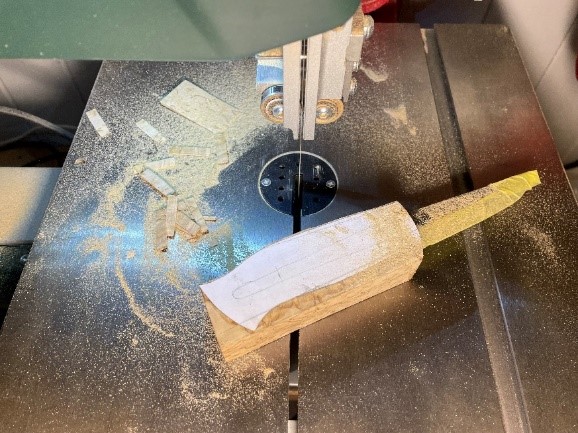
Here the handle block is shaped to the outside of the handle template glued to the side.
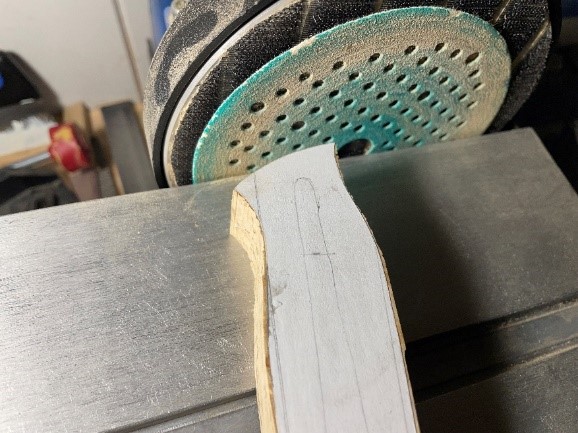
Rounding the end of the handle on a disc grinder.
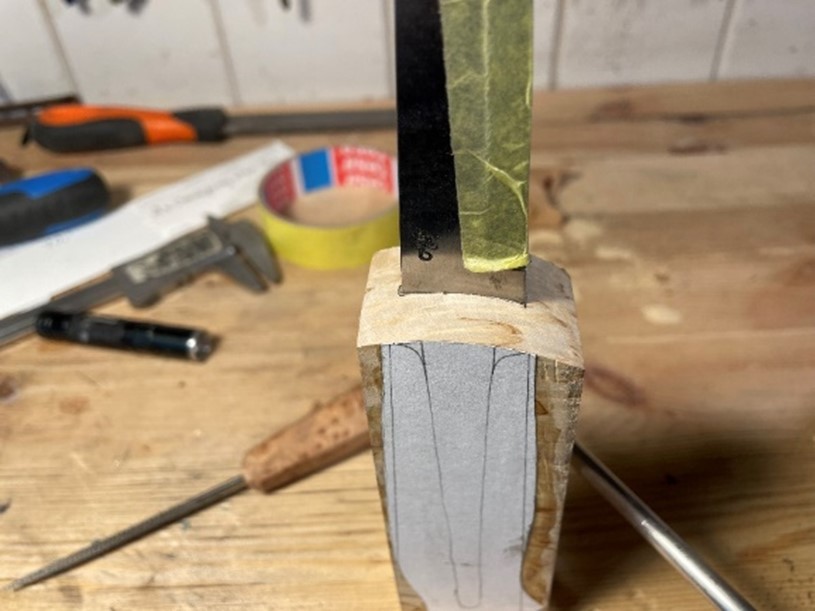
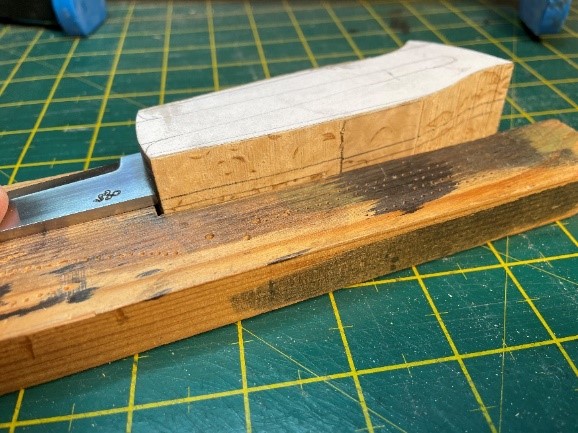
I am here transferring the two lines of the blade sides down the centre of the handle block. The flat side of the blade is placed on a flat block so the handle block is not touching the table. This way the blade is the straight line, and by padding up the height of the flat block and using a piece of wood as table for the pencil, I end up with straight lines following the blade for a true centre of the block.
(Editor's note: This is a simple way to achieve what a granite surface plate and digital height gauge would otherwise do)
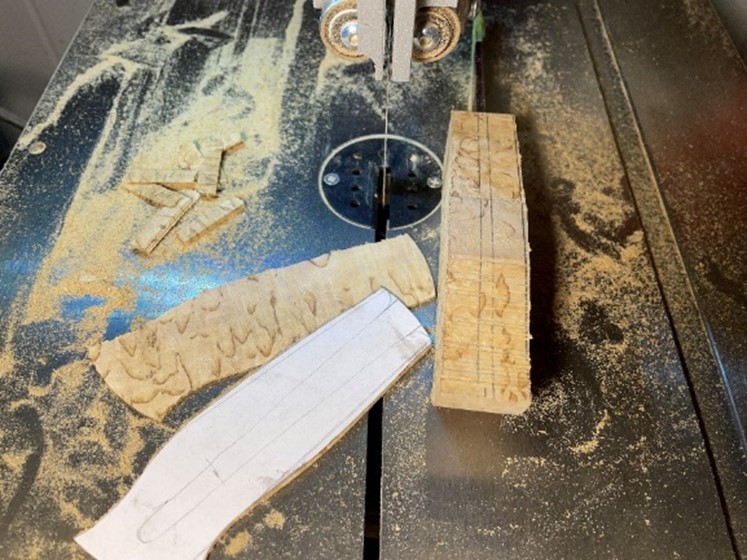
The block is quite a bit wider than the handle will be, here I am taking the sides down a bit. This saves on how much dust will be created later as well.
We now have centrelines top and bottom of the block following the blade, and here I am drawing lines on the sides of the handle. These are drawn to help round the handle top and bottom in a symmetrical way. The lines can be drawn by the pencil following the outside curve of the block as the outside is already shaped to the template lines. Where these lines are on the handle is not critical, they are more to mark about the middle 1/3 of the handle height, the same height on both sides.
Here I am starting to shape the handle to the rounded profile. By having two lines on the top of the handle (the blade sides) and the lines on the sides of the blade, it is easy to get it fairly symmetrical by rasping away anything between those lines. This removes the "corners" on all 4 sides.
Note how the rasping is not going all the way to the back of the handle, l am leaving more material there and will deal with this in a later stage. This step could also be done on a belt sander of course, here showing it can easily be done by hand with rasp and file, this also gives a high degree of control in areas of curves like at the butt end of the handle.
In the below photo I am drawing on new refererence lines to help keeping it symmetrcial between the sides. The bottom pencil line is again drawn by holding the pencil in a firm grip and following the curve from the bottom of the handle on both sides. The other line drawn in is on the flat sides of the handle, a bit in front of the middle. The point is more to have a line marked the same length from the front of the block, to help with symmetry rather than an exact distance from the front.
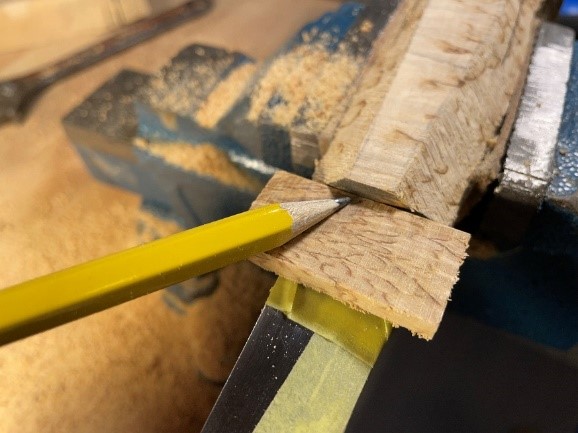
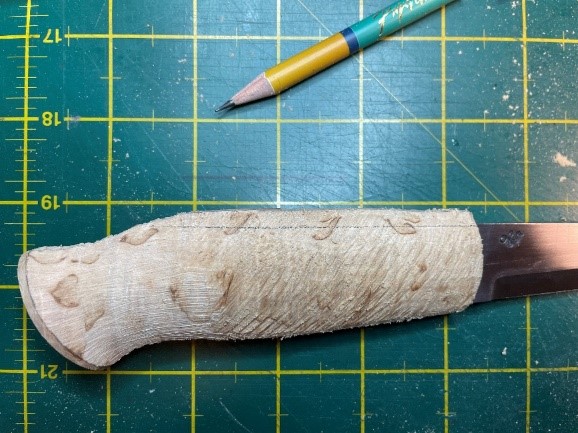
Marking the front of the block by putting a spacer of wood on the blade and drawing a pencil line. Doing this on both sides of the blade gives a reference line for how thick to leave the front of the handle and makes it easy to get the same thickness on both sides. Alson note in the photo how the handle has been rasped to the drawn pencil lines, these lines are very helpful in getting everything to come out the same thickness on both sides, and the rounded belly to come up to the same height on both sides.
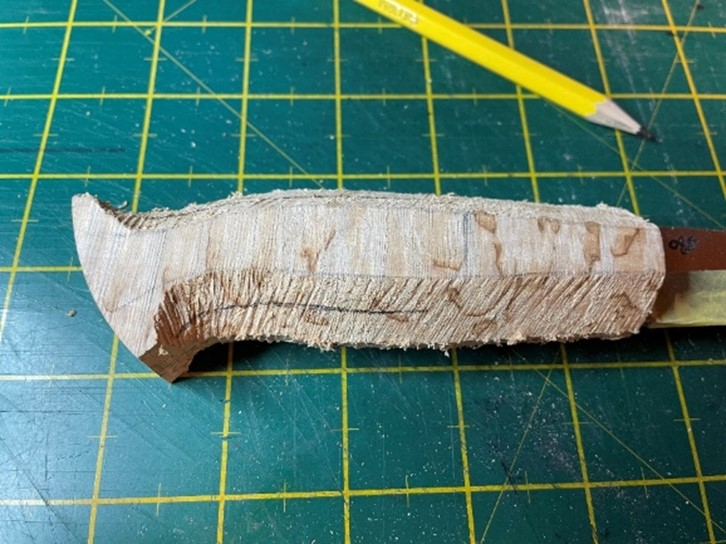
Showing the rough shaped handle from the top or spine side. Notice how the sides have been rasped down from the pencil line on the side of the handle just in front of the middle, to the sides of the blade drawn in on the above photo.
The only flats left on the handle are the narrow strip on the top and bottom between the 2 lines drawn from the blade, and the flat sides between the initial two lines we drew on the sides.
This shape gives a good comfortable grip in my opinion.
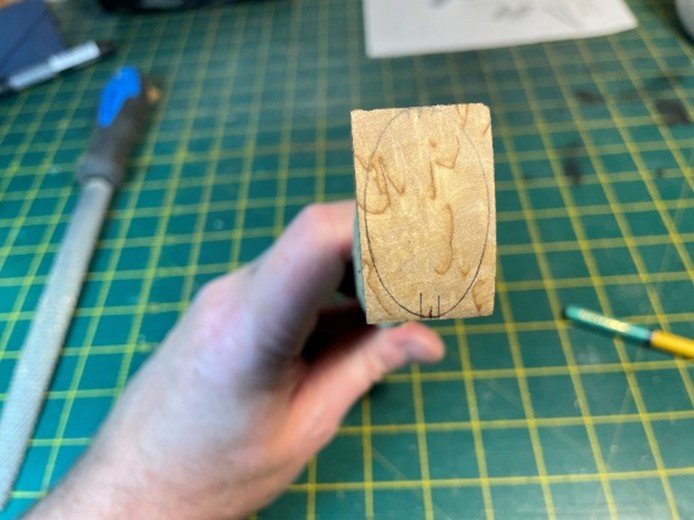
We are ready to start working on the butt of the handle. Using an oval template the shape is drawn on, making sure to place the top and bottom of the oval on the centre line we got by drawing the blade side lines "around the corner" from top and bottom onto the back of the block.
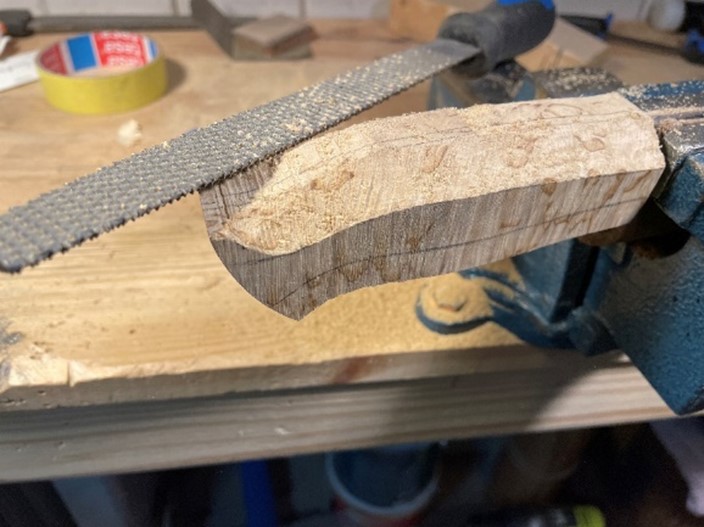
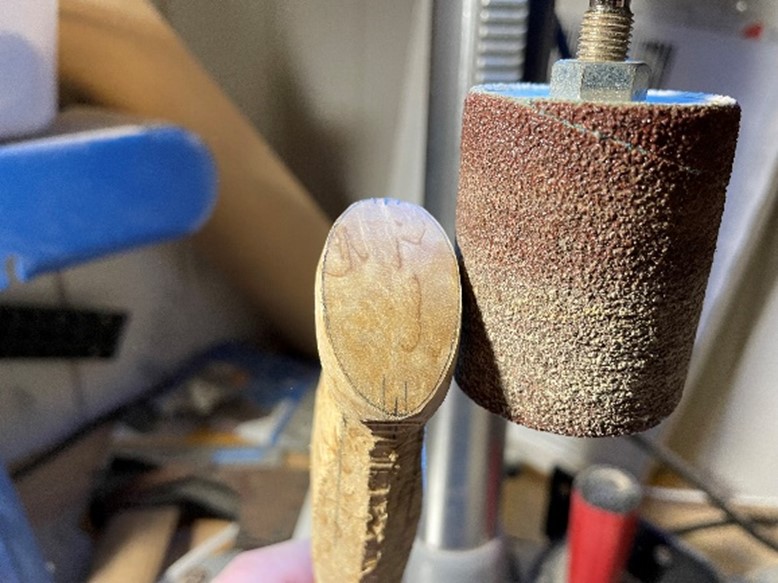
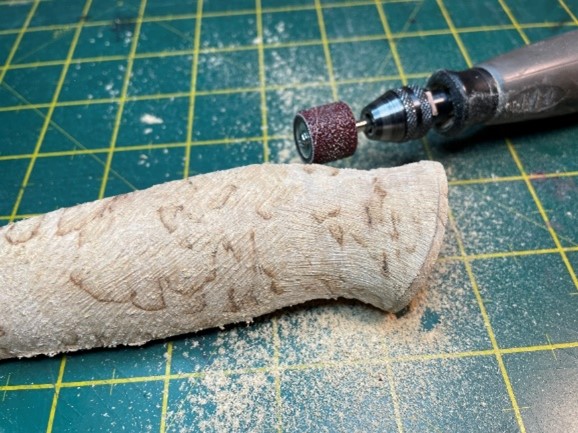
I am using a sanding drum on the drill press to rough shape the butt of the handle to the outside of the pencil line, then clamping the blade in a vice and filing to a more accurate, rounded shape.
We are now going to blend everything in and do the final shaping by rasp and file.
Note the pencil line drawn in on the flat sides of the handle, 5-6 mm from the end all the way around. When roundding and rasping to blend the handle shape, stay away from this last bit of the handle end.
The entire handle is being rounded and the flats are slowly blended into the sides. In the below photo you can see how coarse the rasp is, making quick work of removing material so it pays to go slow and keep comparing the sides for symmetry.
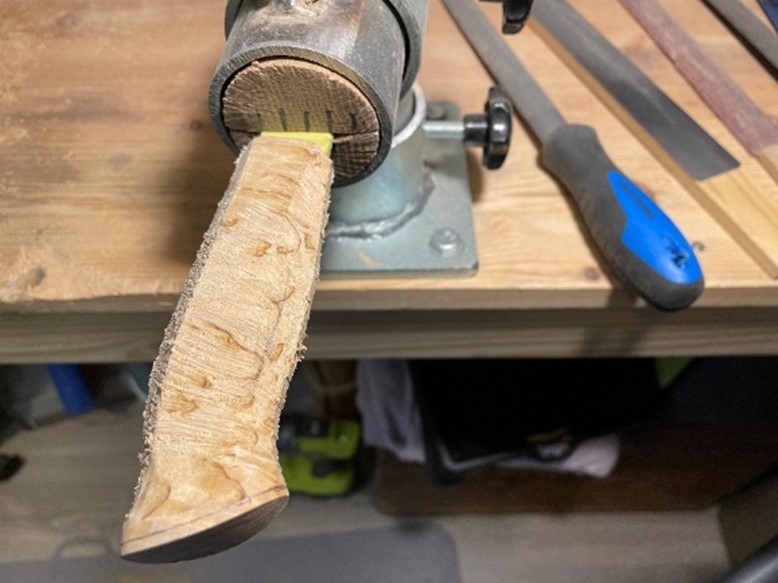
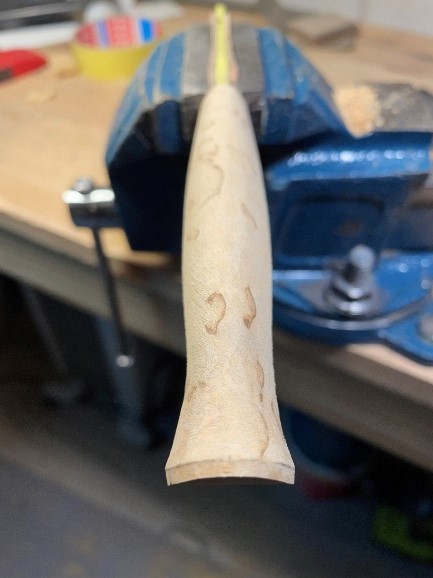
So far we have been careful not to take too much off the butt end of the handle. Now it is time to get the curved end to final shape. I am using a sanding drum on a dremel for this step, but a file would also work well. Hand tools give more control than a belt sander here, on the belt sander it can be easy to lose the back upturned corner of the handle.
The top of the handle is still too tall when seen from the side, so I draw on the line from the spine of the blade. Be careful that this line does not point up or down, but follows the blade spine. Drawing this line so it ends up too high at the end of the handle will leave the blade pointing a bit up rather than in-line with the handle.
The top of the handle is filed down to the pencil line on both sides, then rounded and blended in.
All sides of the handle is filed and smoothed out to remove the rasp marks, before hand sanding can begin.This helps create a well-rounded, comfortable handle that lies well in the hand.
Here I am hand sanding the handle, take care to remove all scratches. These show up as white faint lines, the white line is dust inside the scratch so keep sanding until they are all gone. I use sanding mesh pads from Abranet but abrasive paper will also work.

This is the handle in the final shape. Because the handle is in curly birch, I am dying it with wood stain to help bring the contrast of the grain out even more. To do this, I sand to 400 grit before the stain can be added.
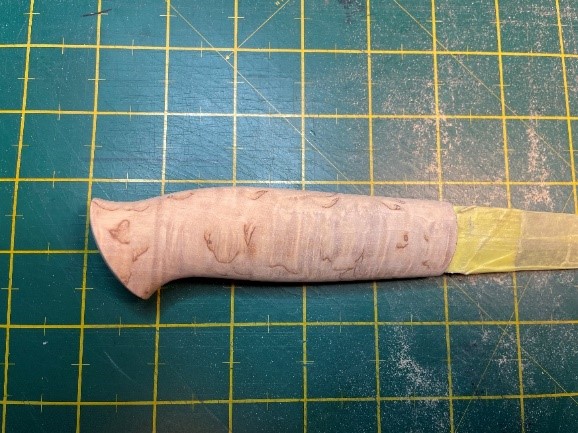
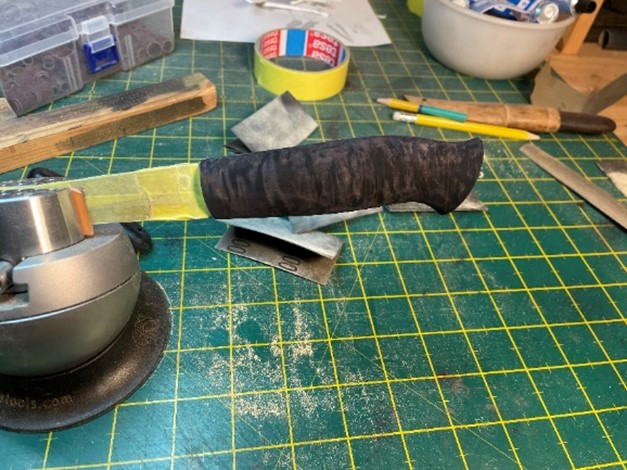
The entire handle has been stained with Herdins Black Ivory and left to dry.
(Editor's note: I bought some of these back in Norway a few years ago but is yet to try them out. I am unable to find what this product is called in English, or if sold outside of Norway and Finland. It is a wood stain powder that "consists of colouring pigments that dissolve in water and are absorbed into the wood". When mixing with water the maker can add water until achieving the desired darkness of the colour. A woodworker might know more here. In Australia I have used leather dye on curly birch with good results but not sure how this actually compares to the "beis")
The handle is sanded with 400 grit paper again to remove a lot of the stain, before being finished with 600 grit.
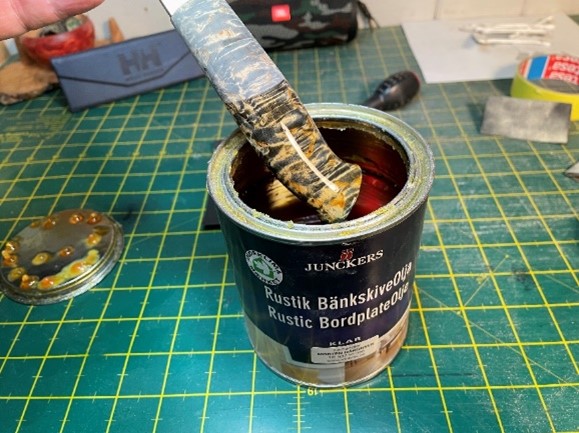
The handle is left to soak in oil for a couple of hours before excess oil is wiped off and the handle is left to dry for at least a couple of days.
(Editor's note: This is a hardening benchplate oil, the product description says it hardens within 3 days)
The knife is now completed, final polishing will not be done until after the sheath is ready.
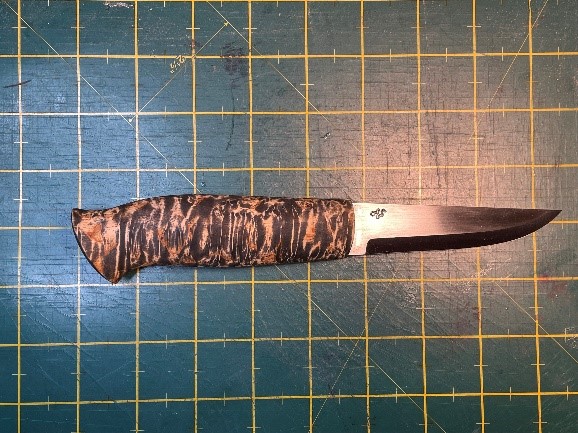
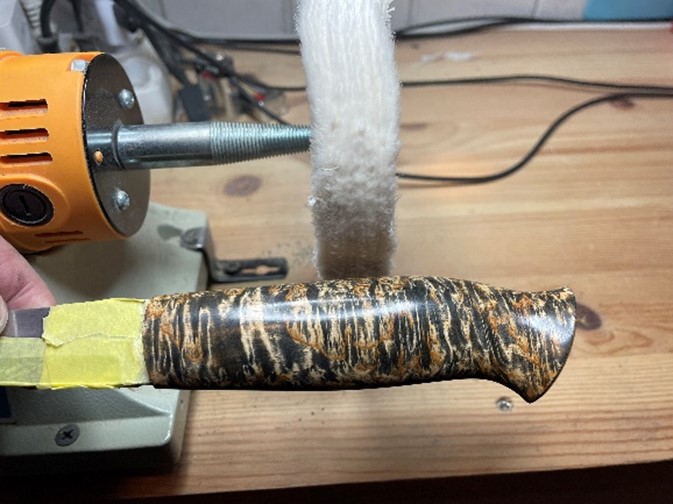
As the sheath part of this article will be a Part II, we are here jumping straight to the end where the handle is polished to a high, glossy finish. I am using Atol 6 to polish the handle.
Here is a photo showing the completed knife with the carved sheath we will make in Part II of the article.
There are many ways to make a knife, this is just how I do it. It does take quite a few hours and there are many steps along the way, but it is fun work and I enjoy doing it. Time passes fast when doing something I enjoy, and I am happy with the result.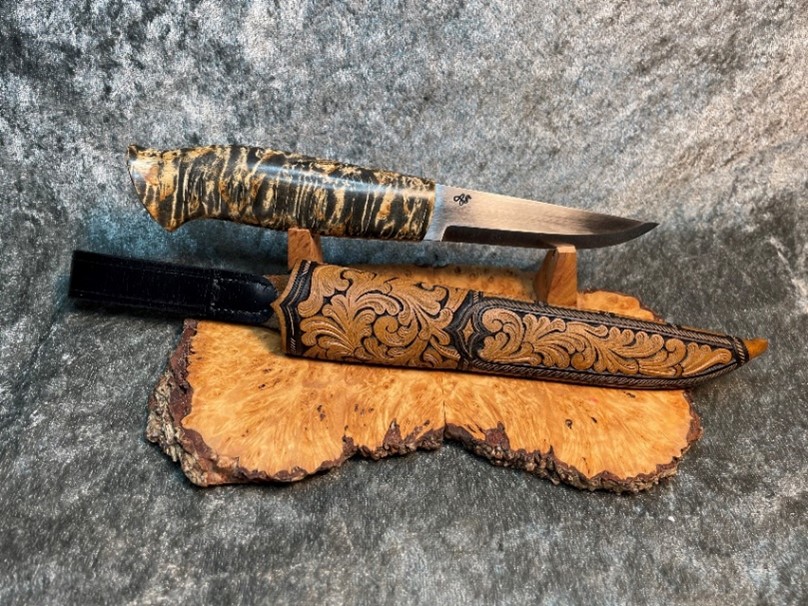
I hope this guide can be helpful, and that maybe someone got a tip or two to help them in their own knife making.
All the best,
Bjørn Svensson
Recent Posts
-

The Etch Test: Ferric vs Hydrochloric vs Gator Piss
The Etch Test: Three Very Different Looks From One Steel One of the great things about knife making …3rd Jan 2026 -

Why Bed The Tang In Epoxy - Then Knock it OFF Again.
What is "Bedding the tang"? Bedding the tang means gluing a stick-tang blade into the handle block i …21st Mar 2025 -

Marble Leather - How to Dip Dye Veg Tanned Leather
This was my first experiment with hydrodipping or dip dying leather, and it came out pretty cool! I …14th Mar 2025