Description
Bevel Jig for use with the Nordic Edge File Guides
Pro tool for consistent, repeatable results.
Bevel jig for experienced makers who already own the Nordic Edge file guides (fits v5-Short, v5, v6 and BigMert)
*Because this bevel jig is based on using a file guide, there is no stopper bolt supporting the blade spine. So if using the bevel jig without a file guide, clamp the blade securely to the bevel jig with 2 G-clamps or similar**
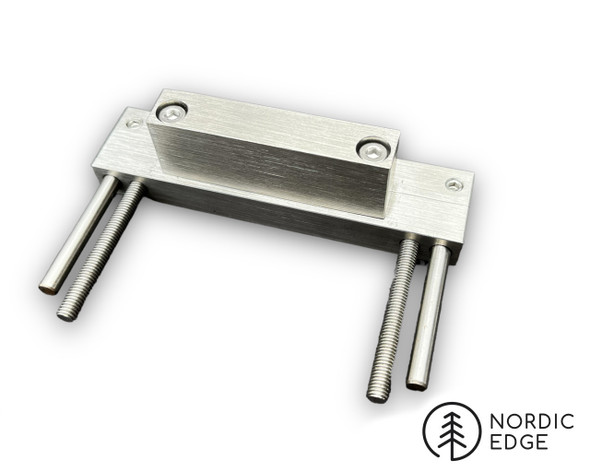
The Nordic Edge bevel jig is 150 mm wide with two slots for the Carbide Faced File Guide (NOT INCLUDED).
The bevel jig is:
- solid stainless steel construction
- non-magnetic, steel dust will not stick to it
- low-friction plastic bottom liner for smooth operation
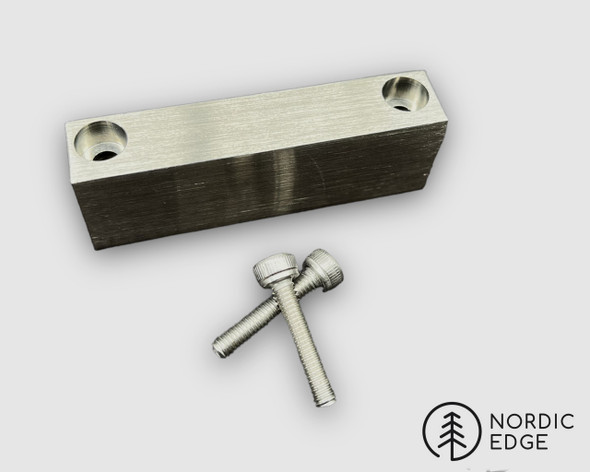
- stainless steel blade clamp for holding the tang to the jig
- Angle is freely adjustable by hand using two thumb nuts
Suggested process:
- Clamp the profiled blade to be ground blade in the File Guide (not included, this assumes you already own one)
- Insert the file guide in the slot in the bevel jig
- (taking care so the bolts stick in or out depending on what side of the grinder you are using. On a Shopmaster 2 x 48" for instance, the bolts have to stick in towards you when using the left side of the belt as on this side there is no room for them sticking out into the grinder)
- Clamp the profiled blade to the bevel jig, using the included clamp, tighten the 2 bolts using the included Allen key. The bolts are to be on inside, towards you and placed on the tang side of the blade.
- Adjust the blade in the file guide if necessary; cutting edge sticking 5 mm above the top of the jig.
- Make sure the blade is the first point to touch the belt from tip to file guide.
- The blade tip has to be either stick out past the bevel jig on the side or above the jig if grinding a very short blade, in order to not grind into the bevel jig itself.
- Adjust the angle of the bevel jig by moving the two knurled thumb nuts until you have the required angle. This will require some trial and error based on your grinder setup and the thickness of the blade.
- Start with a quite aggressive angle to break the corner and go towards the scribed centre-line on the blade, or to the outer line of scribing two lines and grinding pre-heat treat
- Adjust the angle of the bevel jig to progressively bring the grind line towards the spine, this is often faster than starting with a flat angle and having to chase the bevels side to side until they match. If starting with a low grind (bevel jig leaning forward towards the belt) and getting this even, you can adjust the angle back to bring the grind lines slowly down the blade.
- After having ground one side of the blade, loosen the bolts of the bracket and turn the file guide around. Do not touch the file guide bolts, you want the blade in the exact same position within the file guide, just flipped around in the bevel jig.
- Adjust the angle back up to a more aggressive forward-leaning angle to again break the corner and when you are comfortable with getting even grind lines, start adjusting the angle back up to lower the grind lines towards the spine.
Additional Suggestions:
- Grab both handles firmly and start with light passes until you get familiar with the speed and motion for this belt/blade/grinder setup
- Long, slow even passes is the way to go. Don't stop and look halfway through a stroke but complete even, light strokes and then dip in water if necessary, and inspect how you are going
- Start 5 cm from the file guide and lightly go towards the file guide then back out to the tip, taking care to not twisting the bevel jig as you touch the file guide to the belt, to avoid the 2" divot from where the other corner of the belt digs into the blade
- Experiment with your process for grinding the tip, do you prefer to draw straight off to the side or to come off the belt at an angle. This will impact the width of the bevel at the tip
- Do not grind "off the tip" as in draw the entire blade off the belt. Rather when the tip of the blade is at the centre of the grinding belt, either pull the bevel jig straight towards you, or away in a semi-circle. (this is to avoid grinding too much off the tip)
- Grind one side of the blade first, then flip it over and do it again. If comfortable, you can leave the angle of the bevel jig as-is and they "should" match up evenly but the safest bet is often to adjust the angle back to start again and slowly bring the bevel line down towards the spine.
- A set of digital calipers and a sharpie are good tools at this critical step, measuring the bevel on each side and marking the blade side with a sharpie before doing a light scratch with the calipers so you have a light line to grind towards when doing quick checks in between cooling the blade.
- The small text:
The included clamp is for full-tang tang blades but will work with stick tang blades if not tightened too tightly. Usually this is not required but if wanting a stronger grip, use a small G-clamp instead.
The file guide shown in some of the photos is not included, neither is the blade. They are there to show how the tool is used.
14 Reviews
-
Bevel jig.
Well constructed, very solid, easy to use.
-
Bevel jig
Beautifully crafted, comes in a nice storage box with easy to follow instructions. Holds the blade firmly and easy to adjust the angle when working. Love your work guys.
-
Grinding made easy
Great piece of equipment. Just need to keep an eye on the nuts on the angle adjustment. Can come loose. Very happy with this jig despite this small problem. Keep up the good work.
-
Bevil perfection
So easy to use and very well made! Makes knife making much easier for a novice!
-
Great product
I haven't had the experience of using this yet but I can say the build quality is top notch. Length is not that great for working with longer knives.
-
Bevel Jig for use with file guide
Beautiful build quality,very simple to set up and use.
-
Essential for all knife makers!
I bought this a few months ago but couldn't really use it as I didn't have a grinder yet! Used it today with a 2x72 and it worked perfectly. The only issue I had was the provided clamp was not sufficient to hold my blank, but it was a large knife, and you can use the holes in the jig to put stoppers to secure the knife properly. It would be really cool to see an angle scale incorporated into a later design, for smiths who need specific angles, but for me I just go by what looks cool! Well done!
-
Bevel Jig V2
Another well designed/made product from Nordic Edge. This version is much improved form the previous one in that the blade can be fixed at either side of the jig. The hinges are also improved with zero play.
-
The Best product
Thanks guys !!!
-
Excellent product!
Excellent product!


