2022 Towns Bowie Buildoff Challenge: Pirate Bowie
By Bjorn Jacobsen, 29.11.2022
Sam Towns is again holding the #townsbowiebuildoff challenge. The makers taking part has 2 months to complete a big bowie knife in either beginner or "open" category. Sam is a fulltime blacksmith and knifemaker in Western Australia, and co-host of the Forgecast podcast together with Alex Norton.
Towns Bowie Buildoff
The full story on Youtube with intro and rules for 2022 is here:
In summary the bowie has to have:
- Blade longer than 8" (200 mm)
- Clip or false edge on top, at least 1/3 of blade length
- A guard with both a top and bottom quillon (bar sticking out)
- A metal covering of part of the spine of the blade
The "beginner" category is for makers who have been at it less than 2 years, the criteria are the same except the need for the metal cover on the spine.
Second bowie ever
I have only ever made a single bowie before, at the KAA Masterclass with Jackson Rumble. Now that is a pretty amazing way to make your first bowie though, super happy with what I made in 4 days under the friendly and helpful tutoring of Jackson. Another bonus from the masterclass was that Jackson gave us all templates for 2 of his blade styles, handle with and without guard as well as the cross-section of the butt.
So pretty excited about trying to make a bowie on my own and entering the #townsbowiebuildoff !
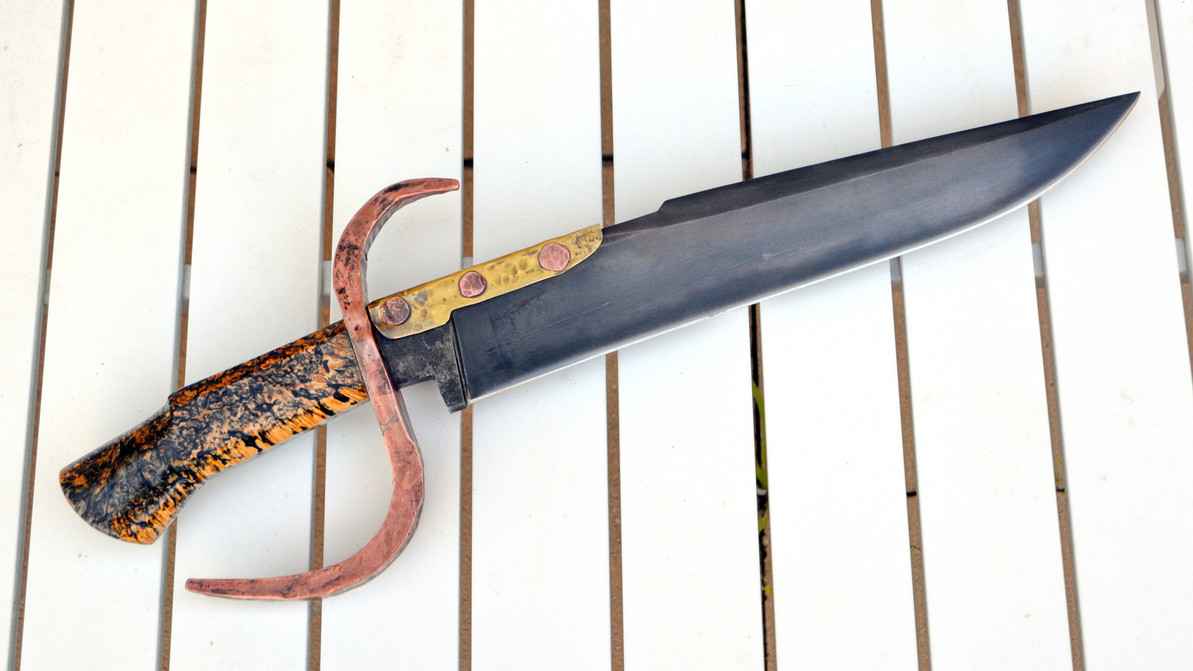
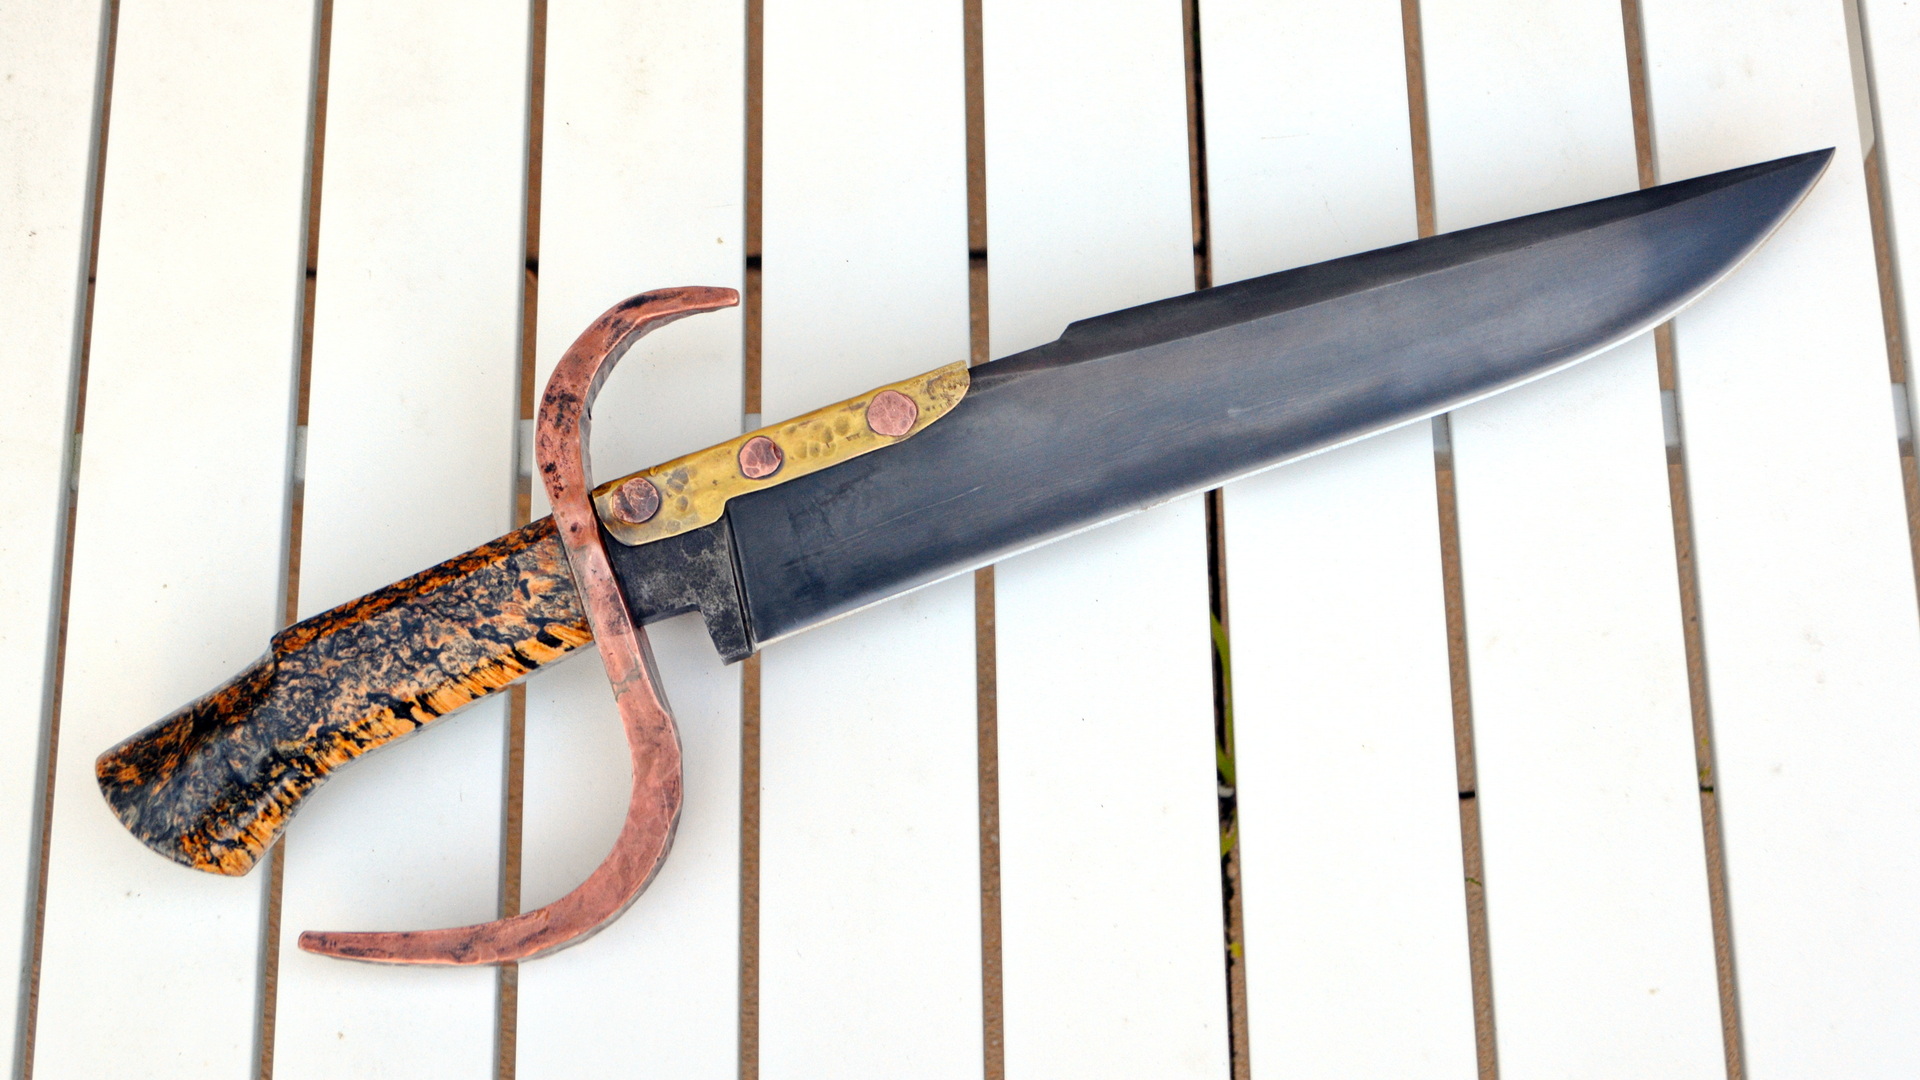
To start with the result; this is where I ended up..
Pirate Bowie:
- 10 mm thick 1084 high carbon steel
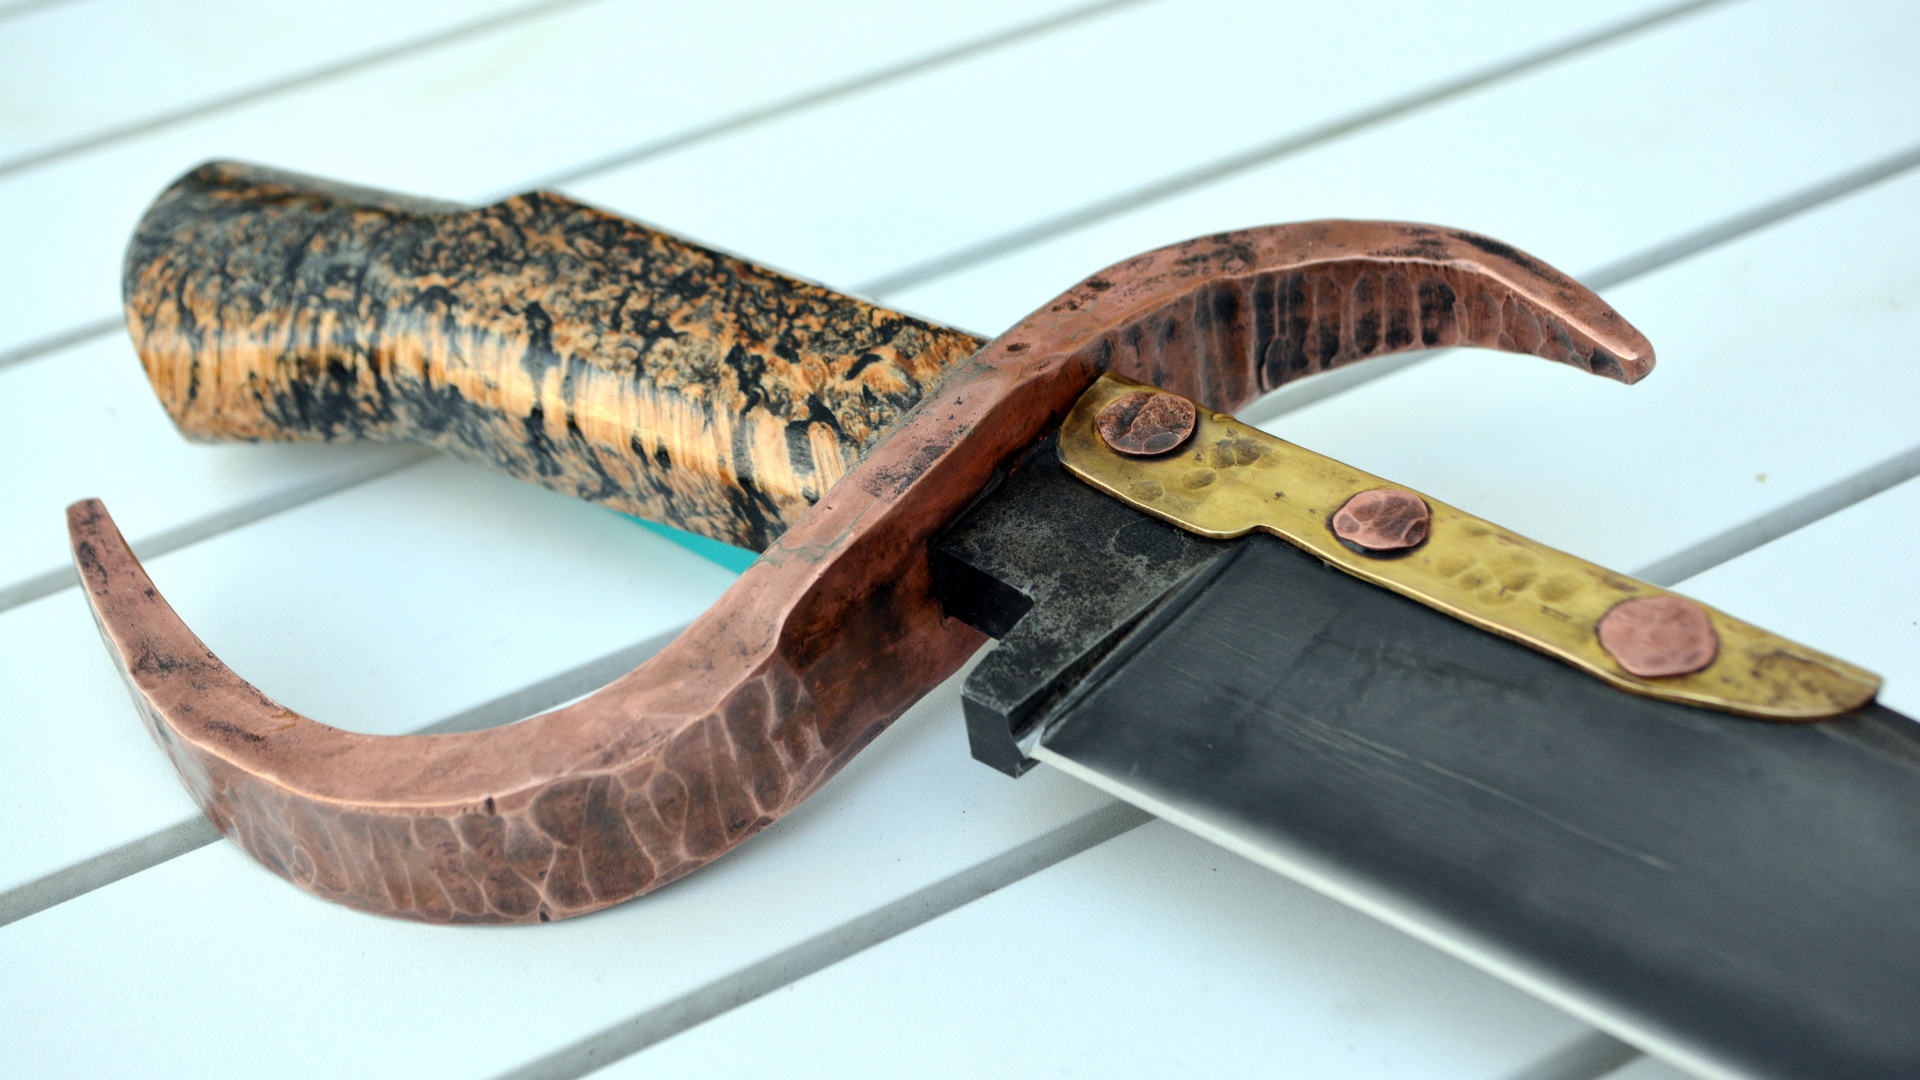
- Forged S guard in copper
- Sparring bar in brass, pinned on with copper pins
- Maple burl handle, stained with black wood stain
- Blade 300 mm long with non-sharp clip on top, etched in ferric chloride
- Forge scale left on spine and ricasso
- Blade and handle based on templates from Jackson Rumble so anything good is his design, anything out of proportions is me making the blade longer and the handle a bit narrower, and my lower skill level.
In hindsight I think the guard and spine cover were a bit too much.. Would have looked cleaner with a smaller guard in steel or brass than half a kg of forged copper. But I went all-out here, in a pirate steampunk-bowie kind of way :)
Here is how it came together: WIP Photos
This project started with a piece of 10 mm thick 1084, drawing on Jackson's template and extending the blade a little to fill the piece of steel.
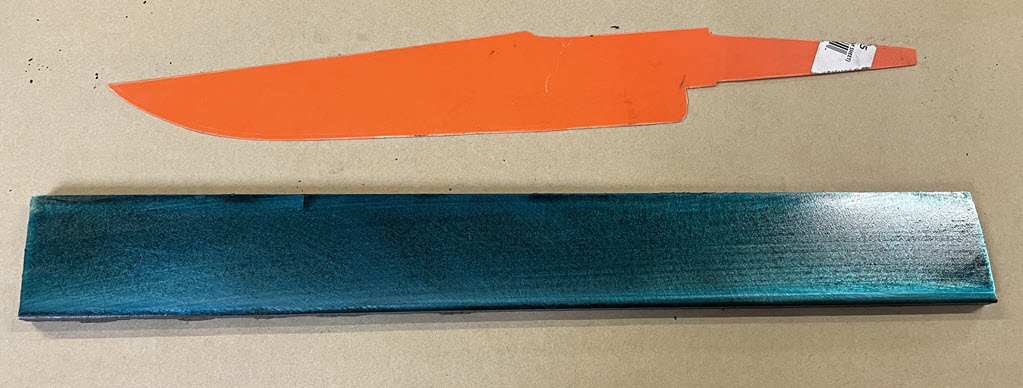
Profiling 10 mm steel is a bit of work! Good ceramic VSM belts in 36 grit helps, but man does the sparks fly when pushing this stuff into the belt.
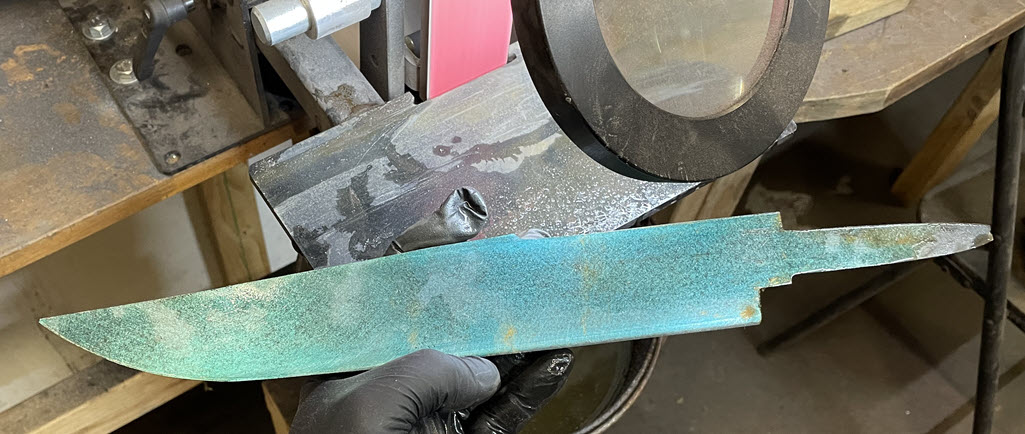
In the below photo I have ground in the bevel and clip on top, completely leaving the ricasso area and the spine alone.
Blade is now ready for heat treatment, except drilling holes for the spine covering.
With the long clip there is not that much space left, so opted for a short 80 mm spine cover, drilling 3 x 3/16" holes at 10, 40 and 70 mm from the end of the ricasso.
Now onto the guard!
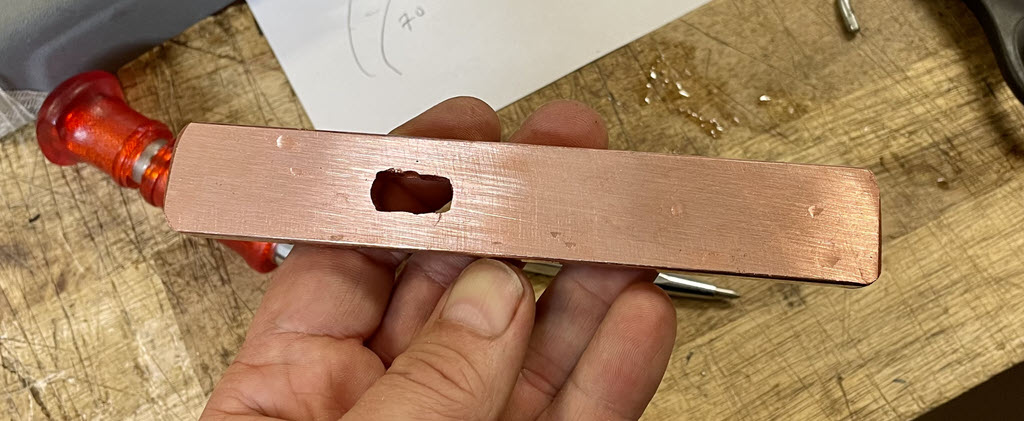
One amazingly easier thing about making such a massively thick blade, is that the hole in the guard is much easier to deal with. Compared to making chef knives, you can almost stick your entire hand in there to file out any stubborn corner. Or at least, so it felt getting the copper guard block ready. Started with a 150 mm piece, thinking 50 from center of hole to the "qullion" or bar sticking out on the spine side and 100 mm on the edge side.
Having first placed my file guide at the shoulders of the blade so the tang points up past the carbide strips, I ground the shoulders square, as well as tapered the tang a bit. This is off-script from what we learned from Jackson Rumble, more like how I normally make chef knives. The tapered tang is visible in some of the photos further down.
This means that the hole in the copper bar does not need to be as accurate as if the tang is full width, the tang is 8 mm wide and the blade at the ricasso is 9.6 mm or so still, making the tang to blade fit-up a quick and easy job.
Forging the guard:
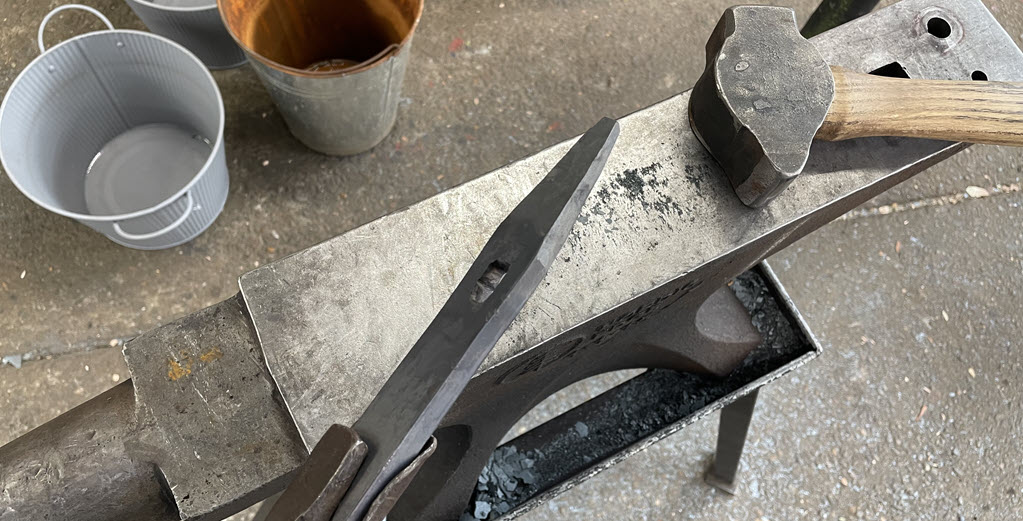
Leaving the forge set at 950 C to make sure I did not melt the copper and make a mess of the whole thing, I tapered the ends to make them longer. Then peened the top side for a rustic (Pirate?) look, and bent it over the horn of the anvil. Before bending the guard into the final S-shape, I hit it down onto the tang to make sure any distortion was removed in the tang hole. The blade was held in a vice in a thick piece of leather to not scratch it, tang sticking up. The hot guard placed down over the tang as far as it went which was all the way minus maybe 10 mm, then I used a squashed piece of RHS tubing over the tang and hit it down onto the tang until it fit perfectly again.
This left some big ugly marks under the guard, but hey they are pirate bowie marks!
Cleaning up the guard with scotch brite belts
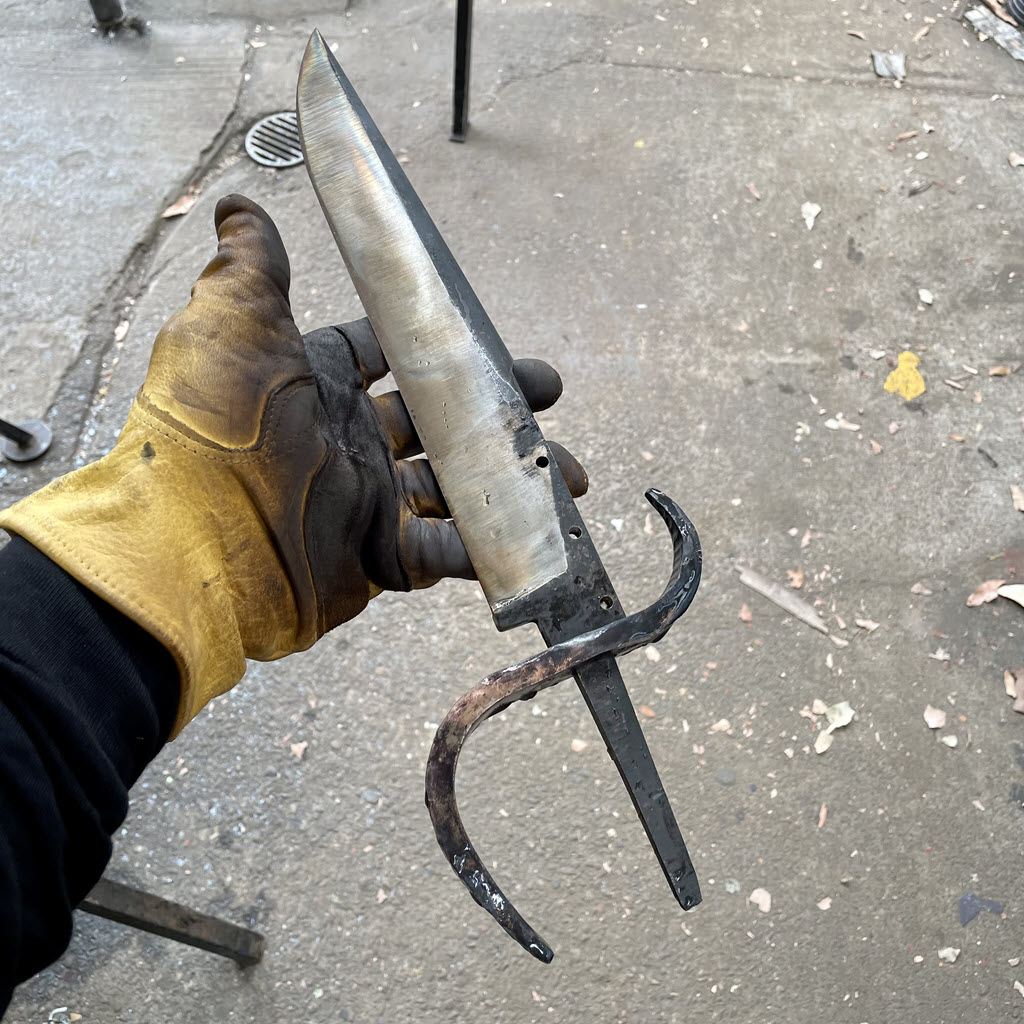
Here is the guard on the blade, you can see the forge scale is coming off a bit. Next time I might leave this rather than remove most of it with a fine scotch brite belt, I cleaned it up a bit much.Trying to patina the guard in gun blue did not go quite to plan, neither did ferric chloride. It left a pinkish colour with some patina on it. Taking more time on this step would probably have given a better result here.
Spine covering or "sparring bar"
Another first for me, not sure if this is a great way to do it or not, but it worked.
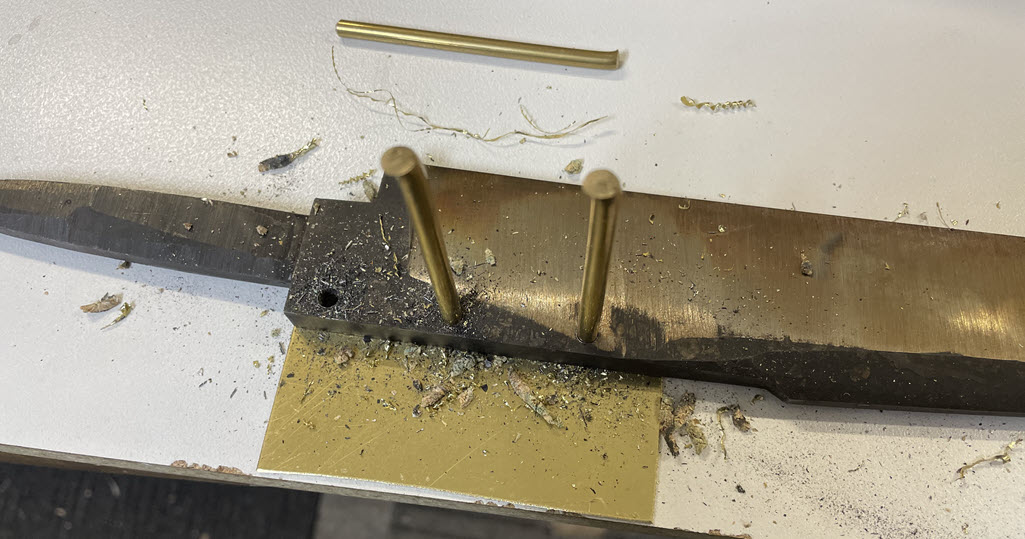
Drilling 3 holes in the blade and then placing a pice of 1 mm brass underneath, drilling through the blade holes into the brass sheet. After the first hole in the brass I put a 3/16" brass pin in to stop it moving while drilling the second hole, then put a pin in there.
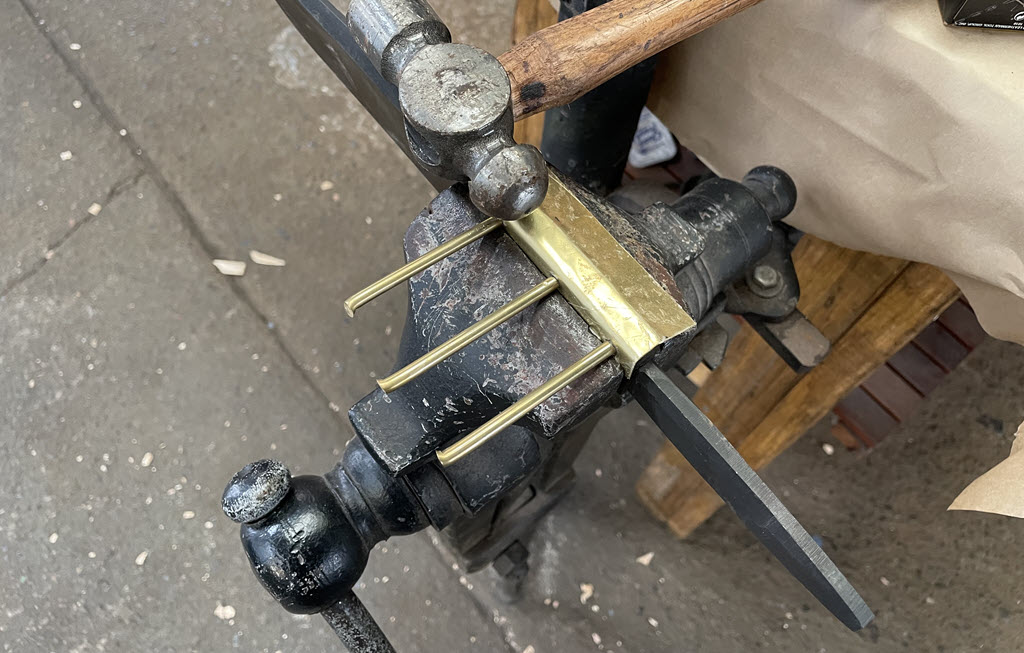
To get the brass sheet over the spine, I clamped the brass and blade in a leg vice. Then just whacked it until it gave in, folding over the spine of the blade and back around. When I had a U channel of brass, removing it from the blade was easy enough. Before grinding it to shape on the Shopmate grinder so it follows the plunge line and very handily covers the massive grinding mess-up on one side of the blade visible in the above photo.
Heat treatment and Hand sanding
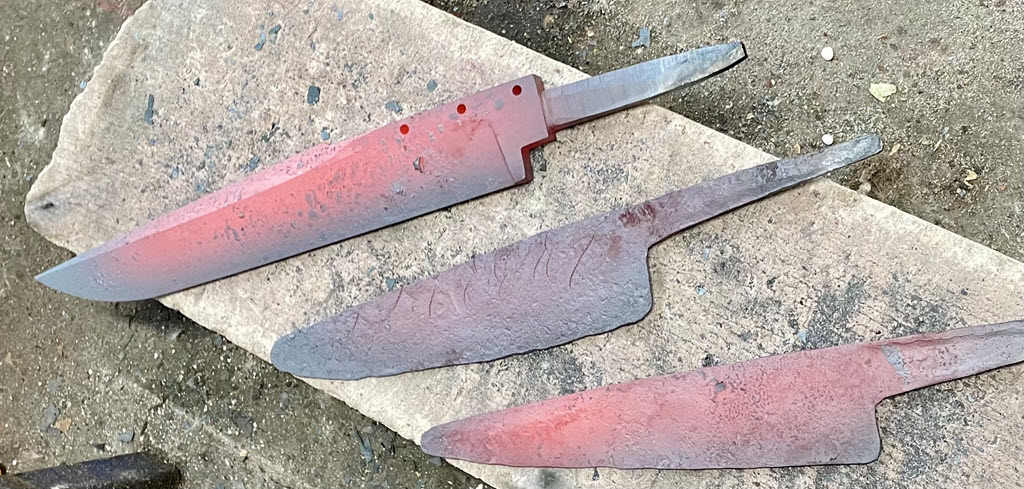
So all parts of the blade are now ready, and the blade could be heat treated, ground to final edge thickness and hand sanded. Here you can also see the tang is ground with a file guide for better guard fit-up.

Handle material selection
For the handle material I went through my bag of goodies (don't we all have that bag?) until I found a stunning piece of what I think is maple burl. Not 100% sure, and cannot remember where I got it from. Usually I write on everything going into my Bag of Goodies what it is, but this one has no note and to be honest I cannot even remember putting it in there. Maybe the handle material fairies had enough of all the CB talk and decided enough was enough.
The handle block looked amazing in it's natural colour, but already having gone crazily overboard in a pirate-stempunky kind of way with the massive copper guard and knowing about the brass spine cover about to go back on the blade, natural just did not seem to cut it!
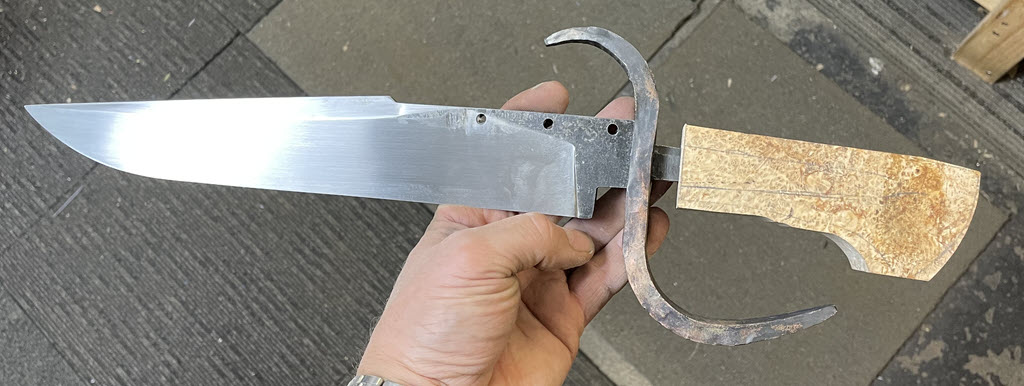
Reading about the Norwegian knife Bjorn Svensson made (LINK), I remembered buying 3 bags of this powdered wood stain back in Norway 5+ years ago and went digging around for them. The black / Ebony bag had leaked into the ziplock bag they were stored in, how handy!
Tipping the leaked powder into a cut-off water bottle and adding water until it seemed thin enough to paint on, I decided to do a test piece before going ahead. (who said we don't eventually all grow up eh?)
Process for staining wood for added character
Sanding two sides of the test piece left over from cutting off the handle block from the piece of wood, then brushing on a couple of good coats of the black stain and letting it dry. I sanded with 180 and 320 grit paper before adding the stain.
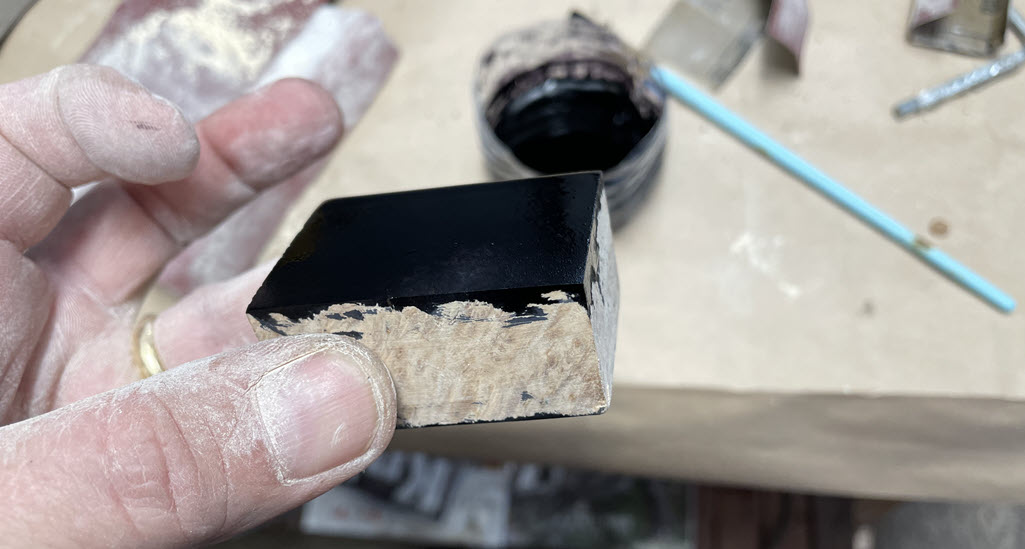
After the stain had dried, I sanded one side with 320 again, then 600, 1000 and 1500. The other side only with 600, 1000 and 1500 grit rhynowet.
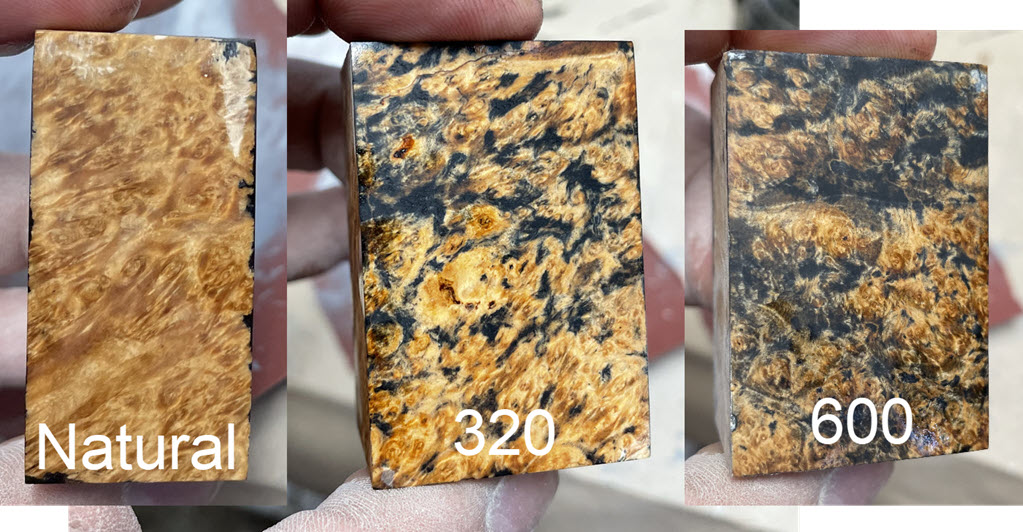
Here are the 3 test sides:
- Left: Natural, no stain, just added some oil to make it shine (forgot to sand this side so unsure of finish level)
- Middle: Black stain, then back on 320 > 600 > 1000 > 1500 grit
- Right: Black stain, then onto 600 > 1000 > 1500 grit
I thought for a pirate kind of look the dark one was nicest, so decided to sand to 320 grit, stain the handle and then move straight onto 600 grit paper.
Would be interesting to do another experiment to see if finishing to 600 grit or even 1000 grit before adding the stain would leave very different results.
Staining the handle
Here the handle is stained with the black wood stain and left to dry.
I have done this several times with leather dye on other handles, and always get a moment of "oops, did I add way too much?" before it starts to come off again. This process only works well on burl, curly birch and other woods with lots of twisted grains. As the grains going into the material retains the stain as you sand the surface layer.
A uniform plane wood will mostly just be sanded back to naked grains, not leaving much stain or effect from this process.
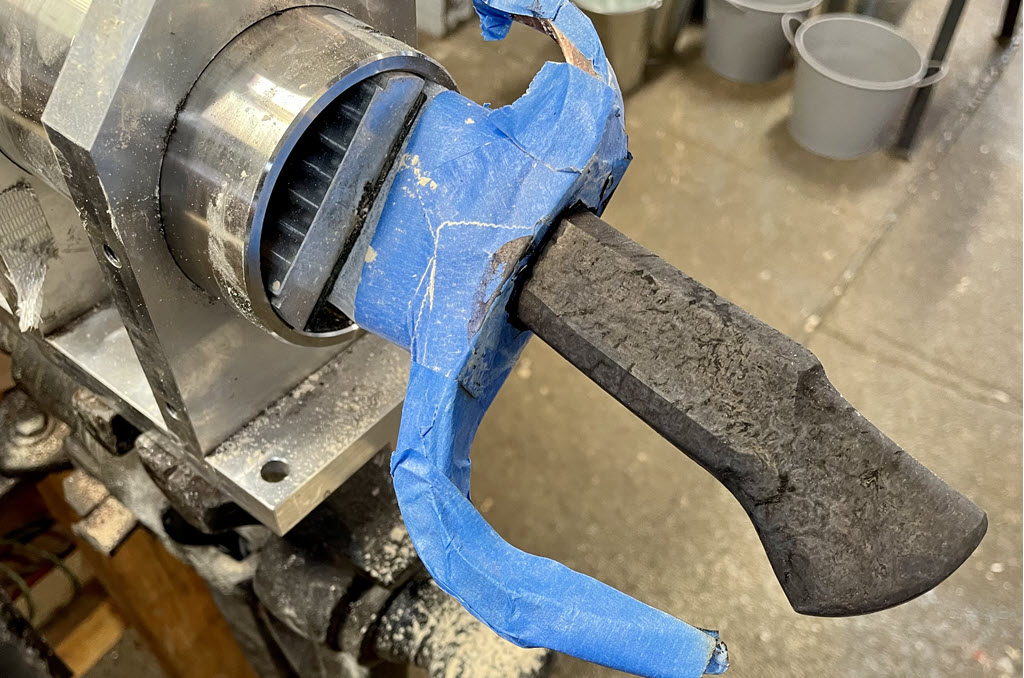
Hand sanding again
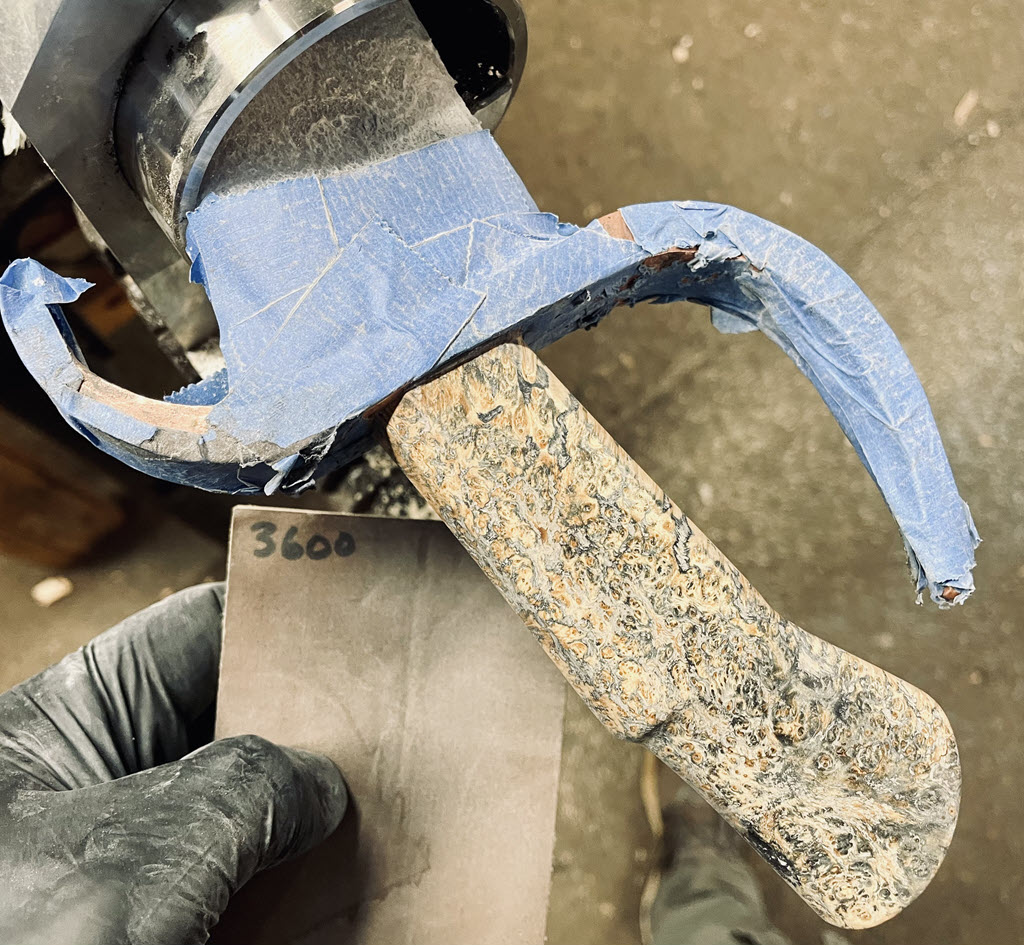
Sanding with 600 grit paper, lots of the black is left behind still.The paper gunks up quickly, and again a lesson for another time might be to keep going longer than I did before changing to 1000 grit (?). Or even do some 320 grit paper again to remove more of the black before moving on to 600 grit.
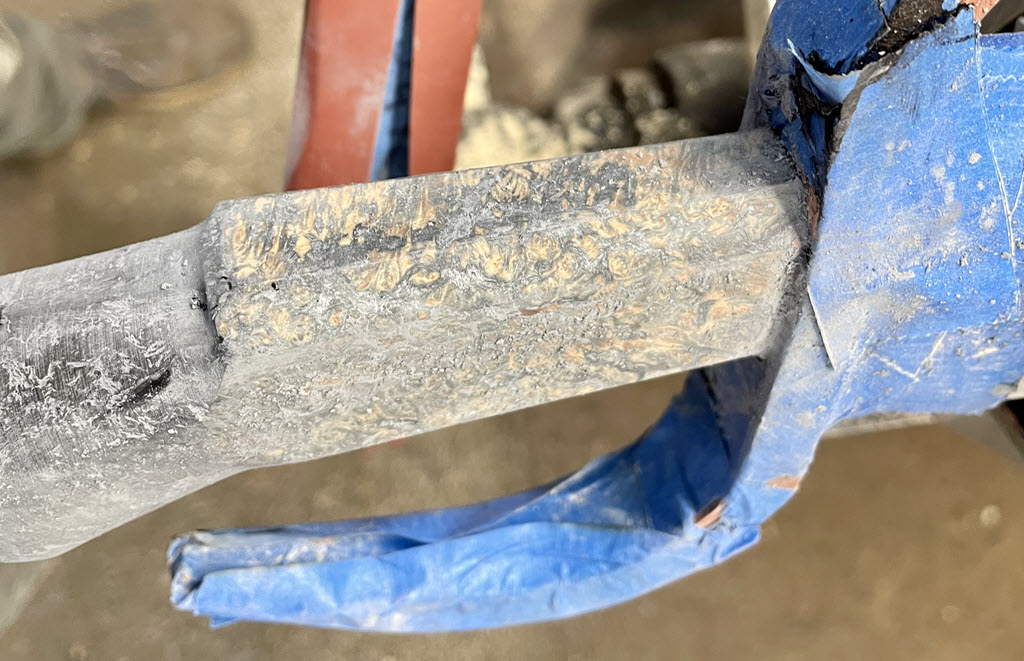
Micromesh polishing pads
After sanding with 600, 1000 and 1500 grit rhynowet red line paper, I got the old micromesh kit out.
These are soft sanding pads in a different grading system, going from 1500 to 12,000 "grits".
As the handle is already sanded, it only takes a couple of minutes to go through all the micro-mesh pads and it really makes a difference. The handle takes on a much higher shine than from just the 1500 grit.
Well worth the extra effort
This is my favourite part of knife making; the final shaping of the handle and seeing the grains come to life at high grit. I used a pice of micarta as hard backing, cutting small pieces of rhynowet and doing all the bevels of the front part of the handle. Four flat sections and bevels on all corners, trying to make sure I did not blend them all together.
Then shoeshining the back section of the handle, adding some masking tape to the back of the abrasive paper to make it strong enough to not tear while grabbing the ends and "shoe shining" back and forth. This really evens out the handle shape, making it more symmetrical and removes any bumps or notches on the outside of the handle.
Watch out for scratches, these show up as white lines (dust inside a scratch) and as the grits become higher, the contrast between the sanded wood and the scratch becomes higher - the scratch shows up more and more. Often it is better to just go back to a coarser grit, get rid of the scratch and come up to the higher grits again.
Timewise, these last few grits take very little part of the overall project but make a big difference in my opinion. If you normally only do say 320 or 400 grit paper on a wooden handle - next time go to 1500 grit and see what a difference it makes. Even plain timbers end up much nicer at a higher grit, I think.
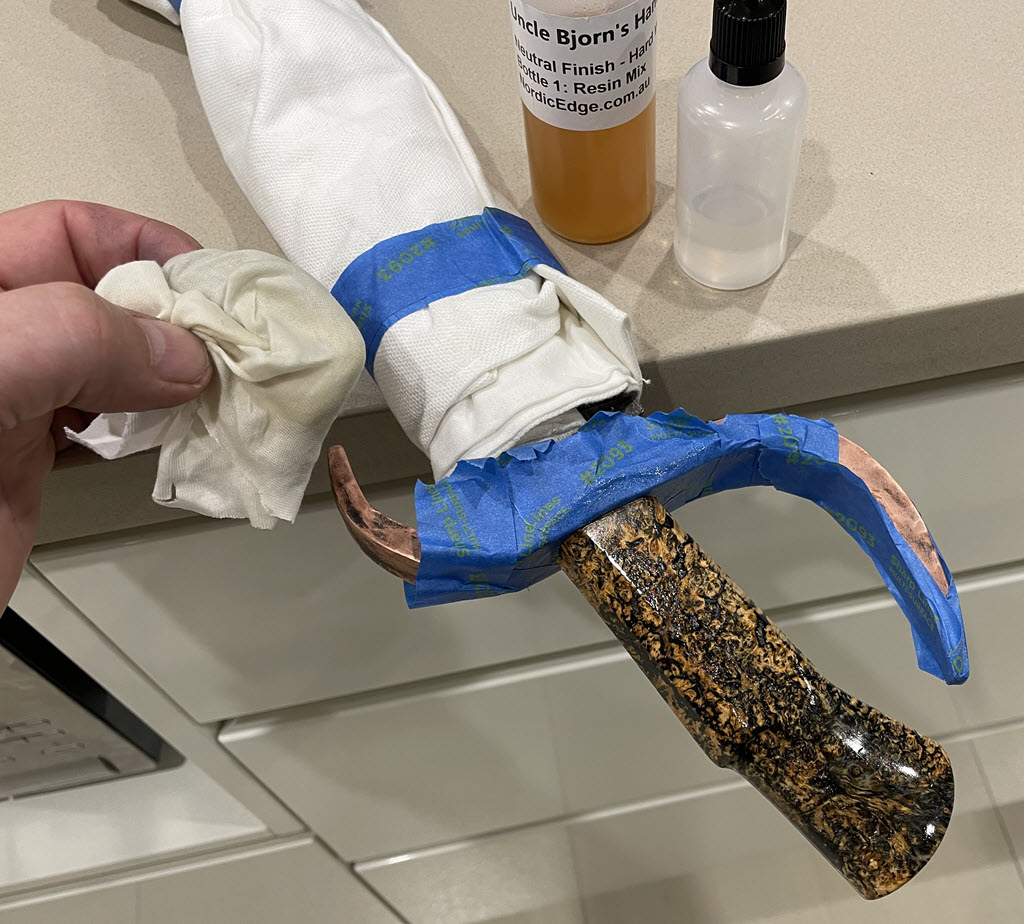
Handle finish: UBHF
In the below photo the first coat of Uncle Bjorn's Handle Finish has been added.
First I give it a good wet coating of bottle 1, the actual handle finish mix. Leaving it to dry 20 mins before repeating this step. On this handle I did it 3 times as a porefiller as the surface was very rough, usually 2 coats is enough.
Then after porefilling and when dry, I feel the handle for any bumps from handle finish drying into a lump on the handle. The layers of pore filling are left wet and not rubbed very much, so if using too much you might get a lump that needs to VERY GENTLY be sanded with some fine sand paper (600 grit).
Sanding too hard here will mess up hours of hand sanding so we are talking barely touching the handle with the paper and only if required. It is easy to go through the handle finish and into the wood so the sanding is optional, and very, very gentle to only remove high spots in the handle finish if they are there.
Then I polished the handle, a good 7 layers on this one:
Squirt a good dose of Bottle 1 and then add a single drop of bottle 2 which is just a lubricant oil to stop the handle mix evaporating too quickly. And rub, rub, rub for at least a minute until the finish starts to dry and the cotton fabric starts to stick. Then just go on with light pressure and keep rubbing for a while to get an even, shiny surface.
Leave the handle overhanging to airdry without touching anything for 5 mins before going again, and again and again until happy and then another coat or two.
The polishing layers are so thin they only need 5 mins to dry, the whole process only takes an hour or something.
Leave the handle to air dry without handling it for at least 24 hours.
Once I put a knife in a padded case after a night of drying and the inside of the padded case stuck to the handle finish so I now leave it for a couple of days to be sure it has dried.
It is dry to touch within 5 mins of the last coat going on if needing to move it, but I always try to not handle it until at least overnight.
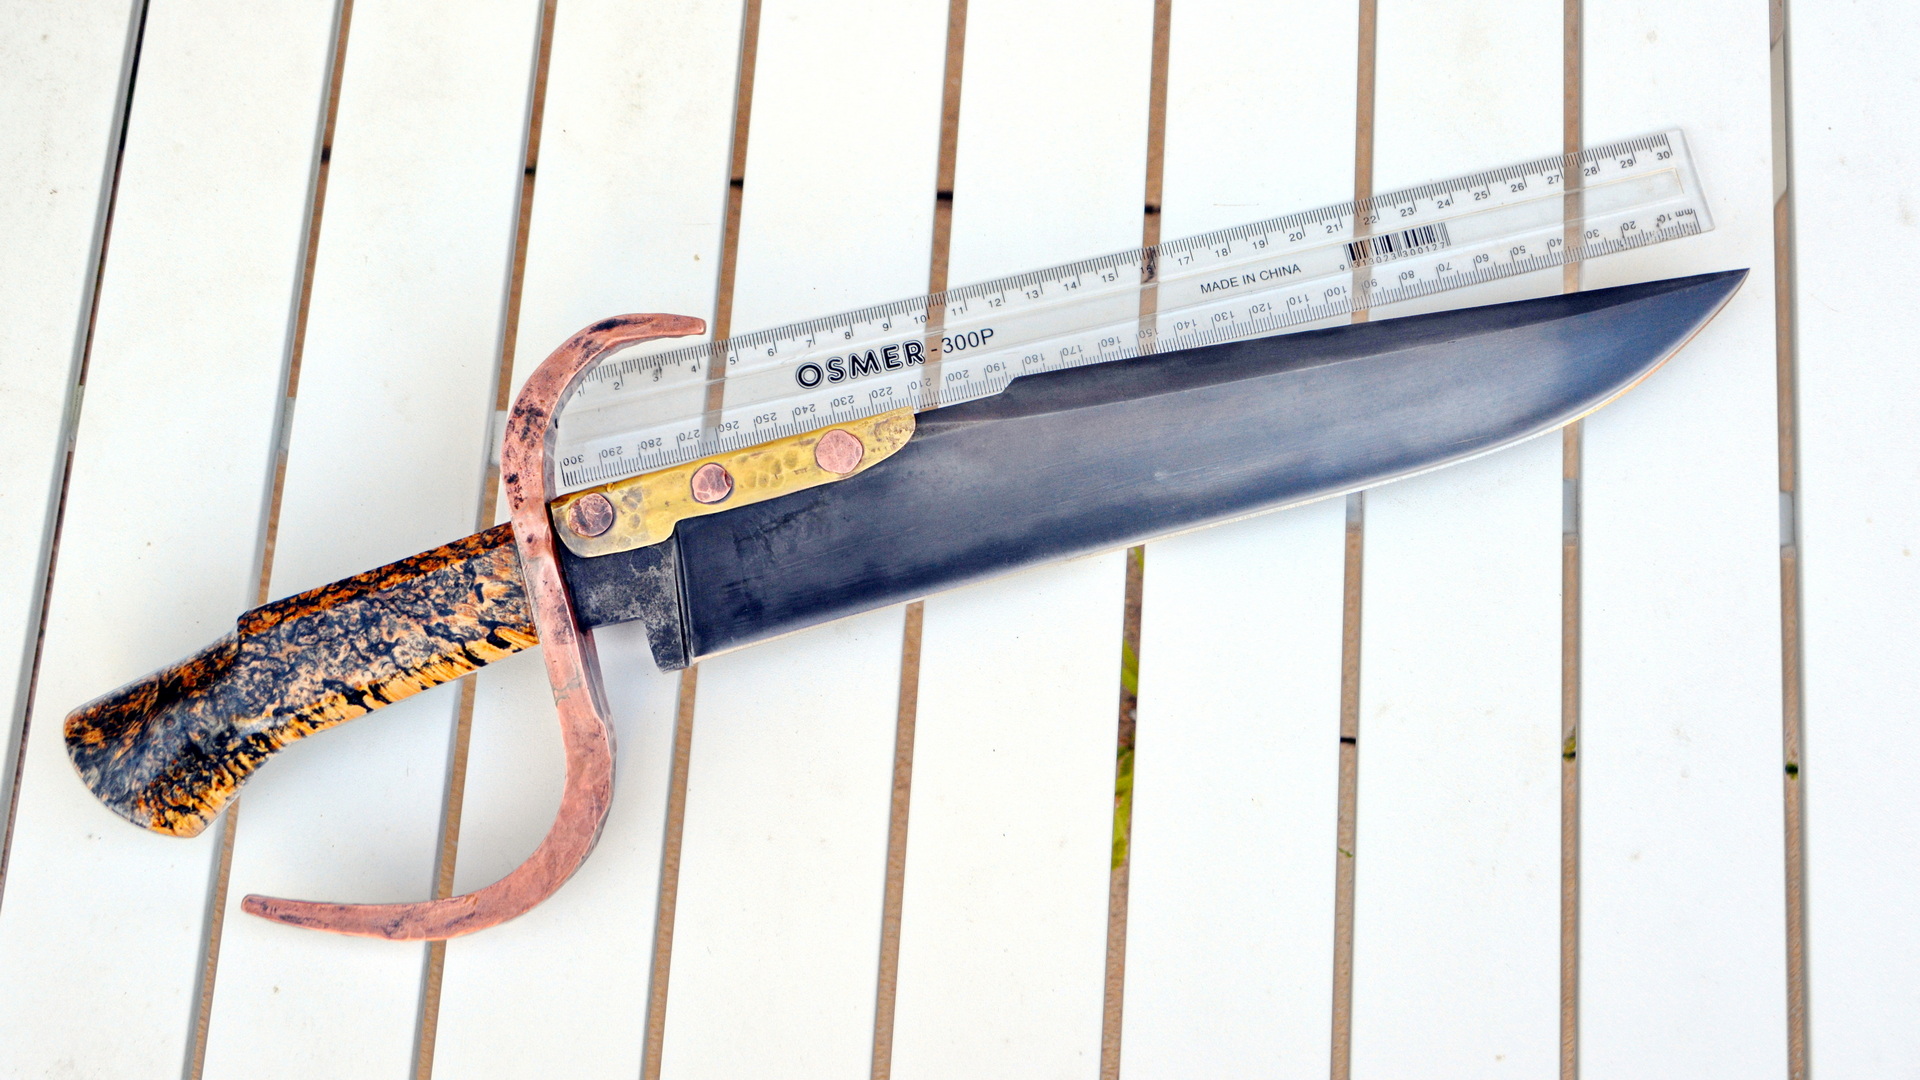
And there we are, one Pirate Bowie later!
It was a fun project, thank you to Sam Towns for the #townsbowiebuildoff
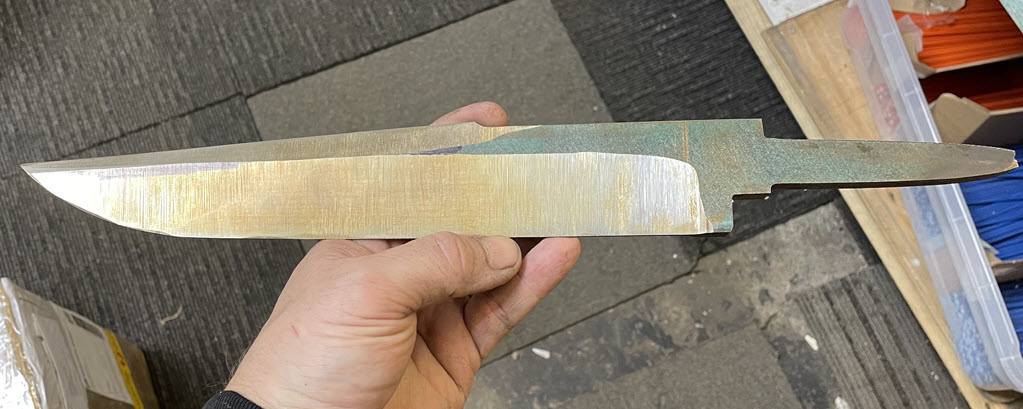
Here showing a 300 mm ruler along the blade to show we well and truly hit the blade requirement!
The blade was etched very quickly in ferric chloride to keep with the rough finish, I really like how the quick etch brought out a quench line. Almost hamon like from just a quick dip and neutralising with windex, before rinsing with lots of running water and rubbing hard with paper towels and sealing with some Nordic Wood Wax to protect the blade, guard and spine covering.
Recent Posts
-
The Etch Test: Ferric vs Hydrochloric vs Gator Piss
The Etch Test: Three Very Different Looks From One Steel One of the great things about knife making …3rd Jan 2026 -
Why Bed The Tang In Epoxy - Then Knock it OFF Again.
What is "Bedding the tang"? Bedding the tang means gluing a stick-tang blade into the handle block i …21st Mar 2025 -
Marble Leather - How to Dip Dye Veg Tanned Leather
This was my first experiment with hydrodipping or dip dying leather, and it came out pretty cool! I …14th Mar 2025

