
Building a French Laguiole Folding Knife: Instructions
Instructions for Laguiole French Folding Knife Kit
- Tools used:
- Ball Peen Hammer
- Small Phillips screwdriver
- Bench vice
- Files and/or dremel
- Sandpaper
- Laguiole French Folder kit http://creativeman.com.au/laguiole-french-folder-kit-with-handle-scales/
- Optional: oil to seal handle scales
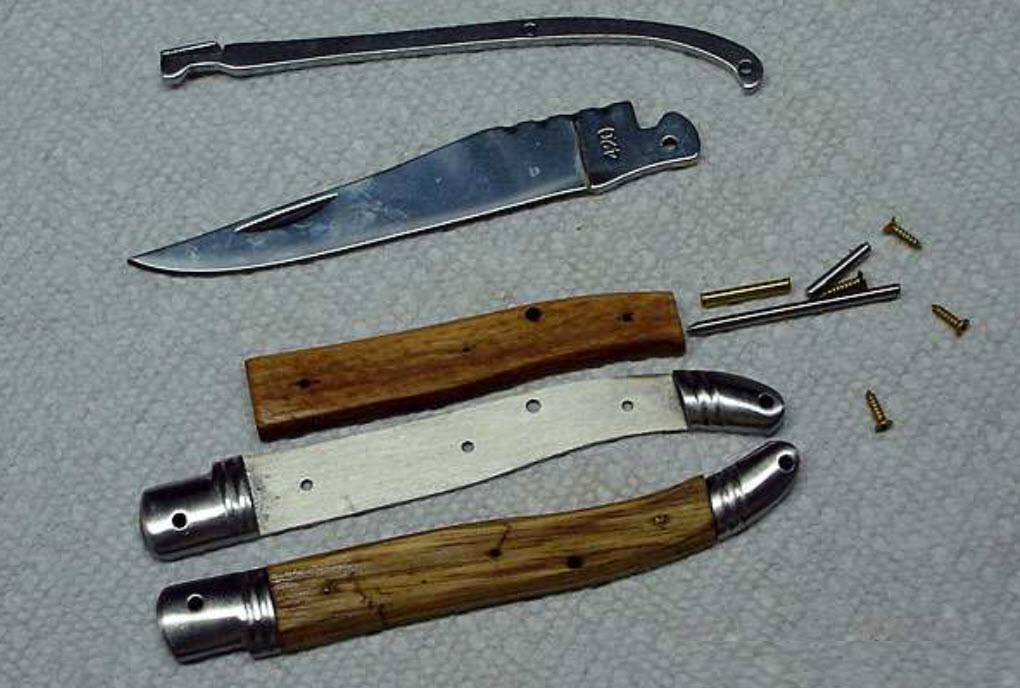
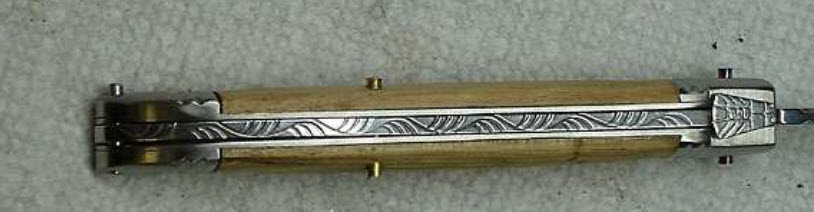
Showing the components from the kit: backspring, blade, teak handle scales, steel handle liners and brass/steel fittings.
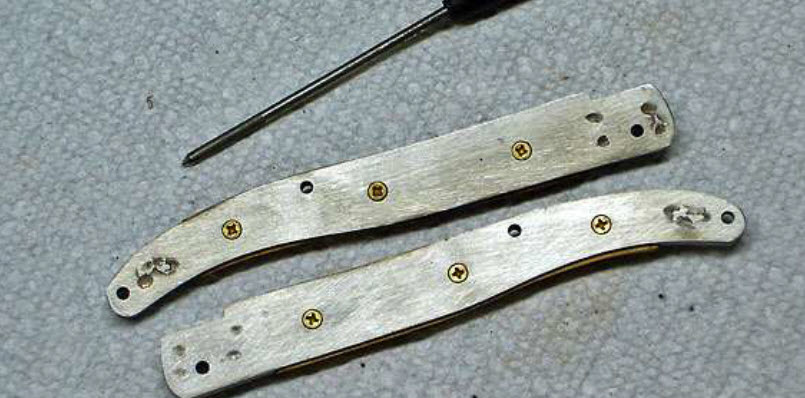
Screw the brass screws from the inside of the steel liners into the wooden handle scales and then file off the screw ends sticking through the wood. File the wood scales to fit the steel liners, they are slightly oversized.
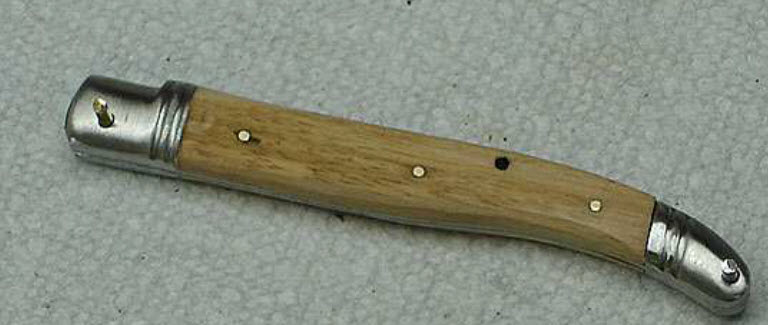
Insert the backspring and the rear bolster pin. In the photo, the front pin is added as well to help hold things together. This is removed in a later step to get the blade in and is optional at this step.

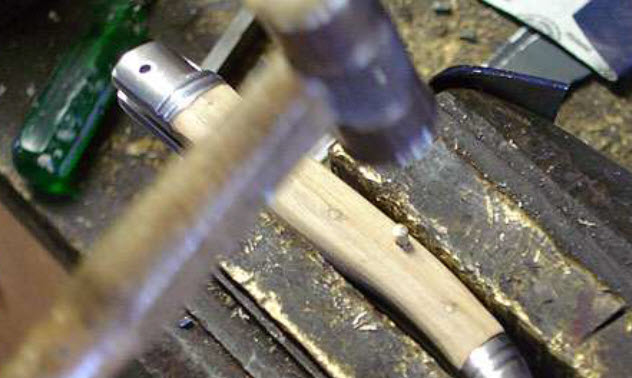
Clamp the handle in a vice with soft jaw inserts of wood or leather and gently tap in the centre pin in the handle. The pin goes through the handle scales, liners as well as steel backspring. Increase pressure until the spring lines up with the hole.

Remove the front pivot pin if having inserted in and insert the blade. Push the blade up against the backspring to get the blade in, and insert the front/pivot pin. Now file/Dremel/hacksaw pins so they stick out about 1 pin diameter on each side. Peening too long pins can make them fold over rather than blooming out. A Dremel rotary-tool with a cut-off wheel is handy here again.

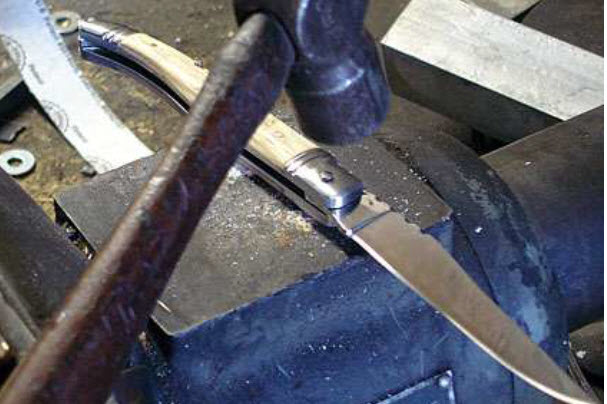
Gently peen the 2 remaining pins, starting with the back pin as this just holds everything together and is less critical than the front one. Peen using the ball end of the hammer, hitting the pin around the outside with light little taps until it blooms out. Take your time, gentle taps, holding the other side down on something solid. Constantly flip back and forth, hitting each side a couple of times and then flipping it over. Ignore that the photo is showing hitting with the flat side.


Critical: Gently tap the front pin (the pivot pin) until the blade is firmly stuck but can still move. Going too heavy here will make the folding knife an attractive French fixed-blade knife.
Gently tap the pin, turning between the two sides every couple of blows. Keep testing that the blade is centred in the handle and that it still opens. In the kit there are 2 shims; thin slivers of metal foil that can be used between the blade and handle while peening to help hold the blade centred.

Then sand the handle scales and bolsters with sand paper to at least 1200 grit.
Cutting strips of sand paper about 30-50 mm wide and backing them with masking tape makes the strips stronger and you can "shoeshine" the handle to even everything out for a great finish. Clamp the taped blade to a table so the handle sticks out and shoeshine bolsters and handle scales. Before changing to the next grit, wrap something hard like a file in the sand paper and sand down the pins to avoid them sticking up. Being harder than the wooden scales, they can easily be left as little bumps.
We recommend sealing the handle scales with oil.
These pictures are taken from the US supplier of the kits and only the text is ours, expanding the original instructions slightly.
Bjorn J, CreativeMan.com.au

Recent Posts
-

The Etch Test: Ferric vs Hydrochloric vs Gator Piss
The Etch Test: Three Very Different Looks From One Steel One of the great things about knife making …3rd Jan 2026 -

Why Bed The Tang In Epoxy - Then Knock it OFF Again.
What is "Bedding the tang"? Bedding the tang means gluing a stick-tang blade into the handle block i …21st Mar 2025 -

Marble Leather - How to Dip Dye Veg Tanned Leather
This was my first experiment with hydrodipping or dip dying leather, and it came out pretty cool! I …14th Mar 2025