
Can You Forge Baker Forge Steel?
By Bjorn Jacobsen, Jan 2024.
If you have been doing knife making for a while, you possibly have come across some of the amazing photos of Baker Forge & Tool steel. The knives usually have a black core with stunning patterns on the sides.
Coy Baker and his team have become one of the best known specialty steel makers in the world for knifemakers, operating out of a shop in North Carolina for a few years now and they just keep getting better.
A few years ago Riley and I met Coy and the team at Blade Show in Atlanta and got to see first hand some of their stuff. Since then we have had a couple of Baker Forge steels at Nordic Edge and it is one of those things I keep picking up to want to have a play with.
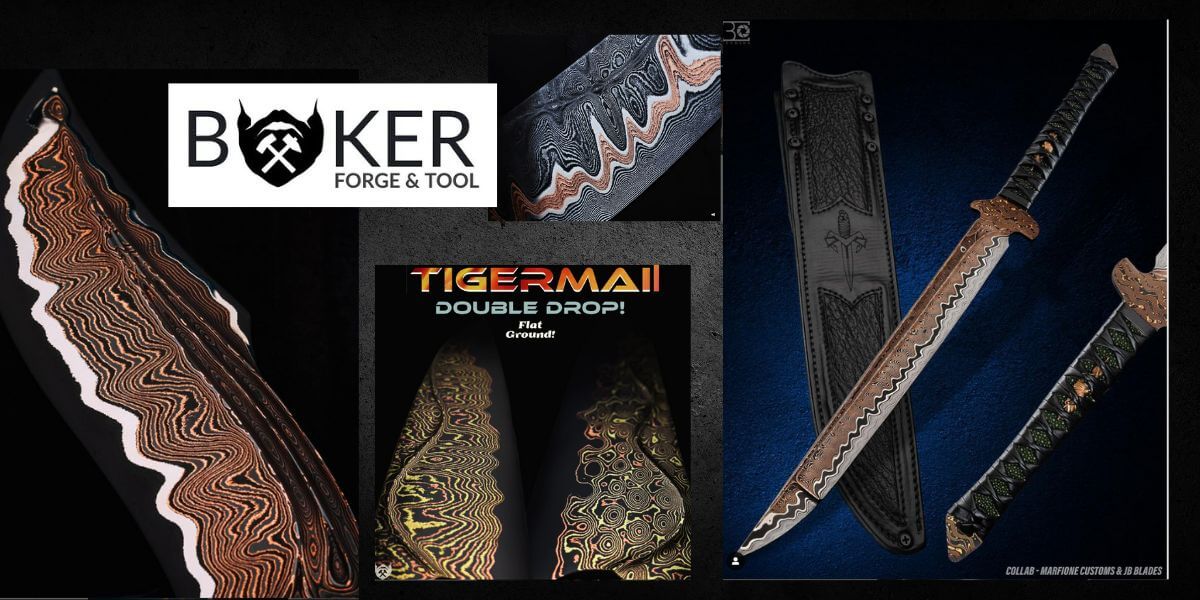
Amazing San Mai billets
The Baker Forge team are making some truly jaw-dropping billets, layering bronze, copper, nickel, damascus, stainless steel netting and who knows how many other things on core blade steels like 80CrV2.
The billets look amazing but they are quite expensive though, this has led me to ponder how to strretch it further..
My first attempt a couple of years ago did not go quite as I had hoped. It forged well, no issues but when it came to grinding the blade I lost quite a bit of height at the heel of the blade. Seems I had forged the cladding down over the edge steel, thinking I forged the edge steel down.
So, here is another go..
Can you forge Baker Forge & Tool steel bars?
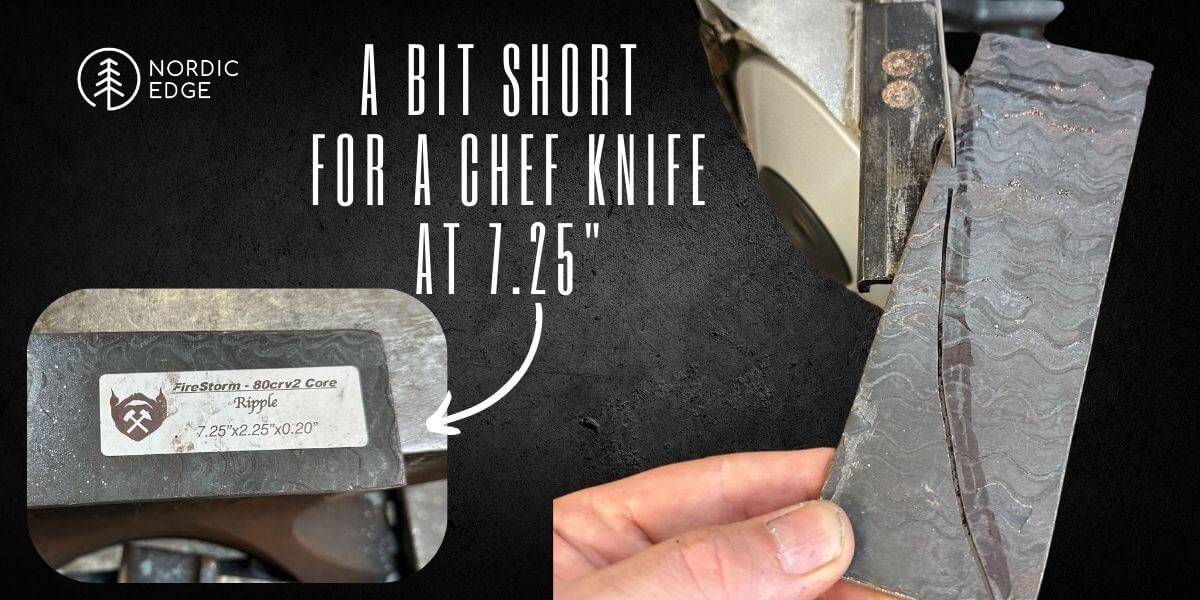
There are lots of types of billets from Baker Forge, the one I am using is a san mai with carbon steel 80CrV2 core and copper with damascus in between as layers on the outside. I generally make chef knives, and the bar I got was more than thick and wide enough, but not really long enough for what I wanted to do.
If possible to draw it out a bit, this would help. After my experience the first time, I did not want to forge it thicker, then draw it out in case it would delaminate.
The Baker Forge website says they recommend not to forge their steel. It is a finished product with several different materials and stock removal is the way to go. That way you do not distrupt the pattern, and avoid any issues you may get yourself into by forging higher than the temperature of any of the metals in the bar can take before melting.
So the answer is: No, you should not really forge Baker Forge steel. But you possibly could if you wanted to..
Time to commit... short blade or forge the bar longer? The bar was only 184 mm (7.25") long, so I really wanted to try making it longer if I could.
Onto the band saw
I decided to give it a try, wanting to draw the tang out at least.
Speaking with Alex Norton of Valhalla Ironworks who is an experienced maker doing some very cool things with Baker Forge Steel, he advised against forging it. Saying there is a lot of complexities around brazed and welded materials here with different melting temperatures and it might be best to not risk anything.
Alex is right, the safer way forward would be to make something smaller but by this stage I had already mentally committed to trying it out. Also, I wanted to know if I could forge it out or not as this will changes the cost quite a bit for the steel needed per knife when these billets are quite costly.
The bandsaw helped saw out the main shape of a chef blade, leaving a little sliver to try forging something else out of. I also cut half way through the bar a couple of cm from the end, leaving a section to be drawn out for the tang.
Temperature for forging billets with copper
The bar I am using has copper in it, and copper melts at about 1085 C (1985 F). So forging at "normal" forging temperatures would be a mistake, letting the forge get hot enough to make the copper start melting and then hititng it with a hammer..
From memory I set the forge to just over 1000 C to stay safe, cannot remember the exact temp but way below copper forging temp. This leaves a shorter forging window before the core steel gets too cold, and also the fact that the layers of damascus and copper will probably be moving at a different rate than the core steel suggested short forging sessions without trying to move too much metal in one go.
** WARNING: To be clear. Do not forge billets with copper in it. The copper can melt and squirt out. The manufacturer here is saying it is not a great idea. We are experimenting here, not recommending anyone else should forge this stuff ***
Forging Baker Forge Steel
The billet was allowed to really soak up heat and even out before every hammering session. Thinking the core steel needed more time than the cladding, and it was the core that needed to move.
Every forging session was short, slowly getting the end stub out and away from the blade.
I then flattened this stub down and started drawing it out.
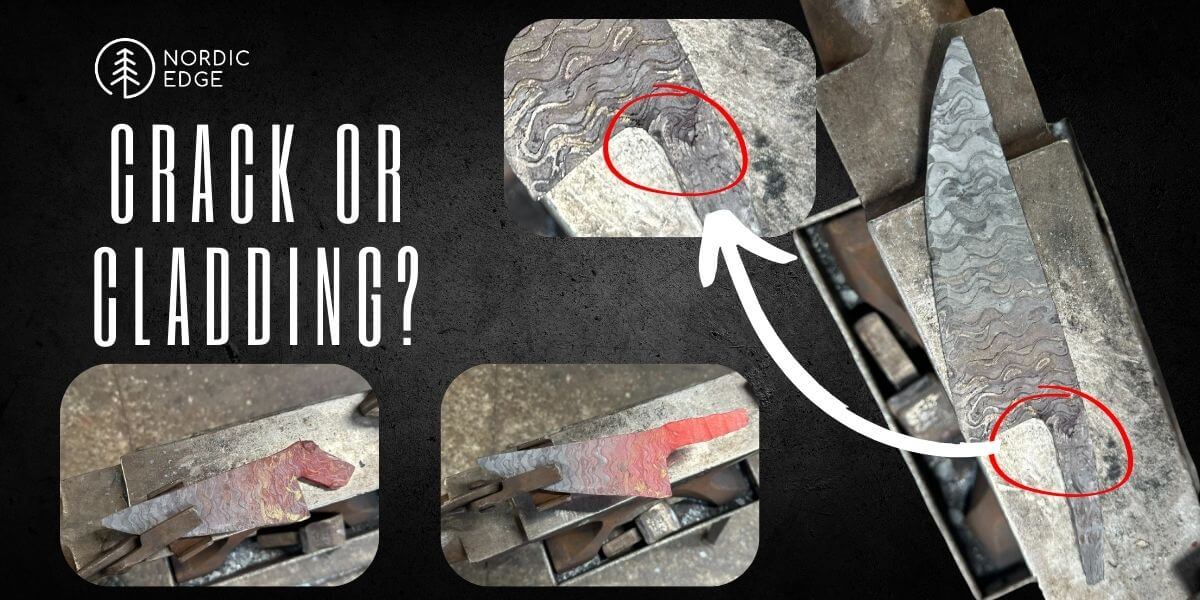
Pretty quickly I got into trouble, the cladding kind of .."buckled" on me.
Did it crack or was it just the cladding?!
In my mind the forging has to happen with hard blows to move the core, not just massage the cladding. The temp window is small and the core is harder than the cladding so I went hard, in short burtsts and quickly put the steel back in the forge for another long soak before continuing.
Welding the tang
Welding in knife making is not often considered a great idea. If you try to weld heat treated steel, you seriously damage the tempering in the area you are welding.
But in this case we are just forging, right? I was not even sure it would weld, thinking it might just touch the cladding and not the core steel.
But I got the MIG welder out, made a couple of small beads on the buckled and cracked cladding, before forging on.
To be honest I was not feeling to great about how this was going by now, thinking I messed up a pretty expensive piece of steel..
Anyway, I forged the tang out and while waiting for it to heat back up I also forged a small blade from the offcut. This one I was going much harder on, upsetting it and drawing it out into a curved blade and with a stick tang again.
Two blades from one billet
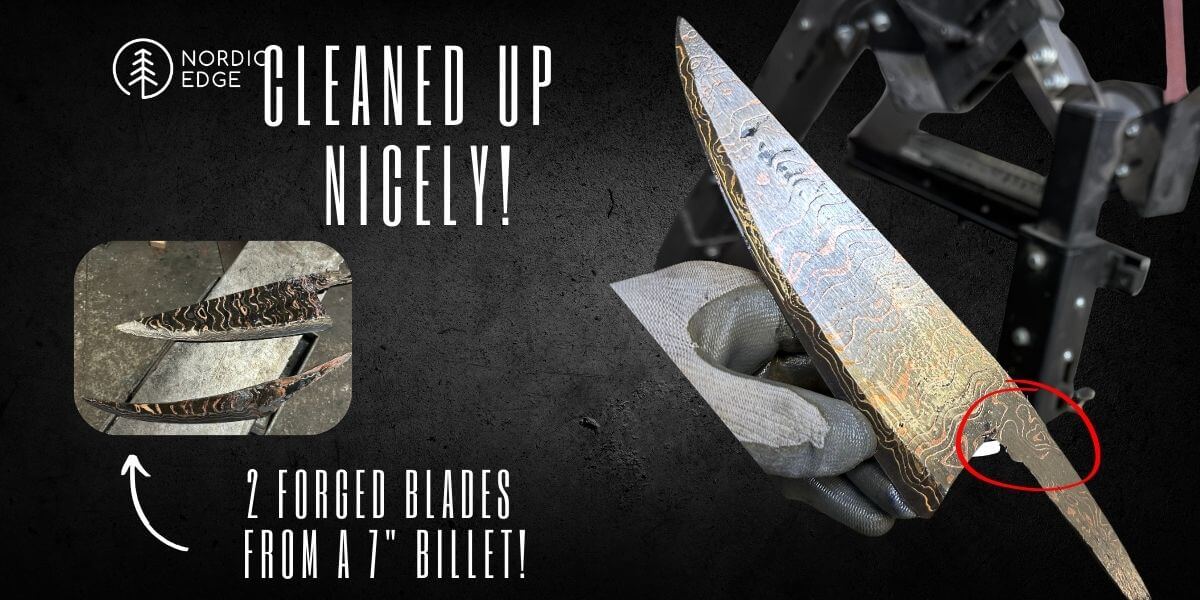
The awesome thing about forging the steel is of course that we get more out of the billet. After heat treatment, it now meant I had two blades from one 7" billet!
Let's just hope that tang is going to be ok.
Cleaning up on the surface grinder
After quench and tempering it was time for cleaning up and finding if we had a usable blade or if it actually had cracked. The 84Engineering Surface Grinder attachment came in handy again, I placed the blade on the surface grinder with a new 120 grit cubitron belt and kept going until I had clean steel on the tang on both sides.
As I was removing a fair amount of material and the blade was by now heat treated, I kept taking it off the surface grinder and dipping it in water to not overheating it.
Cleaned up nicely!
After a nervous 10 mins, I was left with a blade that was now nice and flat and with a solid steel tang. I was pretty relieved that it was all ok and the forging was ok.
So it was the cladding that had buckled and cracked a bit from the forging - possibly going too long or trying to do too much in one go (?). While the core steel underneath was all good.
This was great news, and it meant that I could make a chef knife from the steel as I was hoping to.
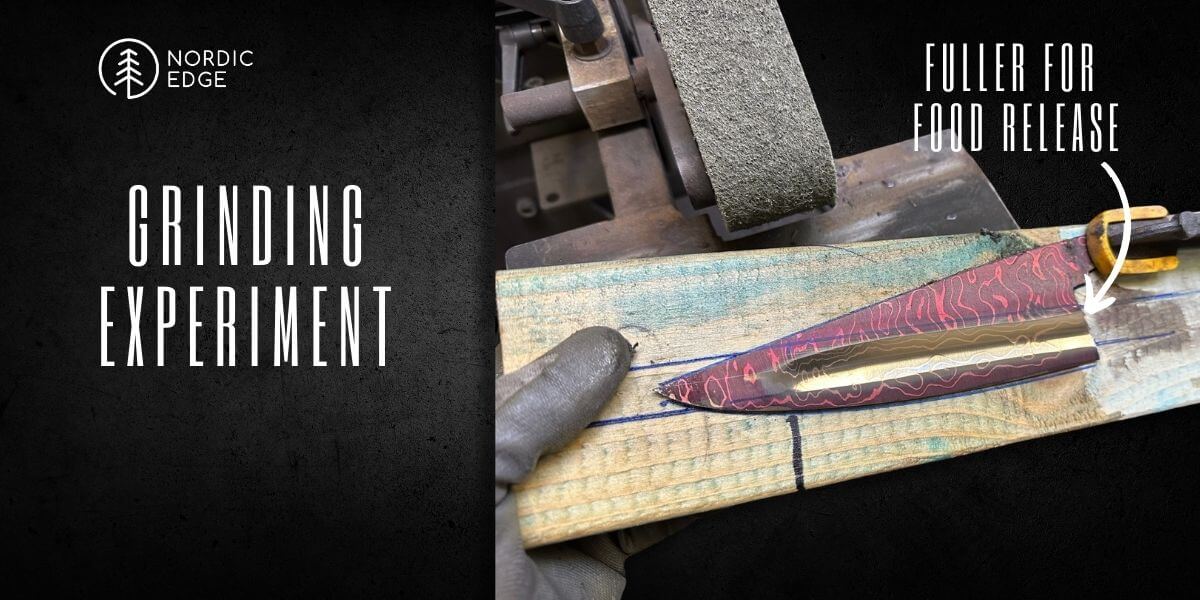
Grinding experiment for food release
When already going all out here, why not experiment with a fuller for food release too?
The chef knives I make tend to have full flat grind where some makers are saying it is better to not have flat sides, for improving food release. Meaning a fully flat blade will have some food stick to it when cutting. A fuller is maybe a complete overkill here, but again, this knife is a bit of an experiment so why not go all out, right?
Fullering made easy
I am also working on a viking sword now, and had found that it was much easier for get a fuller going if clamping the steel to a piece of wood. This way I could drag the big block of wood sideways and it would not lean as much back and forth to mess up the fullering as when I tried doing it freehand.
I wanted to do the same here, so I clamped the blade to a piece of 2x4" pine and fullered it on both sides.
Fullering setup
- Leane the top wheel above the platen forward, almost touching the platen.
- Place the 2x4" on the tool rest with the high side up but not blade clamped to it.
- At slow speed run the grinder and touch the 2x4" to see how high the fuller will be off the tool rest.
- Adjust the wheel height if needed
- Draw two lines on the 2x4" with sharpy showing where the fuller will be ground in
- Clamp the blade to the 2x4" using the sharpy lines are guide for where the fuller will be
- Grinder on, run the belt slightly off one end of the wheel and grind the fuller in onto that end of the wheel, so the belt is slightly rounded over the end of the wheel.
- Keep dunking the 2x4" wood and blade in water as always when doing post-heat treatment grinding to keep it cool.
- I did cubitron II in 60 grit, 120 grit, then alu oxide in 180, 400 and 600 grit before scotch briting the fuller.
Our grinders at Nordic Edge are all 84Engineering 2x48" Shop Mate grinders, these have rubber covered wheels so you can grind on them. This makes this process easier, and you can also use a spare 2" wheel to hand sand the fuller afterwards, if scotch brite is not the finish you are going for.
Etching in ferric chloride
The blade was then etched in ferric chloride for a couple of minutes to see the pattern. Later after making the handle I will come back and etch more to see if I can get the core even darker and maybe get the damascus to pop even more.

Conclusion
My conclusion is that Yes, you can forge Baker Forge steel but if in doubt it is safer not to.
One blade forged fine and I went much harder on that blade, moving more metal. While the one I only folded the end tab out on and drew into a tang got a bit of a cladding buckle.
While in the end also that blade was ok, so I am glad I did it and now have 2 blades from one short billet.
The steel looks great, with layers of damascus in between copper shims. The cladding is thick enough that I could grind a really nice distal taper in the blade towards the tip and have cladding almost to the end of the tip.
This one is going in a drawer for a little while, until I can come back and make a handle for it at some point.
Thanks for reading along,
Bjorn
Recent Posts
-

The Etch Test: Ferric vs Hydrochloric vs Gator Piss
The Etch Test: Three Very Different Looks From One Steel One of the great things about knife making …3rd Jan 2026 -

Why Bed The Tang In Epoxy - Then Knock it OFF Again.
What is "Bedding the tang"? Bedding the tang means gluing a stick-tang blade into the handle block i …21st Mar 2025 -

Marble Leather - How to Dip Dye Veg Tanned Leather
This was my first experiment with hydrodipping or dip dying leather, and it came out pretty cool! I …14th Mar 2025