
Flypress for forging
At the 2022 Blade Symposium, Adam Fromholtz held a presentation on how to use a flypress for forging.
Adam has made a lot of tooling for both his own flypress and the one at Tharwa Valley Forge, developing his own system for quick replacement of tooling. Not only does this make it easy and quick when swap tools, but it also saves the main flypress bolts from contantly being opened and closed every time a tool is swapped out.
Adam's system consists of a bottom plate the bottom tool slips into, and a collar that goes into the screw. Each top tool then slips in and out of the top collar - rather than having to unscrew the bolts in the main flypress screw themselves:
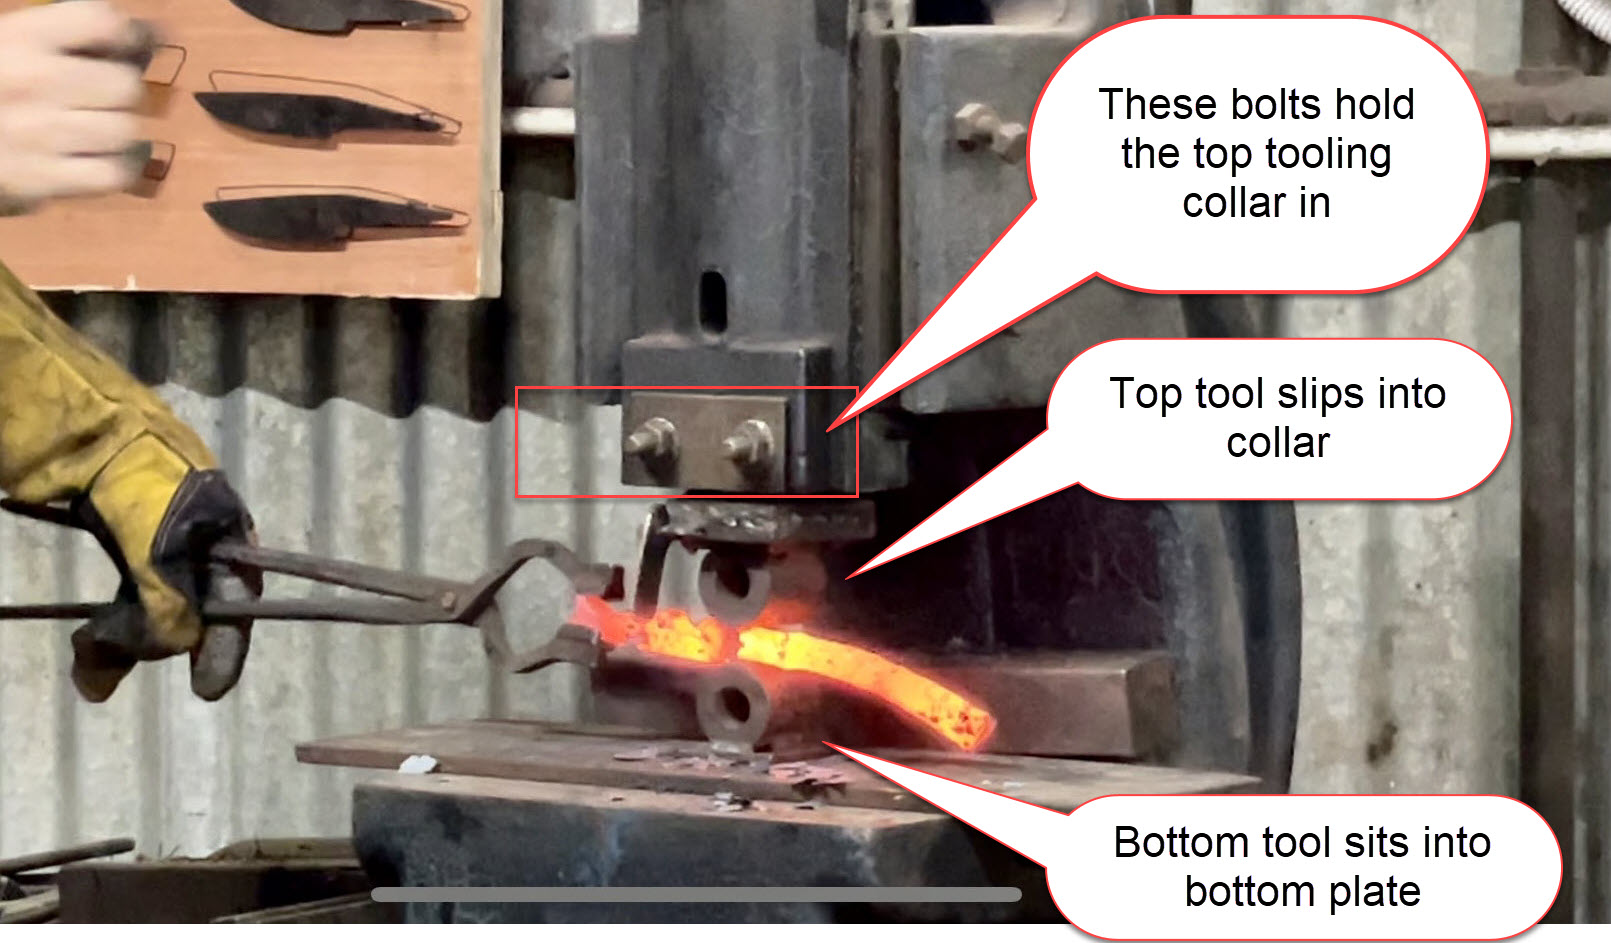
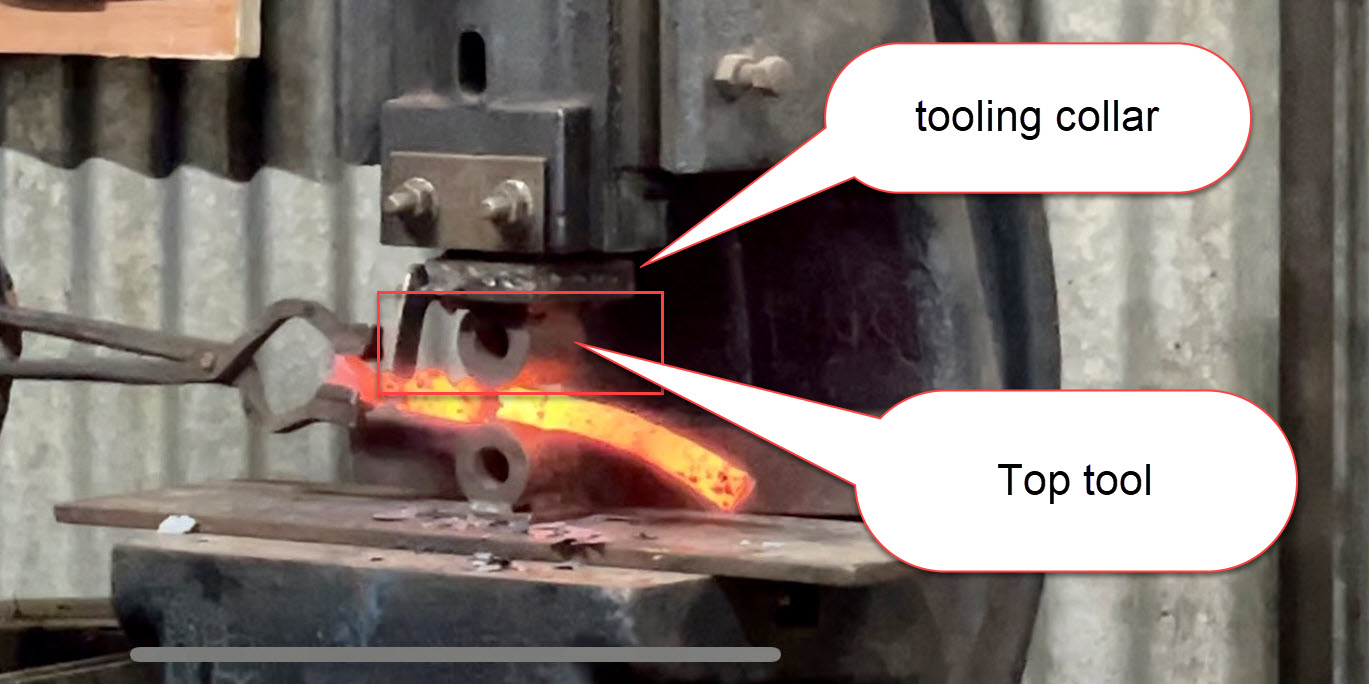
In the photo above, note how the 2 main bolts for the tooling only are used to hold the top tooling collar - they are not constantly used to replace the actual forging tools.
In the tooling collar - the steel plate visible between the bolts and the thick steel pipe touching the hot steel, there is a slit on the left of the fly press where the tool slides in and out. A pin or hanging arm stops the tooling from being able to shoot out of the tooling collar.
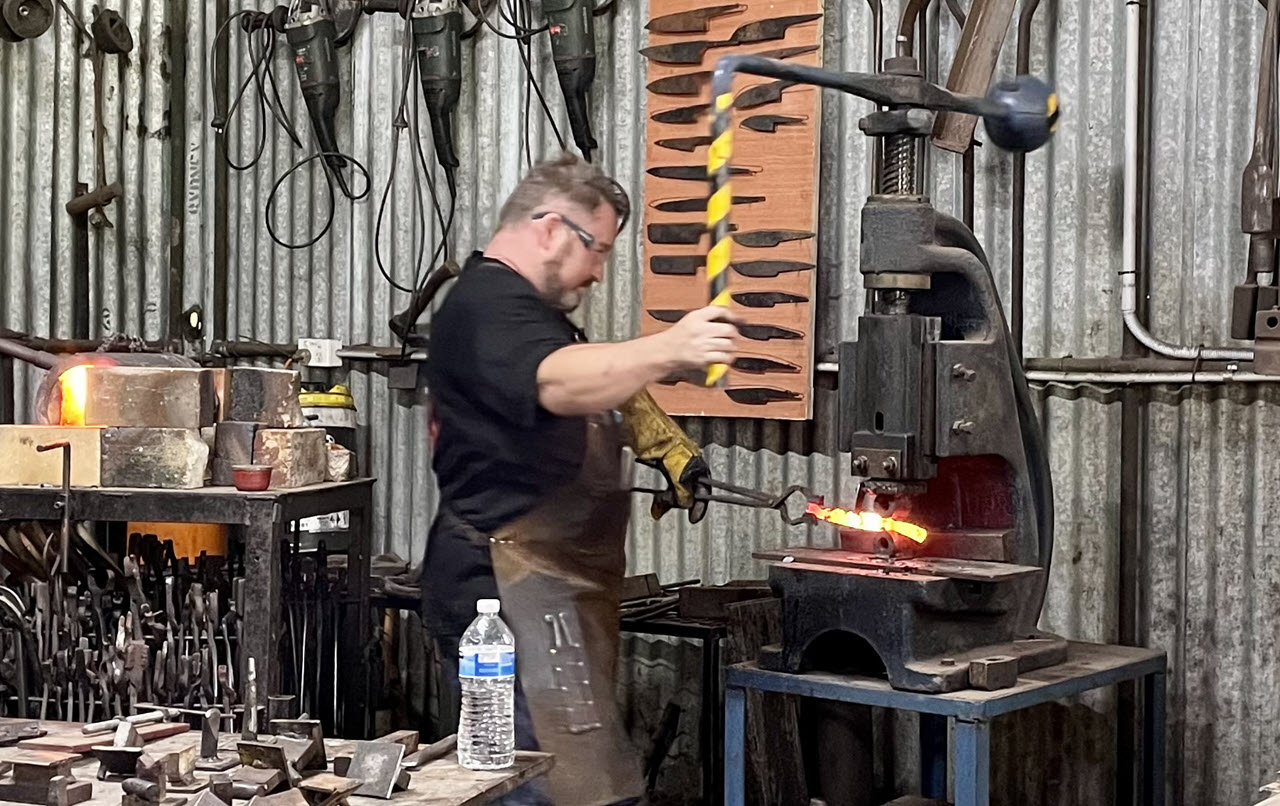
Wanting to replace the tooling consists of :
- slide the top tool out to the left in the photo
- insert another top tool, for instance a hot cut
- keep or replace the bottom tool, and forge away
On the desk in the bottom left corner, you can see some of all the tooling options Adam has made. A lot of these were made for a specific job. The top tools then consist of a 10 mm thick steel plate to slide into the top collar, in the middle of this is the tool needed, for instance a small fullering tool made by 16 mm solid steel round bar.
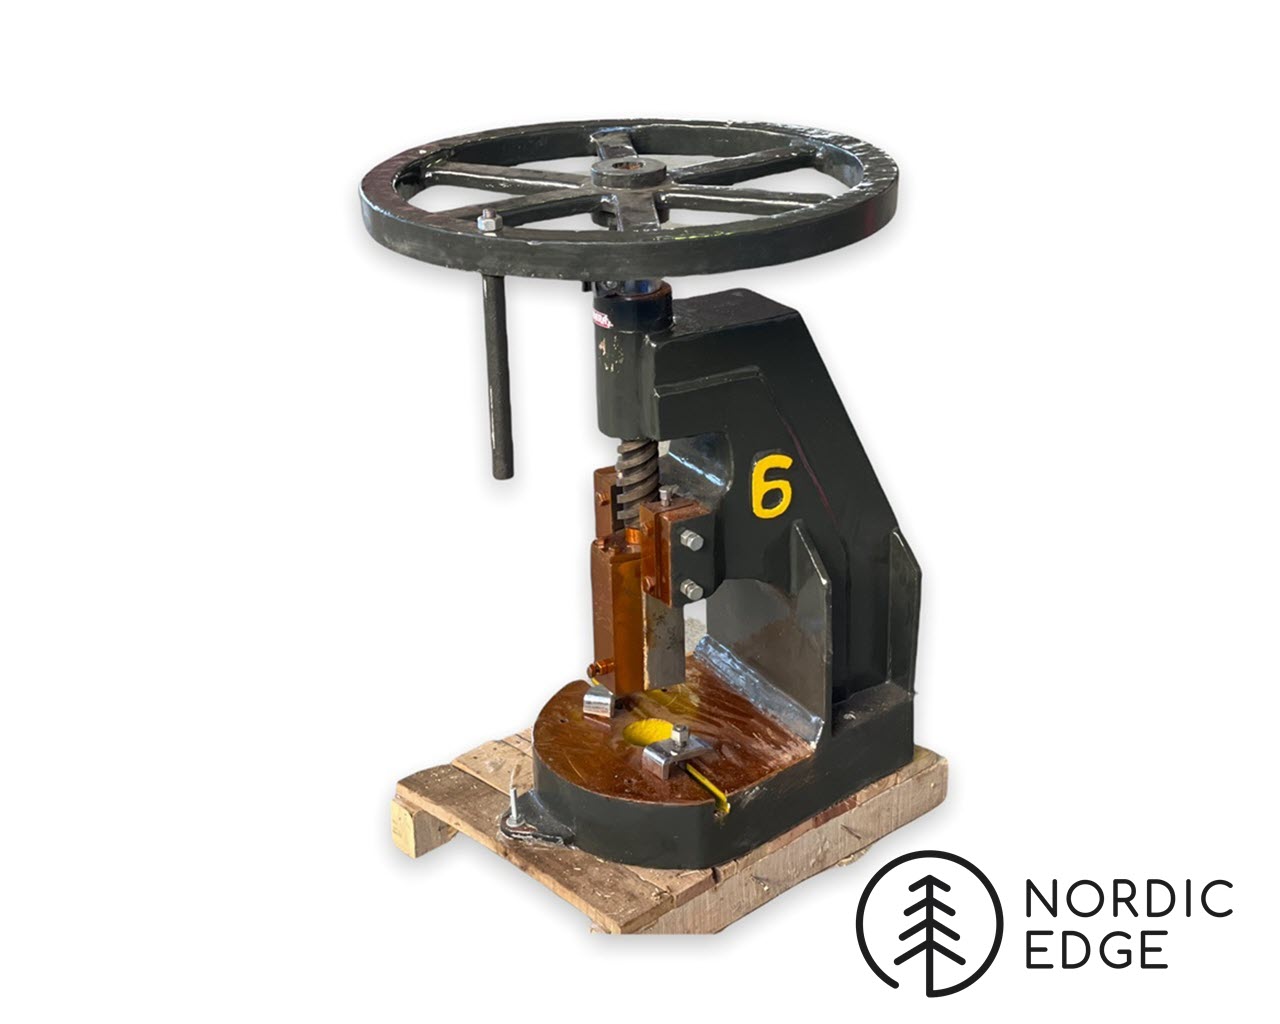
Flypresses pop up on auction sites now and then, or if wanting a new one Nordic Edge offer this 6 ton model:
https://nordicedge.com.au/blacksmith-fly-press-6-tons/
To build your own tooling set for this flypress you would make a bottom plate to sit across the bottom of the fly press, with a hardy hole in the centre for tooling to sit into.
The top tooling collar is a thick walled pipe at the diameter of your flypress, welded to a strong steel plate with shoulders added. Creating a slit tooling can slide in and out of. Note the need to add a stop pin or other way to make sure the tooling cannot pop out of the flypress during forging.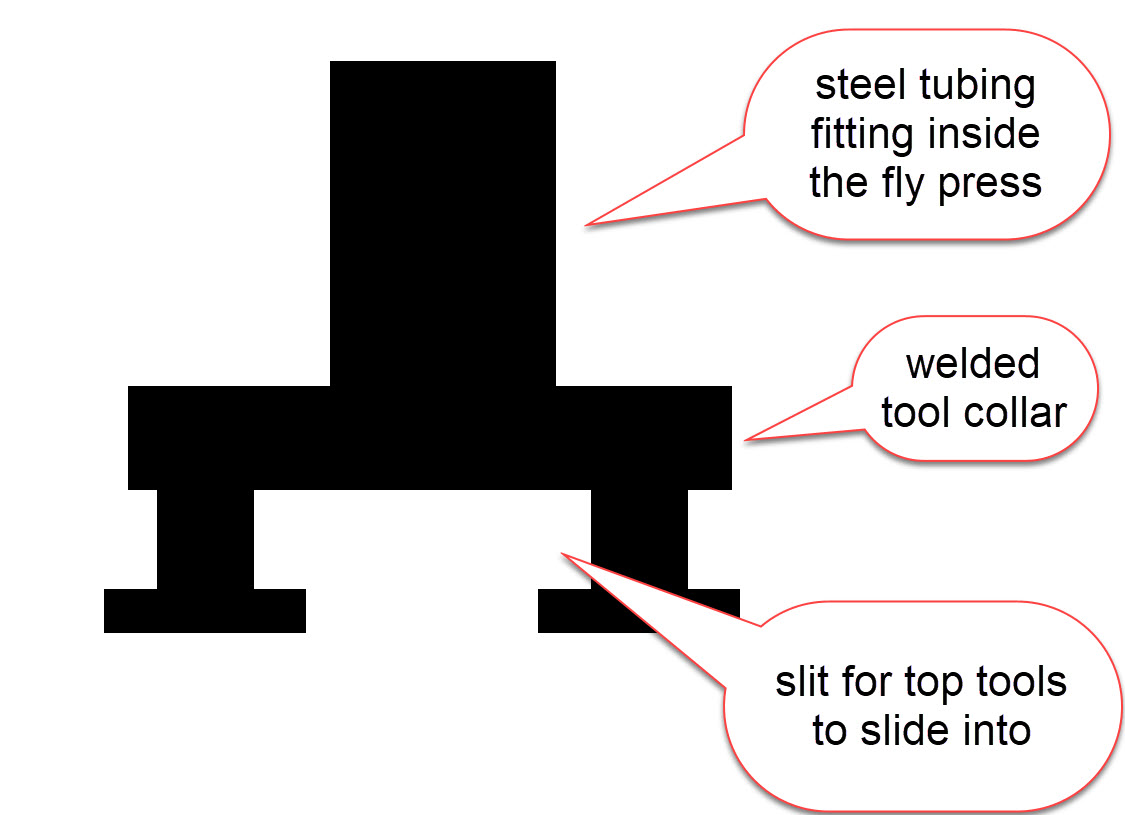
The actual top tooling pieces are welded onto a steel plate sliding into the bottom of the collar:
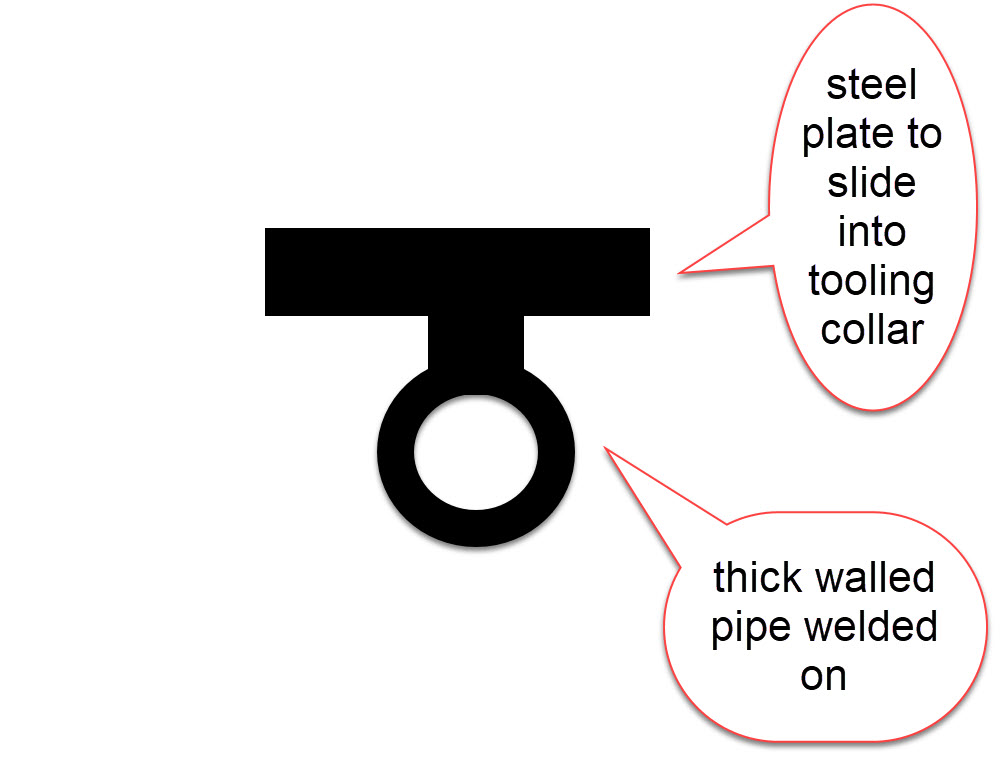
The top tool above is the one marked in red below:
There is not a lot of tooling options to be bought ready-made, expect having to either make these yourself or to have to get them welded up for you. If having these made for your flypress, make sure you have the diameter of the tubing needed to fit inside the flypress and start with small tools.
The bigger the tooling is, the less metal you can move. The force from the flywheeel coming down is spread across the area of the tooling so a smaller tool can press further into the steel than a big tool.
Thank you to Adam Fromholtz for the excellent demonstration of how to forge on a fly press, check out some of his work here: LINK
Recent Posts
-

The Etch Test: Ferric vs Hydrochloric vs Gator Piss
The Etch Test: Three Very Different Looks From One Steel One of the great things about knife making …3rd Jan 2026 -

Why Bed The Tang In Epoxy - Then Knock it OFF Again.
What is "Bedding the tang"? Bedding the tang means gluing a stick-tang blade into the handle block i …21st Mar 2025 -

Marble Leather - How to Dip Dye Veg Tanned Leather
This was my first experiment with hydrodipping or dip dying leather, and it came out pretty cool! I …14th Mar 2025