
How to Carve a Spoon with simple tools
Spoon Carving Instructions
The below is a cut down version of what we go through in our workshops, so you can start making your own spoons at home.
Wood: For your first couple of spoons, use pine from a hardware store like Bunnings.
It is easy to carve and makes a nice looking spoon. The photos below use pine.
Tools included in the spoon carving kits we sell:
- Sloyd knife: Sharp, thin blade for wood carving
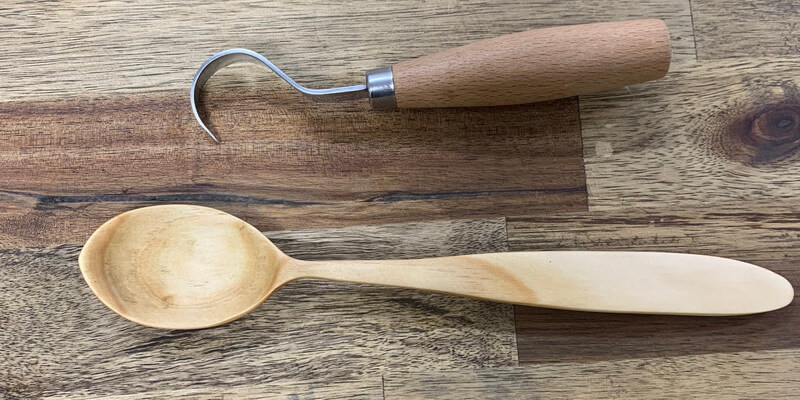
- Hook knife: Bent blade for hollowing out the bowl.
- Chip carving knife: Short blade for carving decorations (optional, not used in below instructions)
- Leather strop and polishing compound to keep your tools sharp during use
Optional tools not included in this kit:
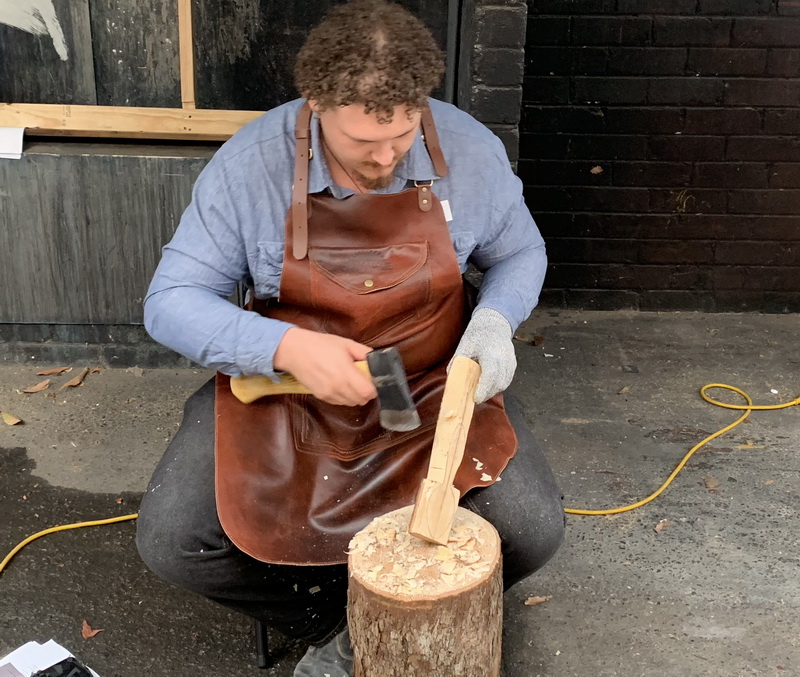
- Axe: Used to rough cut the blank to shape (not required when using pine)
- Saw: Used to create stop-cuts to chop or carve against (optional but helpful)
- Protective glove: Gives some protection against slicing cuts if not comfortable with the tools
Process:
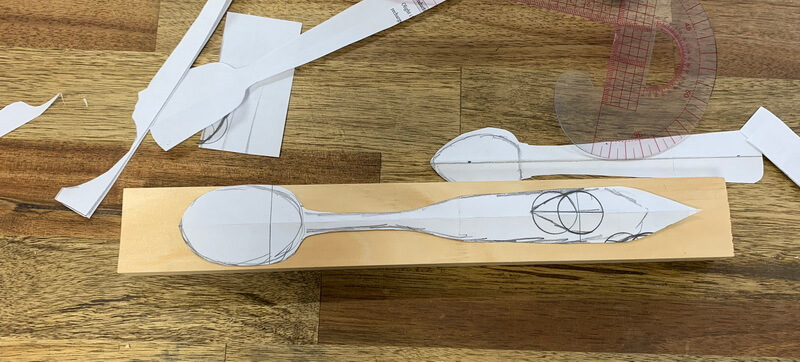
- Create a “blank” that is rectangular in size if starting from a bigger branch
- Draw on profile of spoon, decide widest point of bowl
- Saw control cuts to stop initial cuts going too far
- Whittle the profile of the spoon using the sloyd knife, redrawing the profile as required
- Optional: Create the “crank” (the angle between handle and bowl)
- Hollow out the bowl with the hook knife, and clean up for final profile
- Hand sand (optional)
- Seal the wood with oil or CoCoBee Mix (optional)
Starting point, a flat piece of dry pine as this is easy to carve and requires no axe work:
It is not required to saw “control cuts” but it reduces the chance of damaging the bowl part of the spoon while carving. Any small saw will work, like a swiss army knife, a leatherman, or a hand saw.

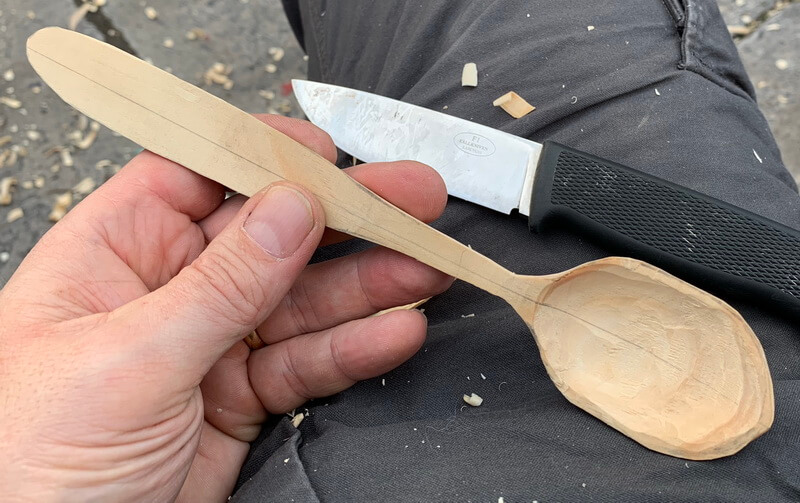
The “sloyd” knife is the one with a straight pointed blade, this is the one we use to carve to the lines of the spoon. This is called the profile or outline, and you do this from both the top and from the side. There is no right or wrong here but have a look at a kitchen serving spoon or a soup spoon to see how these have different side profiles.
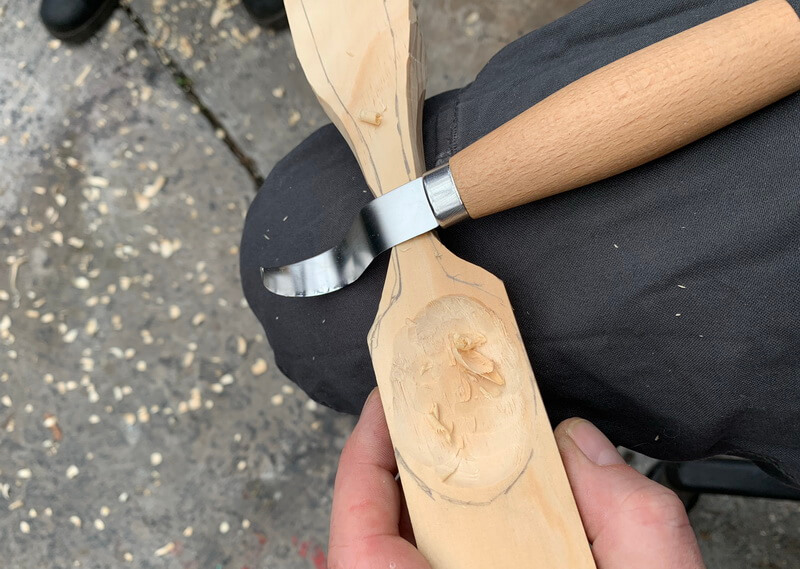
Below you see how we are using the hook knife to make the bowl. This is done across the grains, or sideways on the bowl. When the bowl is deep enough, clean up the rest of the knife with the sloyd knife.
Optional step: If wanting a smooth finish and your knife finish is not there yet, wrap sand paper around something round and hard to help create straight lines and even curves when sanding. Sand to as high grit as you can, the higher the number on the sand paper, the better looking the wood will be. If you use the spoon, the grains might raise from being wet and you will have to sand it again once or twice before it settles.

Optional step is to seal the spoon with an oil that does not go rancid, so avoid vegetable oil. Walnut oil, hempseed oil or grapeseed oils are good. The below is our “cocobee” mix of coconut fat and beeswax, on a spoon made from pine from the hardware store.
Advanced tips:
- When you have done a couple of spoons from pine, try making one from a freshly cut branch. You want a branch 10 cm in diameter or so and about 30 cm long, split it and remove the pith or heartwood. Branches often have less of this than the trunk itself. Flatten both top and bottom and drap your spoon profile on what was the outside of the branch.
- Using an axe makes the splitting and initial carving much easier when using bigger pieces of wood, or wood that is not as soft as pine but requires more care than using only the knives.
- When carving green wood, you will not be able to complete the spoon in one sitting, it needs to be taken to 90% done and then left to dry for some days before you can clean it up with the knives again. This clean-up when dry leaves a much better looking spoon than if you complete it while wet/fresh.
Recent Posts
-

The Etch Test: Ferric vs Hydrochloric vs Gator Piss
The Etch Test: Three Very Different Looks From One Steel One of the great things about knife making …3rd Jan 2026 -

Why Bed The Tang In Epoxy - Then Knock it OFF Again.
What is "Bedding the tang"? Bedding the tang means gluing a stick-tang blade into the handle block i …21st Mar 2025 -

Marble Leather - How to Dip Dye Veg Tanned Leather
This was my first experiment with hydrodipping or dip dying leather, and it came out pretty cool! I …14th Mar 2025