
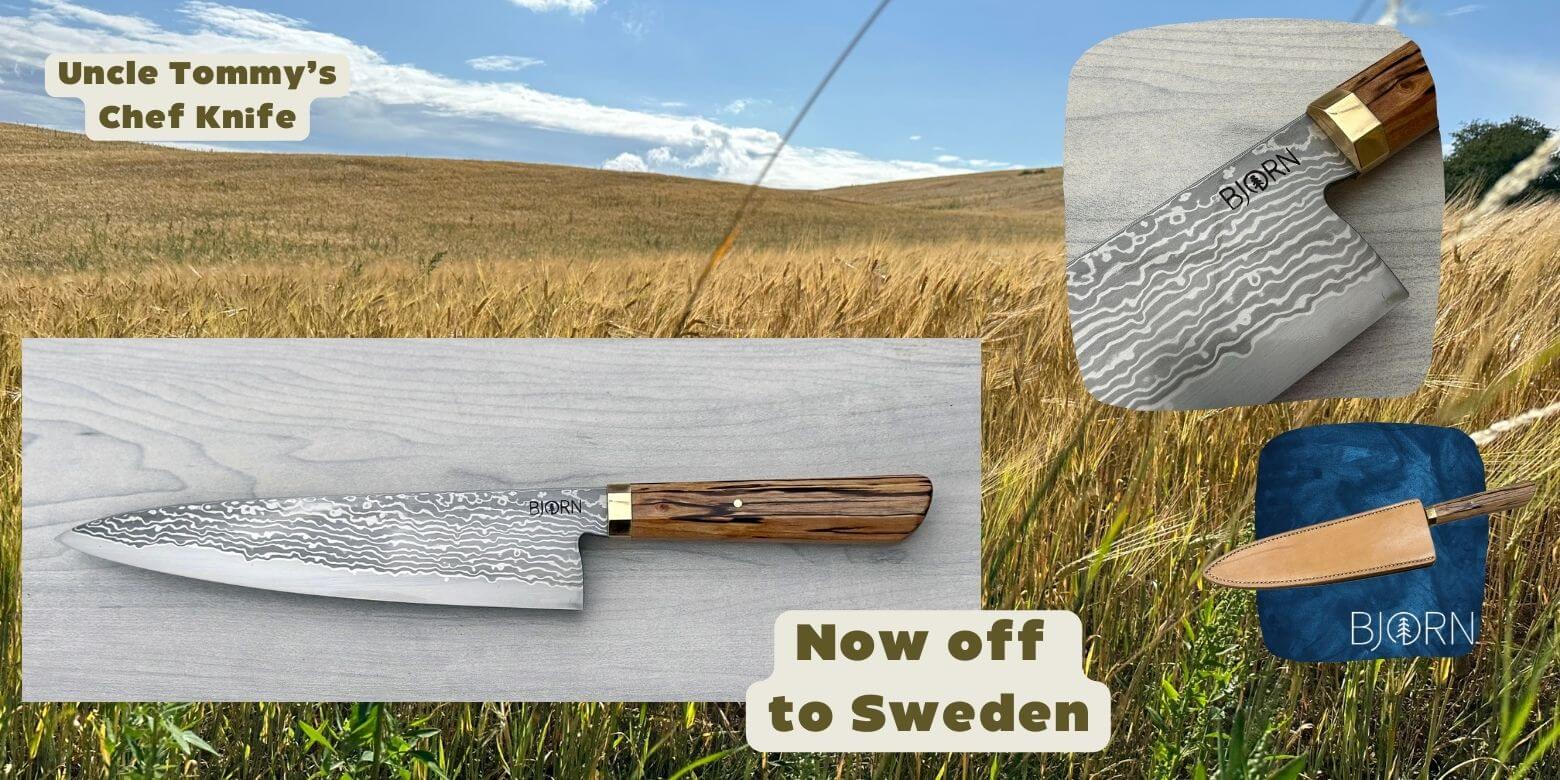
The little cabin in Sweden - and a knife
This was a special knife build for me due to the history of the handle material and for making a knife for a family member. Here is the story of how it came together..
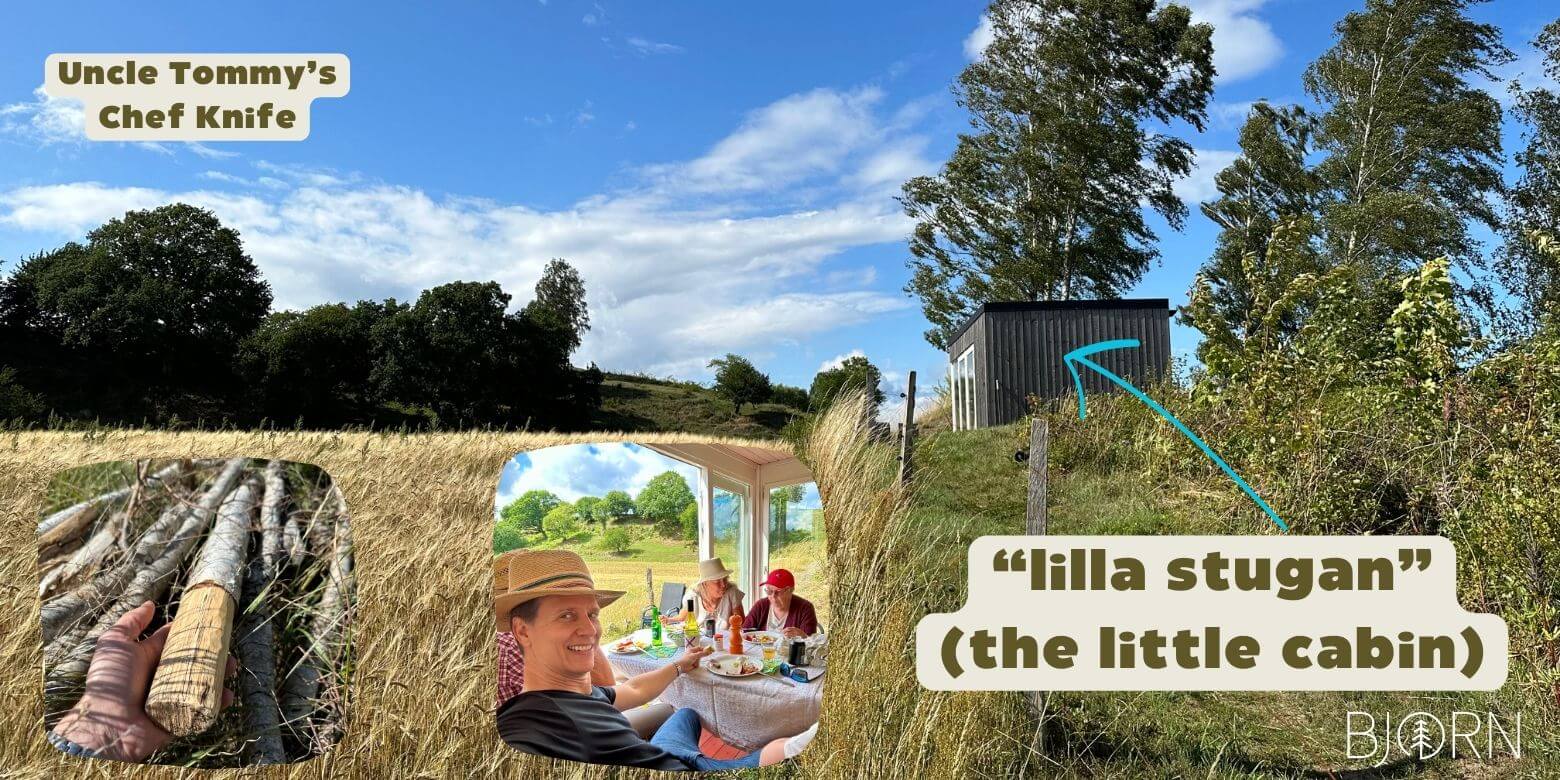
Lilla Stugan – “the little cabin”
My prettier half Marie is from the south of Sweden. Her uncle Tommy and aunt Eva live in Rörum just outside Simrishamn, a beautiful little city by the sea with rolling green hills, old buildings and a history spanning back to at least 1161. It is a popular tourist destination in summer and it is easy to see why after spending a lazy afternoon there earlier this year.
When we went back visit our families in Norway and Sweden in July 2023, we visited Tommy and Eva and were treated to lunch in the “lilla stugan” (the small cabin) which I had seen popping up on Facebook with regular intervals.
Tommy and Eva have built this cool little cabin in their favourite spot on their property, overlooking a golden wheat field against a backdrop of rolling, green hills.
On facebook I had seen updates from “lilla stugan” about Scottish highland cows hanging over the fence, later replaced by wheat, and many an afternoon drink or coffee session with a photo of “today’s view from the little cabin”.
It was clear they really enjoyed their little cabin by the field, and I had been looking forward to seeing it.
Lunch with a view
Lunch was great! The table was done up nicely with Swedish summer dishes, we all had summer hats on for some reason while enjoying the view. And after the nice meal, I asked Tommy if I could make them a knife. Was there something from their property that would work as handle material, maybe?
Tommy got out a small folding saw and we had a look around their large garden. Just behind the little cabin were some thin birch logs that had been cut down earlier in the year. We sawed off a suitable piece of the end of one of them, and then noticed the freshly sawn wood had black spalting running through it!
What luck, this was going to look very nice, we agreed while carving off the bark. I was certain it would be ok to bring back to Australia as long as it had no cracks, holes or bark attached and luckily this was the case.
Deane to the rescue
Back in Australia, the spalted birch dried in in our bookshelf for a while. The presence of that many Discworld books is good for any organic material, I am sure. Then I sent it to Deane Cassai at Reclaim Creative who kiln dried it and stabilised it with Resinex resin to perfection.
Now we had a piece of solid, stabilised birch while it had kept all the cool colors from the spalting. “Spalting” refers to wood that is coloured (attacked) by fungi. The dead birch tree lying in the grass behind the little cabin had been slowly eaten into by fungi, creating these dark lines against the pale birch wood.
This was quite lucky I thought as silver brich in itself is a nice enough wood but possibly not with a lot of character in itself. So the spalting could add some character to the knife build.
Japanese specialty steel
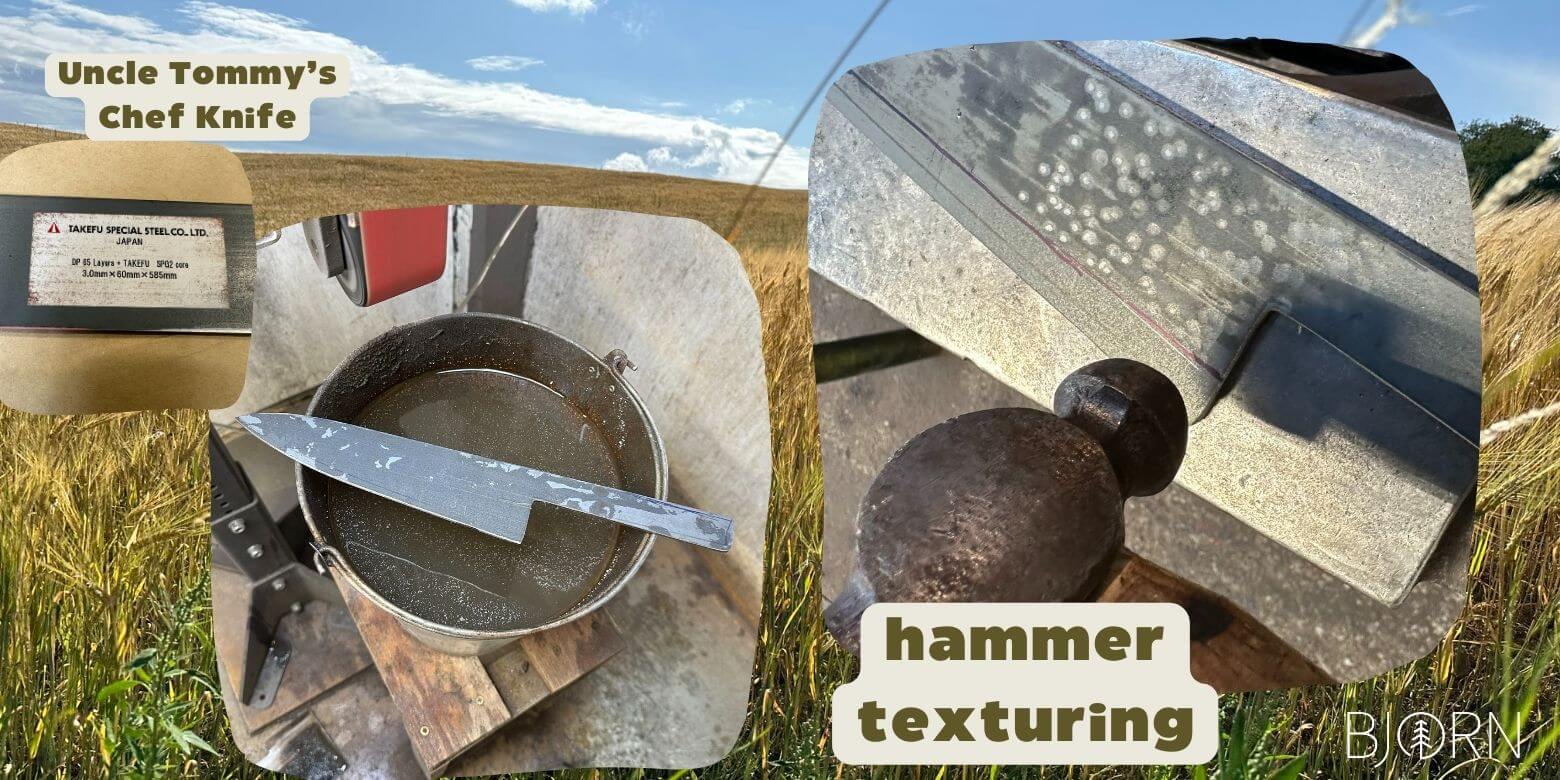
For Tommy’s knife I wanted to use some Takefu specialty steel I had recently bought for the first time.
This is a stainless Japanese chef knife steel called SuperGold 2 with 65 layer stainless Damascus cladding on the sides for some visual bling.
This is my third type of Takefu specialty steel and I am loving working with them due to the great finish they take when etching the completed blade. This last 6 months or so it seems the only knives I have made are with Takefu steels, and this is not the last one after just having bought more Takefu at Adelaide Knife Show.
Takefu SuperGold2 is a high-end powder metallurgy steel from the same company that developed VG10, with fine microstructure and toughness.
It is somewhat like the American S30V but predates the American version by at least a decade. The low Chromium content for a stainless steel combined with higher Molybdenum is part of the reason for the higher toughness. (Read more on Knifesteelnerds.com here: LINK)
It is a very high carbon steel with 1.4% carbon, high toughness and good edge retention even thought it has since been surpassed by many of the newer "super stainless steels" such as M390 and S35VN.
Cold hammering for texture
To start the blade, I first profiled out two blades (this knife is one of them) from the bar, then drew a line 10 mm from the edge before cold hammering the blade.
Both sides, from the sharpie line up to the spine gets the back of a small ball peen hammer. Hundreds of light hits until the surface is all dented and textured.
This distorts the layers in the damascus cladding, creating more of a pattern than how it comes already made from the steel mill. Staying away from the edge makes sure I do not mess too much with the thin core steel which will become the actual edge while creating the patterned sides.
After cold hammering the blade is bent like a banana and takes a bit of work to straighten out again. Cold hammering is a good way to create more play and patterns in laminated steels. A big thank you to Jake Summerell from 116Blades for sharing his process on this one.

The quench – a knife if born
Stainless steels are quenched from higher temperatures than carbon steels, and as most stainless steels this one also requires ramping of the temperature and long soak time before the quench.
This means there is risk of losing part of the carbon in the steel through oxygen exposure in the kiln. So the blade is wrapped tightly (air tight) in stainless steel foil to protect it, retaining the carbon content through the long heat treatment. Another advantage of the foil wrap is much less scale to deal with afterwards than a normal carbon steel quench.
After going through the temperature ramping and final hold time at 1080 C the blade is quenched in oil, then quickly placed in aluminium quench plates to cool down straight. Unlike carbon blade steel that hardens very quickly, stainless steels take a little longer to harden which allows us to place these in the quench plates to help avoid warped blades.
No grinding is done prior to heat treatment to help ensure a flat blade. And as the sides are mostly mild steel damascus there is little to gain from grinding bevels prior to heat treatment. The sides will be just as easy to grind after hardening.
Tempering the steel
After the quench the blade is hard and straight – but too brittle. To reduce the brittleness, we temper the blade. This is a compromise between hardness and toughness, giving up some hardness to gain toughness enough to make it a usable kitchen tool.
The higher the tempering temperature, the more hardness we give up so in this case we tempered at 185 C (low) to not give up a lot of hardness. Wanting a hard, thin edge for kitchen use and accepting that it will stay somewhat more brittle than an outdoor style knife.
(Tommy if you are reading this – do not chop frozen stuff or bones with this knife, please :)
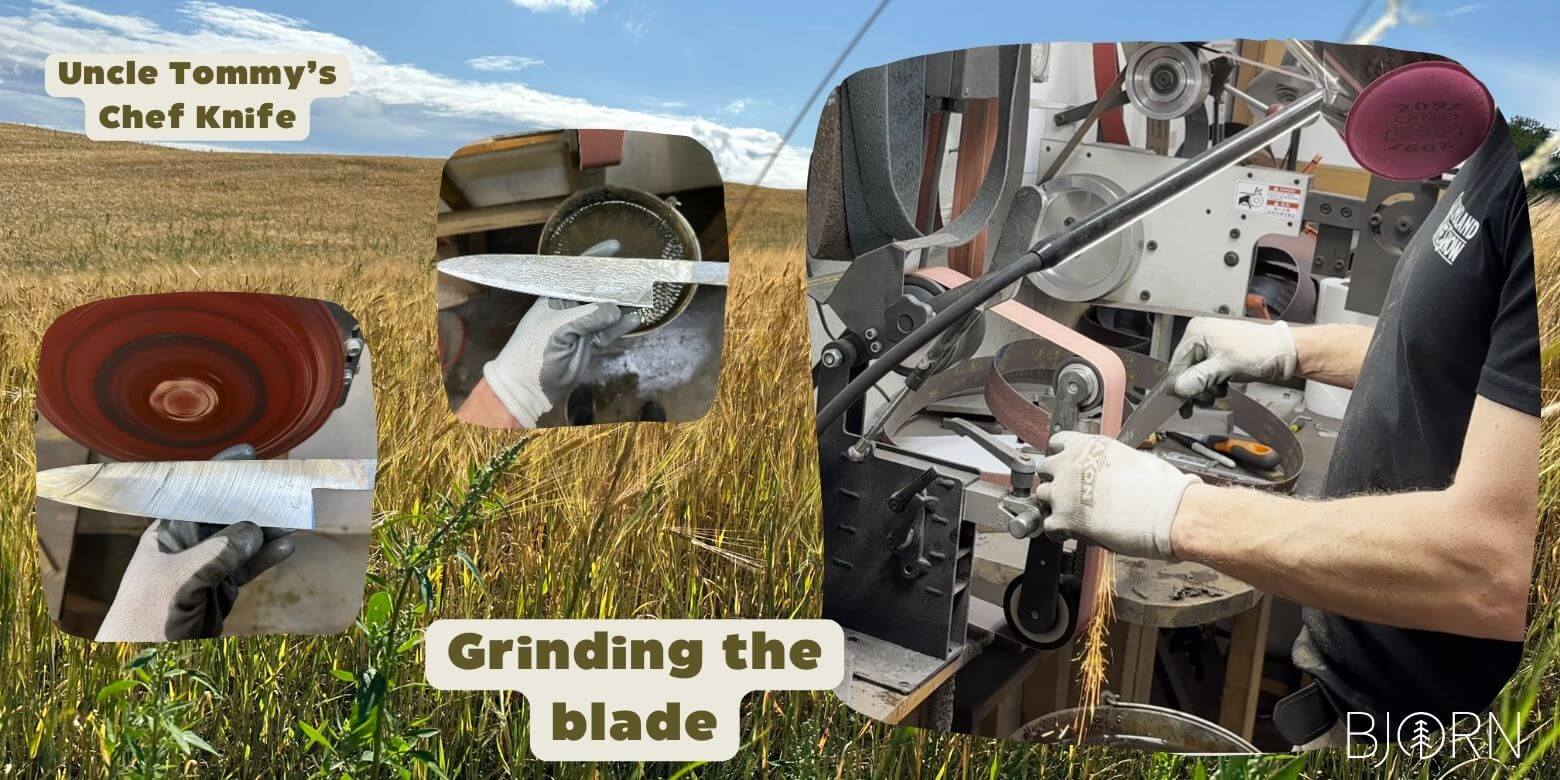
Back on the grinder
Now onto the part of knifemaking that takes the most time, grinding the bevels. I am lucky in that we have a 84Engineering surface grinder attachment in the Nordic Edge workshop, making it easier to flatten the sides of the blade completely before starting the actual grinding.
This removed the hammer dents from the ball peen hammer and makes grinding bevels with a centred edge easier.
Freehand grinding
The bevels are ground in on a Cubitron II belt, these rip through hardened steel and makes fast work of the rough stock removal. While grinding, the blade is dipped in water every few seconds to not ruin the temper.
Overheating the blade while grinding would result in further softening the blade which we do not want. So blue or brown marks on the blade is best avoided to keep the hardness where we want it from the tempering cycles.
I prefer freehand grinding after first roughing in bevels with the tool rest in, resting the spine on the tool rest and pushing hard to quickly remove material. Then removing the tool rest and free handing at slower speed to blend into one continuous bevel from edge to spine, creating the distal taper at the same time.
So maybe I do “tool rest grinding” first and then freehand?
Distal taper is good on a chef knife, in my opinion. Distal taper is the difference in spine thickness from the handle to the tip. Without distal taper the blade is stronger but ends up being too thick for kitchen use, so I always distal taper kitchen knives to less than 1 mm close to the tip.
It looks better this way to my mind with the thinning blade, and makes the blade more nimble to handle with less weight towards the tip than what a blade with full thickness would have.
Disc grinder to flatten the blade
After the freehand grinding it is onto the disc sander. 180 grit paper and slow speed to really flatten the sides and dial in the bevels. As with all san mai steel (core steel with something pretty on the sides) it is critical to grind until there is visible core steel on both sides of the blade– and aiming to have an even amount of core steel to make it look symmetrical.
For blades slow speed of 7-10 Hz is good on the disc grinder, slow enough to have good control and no “jumping” of the blade.
I often do a quick test etch in hydrochloric acid before finishing the grinding. This shows where the core steel is up to and makes it easy to see where I need to grind more to even it out between the sides.
A quick dip in hydrochloric acid before leaving the belt grinder and again before leaving the disc grinder, helps make sure there is exposed core steel all the way along the edge and as evenly exposed as I can get it.
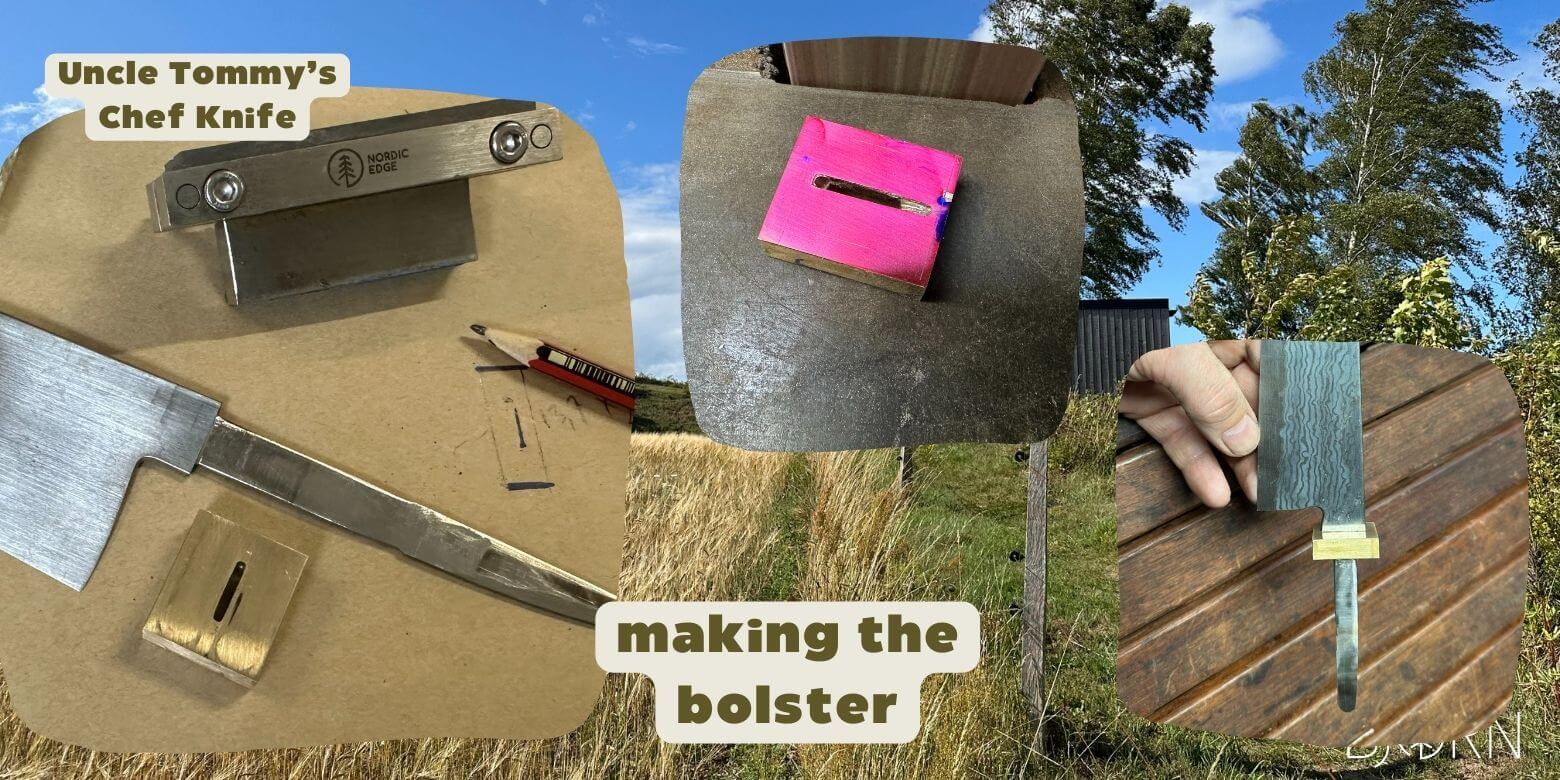
Brass and birch maybe?
I kept sending Tommy photos of the process on fb messenger so he could guide the way it was going. Mostly to make sure he was ok with it, but also to give him the option to steer in a different direction if not a fan of the blade shape or handle style. He was happy with the blade and agreed a brass bolster would look good against the birch, so all good to keep going.
Using a file guide the tang was ground to an exact fit of the brass bolster, and the bolster was pre-shaped a bit to cut down on grinding the brass later as this heats up a lot faster than the wooden block will do.
The last thing we want is to grind too long on the brass and heat it up until the epoxy lets go at the later stages of handle shaping!
We finally get to the handle
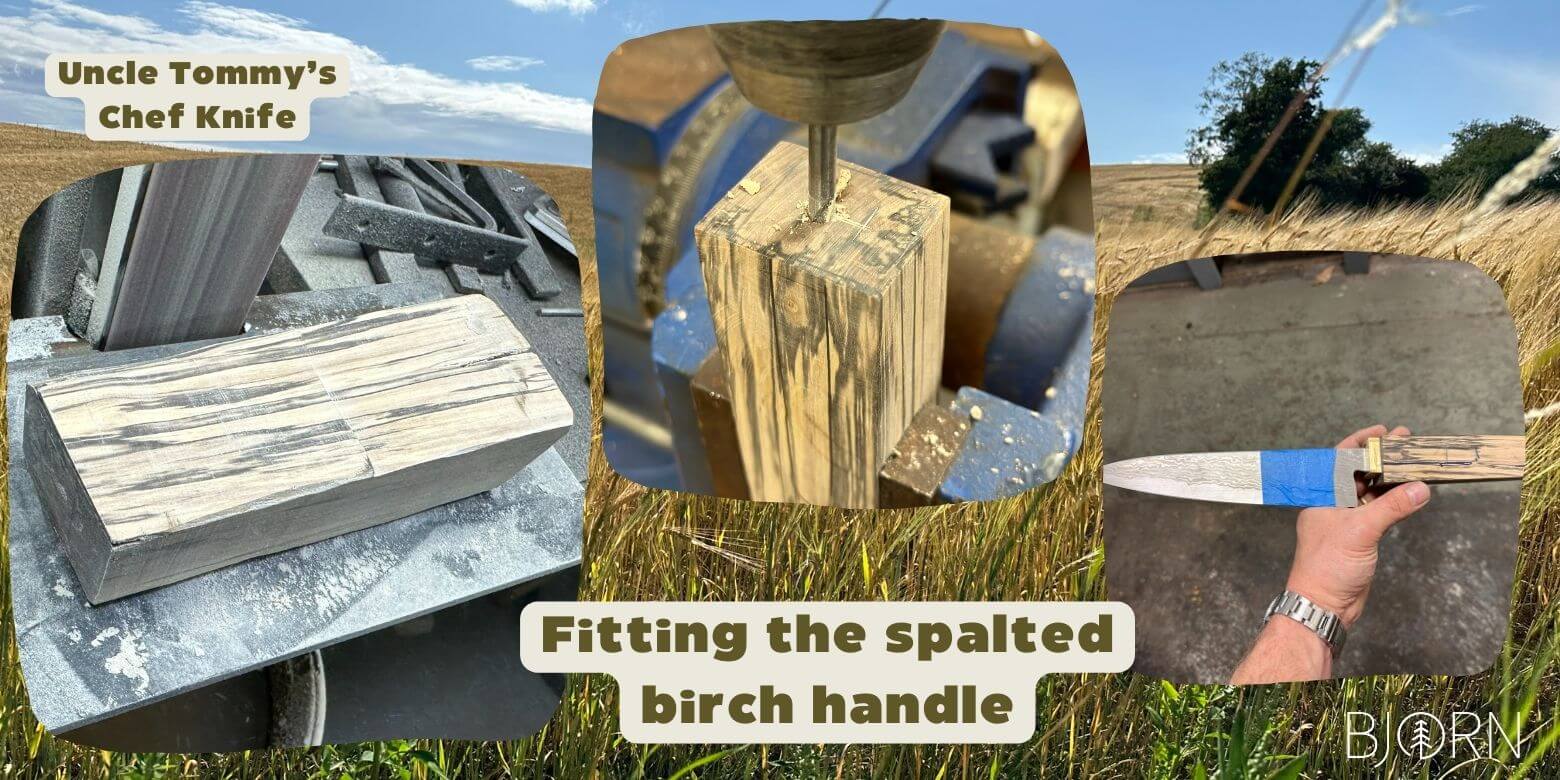
It was finally time to start working on the spalted birch for the handle, I had been waiting for this bit for some time now. From harvesting it back in July and having it stabilised after bringing it back home, I had picked it up and wondered how it would look on the inside many a time over the several months that had passed.
It was now finally time to see what the colours would be like inside the block.
It would have been even better if the spalting had been evenly distributed throughout the block, but in this case it was a bit more colour on one side than the other.
Meaning the fungi attack that created the dark colours were heavier on one side of the block than the other. That is how it is to work with natural materials sometimes, and we just make the best of it. From the colouring I could see it was hopefully going to be a pretty cool looking piece either way.
The block had also cracked on one end while drying, before it got to stabilising. Luckily the block was still long and wide enough for the handle, but it did force where the handle had to be cut from the block, to get around the cracked section.
The block was rough cut to shape, then cleaned up on the grinder. After drilling out holes for the tang and broaching the hole until the tang fit, we were in business.
Disc grinder is the way to go for accuracy
After gluing up the brass bolster and the wooden block, it was time to start drawing lines for the handle shape. Using a marble surface plate and digital height gauge, I drew centre lines and then lines for a tapered handle both in profile view and from the spine.
The handle is rough ground to the pencil lines on the belt grinder before moving on to my favourite handle shaping tool – the disc grinder. It is such a joy to turn the speed right down and go slow and accurate on the disc. Take my time, grind clean lines and see the handle come to live.
The variable speed, and ability to go both directions just creates a lot of freedom for shaping the handle and grind exactly to the drawn lines – where the belt grinder likes to overshoot a bit.
My favourite part and certainly the most dusty part, the grind room looks like a wood bomb has gone off in there after the initial handle shaping session!
Hand sanding again
I am guessing most other knife makers do the same?
Keep changing up the process over time and learning what works for them and how they prefer to do things. I have lately been splitting hand sanding of the blade into two steps. First rough sanding to 180 grits before making the handle (which takes the most time), and then final hand sanding after the handle is finished and it is time to glue up.
This is because I might mark the blade clamping it in the file guide for the tang fitting step. But also because I tend to put the blade down places I shouldn’t and have managed to mark blades a couple of times after they were not supposed to be placed down on the bench top exactly where there were some steel swarf..
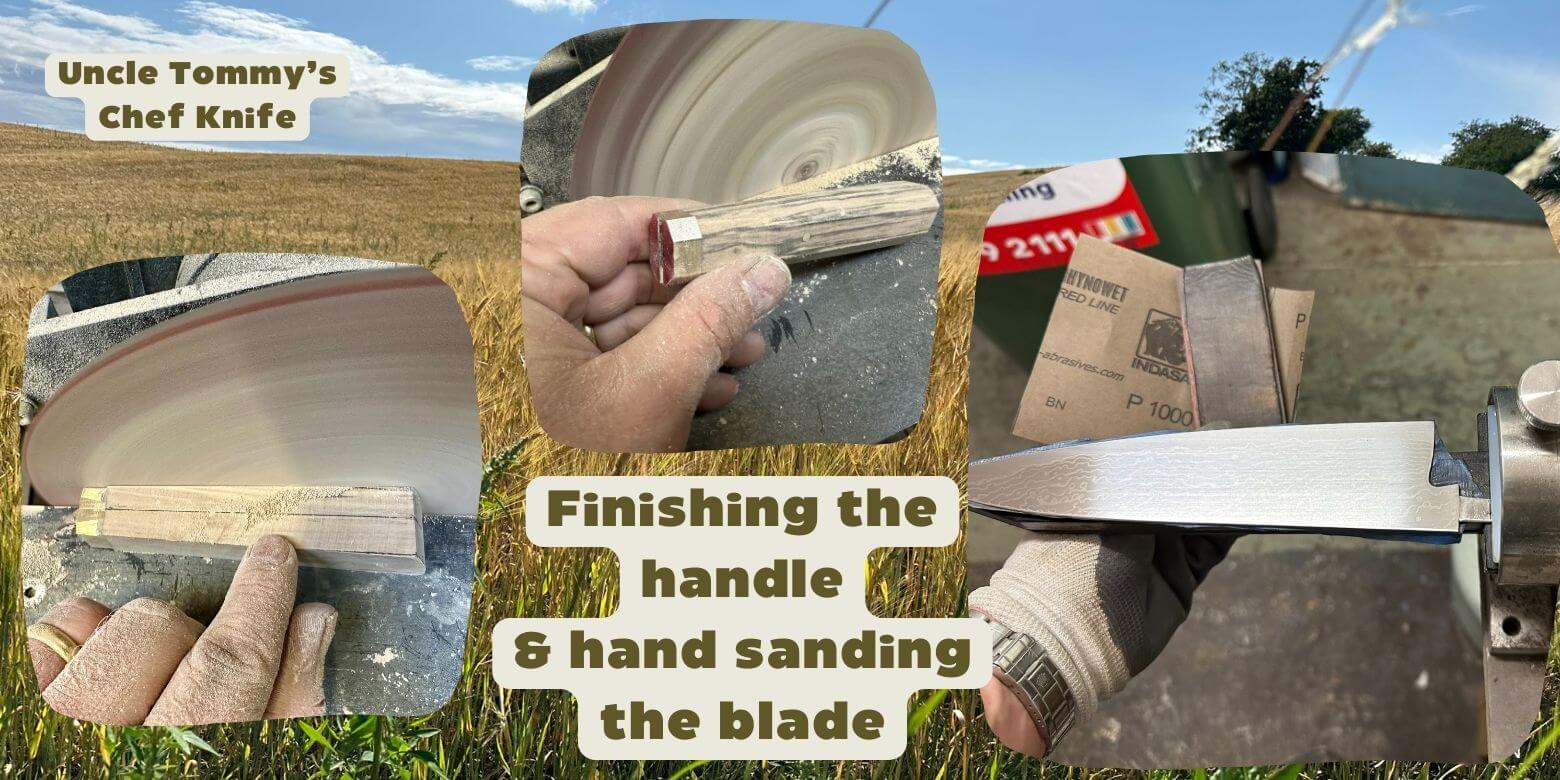
The blade goes back into the blade vice, and since most of the work of hand sanding is the first grit when flattening the blade, it does not take too long for this second phase.
A couple of hours sees the blade now go from 180 grit to 1500 grit Rhynowet metal worker abrasive paper, the last 3 grits with soft backing only to blend it in.
1500 grit is very high, for carbon blades I would normally only go to 600 grits, but this is stainless Damascus so I went all the way.
I find that the stainless Damascus after etching is mostly light still while carbon Damascus goes dark, and the light finish benefits from a higher grit. Or at least it does to my mind, so all the way we go!
Handle finishing is my favourite part
After gluing the blade into the shaped handle with epoxy, the handle is finished back in the blade vice. Using a hard backing for the sand paper, this helps keep angles and lines straight. As well as making sure the transition from brass to wood, and over the brass pin does not get washed out or undercut.
Again I probably go a bit overboard with the high grits, but this is after all my favourite part of any knife project, so I like to sand to as high a grit as I can.
In my book 1500 grit is a minimum, wood just “pops” and looks so much better than if finishing at say 400 or even 600 grits. And it takes very little extra effort after the handle is already flat and sanded, to keep going another couple of grits.
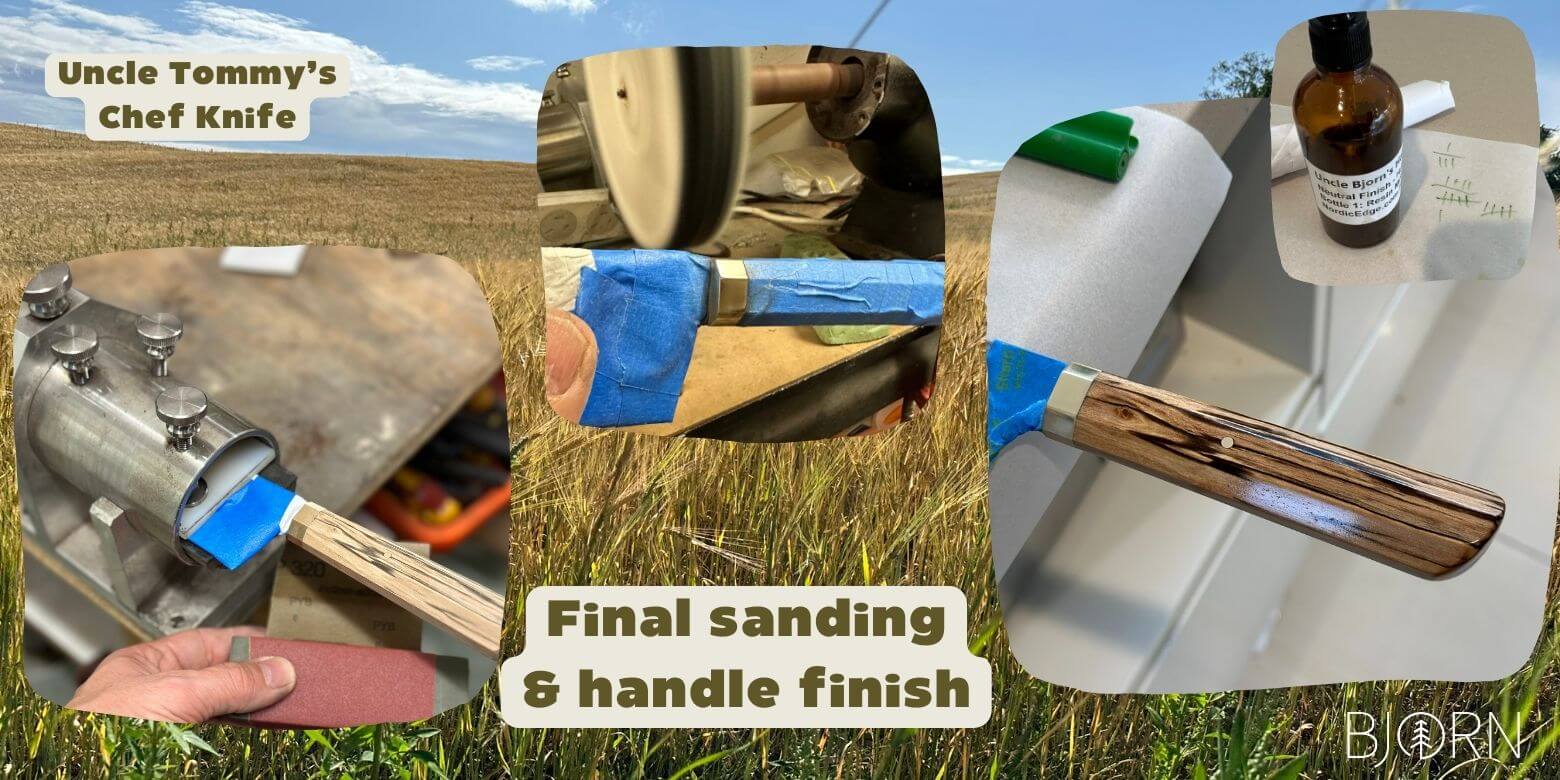
To go that extra little bit on this one, the brass bolster was buffed and the wood got some extra attention from my micro-mesh polishing pad set. These are soft sanding pads with grits from 1,500 to 12,000 (!) and going through the pads leave a shiny, beautiful looking handle even before the handle finish is added.
To seal and protect the wooden handle, I use my own mix “Uncle Bjorn’s Handle Finish” or UBHF for short. This leaves a glossy, protective layer on the handle, it is light coloured enough to not discolour even light woods.
It is also quick to apply and does not require days and days of drying like some oils do. Spending a couple of hours applying layers of first pore filling and then polishing layers, the knife handle ended up looking pretty good, I think!
Leather slip as final touch
A sheath for a kitchen knife is not required, but I enjoy making these little leather slips so that is all the excuse I need. It looks nice when giving away the knife that it has a safe way to be stored in a drawer if not going on a magnet list or knife block. And I love the smell of the leather while working it, as well as the process of making them.
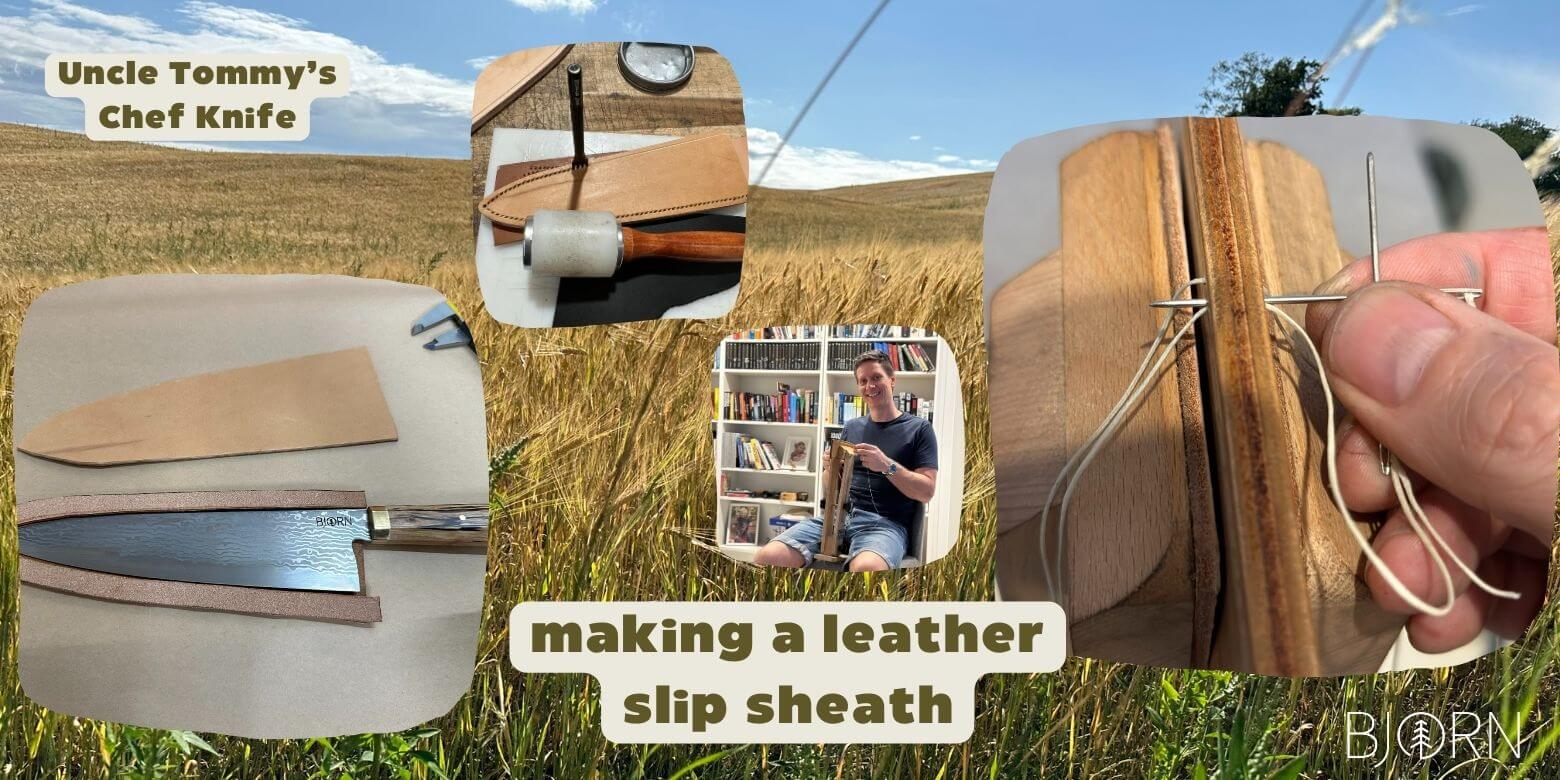
I start by tracking the knife blade on the inside of 3 mm veg tanned leather, then add 12 mm to this outline before cutting it out. Then using this as a template I cut out another piece, with the outside out on both sides – if that makes sense. Both flesh sides or “insides” go in towards the knife blade.
As this is a chef knife, using the same leather for the welt layer would be too thick, so I used some 2 mm leather for the third, inside “welt” layer.
All surfaces to be glued up are roughed up with a rasp before the welt is glued in with this Japanese PVA-looking leather glue I have been using the last year or so.
Martin Carswell is one of the best leatherworkers in Australia and he recommended this glue, saying it leaves no visible glue line unlike some leather cement glues might do.
Then when dry, the leather sheath is ground to shape on the belt sander to even the edges, before having stitch holes punched. I like to dip the diamond stitching punches in leather conditioner every couple of goes, this helps get the prongs out again when punching through three layers of leather like here.
The challenge at this step is keeping the stitching punch straight so the holes come out the back at about the same distance from the edge as they went in.
Not a strong suite of mine, often the back stitching line looks like it was done in the dark – drunk - in a “learning on the job” kind of situation.
Saddle stitching by hand
The actual stitching is another of my favourite parts though. Bringing it home, I clamped the leather sheath in a stitching pony and run the thread through some beeswax.
First I run a diamond awl through each hole to make sure the needles will not get stuck. Then one needle is attached to each end of the thread and locked in place by wrapping the thread three times around the needle before the needle goes through the thread.
I enjoy the process of hand stitching leather, this one I did in front of the tv while our son played fortnite. It is one of the few quiet parts of knife making – or at least it usually is when there is no fortnite :)
Again checking in with Uncle Tommy, he confirmed natural leather was the way to go. No dye on this one, so it just got some more leather conditioner and a couple of layers of Resolene to help protect it against moisture. Buffing it well on an old t-shirt and this project was done!
After etching on my makers mark, the knife is finished and being sent back to Sweden hopefully in time for Christmas!
I really enjoyed this build due to both the history of the handle material,
and for knowing where the knife is going. It might even get to see some use in the little cabin!
Thank you for reading along,
Bjorn
Recent Posts
-

The Etch Test: Ferric vs Hydrochloric vs Gator Piss
The Etch Test: Three Very Different Looks From One Steel One of the great things about knife making …3rd Jan 2026 -

Why Bed The Tang In Epoxy - Then Knock it OFF Again.
What is "Bedding the tang"? Bedding the tang means gluing a stick-tang blade into the handle block i …21st Mar 2025 -

Marble Leather - How to Dip Dye Veg Tanned Leather
This was my first experiment with hydrodipping or dip dying leather, and it came out pretty cool! I …14th Mar 2025