
How To Work Mammoth Tooth?
How to drill and grind mammoth tooth
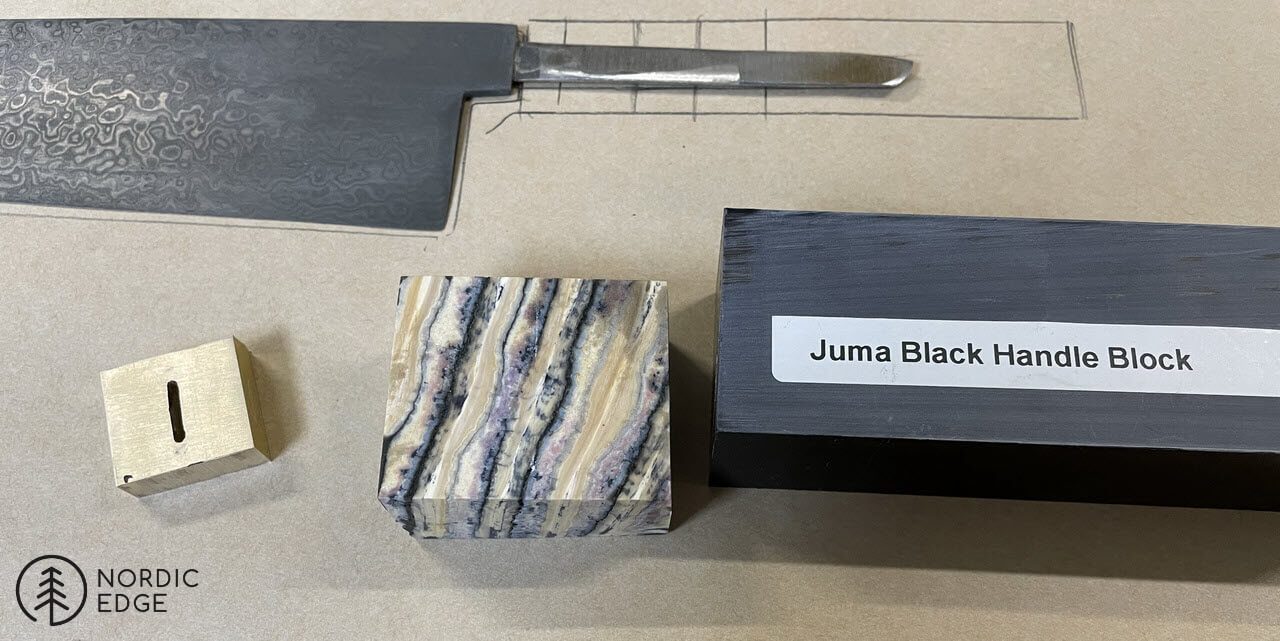
Mammoth molar is an good-looking - and expensive - handle material to use on your knives. This is my first attempt using a piece of mammoth tooth or molar as a spacer and I was a bit nervous regarding how this would be to drill and grind.
By Bjorn Jacobsen, 16th of July 2021.
Hairy mammoth ok to use?
Mammoths are extint thousands of years ago and there are no restrictions in Australia on importing or using the materials. Unlike elephant teeth where we avoid using the material to not encourage illegal hunting, there is no hunting at all with mammoth - they are all dead already. So we can safely use mammoth without endangering the animals.
Stabilised with resin
The mammoth tusk and teeth we sell at Nordic Edge are from Russia and have been stabilised with resin to make them less fragile, they are after all thousands of years old. The material is dyed and stabilised in pressure chambers, much like stabilised wood or antler. This creates a product that retains the original look but with a slightly more plastic-like feel to it, heavy and dense to touch but enables us to handle and machine it.
Mammoth molar spacer
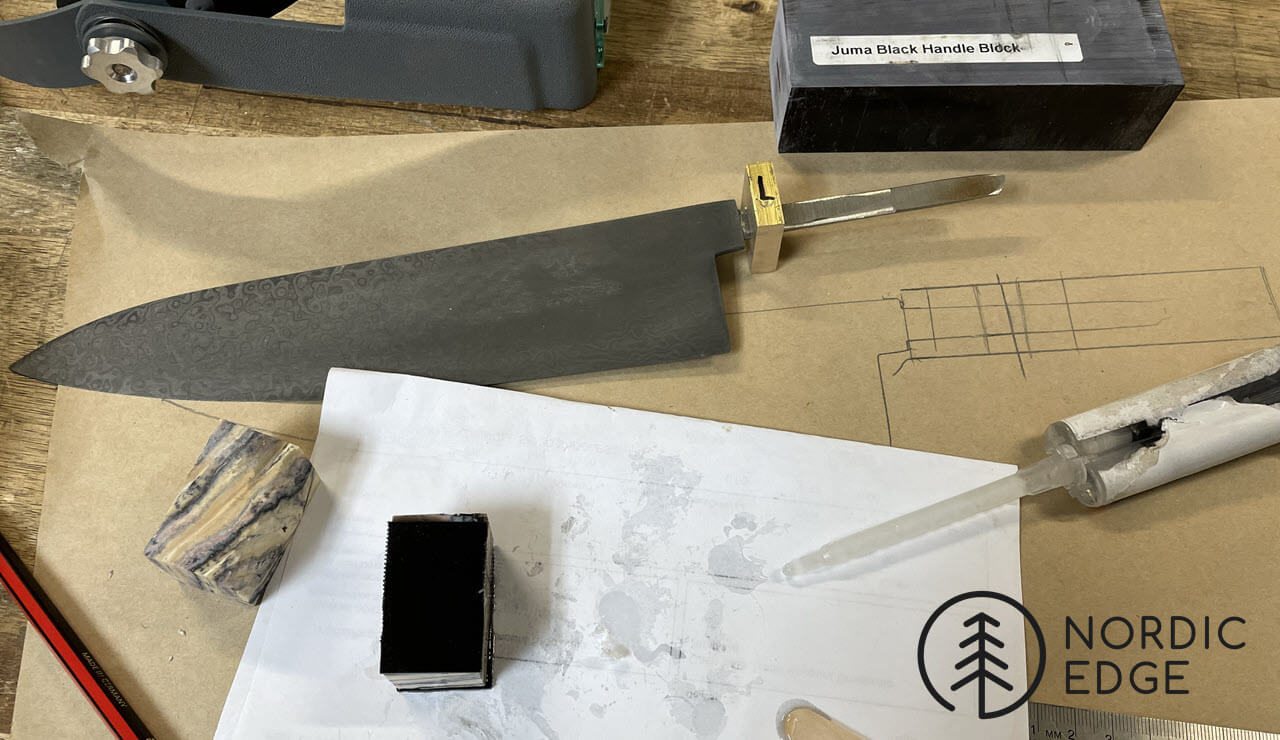
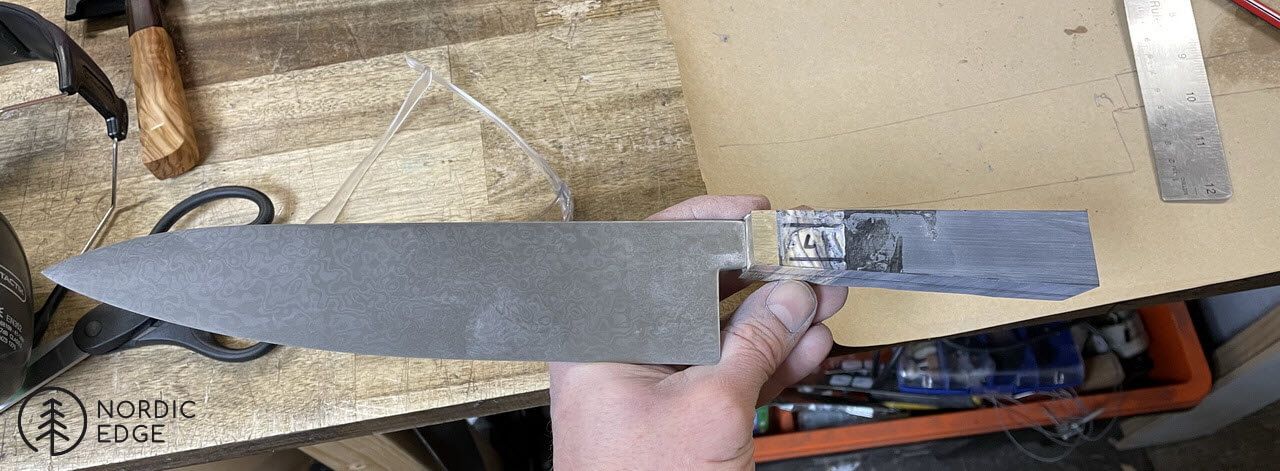
In the below photo we have the blade ready to go, the tang is ground in using a carbide faced file guide to give is a step for the front bolster - or guard - bit. The brass bolster is the 4th one (!) I had to make before getting a nice clean fit on the blade without any gaps. This is where making thick spined blades is way easier to make guards for and chef knife blades can be a challenge.
The problem with mammoth
The concern with mammoth is due to the unique material itself: The mammoth tooth is not built like a human tooth with hard enamel on the outside and softer bone on the inside. The mammoth tooth has hard plates of enamel going through the tooth in layers. This creates the problem of drilling a material that is hard (enamel) and softer (bone), where a drill bit might go sideways if hitting the edge of something hard. It is not a homogenous material to drill and care needs to be taken. In our case the piece is going to be a spacer so a slightly oversized hole would probably not been visible anyway though.
The second issue with mammoth is that it can be brittle and often have tear-outs when drilling. Meaning where the drill bit is just about to come out the underside of the drilled material, the bottom "falls out", possibly damaging the piece so badly it cannot be used.
Sawing the mammoth tooth
Here the mammoth tooth spacer is sawed in half using a metal band saw. I am not sure if a wood band saw would do this but the metal band saw we use for cutting steel and brass cut right through the mammoth with no issues. There were no problems with the saw blade wandering or chittering, it went straight through without heating the mammoth. So this should work with a hacksaw if not having a metal band saw (which basically is a power hacksaw).
Attach G10 spacers to avoid chipping out
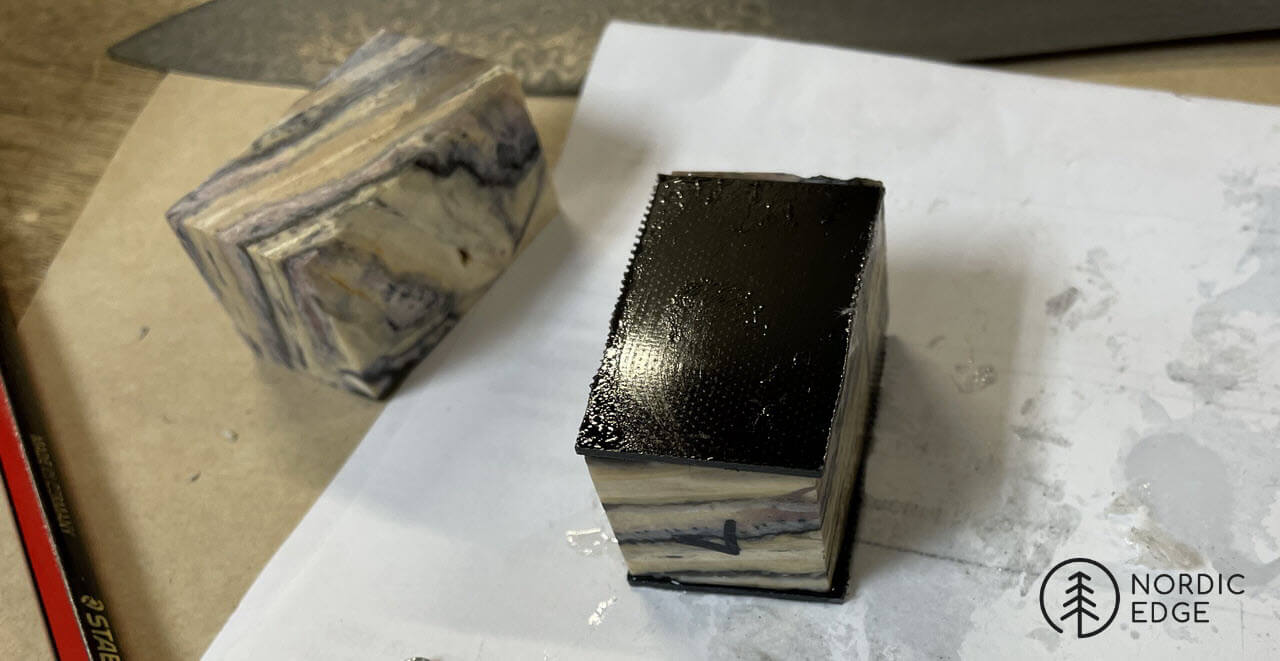
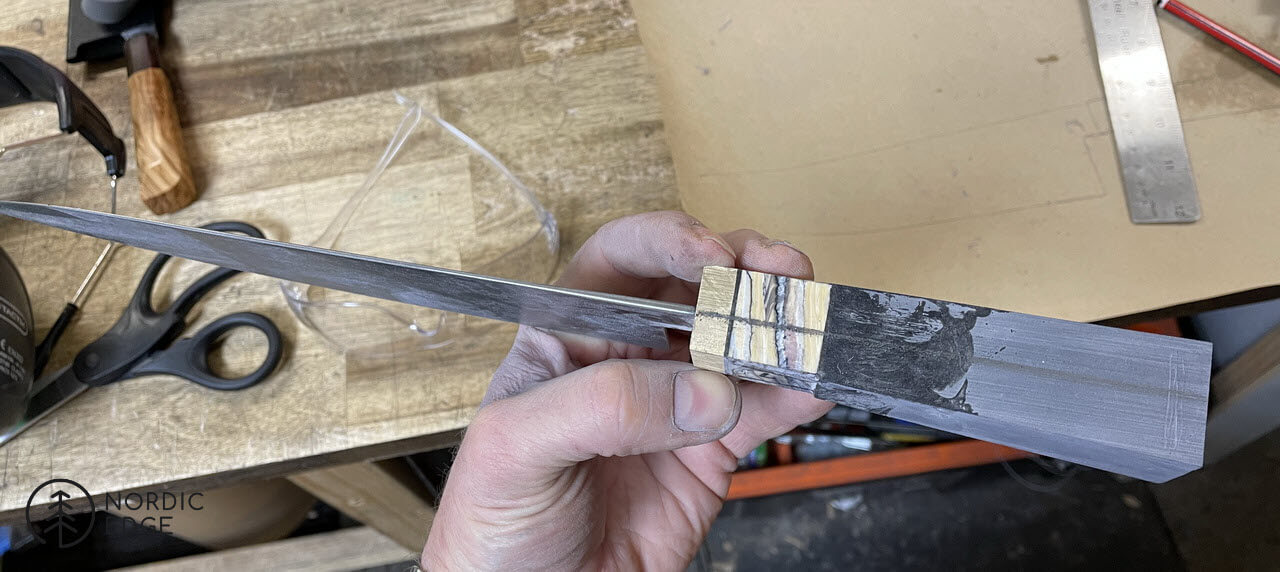
The below is the piece of mammoth with spacers of 1 mm black G10 epoxied to each side with 5 min epoxy. This means the drill bit both starts and ends with G10 rather than the brittle mammoth, to avoid any tear-outs. G10 come in lots of colours and to me the black lines add a nice look between the brass guard and mammoth.
Use stubby drill bits
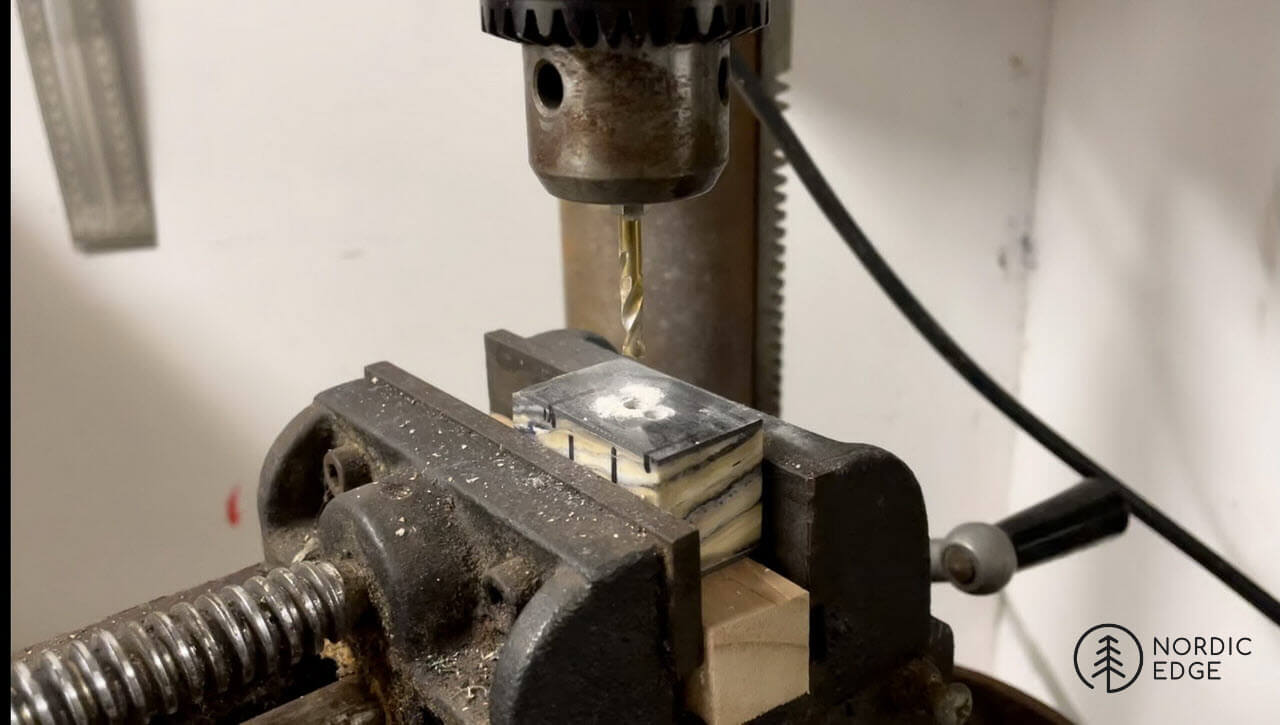
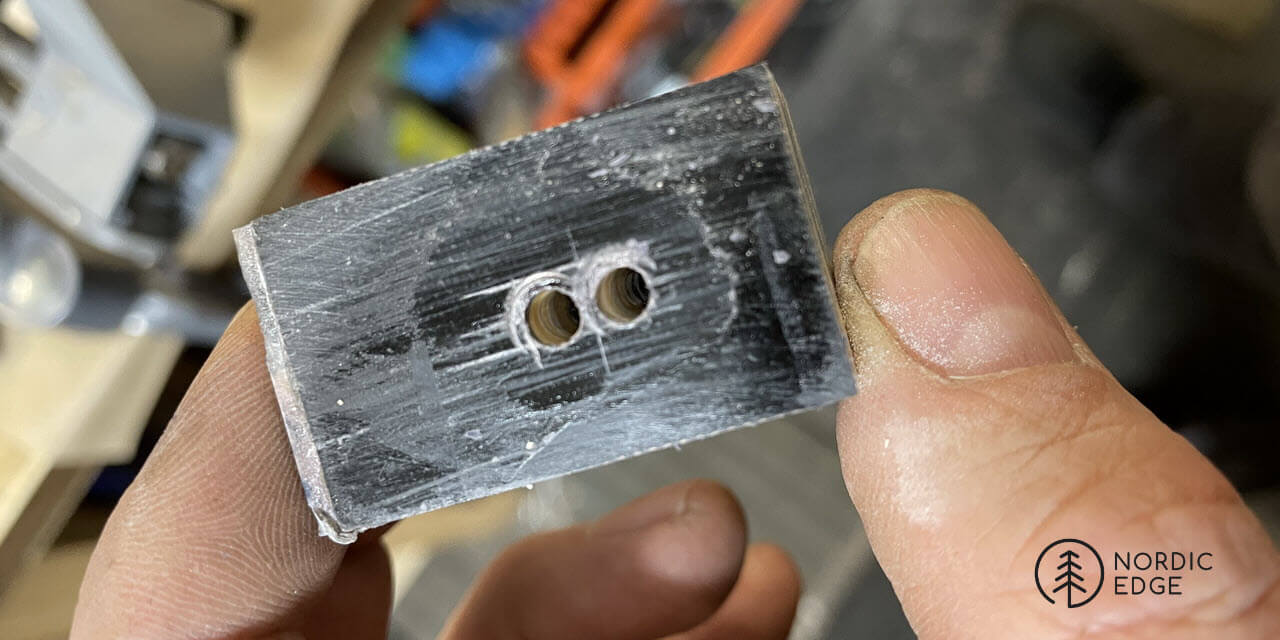
Whenever drilling metal, I prefer using short stubby drill bits. These are less likely to wander or bend. I marked with digital calipers the centre line and then the height of the tang onto the centre line and centre-punched before drilling two holes, one on each end of the drawn line.
This was a nervous moment but it worked well! No chipping, no overheating of the mammoth, no stuck drillbit unable to move through the enamel. Applying even pressure and letting it work it's way through the tooth worked well. I did not use any cutting fluid, leaving it dry. It smelled like burning hair, similar to how antler smells when being drilled or ground.
Sand it flat and remove the extra material
To make sure the ends were flat after drilling I placed a 180 sheet of rhynowet on a flat surface and lightly sanded both ends of the G10 spacers to make sure there were no bumps. Then I used a dremel with a carbide bit to remove the material between the holes. At this point I realised the mammoth molar was not as difficult to work as I had thought, I used a file to clean up the slit with no issues.
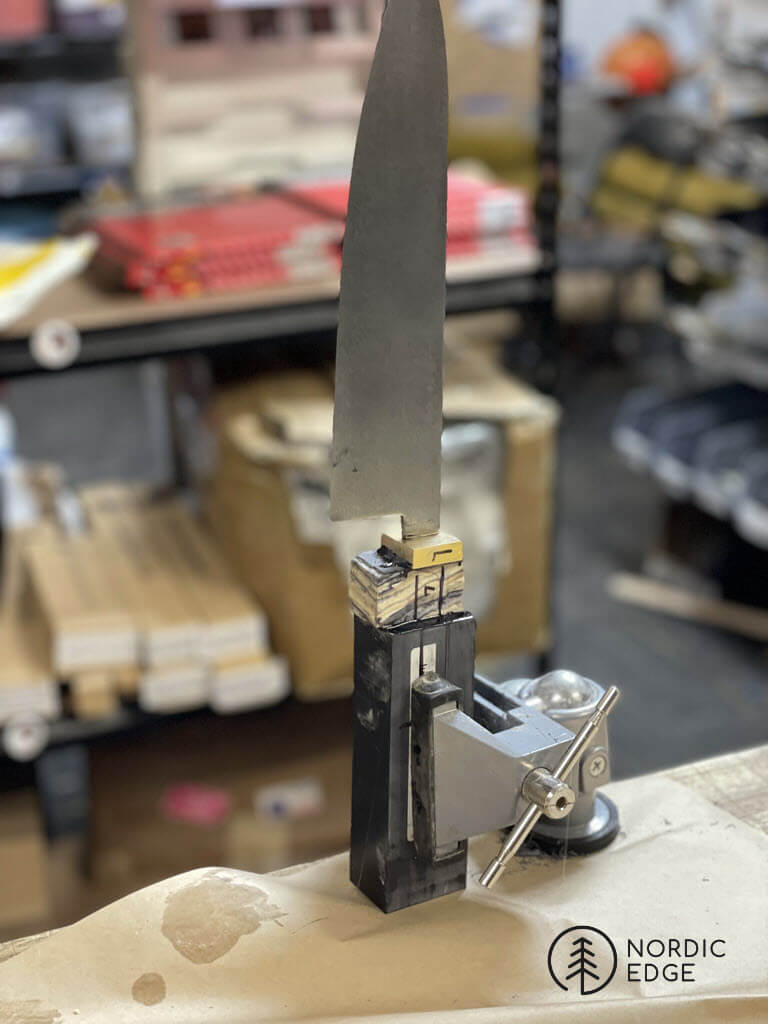
Here the knife handle and blade are epoxied together and left overnight to cure. I like using one of these small table vices and dry-fitting everything together as this allows for the block to be leaned slightly sideways if necessary for the blade to sit flat down on the bolster.
Removing excess materials
Before starting on the grinder I prefer to remove excess materials with the metal band saw. This reduces the amount that needs to be ground off and also reduces the chance of overheating anything. Here the handle materials are all still there from the glue-up. The next photo is after sawing off the excess on top to create a straight line a few mm above a line drawn from the blade spine onto the handle materials.
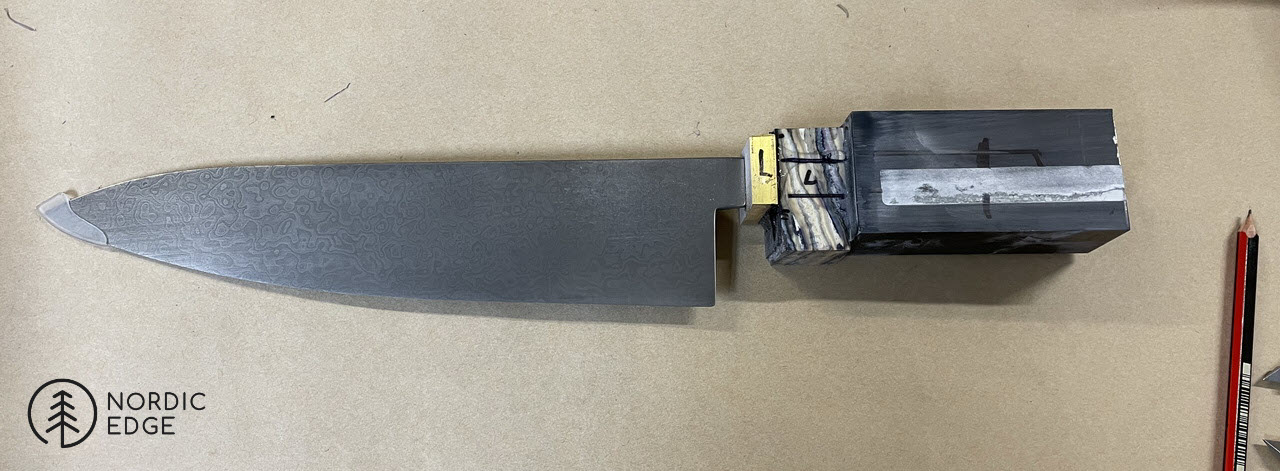
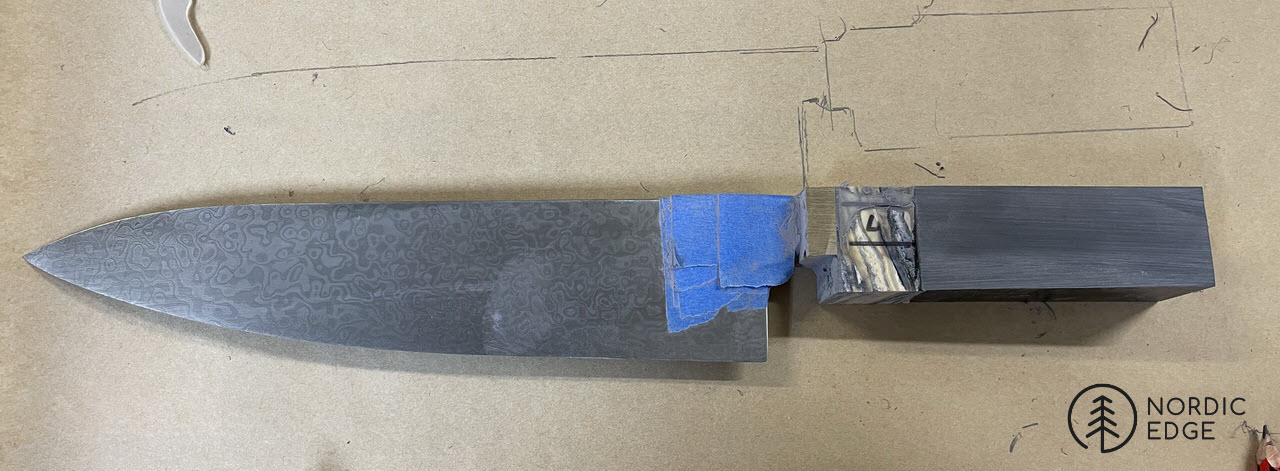
To achieve this we draw a line from the blade spine onto the handle materials. I ended up angling the handle slightly down rather than have a straight line and in the photo below anything above the line has been cut off with the metal band saw.
Squaring up the handle block
This is going to be a "wa" style handle, inspired by Japanese chef knives. So I measured up 18 mm at the front of the brass bolster and 28 mm at the back of the block and cut and ground to these lines. Those measurements were just what worked here from measuring the height of the tang where it meets the brass guard and adding a mm or so on each side.
Showing the process on the spine: using a steel ruler from the blade down the handle, I drew a centreline. Then from this centre line measure 9 mm out to each side of the brass bolster and mark with the calipers and then pen. Mark out 14 mm from the centre line at the back of the block with calipers and then pen. Draw lines between these pen marks and grind away on the belt grinder anything outside of those lines.
Heat warning - keep it cool
The brass will quickly get hot, so much so that the epoxy can let go. To reduce this use as coarse a belt as possible and stop every few seconds to feel the brass with your hand. I treated the mammoth the same, if necessary or not.
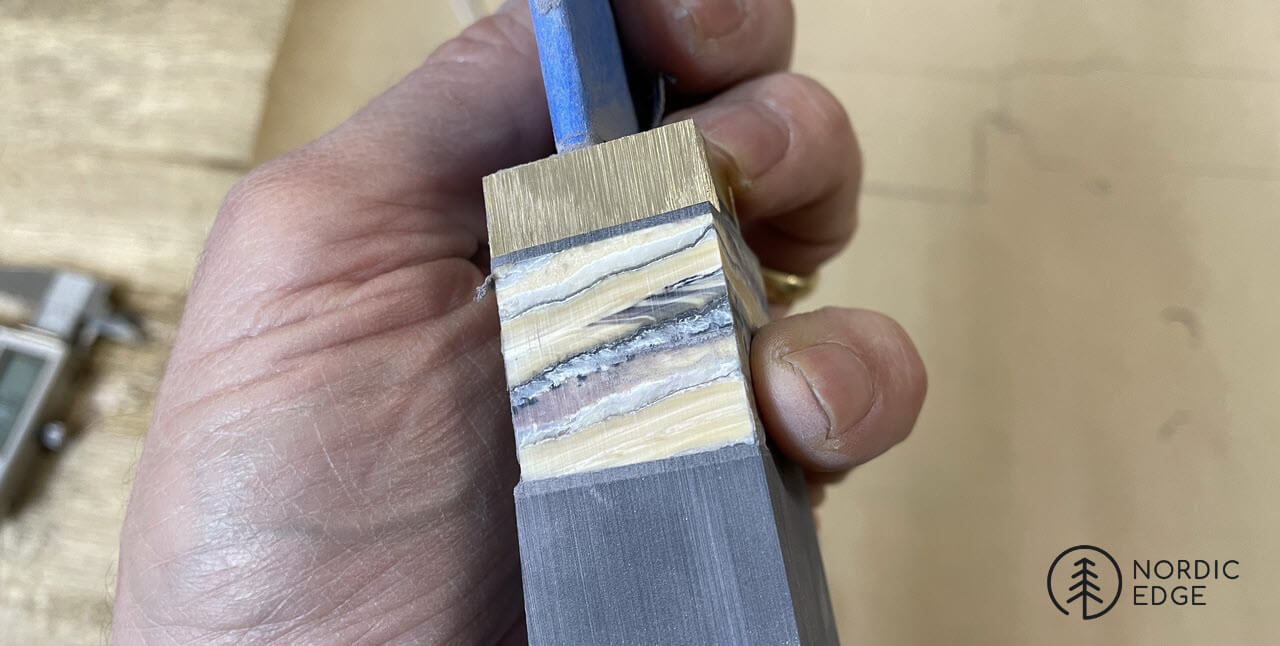
How awesome are the colours in the mammoth tooth!
Shaping the Wa handle
After the block is shaped to the 18 front and 28 back measurements, it is easy to draw on the corners that will be ground off with the digital calipers. I then filled in the scratch marks from the calipers with a thin pen and rough ground to these on the belt grinder and cleaned up on a disc grinder at very low speed (8 Hz).
If not having a disc grinder, I would recommend stopping way before you hit the lines with the belt grinder as it is very quick to go too far and then using a hand file from there until you hit the lines on both sides.
Here is an article with more details on shaping the Wa handle: LINK
Sanded and polished
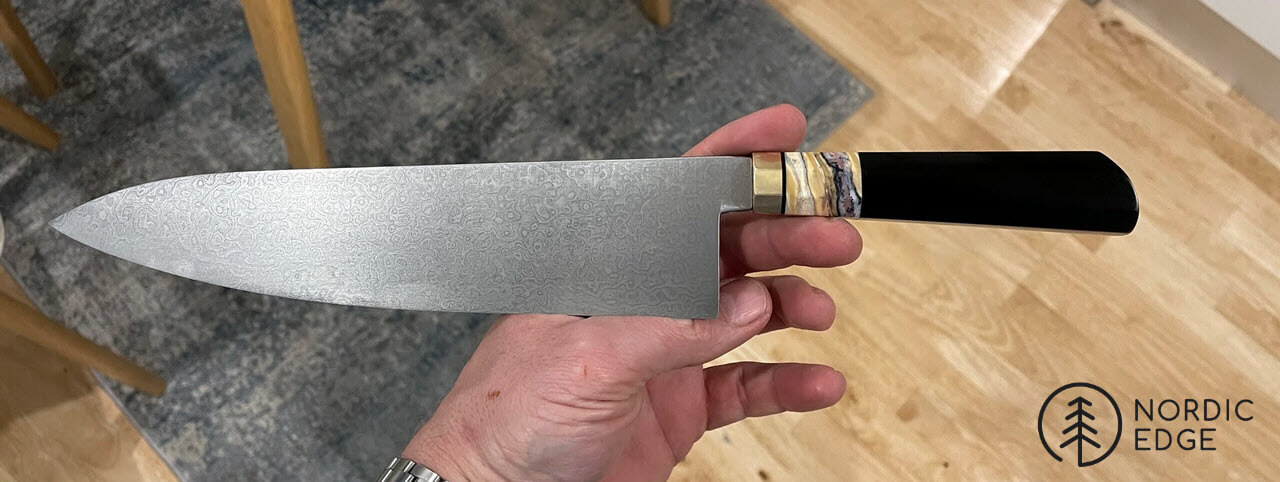
This is the end result, with the brass, mammoth and Juma Black sanded to 1500 grits and then polished with green paste on a polishing mop. I sealed the handle with our own handle finish, thinking this would stop the brass from tarnishing.
A big Thank You to Mert Tansu of Tansu Knives for his guidance with grinding this blade at his place before Covid hit.
When my wife saw it she said "wow that is much nicer than your normal blades!" so maybe I should grind more blades under the watchful eye of Mert :)
Summary - keep it cool
- don't use for end pieces due to being a bit brittle
- use spacers on each side when drilling, to avoid tear-out
- cut to rough shape to avoid heating up when grinding
- metal band saw or hacksaw to cut the mammoth
- keep it cool, don't let it overheat while grinding
Recent Posts
-

The Etch Test: Ferric vs Hydrochloric vs Gator Piss
The Etch Test: Three Very Different Looks From One Steel One of the great things about knife making …3rd Jan 2026 -

Why Bed The Tang In Epoxy - Then Knock it OFF Again.
What is "Bedding the tang"? Bedding the tang means gluing a stick-tang blade into the handle block i …21st Mar 2025 -

Marble Leather - How to Dip Dye Veg Tanned Leather
This was my first experiment with hydrodipping or dip dying leather, and it came out pretty cool! I …14th Mar 2025