
Simple way to make Wa handle shape
Simple way to make "Wa" or Japanese style handle
This was a great learning exercise and sharing the photos and process here - even though the result is not what I wanted. I messed up already when rough shaping the handle and made the decision to continue to test the process, where it would have been smarter to not invest more time into this handle, and just start again.
Anyway, I think the process is sound still, and it is a very simple to follow way to create the Japanese style Wa handle.
The blade:
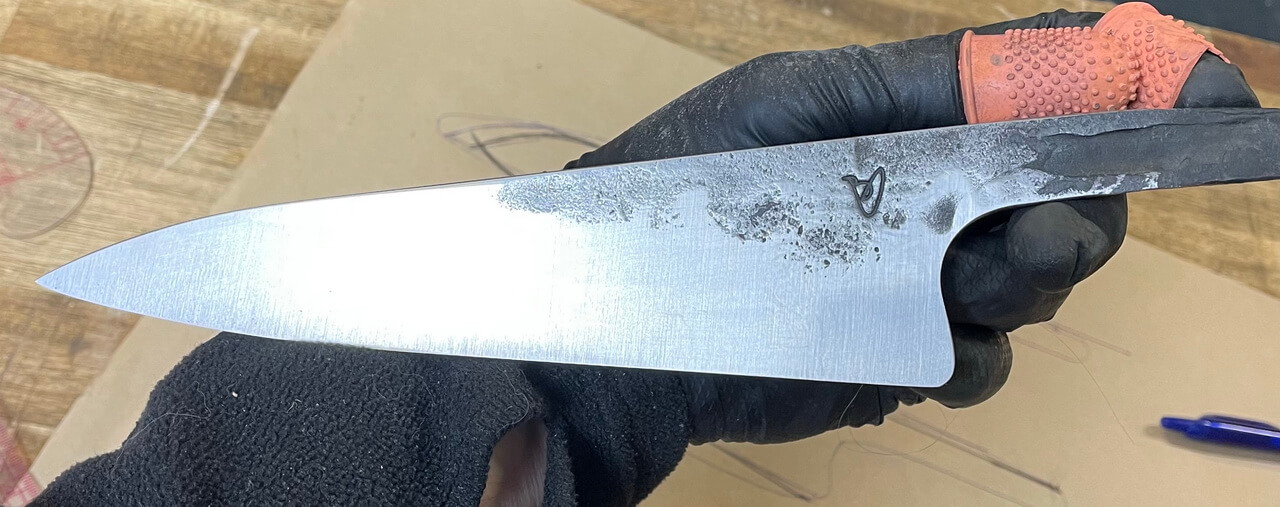
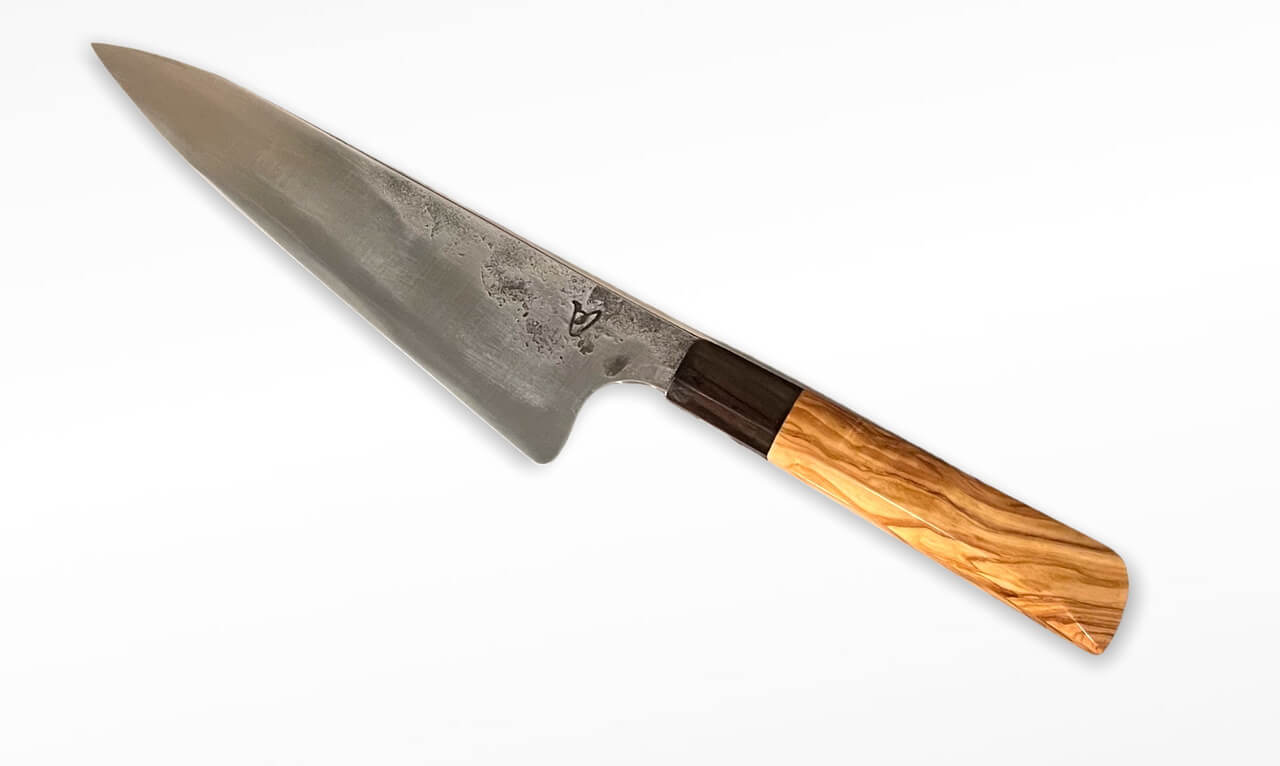
This was a forged chefe knife blade made from 1084 High Carbon steel in 3.5 x 50 mm. Grinding the bevels with those rubber thimble protectors is another tip from Henning Wilkinson and it is brilliant. Less burned finger tips is a bonus, and the one on the forefinger with the tip cut off slides up on the last joint where I rest the blade while grinding bevels.
Preparing the tang:
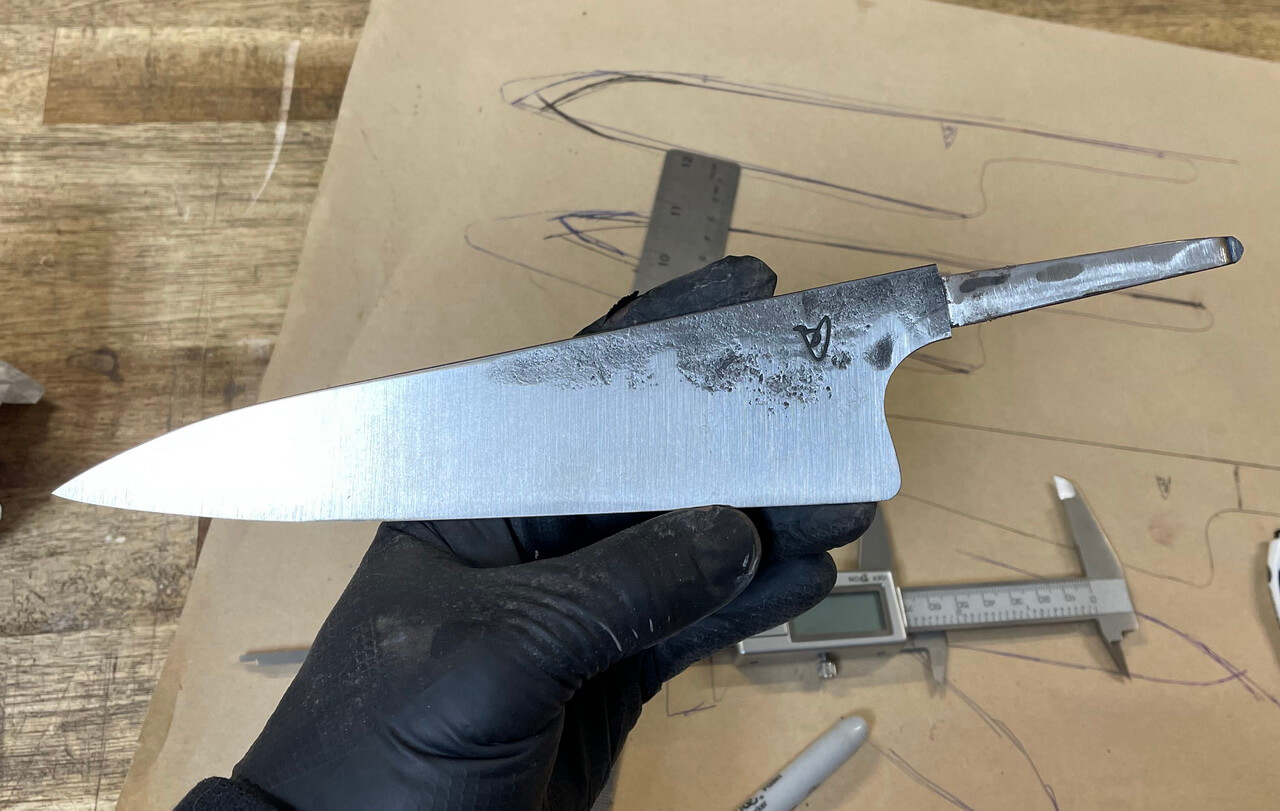
Using a carbide faced file guide, the tang is ground down to prepare for gluing into the handle block. In this case I used a pre-milled handle block with olive and ebony wood so the tang has to fit this block. I rasped the slit in the block a bit bigger and then ground the tang until it fit. The tang is rough ground using a 60 grit VSM Ceramic belt and then the last couple of mms are ground using a 180 grit aluminium oxide belt which is gentler on the carbide strips of the file guide. They last longer if not used with ceramic belts.
Gluing on the handle block:
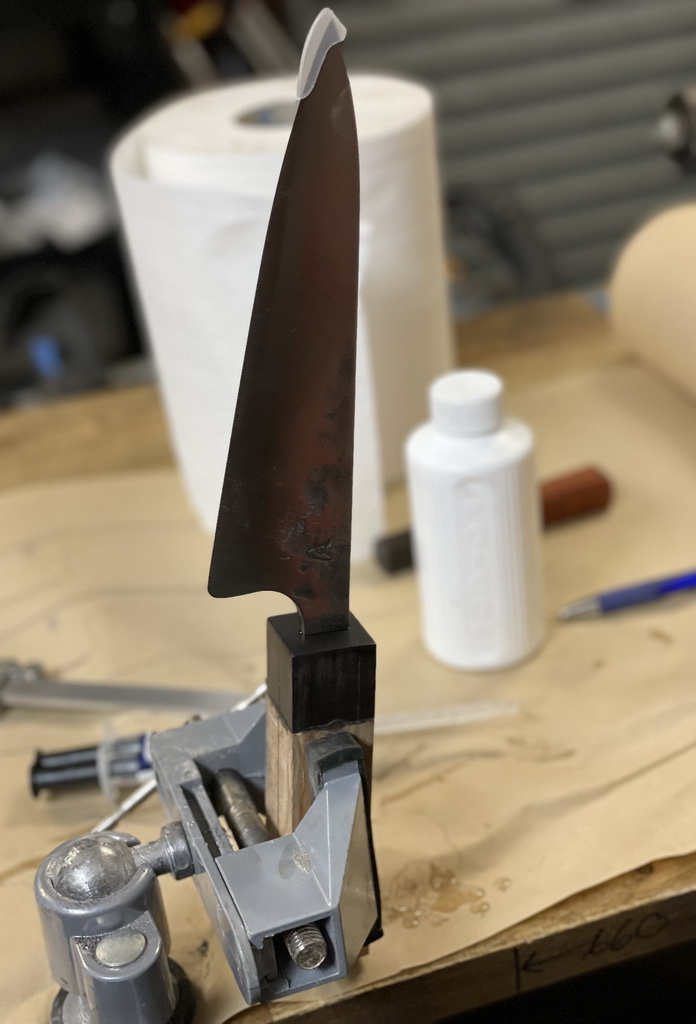
When the tang fits the slit in the handle block, I use a small vice to hold the handle block. This makes it easy to adjust the block in any direction needed to make sure the blade sits flat down on the block - as well as remove any chance of the block falling over if just balanced on the end. Also note the blade tip protector on the blade, these are very helpful if you without thinking lean forward to check if the blade is straight..
This blade was secured with Resinex 5-min epoxy but any two-component epoxy will work from bunnings, the super market etc. Usually we recommend using "max strength" over the 5-min versions to give yourself more time to clean up but the 5-min version works well also.
Squaring up the block:
The reason this process for making a Wa handle is so simple to follow is because the block is squared up and then tapered before any of the corners are cut off. So the first step is to square up the handle block.
A digital caliper and pencil works well, a height gauge would have been even better.
Decide final dimensions and taper:
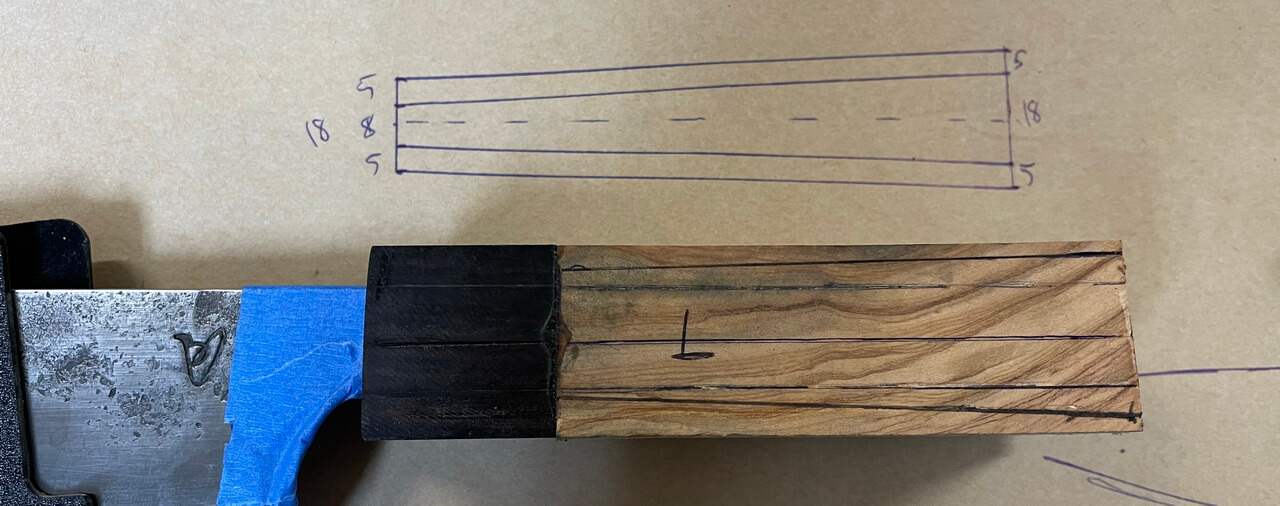
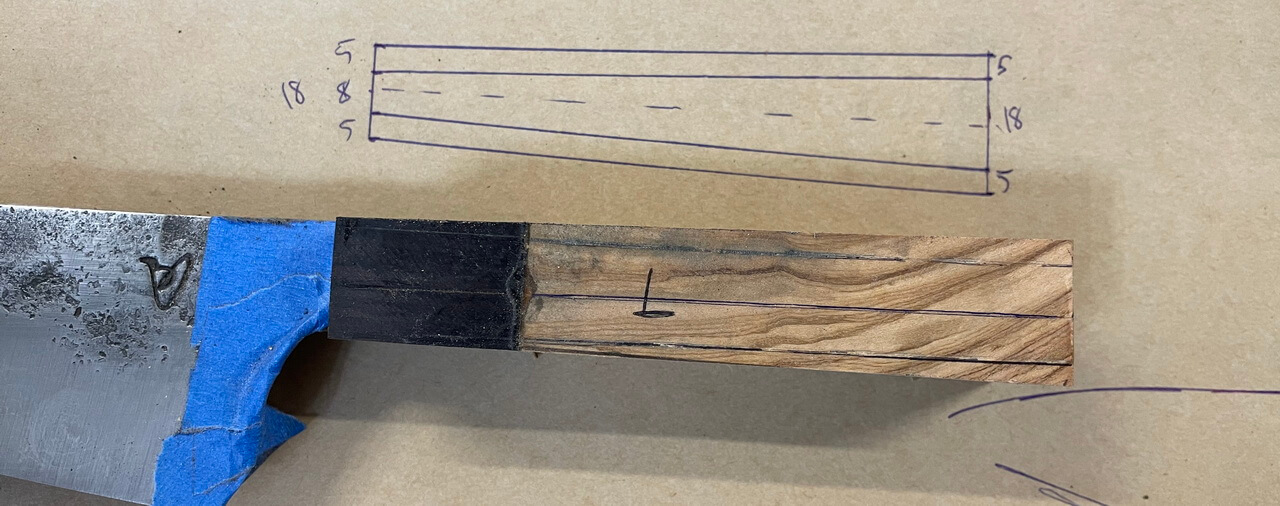
When the block is squared up, I draw a centre line and start looking at dimensions. The centre line is the centre/middle of the tang width of where the tang meets the handle block.
I prefer a straight line going from the spine of the blade into the handle rather than a big step up, and decided on a 18 mm front and 28 mm back height for the handle. Above the handle block you can see my scetch, showing the 18 mm front and 28 mm back dimensions. On the block I measured using a digital caliper up from the centre line and then connected these marks.
From the back end I marked 14 mm up above the centreline, and 14 mm below the centreline. These marks are 28 mm apart. At the front of the block, I marked 9 mm up and down from the centreline, this makes the 18 mm front. Then I drew with a thin, black pen between these lines to create the taper lines we will grind to.
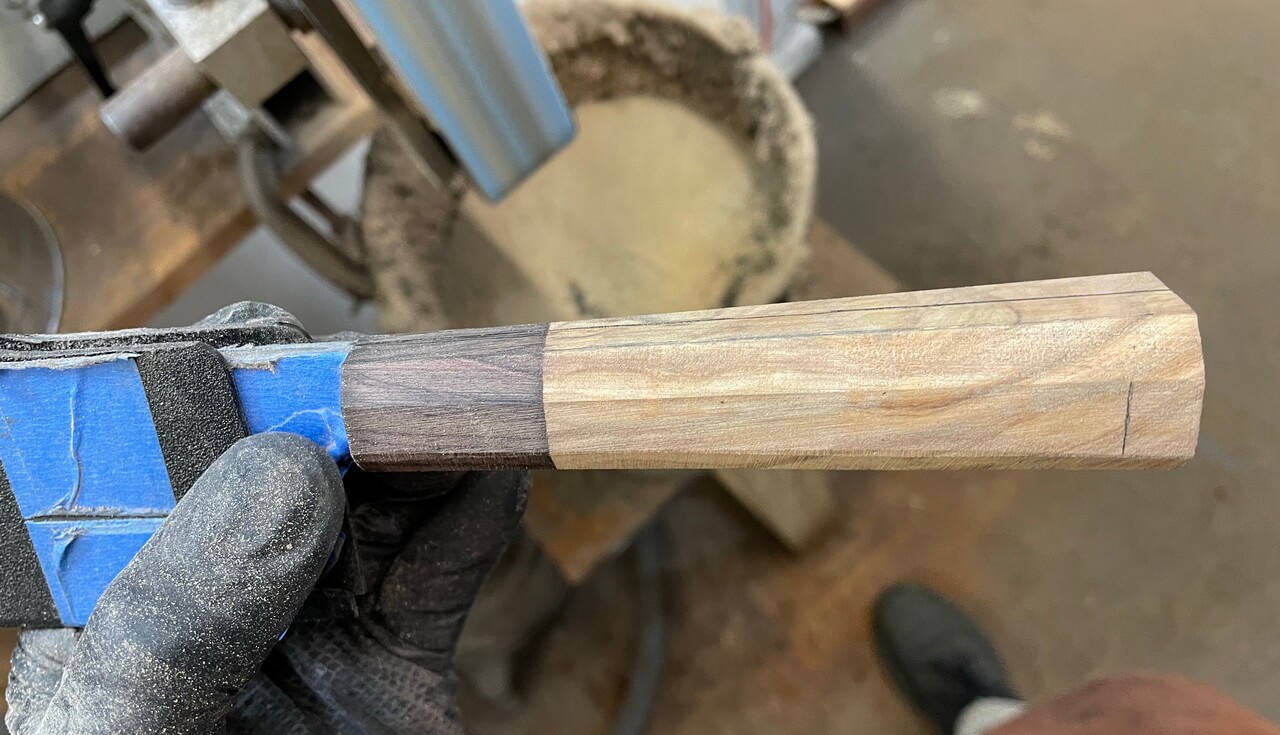
Tapering the handle block:
This is where it went wrong for me. I was rushing a bit when rasping the slit bigger in the pre-milled handle block and made the hole bigger than necessary inside the block. And when grinding away the bottom of the block to the line drawn in the above image...I ground into the tang hole - showing the epoxy from inside the hole!
In retrospect possibly not the best decision, but I pressed on to keep doing the WA handle rather than start again.
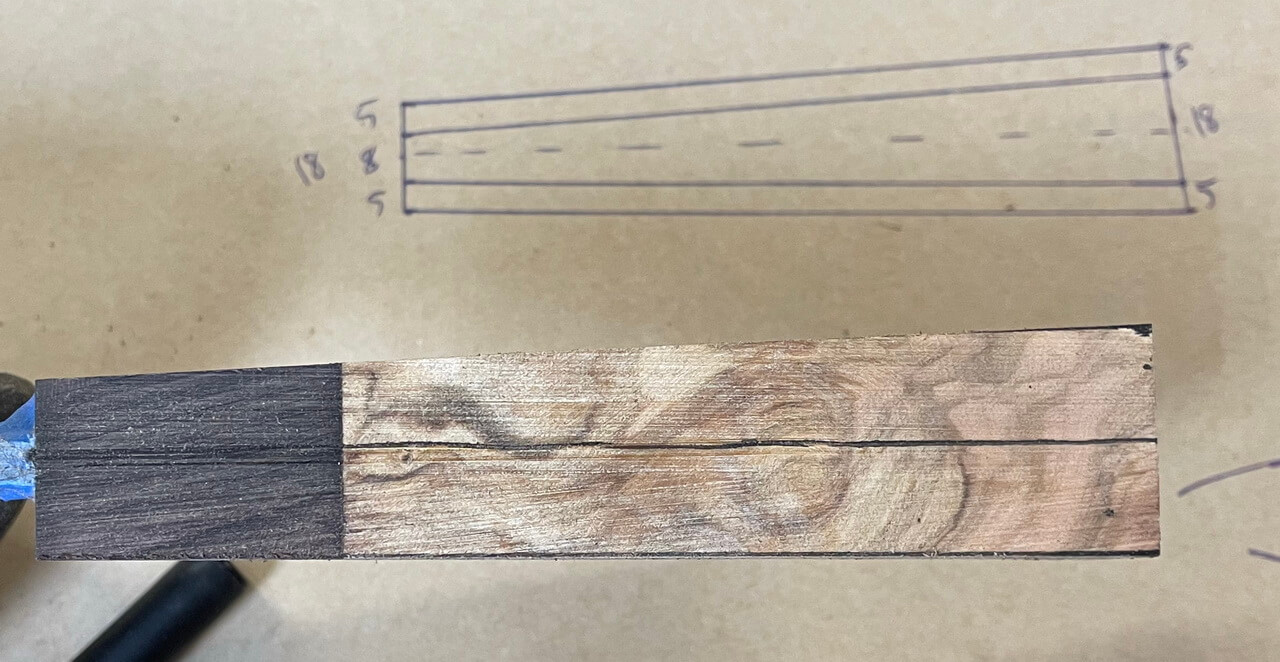
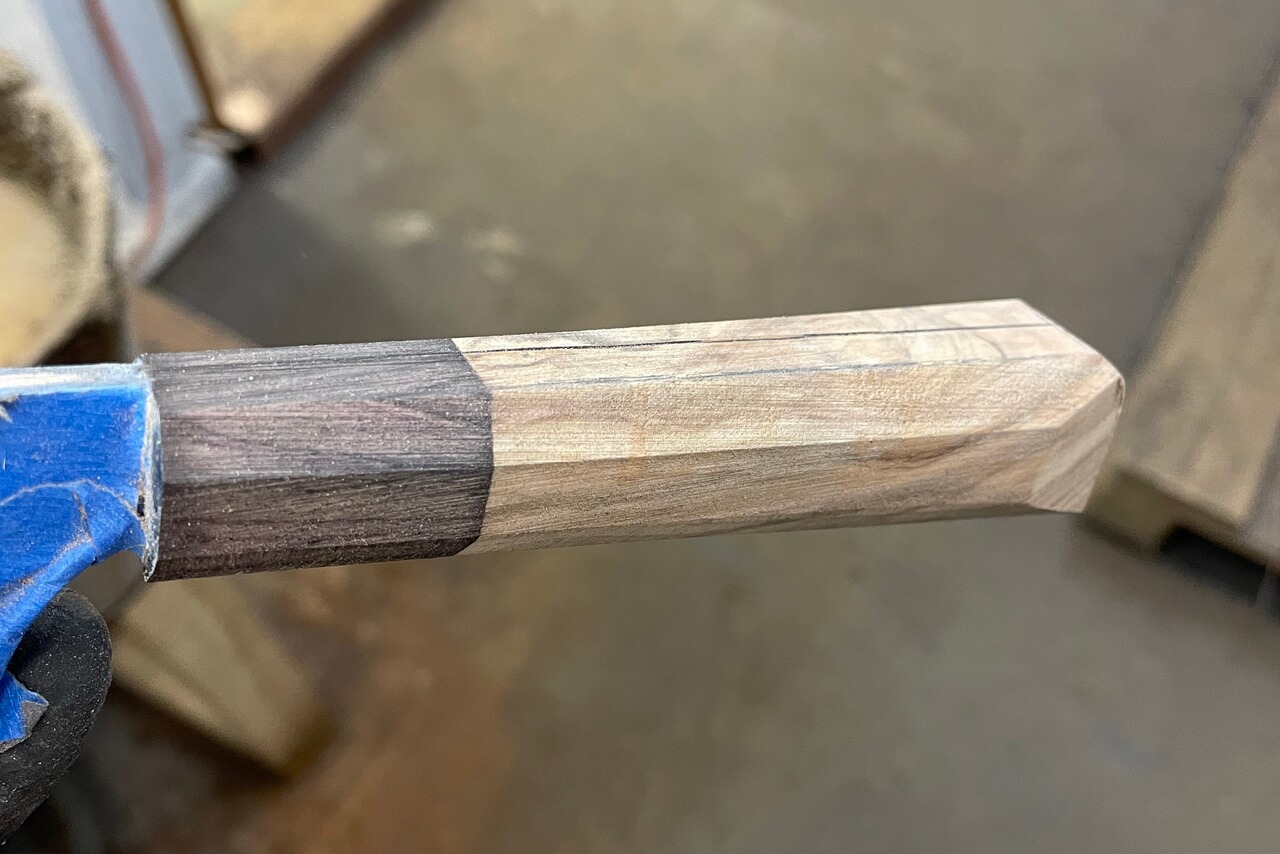
Here I am doing the same process on the top and bottom of the block, using the same dimensions of 18 and 28 mm, drawing marks with the digital caliper away from the centreline, then connecting these marks to lines. Before grinding to these lines on the grinder.
Taking the time to draw a centre line and using this to square up and taper the handle block does not take a lot of time but it sets you up for success later so take the time needed. Make sure the back of the block is square. Make sure the sides are flat. Go slow on the grinder, stop and measure or check your lines often, until you are happy with the result.
How to draw the in corners:
There are -at least- two versions you can make here:
- corners widening and the centre section stays the same width from front to back
- corners staying the same width and the centre section widening.
I decided to go with the second option, meaning I wanted the "corners" or cut off corners to be the same width, leaving the middle of the handle flats to widen towards the back.
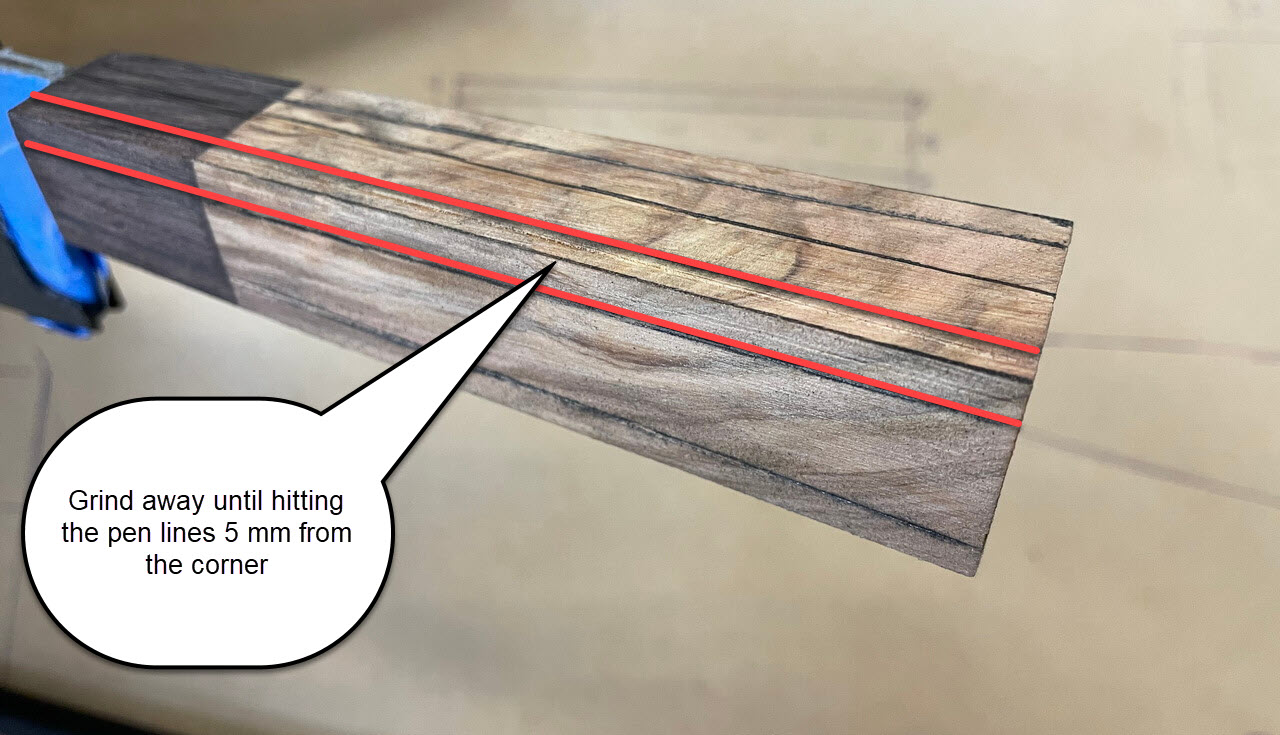
This is easy, just mark 5 mm with the digital calipers away from all corners and draw in these marks with a pen.
Meaning when we later grind to these lines, we will create a "corner" that takes off 5 mm from the entire handle length - leaving the middle or flat section to get wider and wider towards the back of the handle
Grinding off the corners:
Now it is straightforward to grind off all the corners, making sure to not overshoot the drawn-in lines. A trick here from Kevin Slattery of Kev's Forge is to only rough these in on the belt grinder and do the fine work on a disc grinder, if you have one. We are not removing a lot of wood here, and this whole process could have been done with hand files.
It is easy to take off too much here on the grinder or belt sander so take it slow. Zirconia belts are best for this process, they have less abrasive and clog much less than ceramic belts for handle materials. A piece of rubber is a good tip to every now and then touch to the belt as well, to clean it from wood stuck in the belt.
Shaping the back of the handle:
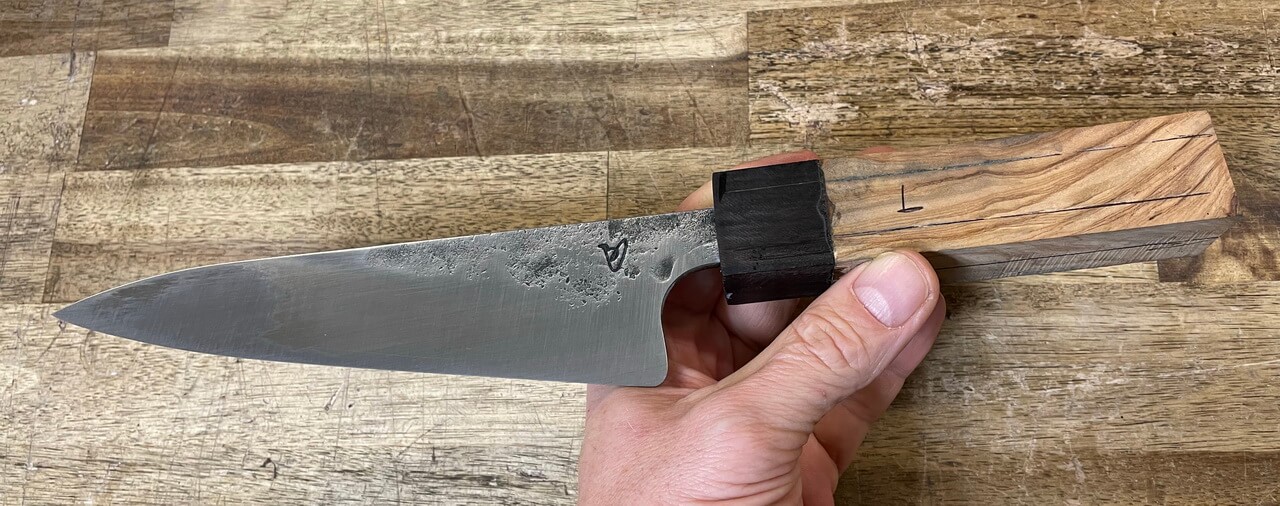
This is an optional step but I also drew in a line 10 mm from the end of the handle block on both flat sides of the handle. As well as 8 mm from the ends on the actual back side of the block. Then ground these bevels or corners off as well. I then drew in a line on the top of the block (not in the above image) and rounded from the bottom of the block to this mark on the top. This was to create a rounded back of the block, removing the top corner to make the knife handle sit better in the hand.
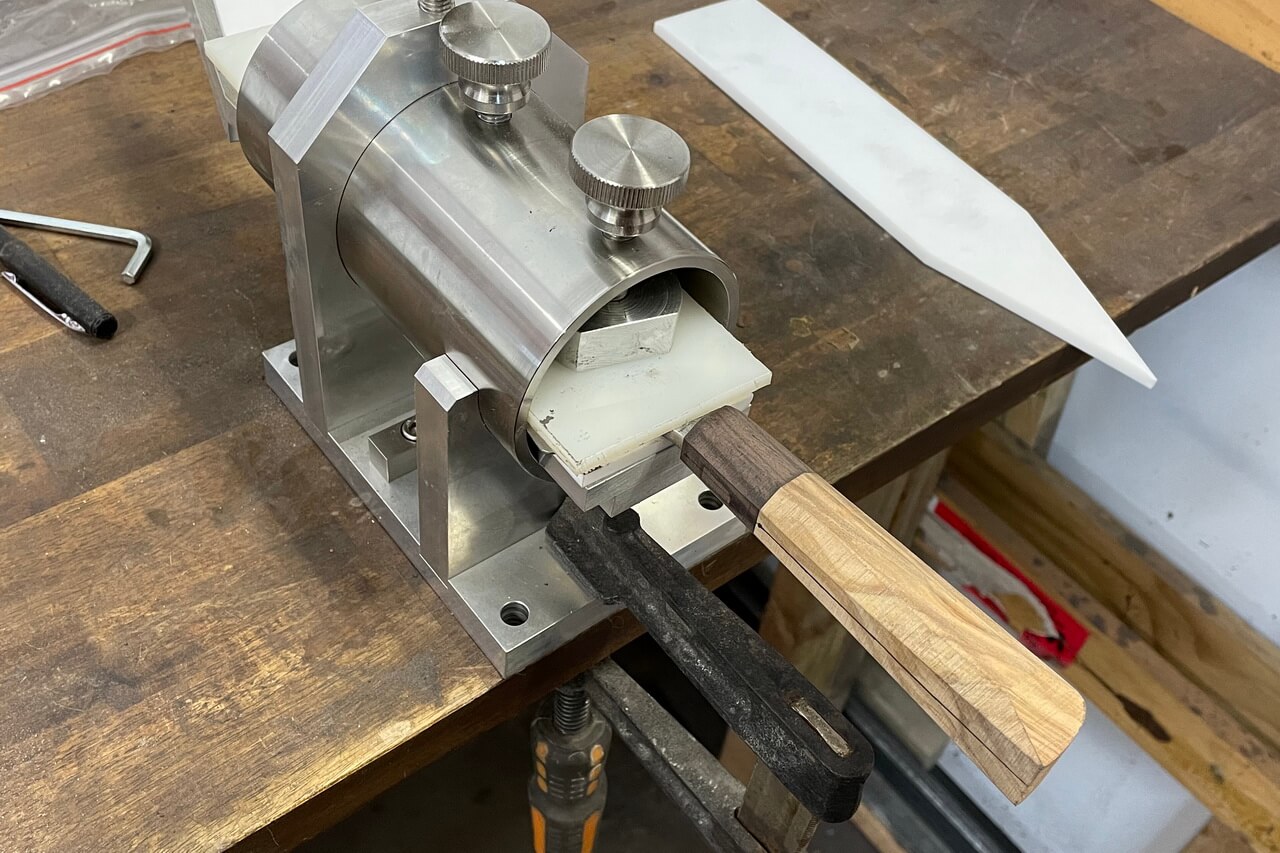
Hand sanding:
When you have hit the lines to remove the corners on all sides, the bevels are done. From here on out it is all hand sanding. Using a hard backing is important here to maintaining the bevels. For instance, wrap the abrasive paper around a file or a piece of G10. I like using a file as this is long enough to help keep the angle and not wash out the corners. This was a good time to test our prototype blade vice, making it easy to turn the handle around to sand all the bevels or flats.
Hand sand to a high grit:
This is personal preference of course, but we spend so many hours making a knife that to me it makes sense to spend the 5 mins extra going from 600 grit to 1500 grits on the handle. After the scratches are removed at 180 grit it is all fairly quick to sand from then on out, and I think the handle materials - especially wood- looks so much better if taking a few minutes extra to go through to a high grit.
Personally I also use micro-mesh on all wooden handles, thinking they look even better after going through the 9 pads from 1500 to 12,000 grit but hey - I understand this might not be everyone's cup of tea.
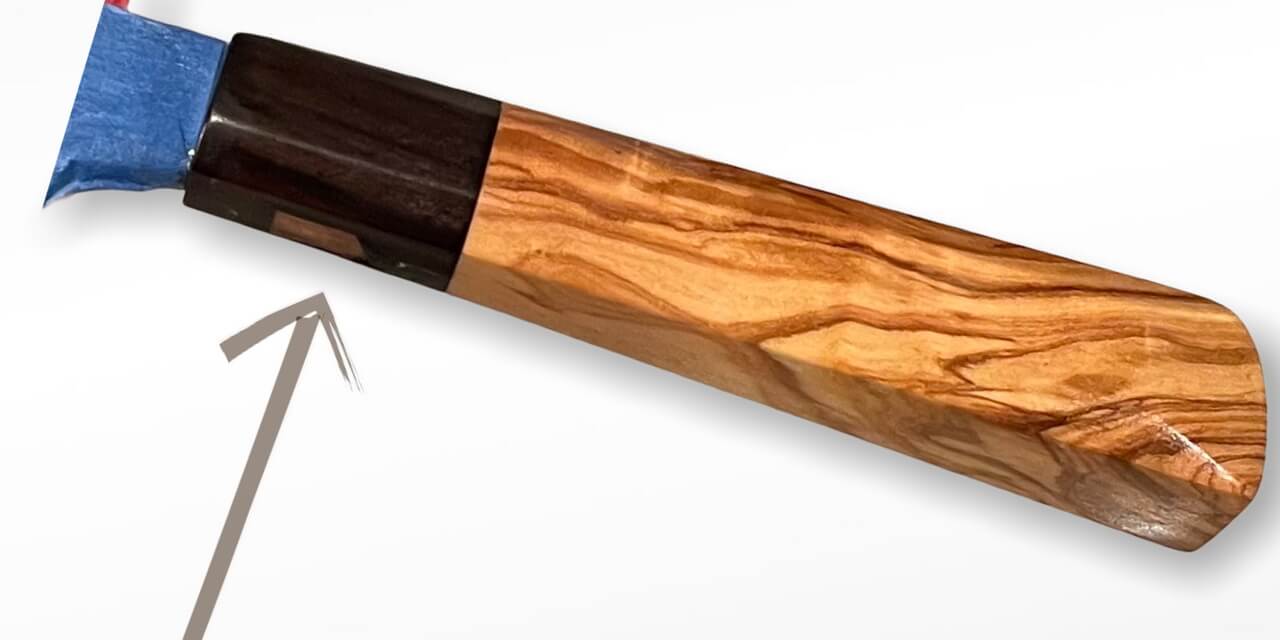
The handle is finished sanded and if you look closely you should be able to see where this went wrong..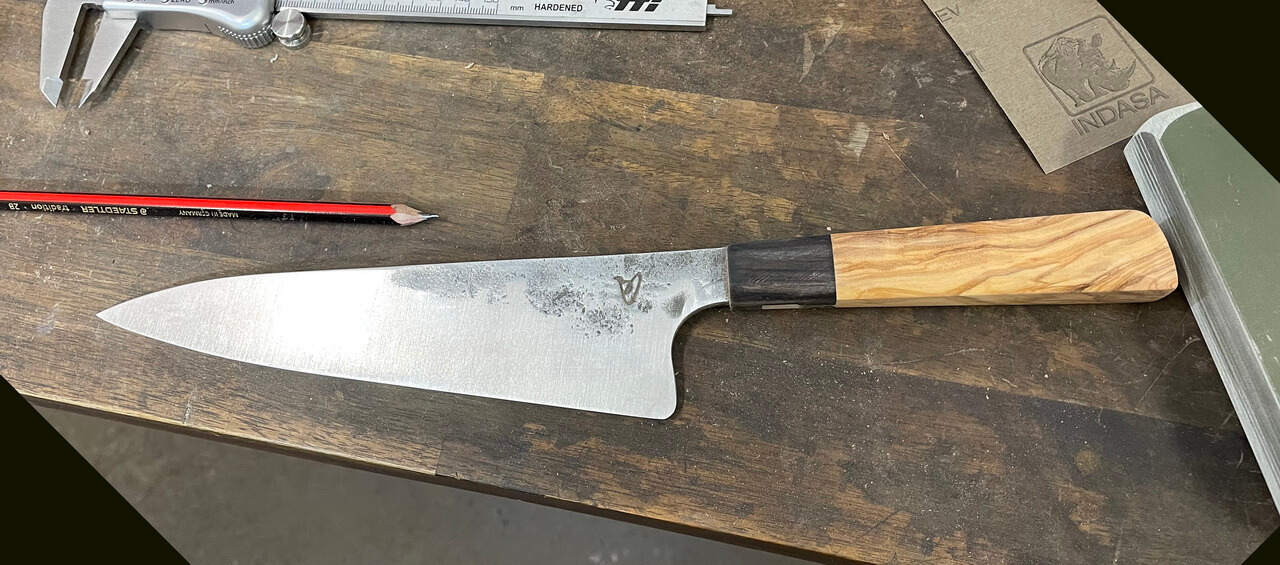
The handle was sealed with our own handle finish for a high-gloss, long lasting finish. The handle finish leaves a layer of resin that locks the wood in and stops it from discolouring with use. Another thing I like about the finish is that it is so easy to add more layers over time. We use kitchen knives every day that I made 5-6 years ago and every year I give them a super light touch with fine sand paper and add another 5-6 layers of handle finish and they look like new for another year.
Now for the bad news.. This handle was a total failure, due to me grinding into the tang hole underneath the handle block.
The lessons for me here were; be more careful when rasping the tang slot out. Go slower on the belt grinder when roughing in the corners and finish the corners by hand file or disc grinder. I was as usual a bit too quick here and the result was not what I wanted. But I learned something about making Wa handles and will do this process again.
Thanks for reading through, if you have more tips on how to make this process better: join the facebook group and let us know.
thanks
Bjorn
Recent Posts
-

The Etch Test: Ferric vs Hydrochloric vs Gator Piss
The Etch Test: Three Very Different Looks From One Steel One of the great things about knife making …3rd Jan 2026 -

Why Bed The Tang In Epoxy - Then Knock it OFF Again.
What is "Bedding the tang"? Bedding the tang means gluing a stick-tang blade into the handle block i …21st Mar 2025 -

Marble Leather - How to Dip Dye Veg Tanned Leather
This was my first experiment with hydrodipping or dip dying leather, and it came out pretty cool! I …14th Mar 2025