
Making A Chinese Cleaver in 440C
Making a 440C Chinese Cleaver
By Bjorn Jacobsen, Sept 2023
This was a first for me in a couple of ways;
- First time using 440C stainless steel
- First time making a cleaver
- First time sending a knife overseas hoping it would get there
When to use 440C steel
440C has a long history as a trusted knife steel, when I grew up and started becoming interested in knives it had already been used for all kinds of knives for a long time.
Having large carbides in the steel matrix 440C holds a great edge – due to high abrasion resistance – but is not one of the toughest steels. It has high corrosion resistance, making it suitable for marine or kitchen use, anywhere the knife will be left wet or exposed to things that would discolour or oxidise a carbon steel blade.
440C is a high carbon, high corrosion resistance steel – but it will make you work when it comes to finishing. More on that later..
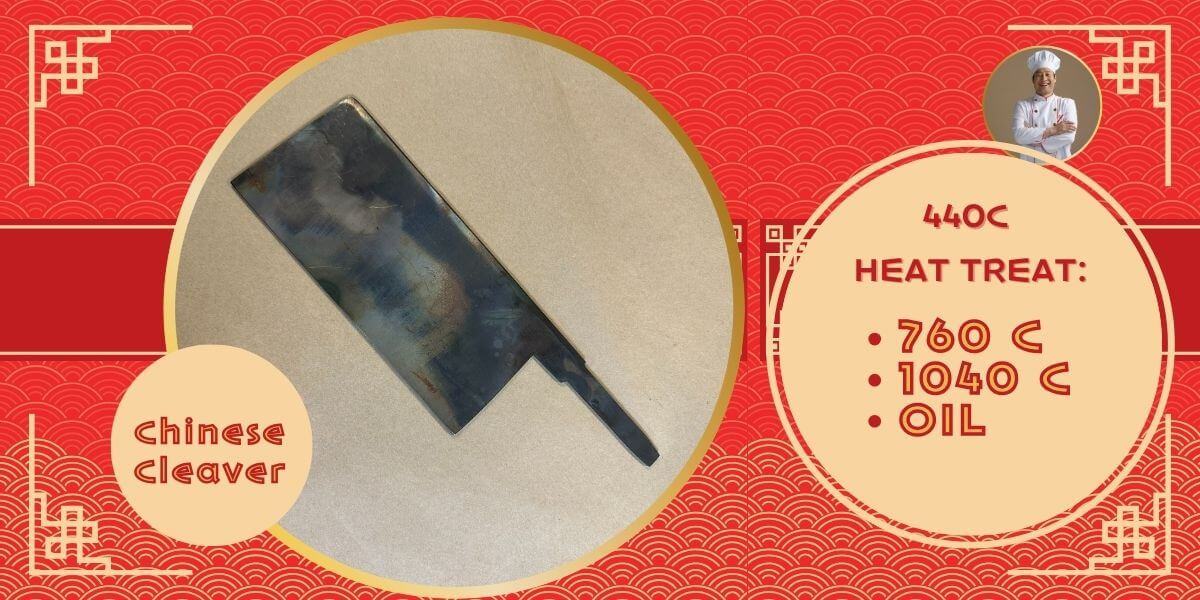
How to heat treat 440C Stainless steel
- Wrap in stainless steel foil to avoid carbon loss from the long hold times
- Hold at 760 C for 10 mins (1400 F)
- Ramp to 1040 C and hold for 30 mins (1900 F)
- Quench still in the foil pack in oil or between quench plates
- If possible: Cryo treatment (-70C) or at least kitchen freezer for 1 hour (-20 C)
- Temper 2 hours x 2 at 190 C (375 F) for 58-60 HRC depending on cold step
Heat treatment of any given steel is never as simple as a short recipe, but this is a good starting point. Over time you may from testing your own blades decide to modify this to even better fit your particular use case but this was the recipe I landed on for my first 440C blade after reading online.
Here is a link to a bit more info: HEAT TREATING 440C
Quenching in oil
440C can be quenched in oil, between aluminium plates or even in still air and it will successfully harden. I packed it in steel foil, used an electric kiln for the heat treat and then quenched in medium-speed oil and this worked well. Before leaving it in our kitchen freezer for an hour at -20 C (-4 F) and then tempering in our kitchen oven. The cold step increases hardness somewhat by increasing the gap from quenching temp to “cold”. (KnifeSteelNerds.com is the place to go for more info here)
What makes a Chinese Cleaver
A Chinese cleaver is quite different to what a western chef might think of when hearing the word “cleaver”, being the general-use kitchen knife and not a specialised tool for chopping bone or frozen meat. A Chinese cleaver has a similar broad, rectangular blade with not sharp tip but is lighter and nimbler than a Western “meat cleaver” specifically made with a thick edge and for chopping work.
In Chinese cuisine the cleaver is the king of the kitchen, used as a highly versatile, general-purpose kitchen knife that will slice, chop, mince and scrape. Here we are talking of the middle range or common 2-3 mm spine version.
Cleaver blade design - tall and straight
After having read up a bit on the style of blade and reviews comparing different Chinese cleavers, I went for a 210 x 95 mm or so in final dimensions with a ricasso and a full flat grind. This will remove a lot of weight but still leave a strong, stiff spine and a flat edge with only a small hint of belly.
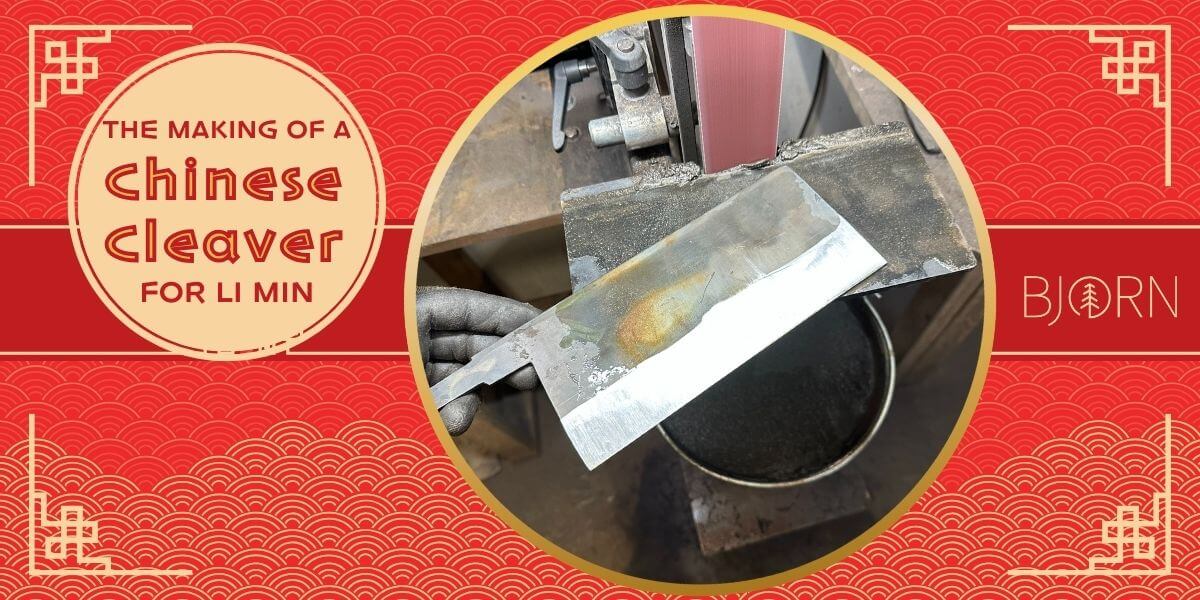
Grinding challenge
This was my first time grinding 440C and it is the hardest steel I have ever worked. I don’t know how many knives I have made over the 8-10 years I have been grinding blades but I know I have NEVER had such a hard time grinding a blade steel to look clean. Scratches take forever to get rid of.
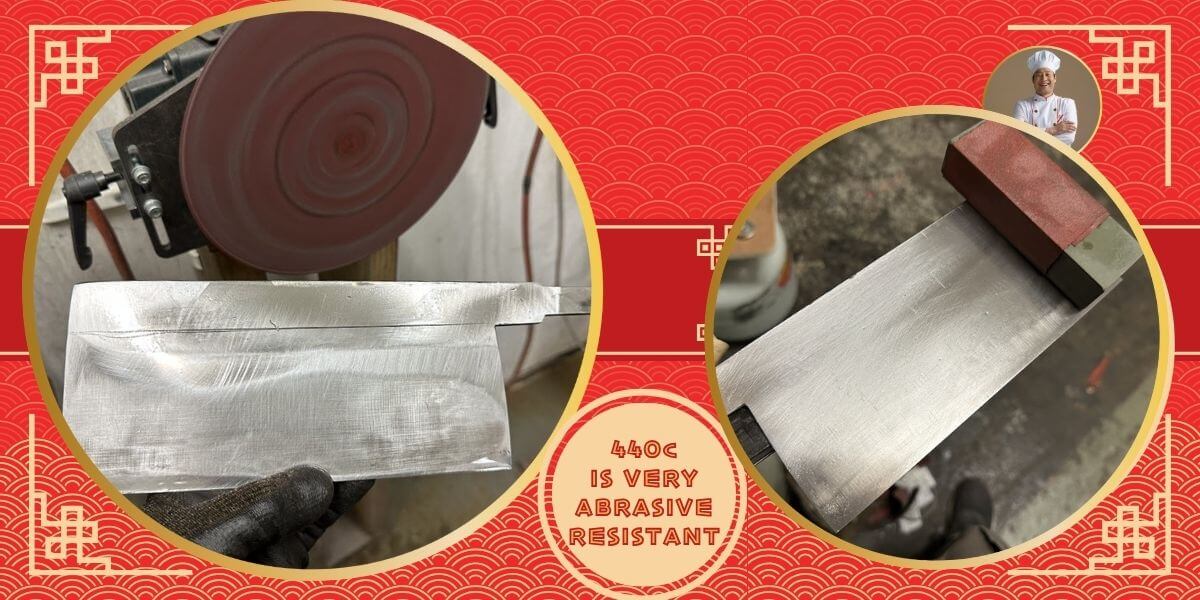
This stuff is so abrasive resistant that where I am used to being able to clean up a scratch on the grinder with a few passes, it took forever – or so it felt.
It started to dawn on me that making a cleaver which is probably 4 times (?) as much surface area as a normal chef knife in a steel that is this abrasive resistance was maybe not the best idea.
The fact that the blade is 210 x 100 mm while grinding bevels makes for a lot of steel to grind, and being a Chinese cleaver I wanted to take a lot of metal off it to not leave it too thick and heavy.
This ended up being a lot of work both on the grinder, the disc grinder and eventually hand sanding. After all that it still had a few scratches I would not have accepted in say AEB-L or 14C28N but after sessions on this thing – it was enough ?
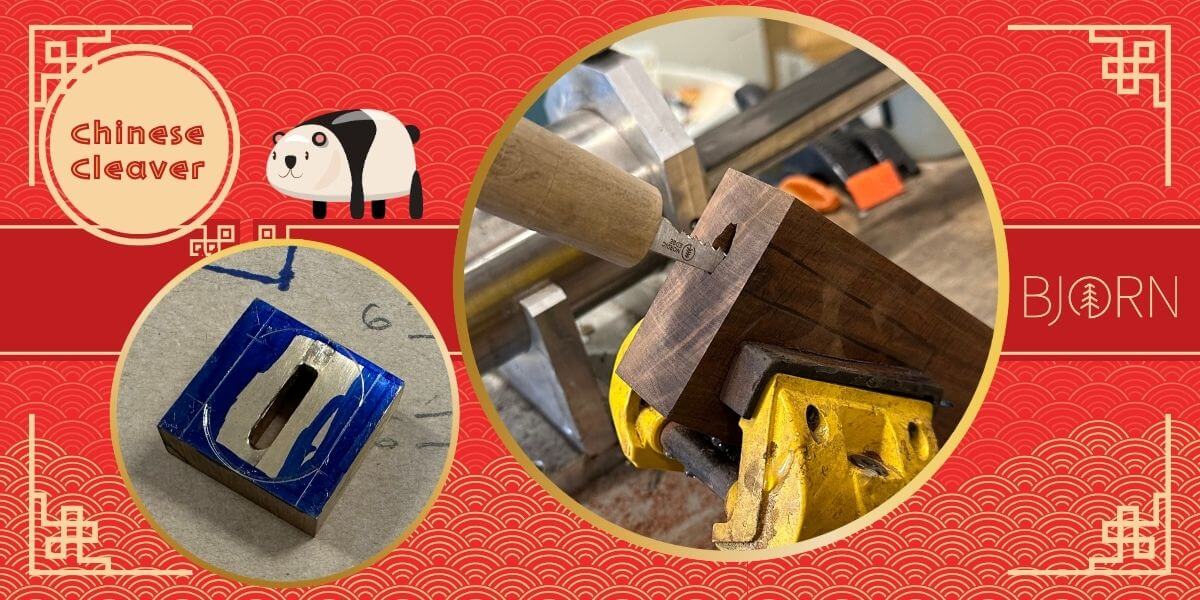
Brass and wood – a classic combo
The bolster or front section of the handle in 10 mm brass was marked out and ground to shape before attaching it to the rest of the handle. I prefer working this way as the brass heats up so much when grinding and is easier to dunk in water to cool down by itself.
The handle block was drilled for the tang and then sawed or rasped out using a broach – a tang hole saw – until the blade would fit all the way down into the block.
Australian Western Myall
Because this was for Li Min in China, it seemed suitable to use an Australian wood for the handle. Deane Cassai from ReclaimCreative had given me a stabilised block of Western Myall about a year ago that I had been looking at but not quite had a suitable project for – until now!
Western Myall (acacia papyrocarpa) is a desert acacia that grows only in arid parts of central Australia. Not only native to Australia but it only grows in Australia, it is endemic to the limestone plains of southern Australia starting from Western Australia to mostly being found in South Australia.
Western Myall is a medium-dark wood with beautiful quilting in lighter colours, I was really looking forward to seeing how this would finish up and thought it could be a fitting handle for the Chinese cleaver.
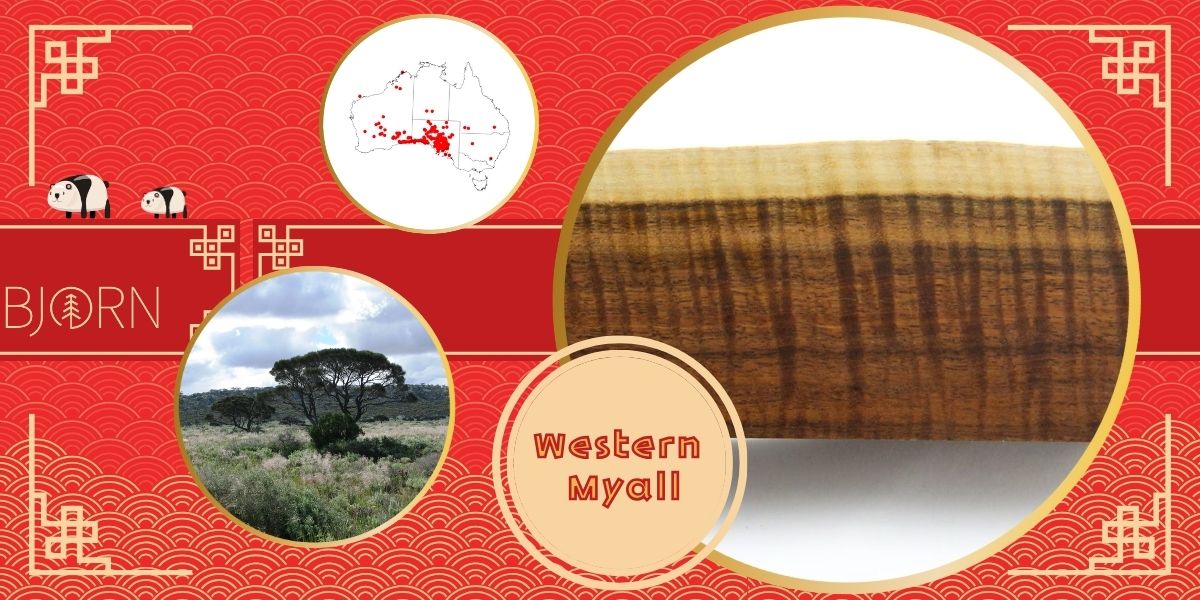
Photo credits: Tree By Aussie Oc - Own work, CC BY-SA 4.0, https://commons.wikimedia.org/w/index.php?curid=47681081 and map of growth areas By MargaretRDonald - Own work, CC BY-SA 4.0, https://commons.wikimedia.org/w/index.php?curid=87156923
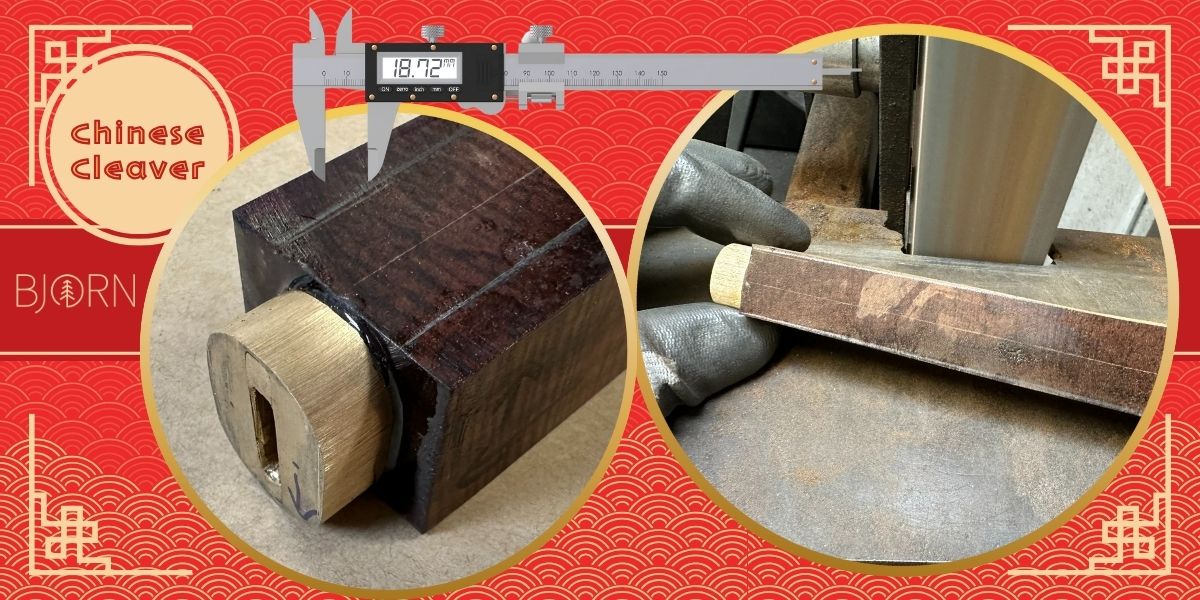
Handle design and calipers
After gluing the rough shaped brass bolster to the squared up front of the Myall block, I decided on some dimensions from the top as well as the side. A digital caliper and sharp pencil is very helpful here.
Sometimes the centre of the blade spine is not in the centre of the block, that is not problem. I start by drawing the centre line from the middle of the spine and the edge of the blade onto the block top and bottom. Being as accurate as possible, these lines are now the true centreline of the block and everything else is off these lines.
I can now do some measurements with the calipers and decide on for instance 18 mm at the brass to wood transition and 24 mm at the back of the wooden block. Marking these out from the centre line (9 mm on each side at the front and 12 at the back) before connecting those lines with a steel ruler and pencil.
The same then can happen from the side view; drawing on lines following the spine line onto the block as a straight line. I move this line up 2 mm to give myself something to grind and sand off at the higher grits, then on the bottom I draw a line from the ricasso onto the block. Then decide how much wide the handle will be in the back, and connect also these lines with a ruler.
The rough shape is ground on the 2x48” Shopmate grinder before being cleaned up on the disc grinder. We have several of the 2x48" grinders from 84Engineering at the Nordic Edge workshop, as well as 2 different 2x72" knife grinders. I prefer working on the 2x48" models, the tracking is better than on the longer belts and I like working on them.
For steel I prefer Cubitron II belts over Ceramics now, they grind faster and cleaner. And for handle materials I prefer Zirconia belts as these have less abrasive on the belt and do not clog up as easily as if trying to use ceramics on wood.
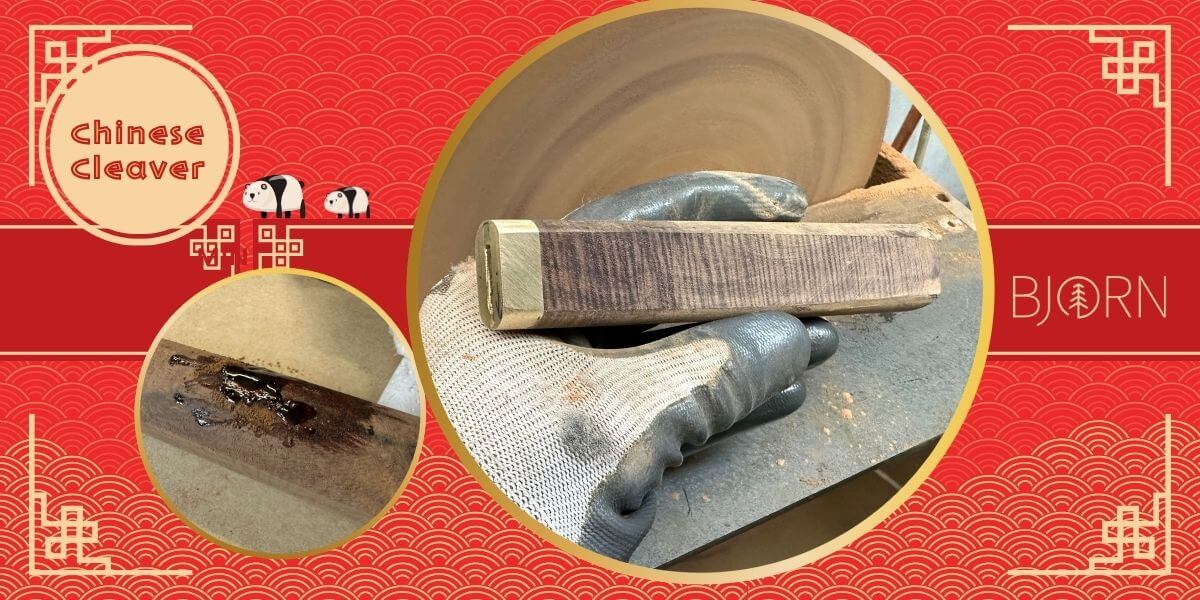
Shaping the handle on the disc grinder
The disc grinder used to be something I only did between grinding a blade and hand sanding it, and more often than not I would not even use it then. Now I find it such a valuable tool in the workshop. Not only does it save lots of time from the handsanding step by grinding the blade flatter than I can do on a belt grinder.
But when it comes to making handles without the blade attached, the disc sander really shines!
The ability to very slowly dial in the grinds exactly to the pencil lines has quickly become one of my favourite steps of making a handle! The tool rest is checked to be 90 degrees to the disc, the speed is still slow but maybe 9-15 Hz for the handle, and then facets, flat sides and tops becomes a fun part of the work. (for blades I go 7-9 Hz, really nice and slow for max control).
I ground the handle and brass bolster as one continuous flat side from front to back on the disc before rounding the top and bottom of the handle to match the brass bolster in the front and followed the same shape but slightly bigger at the back.
The myall block had some cavities which I filled with super glue before grinding flat again.
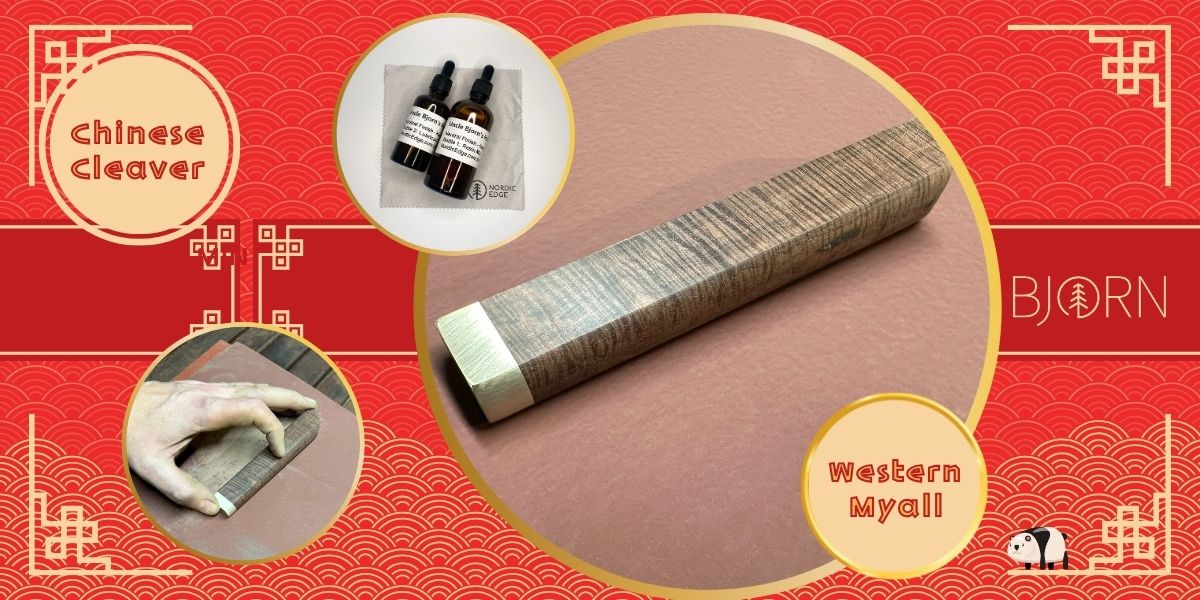
Hand sanding and some UBHF
Hand sanding wood has always been my favourite part of any knife build. How awesome is it to see the wood grain starting to come through as you work up through the grits until it shines – even before adding handle finish!
Usually, I do final sanding after the blade is epoxied in but here I wanted to really keep the flats clean and hand sanded with sheets of rhynowet abrasive paper on a stone surface plate to keep things nice and crisp.
As all my handles it was finished with some Uncle Bjorn’s Handle Finish (UBHF).
This is our own mix at Nordic Edge that leaves a glossy, hard wearing finish to seal in the wood without discolouring it. I like how quickly it dries, making me able to go from sanded wood to sealed handle in a couple of hours. Leaving the handle to dry without touching anything until then next day is needed still even if dry to the touch to make sure it does not stick to anything overnight. Then the next day it was ready to be part of the knife.
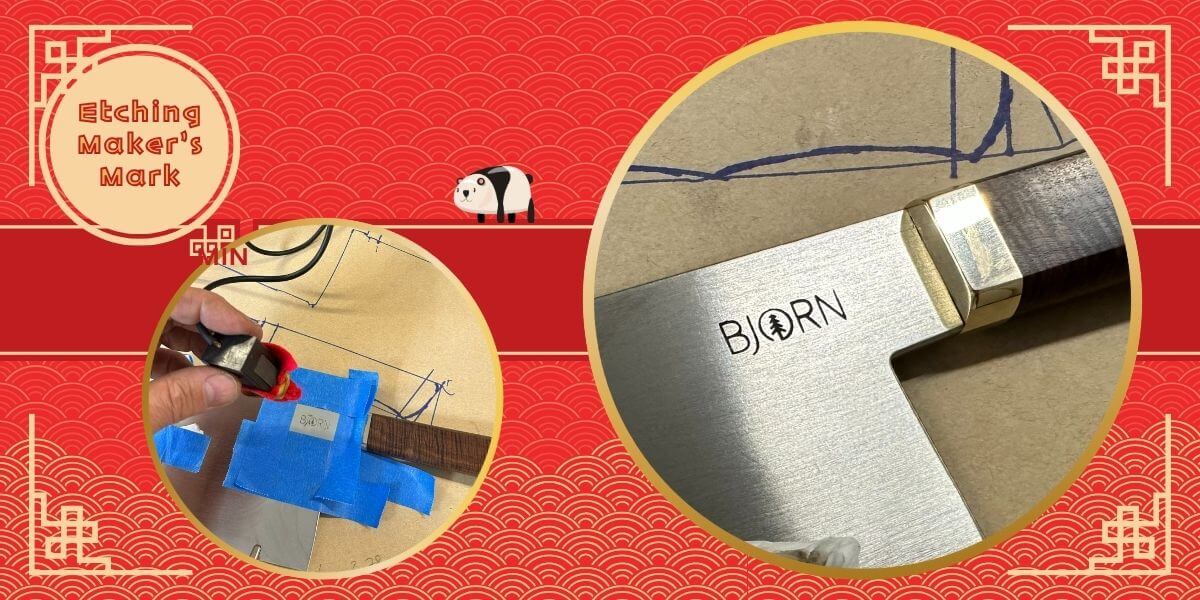
Making my Mark
The cleaver was now ready, but before sharpening I still needed to add my maker’s mark. Attaching a vinyl sticker or stencil with my logo “BJORN” cut out, leaves the cut-out steel exposed while the steel around it is protected. An etching machine from Darwin at Gelandangan helps etch the maker’s mark onto the steel.
There are different ways to etch the mark on, I prefer this way using single-use stencils over the gold/green longer lasting versions because with single-use sticker stencils there is no ghosting - meaning no sanding needed after etching.
Also the marking machine from Darwin has 2 settings, for "etch" and "mark" meaning it first etches away the steel, then deposits a black substance back into the etch for a nice contrast. My earlier version of a power supply from some electrical appliance always ended up more grey than black.
Sharp and ready
Then it was onto sharpening and the cleaver was done! Not sure how easy it shows in the photos but the Western Myall has some really nice figure in it and the cleaver has a nice feel to it. This was another fun project and I am glad I tried my hand at a Chinese cleaver. 440C was a bit more difficult to work than I expected but I am happy with the result!
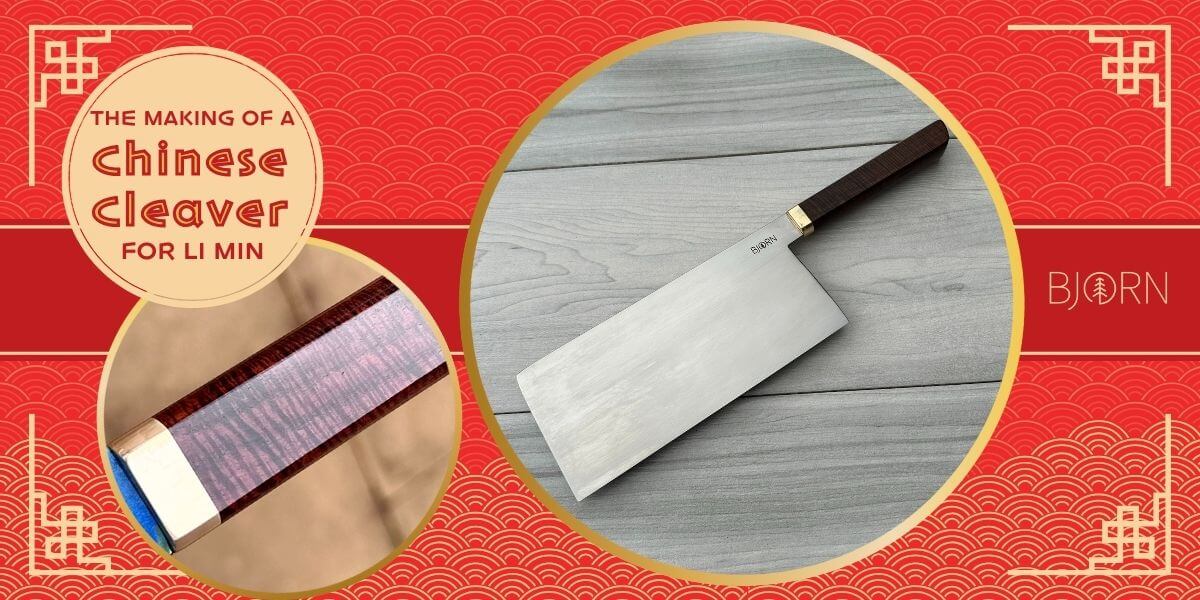
Thank you for reading along on another knife build :)
If you want to have a go with 440C yourself, the cleaver size is here: LINK
Bjorn
Recent Posts
-

The Etch Test: Ferric vs Hydrochloric vs Gator Piss
The Etch Test: Three Very Different Looks From One Steel One of the great things about knife making …3rd Jan 2026 -

Why Bed The Tang In Epoxy - Then Knock it OFF Again.
What is "Bedding the tang"? Bedding the tang means gluing a stick-tang blade into the handle block i …21st Mar 2025 -

Marble Leather - How to Dip Dye Veg Tanned Leather
This was my first experiment with hydrodipping or dip dying leather, and it came out pretty cool! I …14th Mar 2025