
MG French Chef 200 by Anthony R
Anthony R in Tuross Head, NSW recently completed this classy French style chef knife.
Thought we could share a couple of photos here from the Australian Beginner Knifemaking Group, with Anthony's permission.
In European knife blade styles, full-sized chef knives are usually classed as either "French" or "German".
This depends on the amount of belly in the blade, and how it is used.
The French style is a flatter blade for a sharper (louder) chopping action, while the German with more belly is often used in a rocking motion.
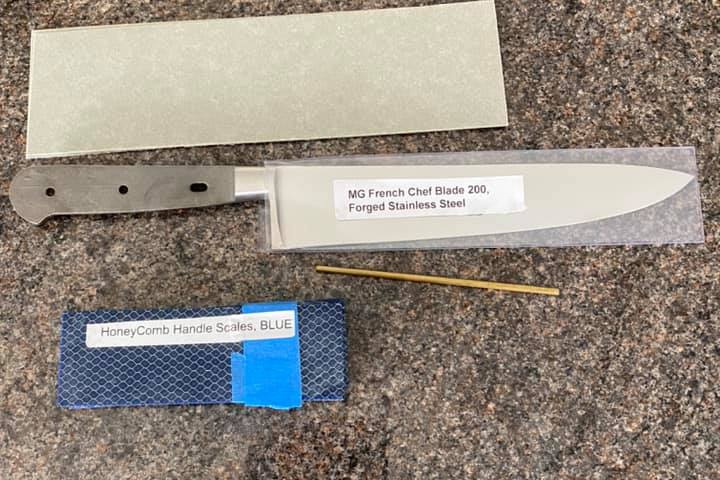
The MG blade series are forged in Spain from a single piece of stainless steel, the integral guard is not attached afterwards but part of the actual blade. These are a bit more advanced to get a good handle fit on, with the integral guard angled back towards the tang.
Anthony has selected the French style MG 200 blade, handle scales in blue honeycomb which is a combination of aluminium and casting resin, as well as some grey spacer material and mosaic pins.
Here are Anthony's comments on his process:
Creative Man MG200 French Chef Blade Handle installation process
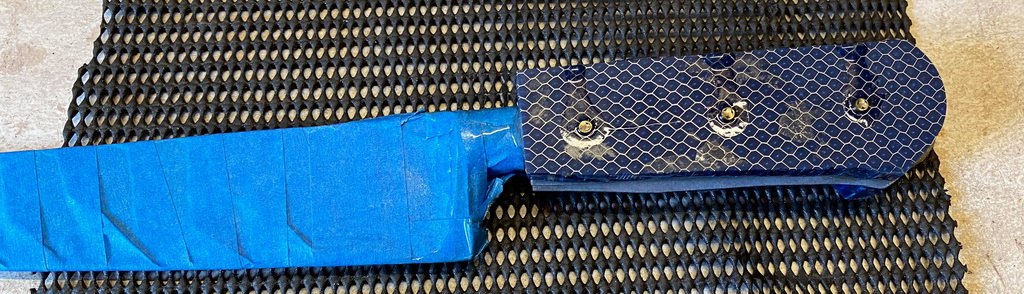
1. Protect the blade(and your hands) by wrapping the blade and bolster with multiple layers of masking tape or similar 2. Decide which side of the handle scales will be outside then check scale inside for flatness.
3. Trace handle shape onto spacer and scales
4. Shape end of scale to tightly fit against the bolster.
5. Roughly cut out scales and spacer leaving an edge margin for shaping (I use a hobby bandsaw for this step)
6. Rough up handle area on blade and inside of scale to get good epoxy adhesion
7. Mix epoxy, fit one sides scale and spacer to blade and clamp well.
8. When epoxy dries (next day) using the drilled pin holes as a guide, drill pin holes through the attached spacer and scale.
9. Mix epoxy, fit other sides scale and spacer to blade and clamp well.
10. When epoxy dries (next day) using the existing pin holes as a guide, drill pin holes through the 2nd attached spacer and scale.
11. Cut off selected pins to a bit over length, rough up outside, mix epoxy and lightly coat pin and fully insert through the handle and leave to fully dry.
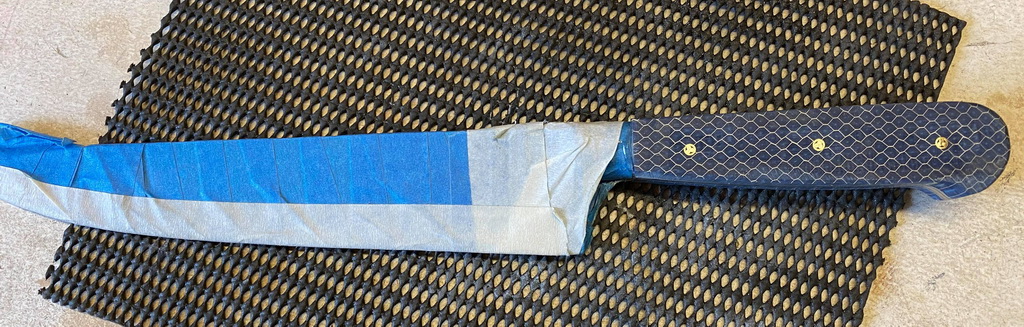
12. Carefully grind/sand off excess pin, spacer and scales back to the metal tang of the knife blank (I use a bench disc and belt sander for all my machine sanding).
13. Round off handle scales to your preference, shaping down to bolster at the same time.
14. When happy with handle shape and feel, start to hand smooth the scales off using multiple levels of “wet and dry” sandpaper. I start with about 80 and work my way up to 1500 or 2000 until all marks are gone.
15. Polish scales using buffing rouge (I use white rouge with a loose calico buffing wheel on my bench grinder).
16. Remove tape around blade and bolster then cleanup any epoxy etc from bolster.
17. To polish blade if required I use multiple grades of wet and dry sandpapered the blade (in one direction only) then buff with brown rouge on a stitched rag buff wheel.
18. When happy with surface, mirror buff blade and bolster (if needed) with green rouge using a loose calico buff wheel.
The important part when shaping handle scales with pins is to not let them overheat. Some handle materials burn easily and you get a ring around the pins, or you can heat them up enough for the epoxy to loosen. Do each pine only for a couple of seconds on the belt sander or use a file to file them down flush to the scales before starting to round the handle. Here the handle scales are ground flush to the fulltang handle and the pins are flush with the scales.
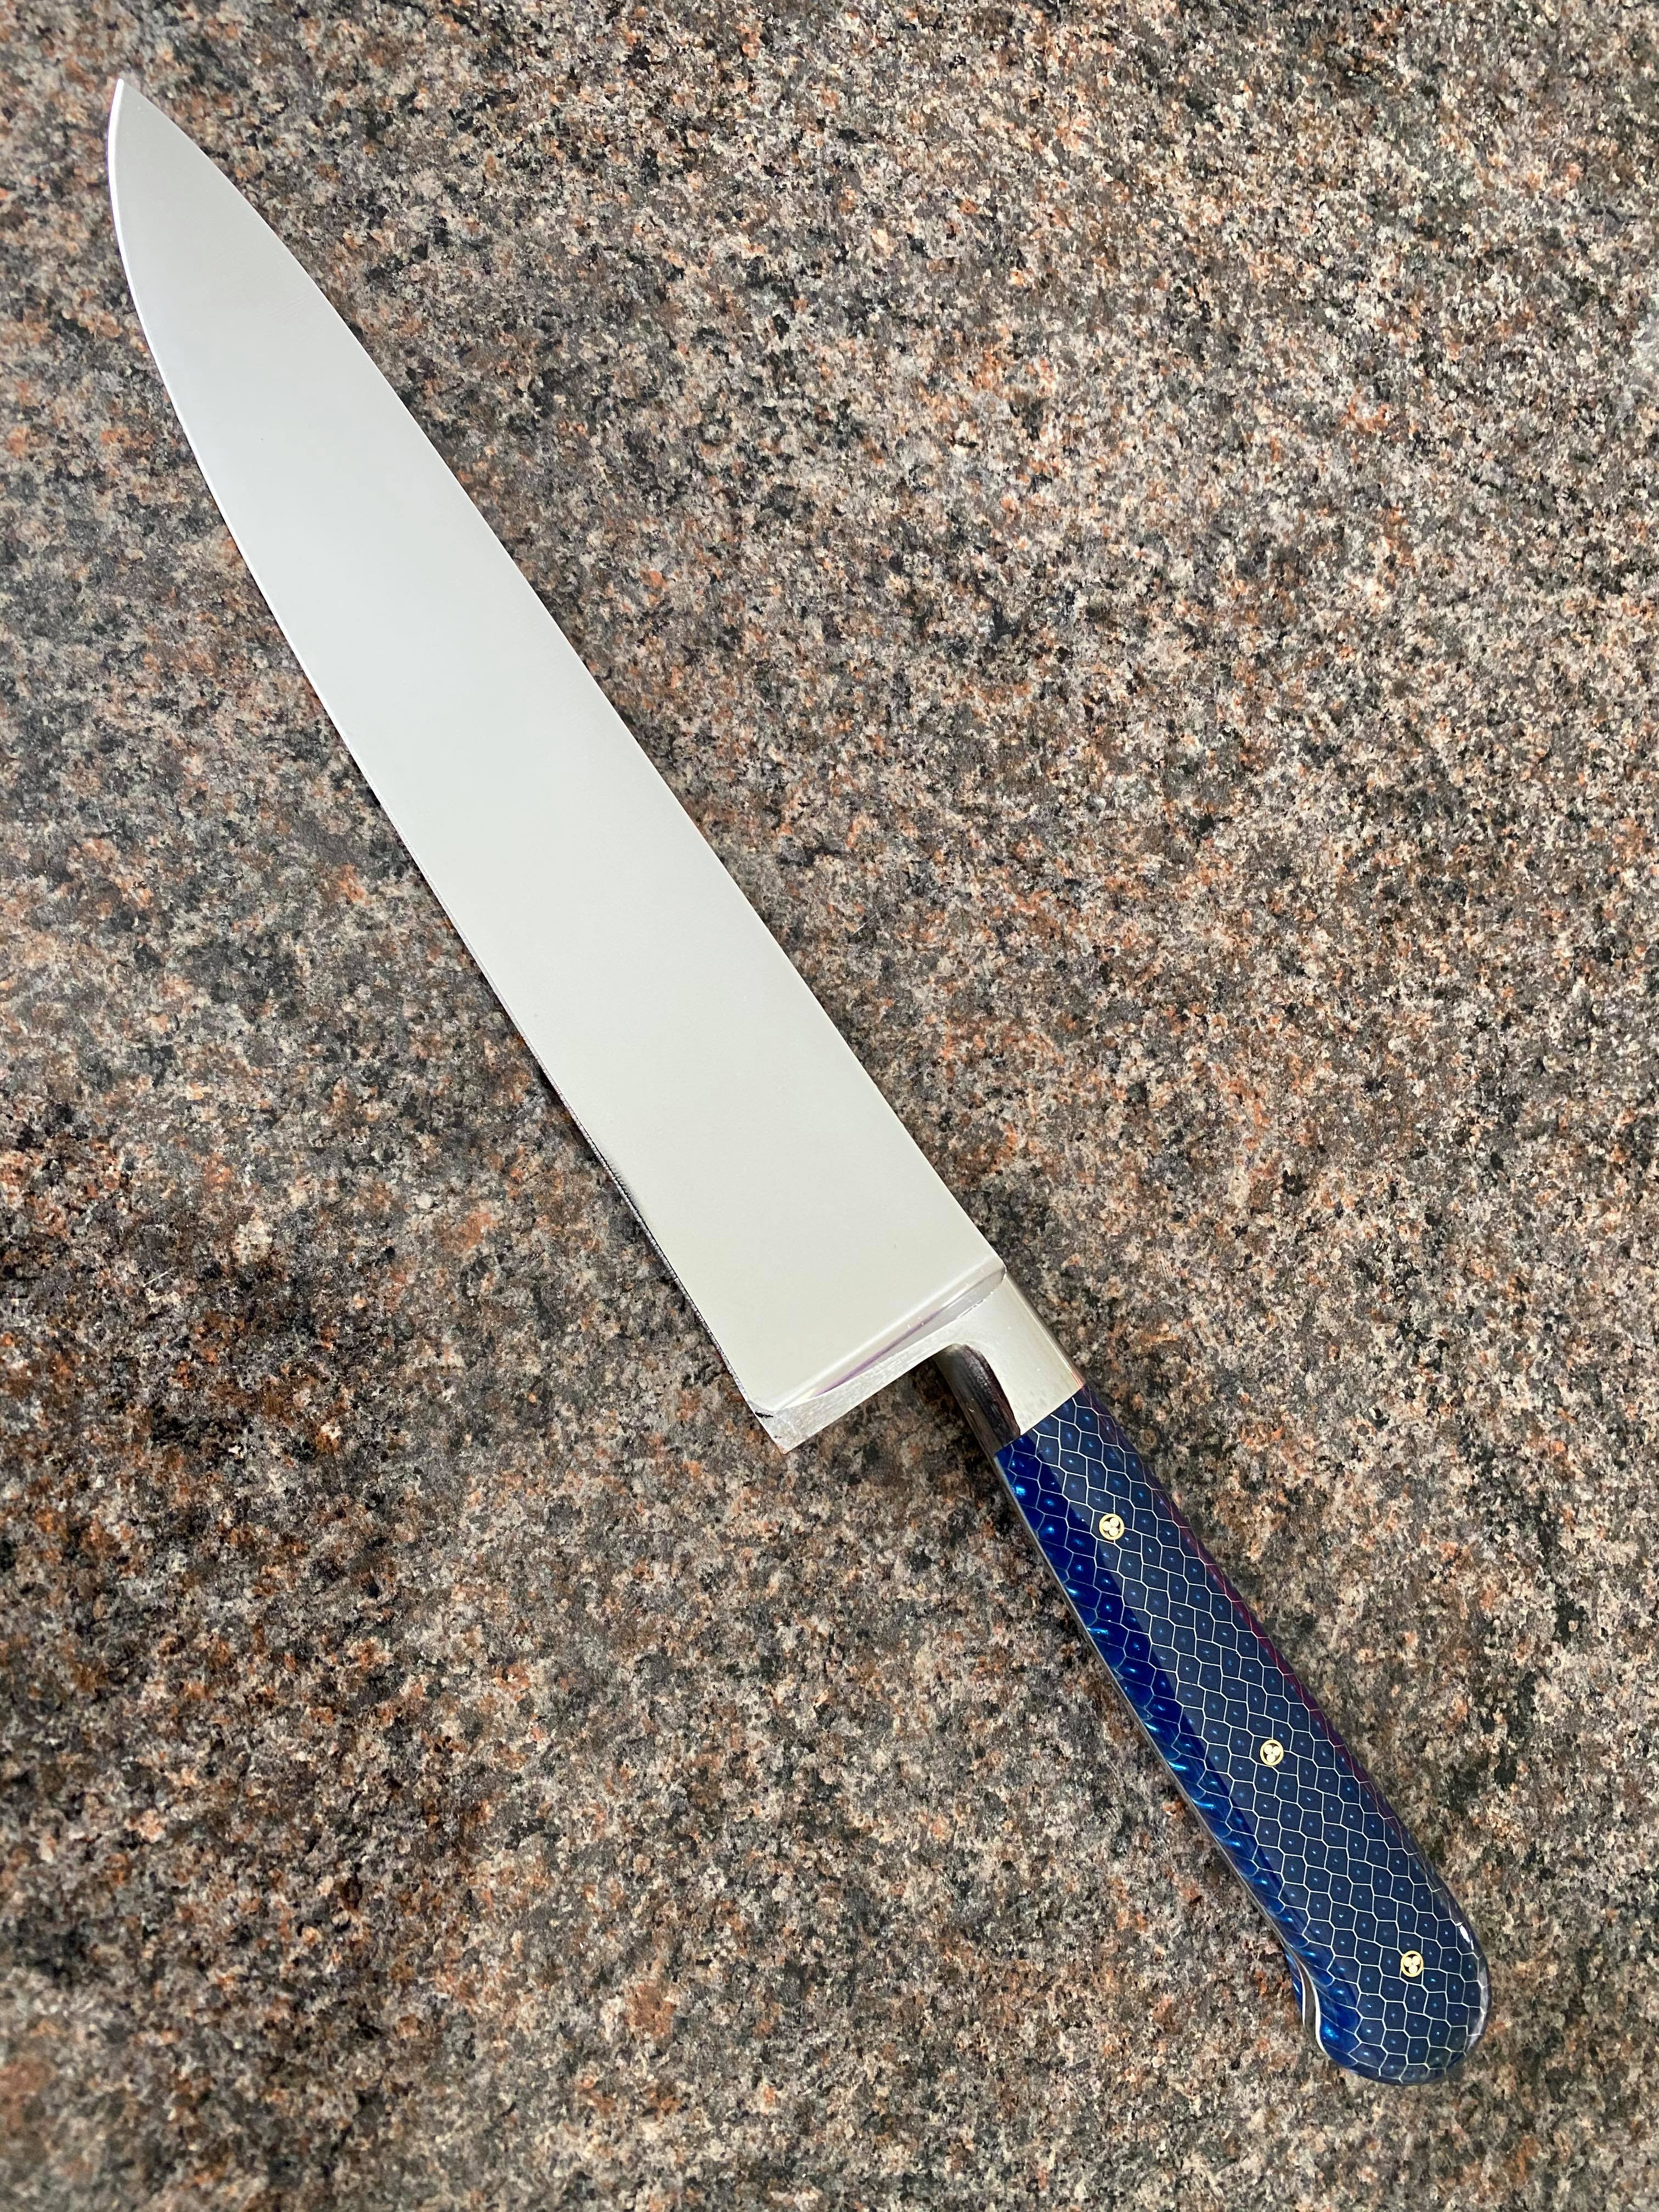
A bit of hand sanding later and we got a knife! Resin scales are great for kitchen knives, not absorbing moisture. They can be finished by sanding to a high grit, or given a bit of a polish on a polishing mop/wheel.
A beautiful chef knife for sure, well done Anthony.
Recent Posts
-

The Etch Test: Ferric vs Hydrochloric vs Gator Piss
The Etch Test: Three Very Different Looks From One Steel One of the great things about knife making …3rd Jan 2026 -

Why Bed The Tang In Epoxy - Then Knock it OFF Again.
What is "Bedding the tang"? Bedding the tang means gluing a stick-tang blade into the handle block i …21st Mar 2025 -

Marble Leather - How to Dip Dye Veg Tanned Leather
This was my first experiment with hydrodipping or dip dying leather, and it came out pretty cool! I …14th Mar 2025