


Description
How To Finish Micarta Knife Handle Scales
Why use micarta?
Micarta is a popular handle material due to ease of working and being water-proof. It drills, grinds and sands as easily as wood but with the advantage of having no issues being left wet for days on end. Micarta is made by layering material in resin, and the type of material will influence how the final product looks. For instance will yute or canvas micarta be rougher than linen or paper micarta with coarser fibers in the resin and might leave a more grippy, coarse sanded handle.
No need to seal micarta
Unlike wood, micarta does not need to be sealed with wax, oil or handle finish. Many makers do so anyway, for instance covering a brass bolster and micarta scale with handle finish to avoid the brass tarnishing and leaving the same glossy finish on the micarta as on wood. Nothing wrong with that, we are only saying it is not really necessary.
Process for preparing and attaching micarta handle scales
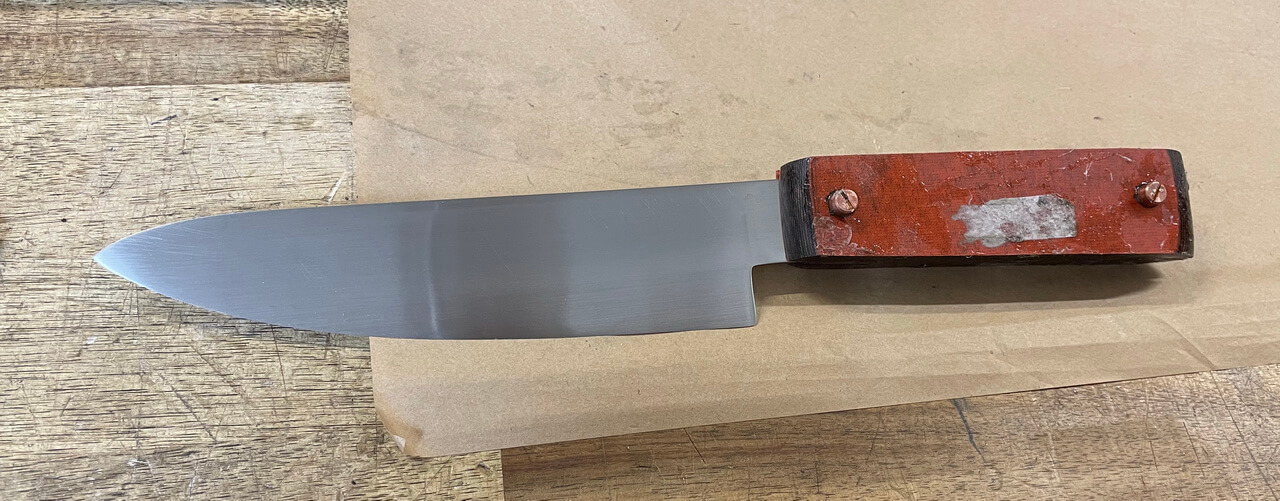
Here are some photos of a recent chef knife in 14C28N, the upgraded version of the popular Swedish steel 12C27. It is as easy to heat treat as 12C27 but with better edge retention.
- Drill the scales for pins (in this case corby bolts) by placing one scale under the blade. Drill one hole, insert a pin to hold it in place and then drill the second hole. Repeat with the other scale. (counter-sink if using corby bolts)
- Put pins in the holes to keep the scales aligned and then shape the front of the scales. This way they match.
- Bevel the front of the scales and sand to finished grit now, without the blade. (sand the front of the scales)
- Attach the scales and pins with epoxy, wipe epoxy off the front with kitchen paper and acetone before it sets hard. If using handle pins, clamp the scales. With corby bolts, they hold on themselves.
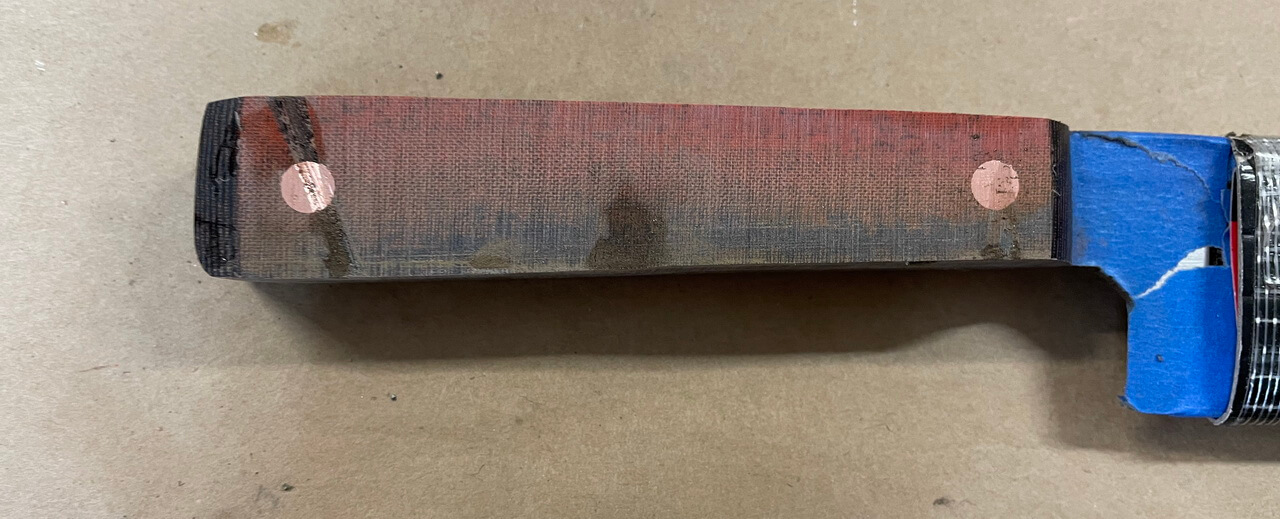
When the epoxy is hardened, cut the pins or corby bolts flush with the scales with a hacksaw or metal band saw. This heats them up much less than if just doing it all on the grinder. If you do it on the grinder, use a coarse belt and make sure you do not overheat the pins as this migth both make the epoxy let go - and give black burn rings around the pins in lighter coloured handle materials.
Now when the handle scales are flat underneath it is easier to grind them to the shape of the tang of the blade. Go slow and make sure you have shiny steel all the way around but do not grind anymore than you have to. It can be easy to grind off too much of the tang here.
Optional:
I also now measure from the outside of the pin to the edge of the handle material with digital calipers. Marking with a thin pen and grinding off anything that is too wide. In the photo below the top of the back of the handle is wider over the pin than underneath the pin, so I ground off a touch to make sure the pin is centered.
Grinding and hand sanding
No action shot here, sorry! But the below shows the handle after grinding with Zirconia belts on the grinder and then hand sanding with Rhynowet abrasive paper to 1500 grits.
The hand sanding starts with "rough" paper in 180 grit, cutting strips about 5-8 cm wide and backing them with blue masking tape. Without the masking tape I find the sandpaper rips when shoe-shining the handle.
The first grit of hand sanding is to both even out the handle shape, and remove any scratches from the grinder. The knife blade is clamped to a table and the handle sticks out over the edge. I grab the sand paper strip at each short shide and "shoe shine" back and forth across the handle. This evens out the handle shape, making everything more symmetrical as well as removes coarse scratches from the grinder.
Be critical before leaving the first grit, scratches that are hardly visible now will really show up in later grits, when the contrast between the shiny surface and the scratch is bigger. Any white line is a scratch with dust in it.
Sand with a hard backing on pins
Before changing grits, wrap the sand paper around a hard backing - like a steel file. Then sand the pins or corby bolts with the hard backing to remove scratches. If not taking care to sand with a hard backing, the pins are hard enough to resist the hand sanding, leaving scratches in the pin face. This is always true when sanding across a combination of harder and softer materials, the harder material can easily be left sticking up above the softer material. If you for instance have a spacer sheet of brass in a wooden handle, always sand with hard backing to make sure the brass is sanded down as much as the surrounding wood to avoid leaving a ridge you will be able to feel later.
What grit to finish at?
Personally I always sand to a high grit, thinking that it costs very little extra time to go from 600 to 1500 or more grit.
After the first grit of shaping and removing scratches, the latter grits are quick and I prefer the "grain popping" look of 1500+ grits over the lower grits. But this is of course just personal preference.
Coarser grits leaves the resin more dull, and with a grippier handle finish that might be a good finish for a fishing or bushcraft knife perhaps? If leaving the micarta with a rougher finish, you may still have dust embedded, wipe this off with some WD40 or acetone on paper.
The below photo shows sanded to 180 grits vs polishing, note how the colours change as the micarta becomes more shiny.
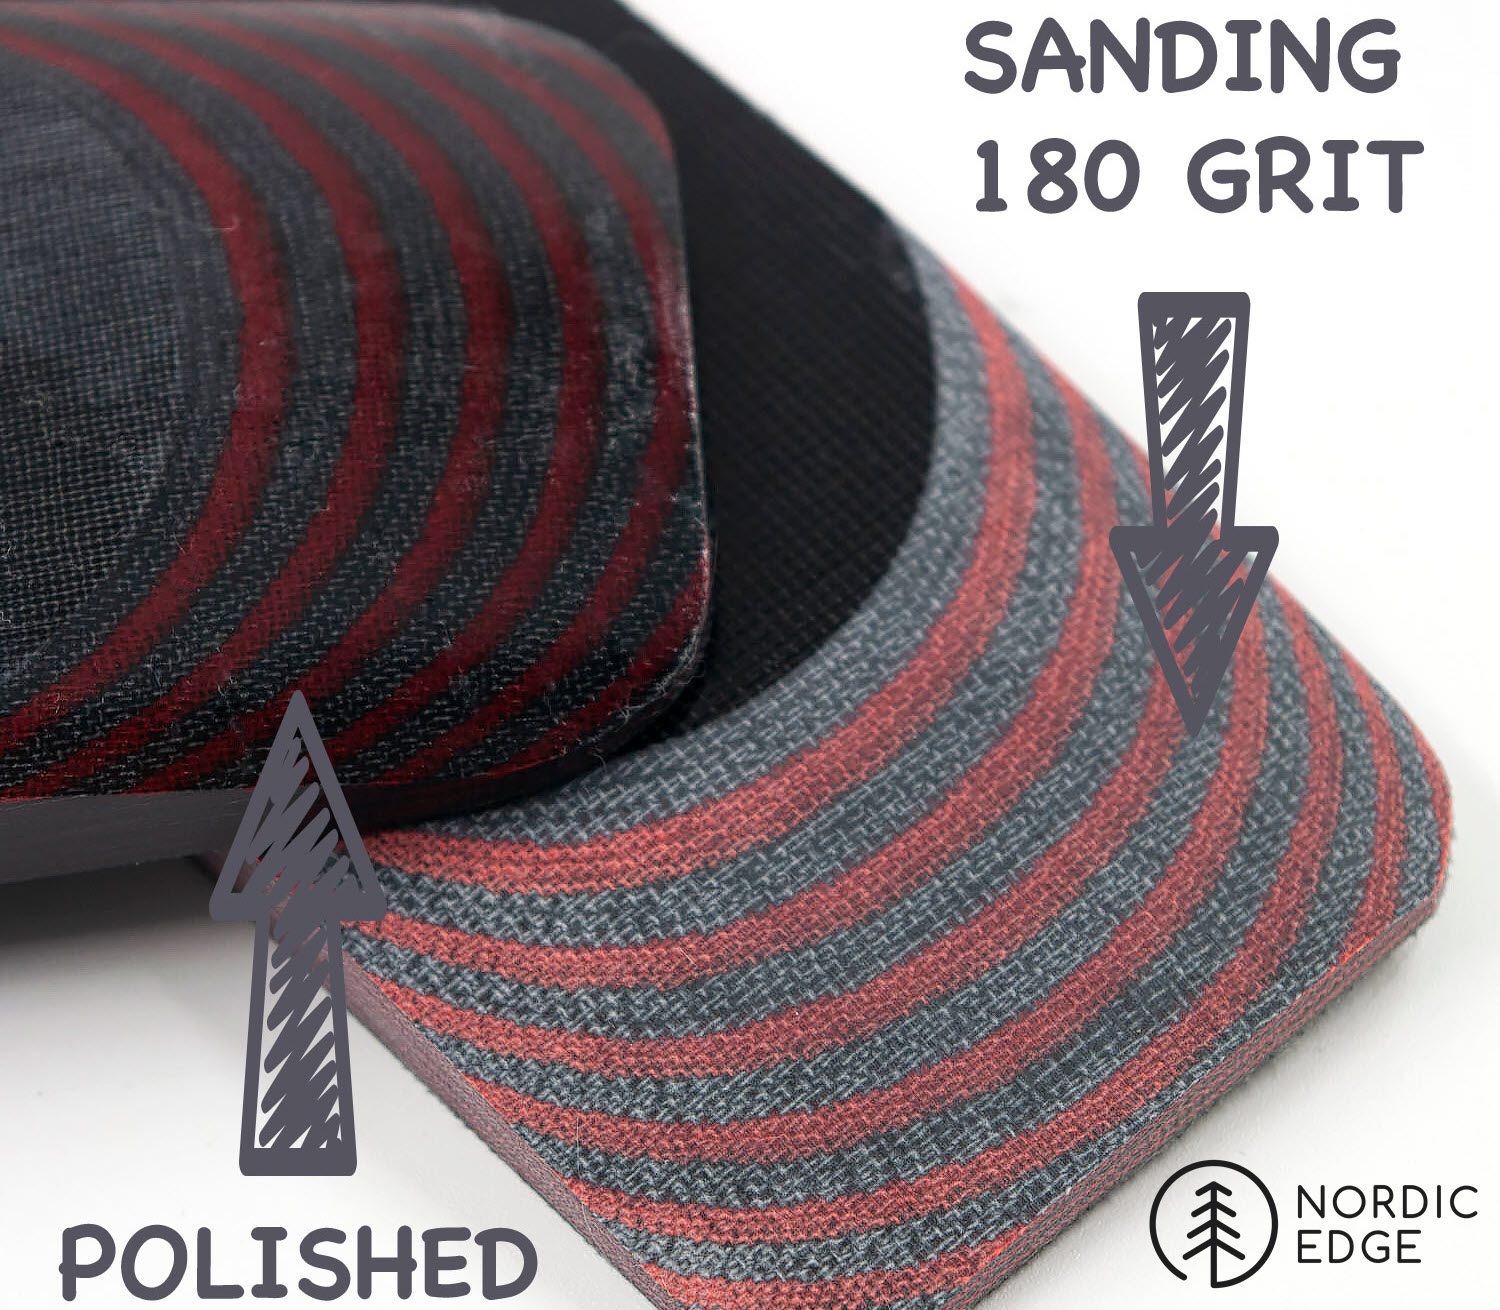
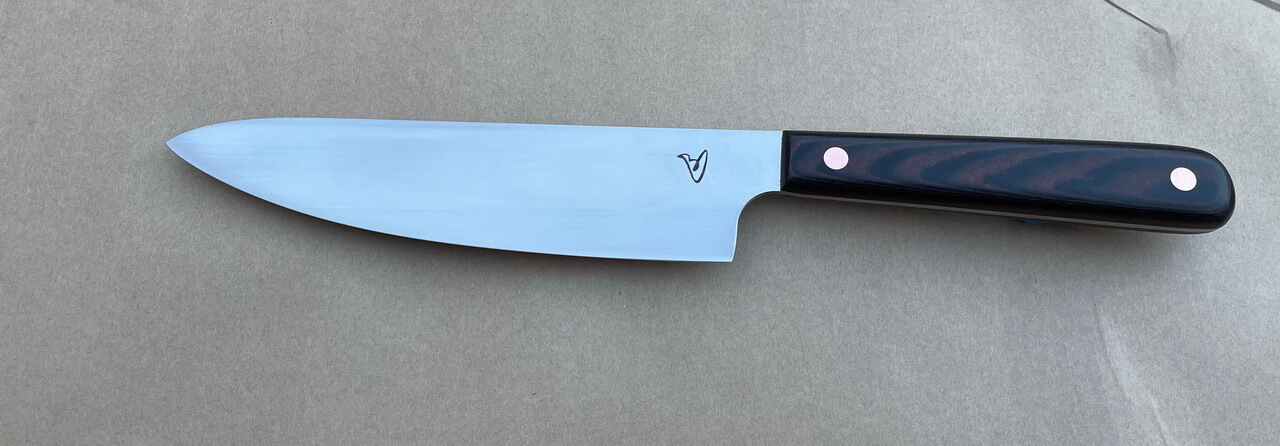
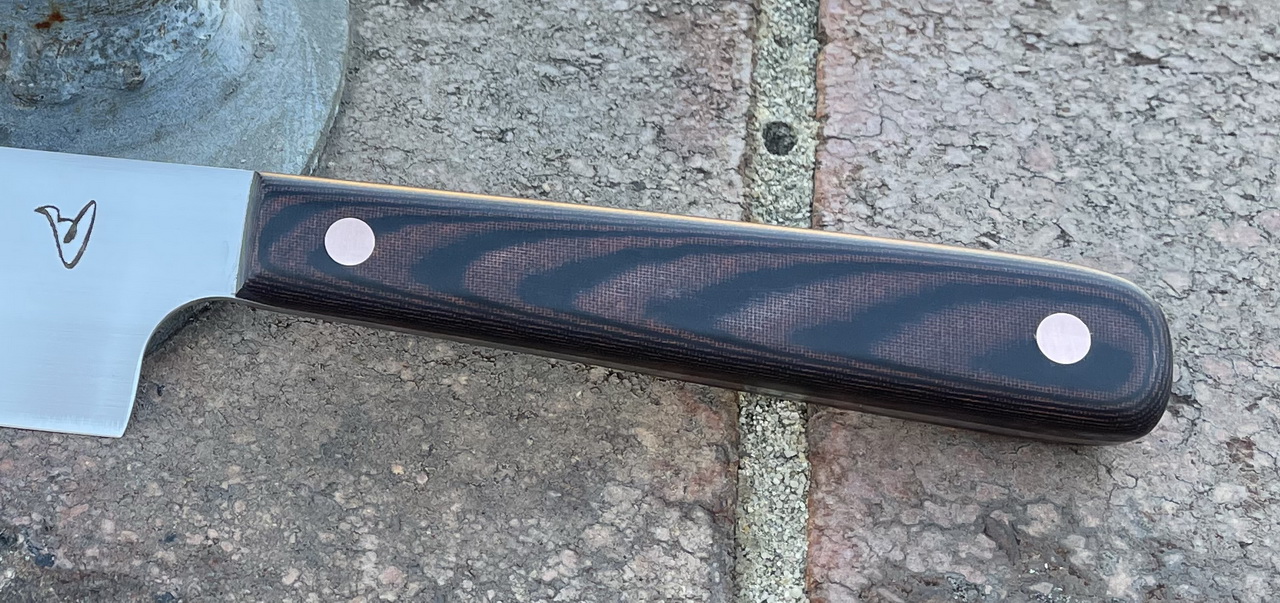
Polished vs sanded micarta
Micarta can be left sanded with a coarse grit like 180 for a grippy, rough texture. Or sanded to high grit and finished on a polishing wheel, like I did on this chef knife. I used green compound, not white as in this photo.


