

Description
Instructions for Hardening and Tempering 12C27 Steel
12c27 is a popular Stainless Steel, made by Sandvik in Sweden. There are several hardening profiles suggested by Sandvik, the below is one of these, providing good hardening with a temperature controlled gas forge. 12c27 is possibly one of the easiest stainless steels to heat treat at home.
*Disclaimer; I am an amateur knife maker, the below is only my understanding and experience, and not to be seen as authoritative advice.
Heat Treating 12c27 in a gas forge to 56-58 HRC:
- Heat steel to 1080 C (1976 F)
- Hold for 5 min (for 2.5 mm thick blades)
- Quench in Canola oil, heated to 40 C (104 F)
- Into freezer* (optional step, aiming for -20 C)
- No hold time, just get blade cold and quickly onto Tempering
- Temper in stove, at 170 C for 2 hours (338 F)
- Let blade cool to room temperature
- Temper in stove, at 170 C for 2 (338 F)
*Sandvik offer 3 hardening profiles; no freeze, -20C and -70C.
The difference is only a couple of HRC points in hardness from no freeze to -70 C profiles. So this steel can be hardened to a great blade without investing in a dry-ice or cryo setup.
Link to the Sandvik profile used here: http://smt.sandvik.com/en/products/strip-steel/str...
Added 2021: We have changed our process slightly on 12C27 and the new, improved version 14C28N: After quenching in oil for less than 10 seconds, we squeeze the blade in a vice between aluminium plates while it cools down. This is more than fast enough to harden the blade, and helps keep it straight.
What is Stainless Steel?
Iron is an natural element we find in the ground. By adding carbon we get (carbon) steel, that will rust if left wet.
By replacing some of the carbon with Chromium, the steel is more corrosion resistant. The result is a steel that will not discolour when used in the kitchen, as well as be more resistant to rust. Because of this, stainless steel is a popular choice for chef knives, fishing knives and other outdoor knives that may be left wet, or where the added protection against the elements is desired.
In reality there are hundreds of different grades of steel, each with different percentages of alloys added to help deliver a specific set of strengths. Steels with 13% or more of Chromium added are considered Stainless, with D2 having 12% being considered a "semi-stainless". The Chromium also helps with Carbide formation in the hardening steel.
12c27 has 0.6% Carbon, 13.5% Chromium, as well as other alloy elements such as Mangenese, Phosphorous and Silicone which play less of a role in the qualities of this steel.
From the Sandvik product sheath:
" Sandvik 12C27 is a martensitic stainless chromium steel with an optimized analysis for high quality professional knife applications. After heat treatment, the composition of carbon and chromium gives a unique combination of properties including:
- Very high hardness
- Good corrosion resistance
- Very high wear resistance
Typical applications for Sandvik 12C27 are hunting and fishing knives, pocket knives, skate blades and ice drills. "
Annealed (easily workable):
Usually when buying knife steel, it will already be annealed, meaning it is as soft as possible when you receive the steel. This is to help make the steel easier to work. It can be filed with hand tools, holes can easily be drilled in the tang, and it bends easily by hand.
For instance the 12C27 profiled blanks we sell on CreativeMan.com.au are from Gameco in Sydney, who had these cut by waterjet to make sure there are no hardened edges when the blade reaches you.
Grinding bevels before or after heat treat?
If using hand tools, you have little choice but to first grind bevels and only take the edge down to sharp after hardening. Hand filing bevels on hardened steel would be difficult, to say the least.
Using power tools or a knife grinder, you have a choice between before or after heat treat.
Personally I grind all 12c27 blades after heat treat. Usually I make chef knives with this steel and I have had issues with it warping during heat treatment. The cross section of a chef knife being so high and thin, they seem to warp easier. Trying to stress the steel as little as possible before the dangerous quench, and also invest as little time as possible before I know the blade will be straight, I wait with the bevels.
So I choose to first grind the profile and clean up the blade, heat treat and make sure it is straight and only then start grinding in the bevels. Taking it slow and constantly cooling the blade by dunking it in water makes sure the tempering is not compromised.
*again this is my understanding and personal experience only. I have read others comment on negative effects from heat build up along the edge from grinding after heat treat.
Hand filing jig:
If using a hand filing jig, file the bevels leaving the edge between 0.5 and 1 mm thick before heat treat.
Normalising or not?
12c27 is not forged, only ground to shape so there is less of a need to normalise than when forging carbon steel.
Rightly or wrongly, I still normalise 12c27 by heating up and leaving to air cool 3 times before the final heat to 1080 and quenching. I have had issues with 12c27 blades warping during the quench and have read quite a few posts from others with similar experiences. (This image is from a carbon steel blade, the process is the same as in heat the blade up and let air cool to black)
The Hardening:
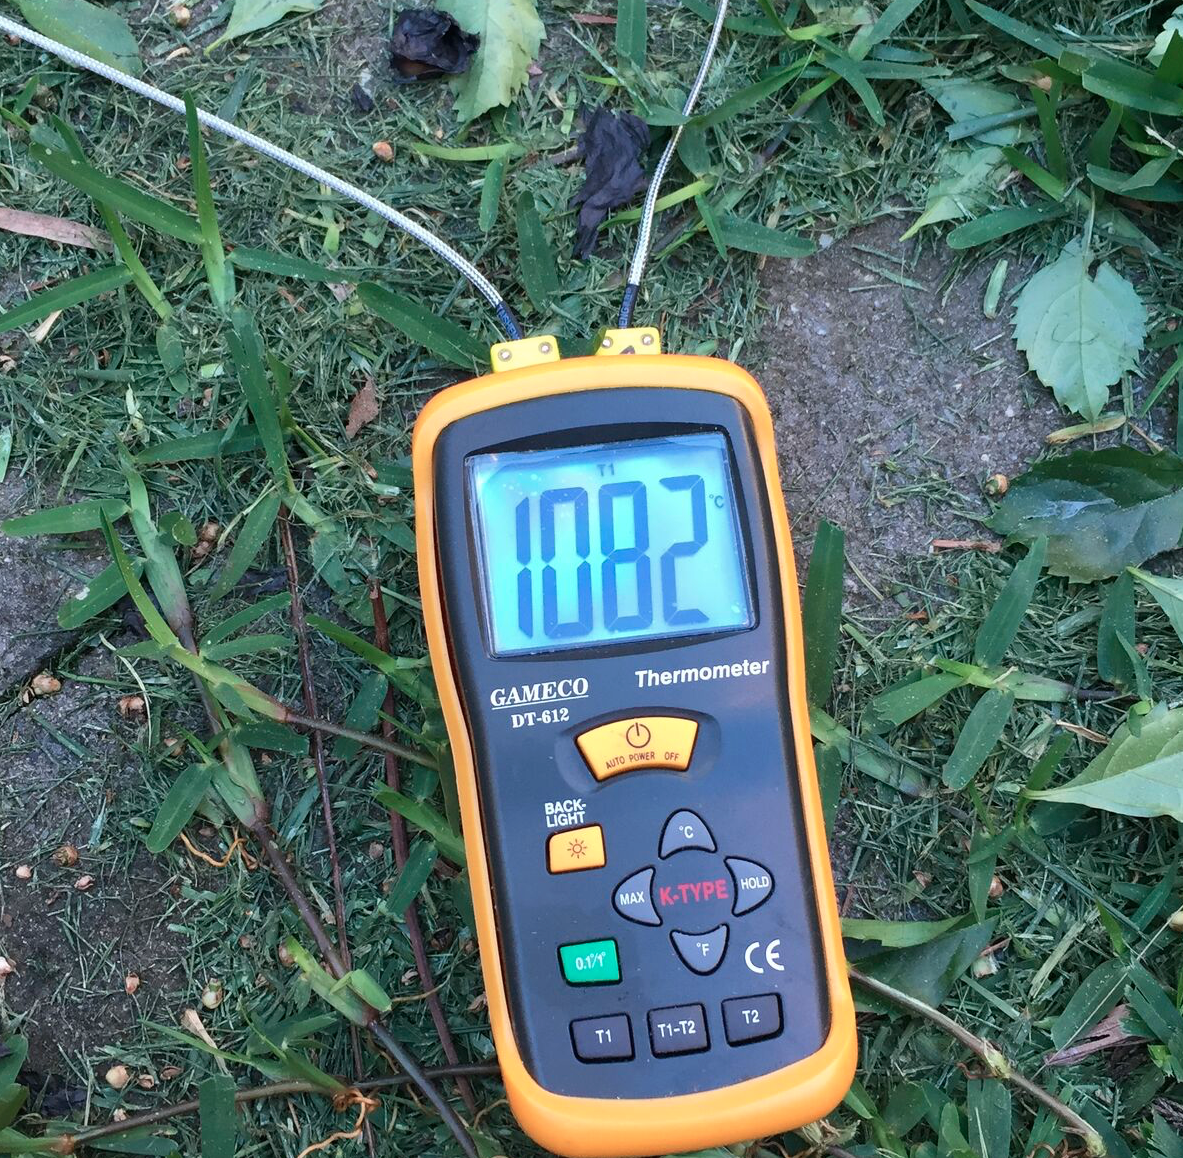
Heat treating 12c27 requires a temperature controlled forge. A thermocouple with a sensor in a hole drilled through the side of the forge is an easy way to do so. A Thermocouple costs about $50 and is a good tool to have. I use 2 sensors, one in each end of the forge and the temperature difference seems to be 2-3 degrees C between them.
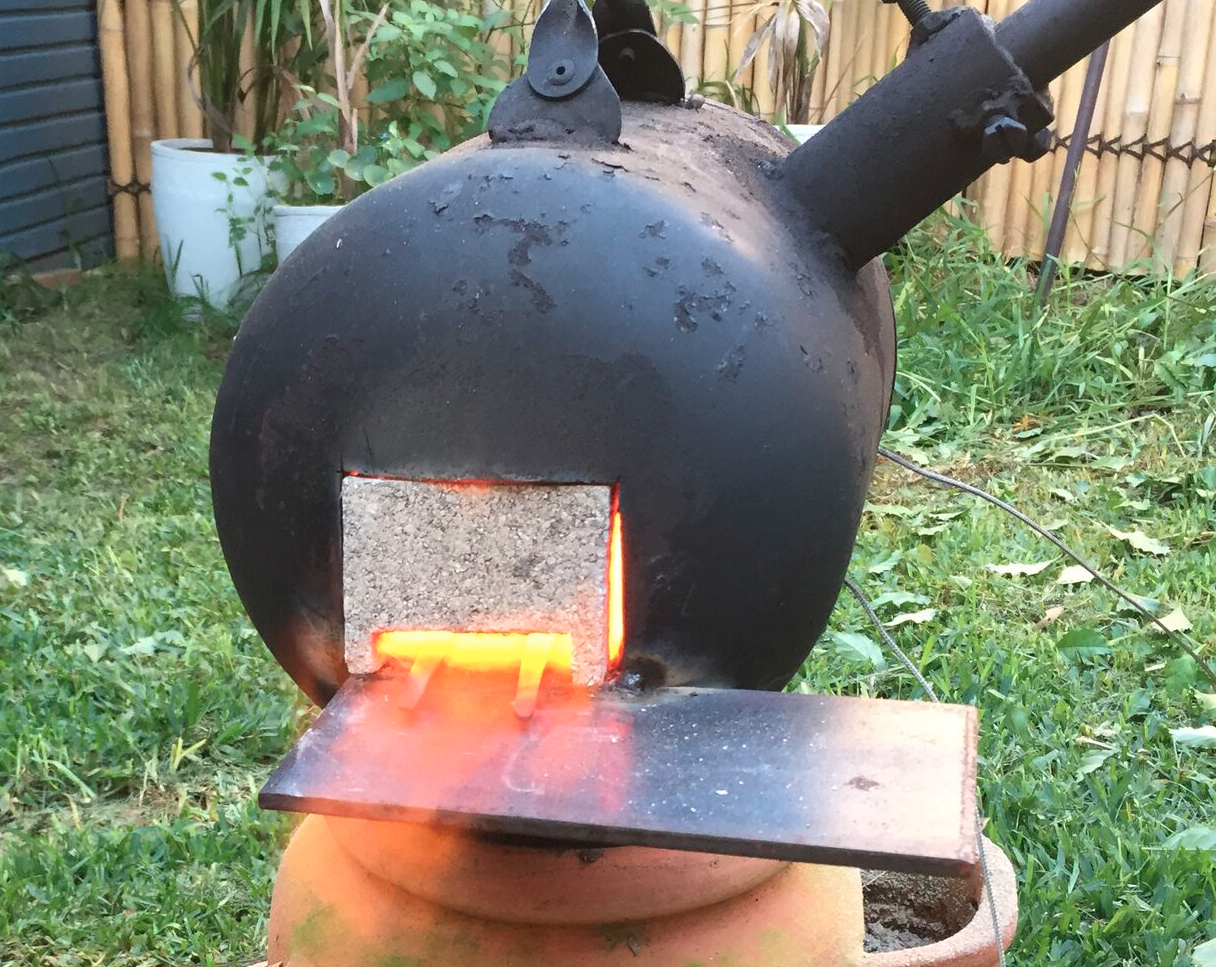
Have as small an opening as possible when heat treating stainless, as you are going all the way up to 1080 C and trying to maintain an even temperature. I use a bit of time at this step, making sure the temperature is even and stays even for several minutes before adding the blades. If the temperature goes to high and you start adjusting the gas, it is easy to overshoot or loose too much temperature.
Using a fire brick, block the opening(s) so only a small slit is free for inserting the blades. The smaller opening helps with achieving and holding an even temperature. I bought the firebricks from a pizza oven place, they are easily cut with a handsaw or knife.
Depending on your setup, you may have to move the blades but in my forge I am able to find the temperature and then just leave the forge. Add the blades, wait 5 minutes, quench in pre-heated oil.
Soak time 5 min at 1080C:
Soak time is the time you hold the blade at the critical temperature, allowing the carbon to "melt" or fully dissolve into the steel.
Hold the blade at 1080 C or as close as possible for 5 mins. This is based on a material thickness of 2.5 mm, as in the 12c27 we offer. Vary the soak time (holding time) for other thicknesses, based on this table from Sandvik:
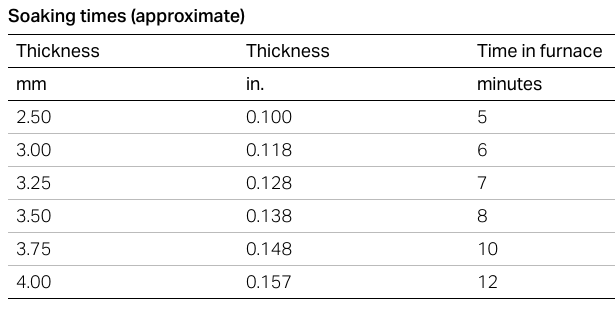
Hardening temperature needs to be between 1050 C and 1090 C, and hold time varies from 5 min for 2.5 mm thick stock to 12 mm for 4 mm thick stock.
1080 C is listed as the optimal temperature (1976 F).
Quench:
To harden the steel it needs to be cooled to below 600 C within a minute or two, ideally faster.
One easy way to do so is by quenching in oil.
Canola oil is an easy alternative, heat the oil to 30-40 C, colder oil is thicker and will not cool as effectively.
At least a couple of liters of oil to help remove the heat quickly enough.
Quench the blade in oil, then after 15 seconds or so pull it out and test for straightness. There is now a window of opportunity to straighten any bends before the steel "sets" and hardens.
Personally I have not had good experience with straightening warped blades, they either stay warped or break.
There are more experienced knife makers who successfully do so, so mentioning it here as it should be possible.
Hold the blade against a straight edge, gently bend and test again. Or place it on something flat and gently hammer flat.
*Disclaimer, I broke a blade by hand by trying to get it straight, with surprisingly little effort. So do this at your own risk*
(Another reason to grind after heat treat, invest less time before it may warp.)
Deep freeze:
This step is optional but adds some extra hardness to the blade. Cool the blade in a freezer until as cold as possible. The aim is -20 C (-4 F) and there is no hold time, only get it cold and then move to Tempering. Cooling the blade further, by using a bath of dry ice and methylated alcohol rather than a normal freezer is supposedly even better, adding a HRC point or two.
To reduce the time the blade is in this stressed state of being quenched but not tempered, try to get to tempering within 30 minutes of quenching.
Tempering:
A hardened blade is too hard to be a usable knife. It is brittle, will break and chip.
To give it back some "springiness" and take the hardness down to a usable level, the blade is heated to a lower temperature than during the quench.
Tempering is a result of time and temperature, so a higher temperature requires less time.
Tempering time: The Sandvik datasheet lists only a 30 min tempering cycle, using the below temperature/hardness graph.

Personally I have done 2 x 2 hours at 160 C and had a blade tested at Gameco in Sydney at 56 HRC.
I use this blade most days in the kitchen and am very happy with the performance so this works for me.
More experienced makers may have more knowledge to add to this, preferring 2 or even 3 cycles of tempering.
Stainless steel foil or vacuum heat treating?
The method described here in a gas forge can be used without stainless steel foil and will not result in a lot of scaling. It will not be as professional as if sending the blade out for heat treating industrially, but will provide a blade requiring more grinding/sanding than if sent to for instance Hills for HT.
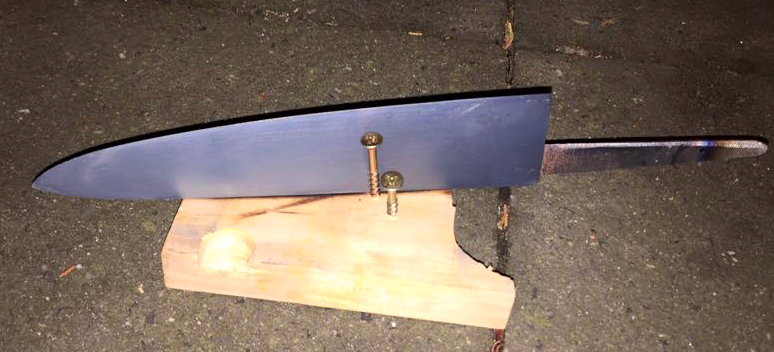
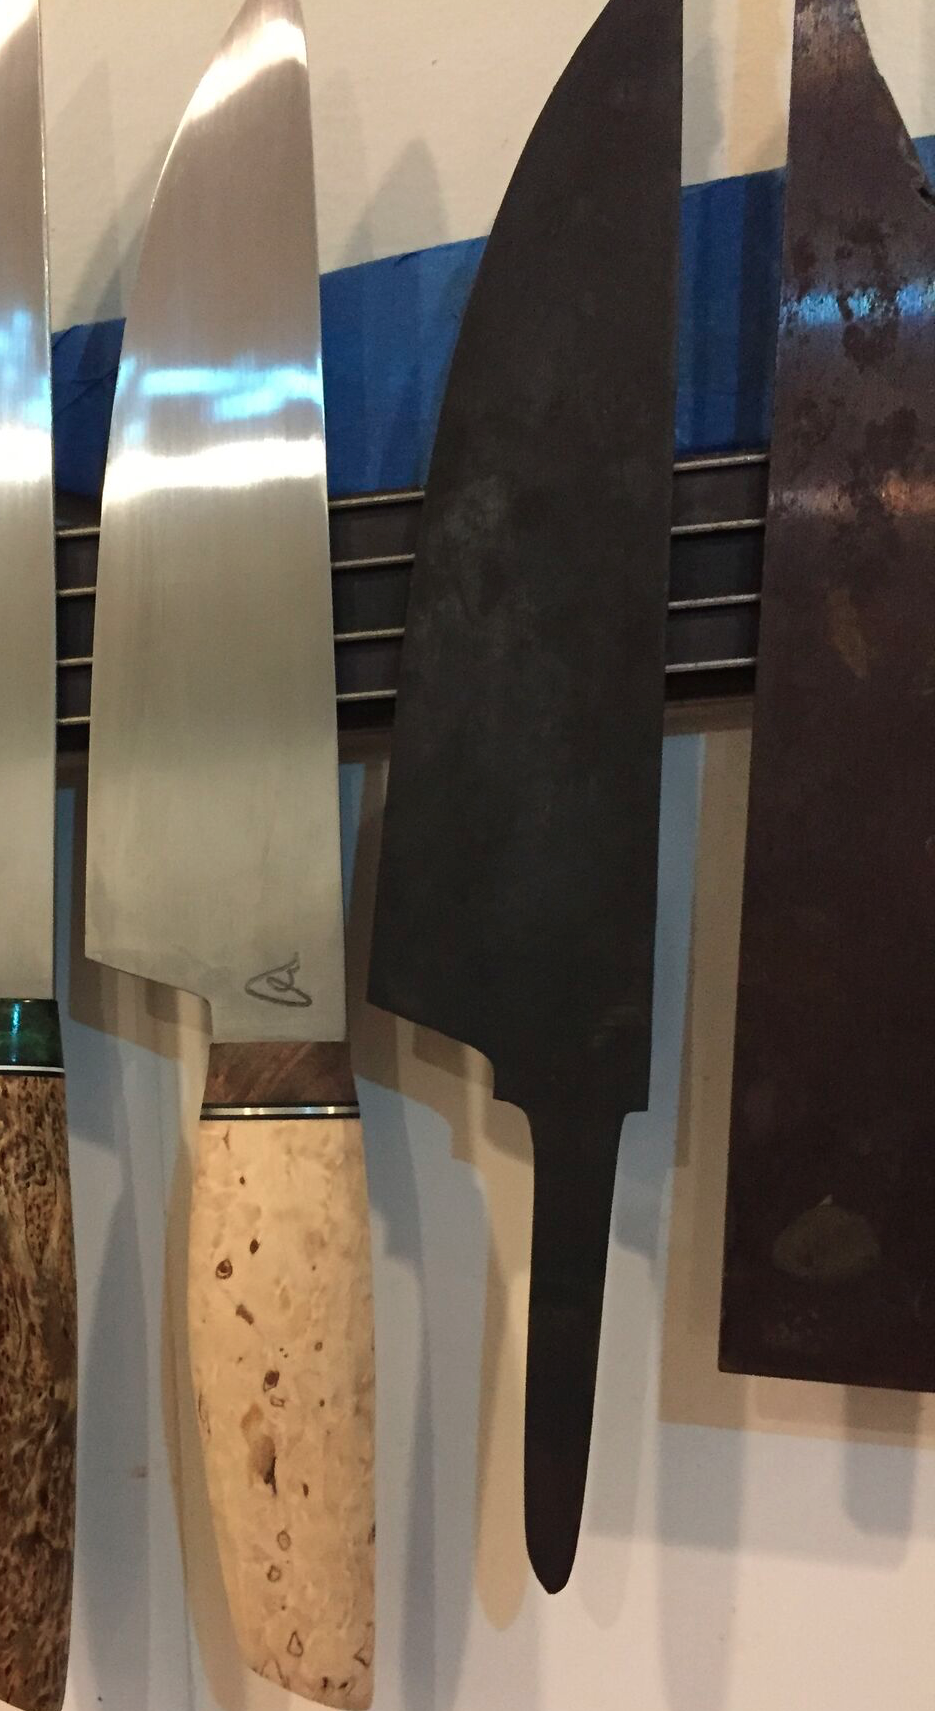
The heat treated blade shown below, before bevels are ground in and the hand sanding starts.
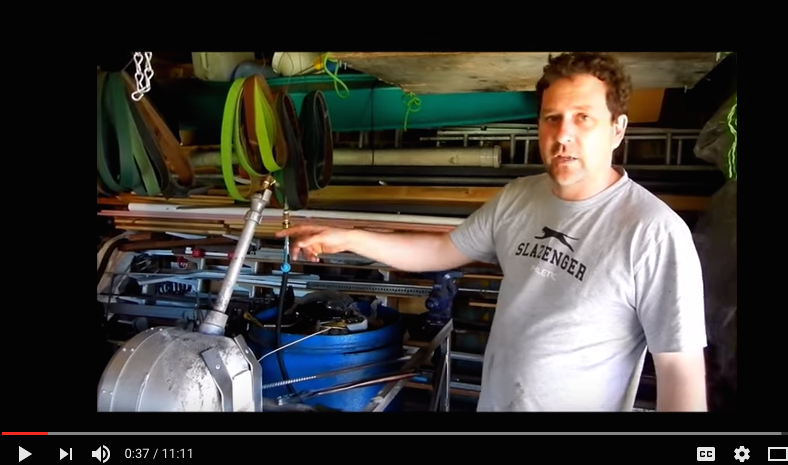
Corin from Gameco has made a really good video describing the process of heat treating in a gas forge, and how to tune the forge to a rich mix.
This means there is not enough oxygen in the forge to completely burn all the gas, resulting in no oxygen to scale up the blade during heat treat. The result is a cleaner blade, requiring less clean-up after heat treat.
Recommended video to watch: https://youtu.be/v4AuZTyEo2o


")


