


Description
How To Heat Treat Simple Carbon Steels:
** Recipe for 1084, 1075, 15N20 and 5160 **
The short version:
- Heat the steel to non-magnetic any way you can (815 C / 1500 F)
- No hold time required, just get the entire blade to this temperature
- QUICKLY quench in luke warm Canola oil (oil is 40-60 C / 104 - 140 F)
- Sand the flats with some sand paper (enough to get a few shiny sections)
- Temper the blade in the stove for 2 hours x 2 at 200 C (390 F)
- This will give you a good hardness for general purpose kitchen and outdoor knives.
- OPTIONAL: Even better - add normalising step first by heating 3 times to 875 C (1607 F) and letting air cool to black, before step 1.
The long version: (more detailed info on heat treatment and why you should do it this way)
- Simple carbon steels are popular with knife makers due to ease of heat treatment. Having a bigger window for success means you can do this with simple tools and still get a good result. The process above is a proven way to harden these materials. Do that way, don't combine it with something you heard or read just to be sure.
- Simple carbon steels are things like 1084, 1075, 15N20, (and 5160 which is often what leaf spring is made from.) There is an argument for using known steels rather than a random old piece which may or may not be the grade of steel you think it is, or may or may not have micro-cracks or other issues that might not be visible on the surface. But if you do make something from an old file or a "mystery steel", this is the recipe you start with, hoping it is a simple carbon steel. if that fails, it is either not hardenable, or not an oil-quenched steel.
- Heat the steel any way you can, a blow torch, a fire in the ground with a hair dryer, a gas forge/furnace. Just get the entire blade to the same temperature which you can see by it having the same colour all the way. We are not too concerned about the tang, but the entire blade and if possible the part going into the handle should be the same temperature.
- This is aimed at someone starting out - and will work well with for instance 1084 high carbon steel and the other simple carbon steels mentioned. Even better is a gas forge with a thermocouple for temperature control, consider these the basic version.
- Do not rely on the colour of the steel as a thermometer, telling you when it is hot enough. This requires experience and consistent light environment each time you harden blades. Different light can easily adjust the visible colour from time to time.
- It is much simpler to get a magnet from an old speaker and take the blade out of the heat source, touching the blade to the magnet. When simple carbon steels like 1084/1075 etc are at "Critical temperature", they are no longer magnetic. *anyone ever says this as part of heat treating stainless steels be sure they are well-meaning but wrong*.
- Simple Carbon steels are easy to heat treat but where you have very little room for play, is the Quench:
- When the blade is non-magnetic, note the colour as this is what you are going for. In with the blade, get it to the same temperature or slightly higher, then QUICKLY get it into the oil. You have little time between the heat source and the oil, as the blade loses temperature in the air quickly.
- Pre-heat the oil to 30-40 C by heating a piece of steel and stirring around in the oil. This is easy to overdo, give it a stir and test with your finger. Easy to heat the oil more, takes a long time to cool down again.
- Steels are considered either "air cooling", "oil cooling" or "water cooling", generally based on the carbon content. The lower the carbon, the quicker (more agressive) the quench has to be.
- Simple carbon steels are "oil quenched" so do not use water, this is unnecessarily agressive and might crack the blade.
- Heating the oil makes it more fluid and thin, it can get close to the blade and cool it quicker. As opposed to thicker, slow-running cold oil which might create a steam envelope around the blade (not cooling it as quick)
- Normalising: In the past normalising was considered by many as an optional step, at least if not having forged the blade. Today it is probably done by most if not all knife makers who have been reading up on the knife steel testing done. We ALWAYS normalise these steels before quenching and recommend you do so to to reduce the risk of a coarse steel structure and possible bends. To do this you do require temperature control as you are holding the blade at 875 C and then letting it air cool to black before heating it again to 875 C for a total of 3 times - then go on to heating it to 815 C and quenching in warm oil.
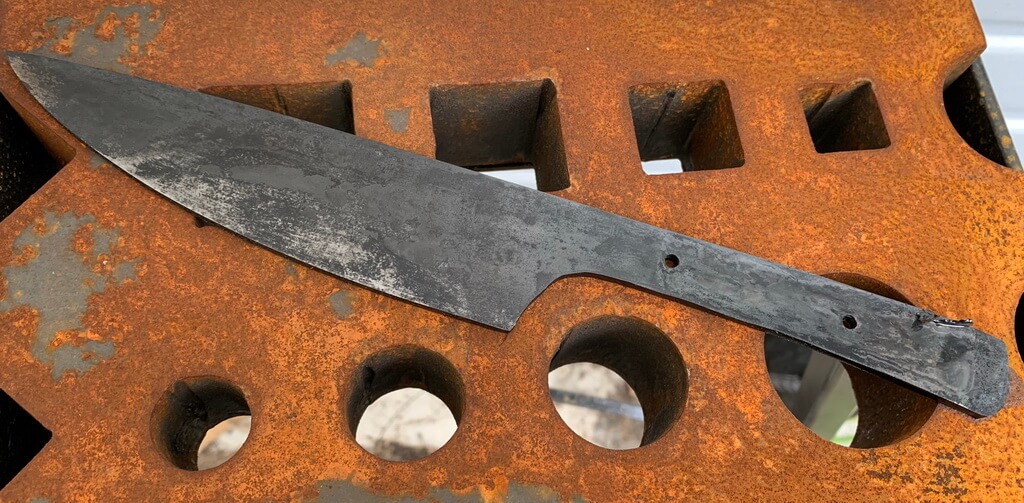
*the blade has been wiped clean after the quench. Next is sanding some shiny areas for seeing temper colours, then into the oven for tempering it goes*
If you are still reading, here is more detail:
- When the blade comes out of the quench, it is fragile. Treat it carefully. Wipe the oil off and have some fine sand paper ready. Quickly sand the flats until you have some shiny areas, this is for being able to see the Temper colours later. Do not straighten any bends, do not drop it, do not wait until tomorrow if you can avoid it.
- Get the blade in the stove at 200 C, having the stove pre-heated is a good idea. Leave it there for 2 hours, cool it under the tap and inspect the temper colours you got. Anything from light straw to dark bronze is generally considered ok.
- Tempering colours is oxide building up on the steel, as the steel gets hotter and hotter in the stove. Because these colours are thin layers that build up, changing the colour, some very clever people have tested this again and again, showing that there are clear "rules" for what colour is showing based on the temperature. This is why we consider tempering colours "evidence" of successful tempering, your blade has golden/brassy colours? Awesome, well done. The thermostate in your stove is probably not super accurate so make a note of what temperature you put it at and what colours you got so you can adjust next time if necessary (Talking of improving your game, Taking Notes is probably right up there with "Don't take the guard off the angle grinder" and "use a dust mask" even though those are more "how to live to retirement" kind of tips).
- The oil can be a lot of different things, most or all of these might work but why not use canola oil? It is thin enough to quench quickly, it is cheap and readily available, it does not contain dangerous stuff (unlike used engine oil etc) to breathe in while quenching, and it is easy to get rid of when that time comes. Canola oil is not as good as professional heat treatment oils, but if you are sitting on some of that, you are probably not reading this article :)
- Tempering temperatures very much affect the final hardness or to be clearer: The higher temp temp, the lower final hardness of your knife blade. So for a sword for instance where you want a tougher blade, you accept giving up some hardness and temper at a higher temperature than for a chef or outdoor knife where 200 C is the normal recommended tempering temp.


