Description
How to make your own blade and fulltang knife
These instructions show how to make a knife including the blade itself, using our 1084 Carbon Steel kits.
The instructions are showing how to make a fulltang blade, the only difference with making a stick tang blade is during the profiling of the blade. For instructions on completing a knife when the blade is ready, the Fulltang instructions are included below, or head over to the stick tang instructions if making one of these.
The process:
- Design your own blade profile and cut or file this out
- File in bevels
- Drill holes for pins
- Heat treat the blade
- Grind in final bevels
- Hand sand the blade
- Glue on handle scales
- Shape handle and sand smoth
- Optional: seal handle with oil, wax or similar
The advantages of making a blade from a known steel, as opposed to an old file or a random piece of steel are these:
- Heat treatment, by knowing the steel you have a greater chance of successfully hardening the steel
- Easier to work, buying steel that is already annealed will be a lot easier to file, drill and work than anything that is hardened already.
Thank you to Samuel Hart for the photos of his build, used below.
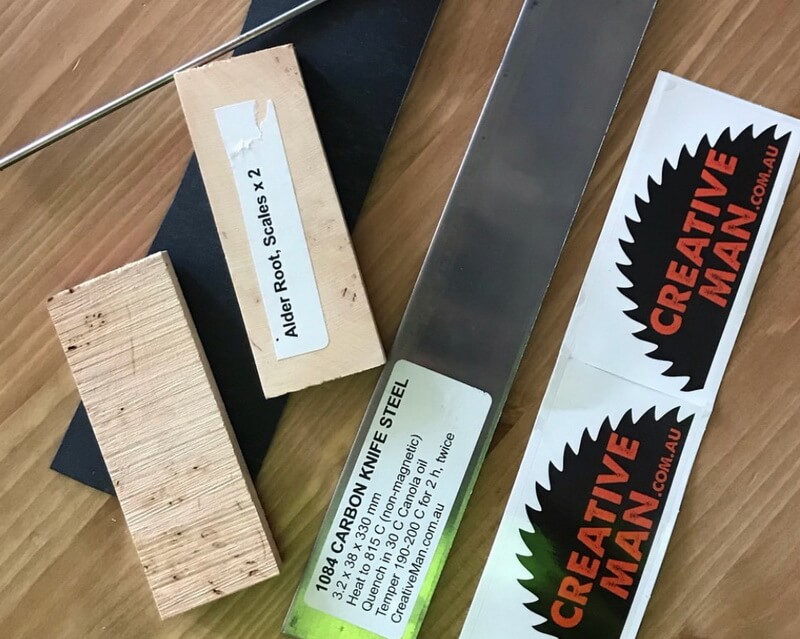
Designing your blade profile
Draw the size of the steel you have available on a piece of paper, multiple times down the page. Draw in a shape you want to make, and then do it again. Test different versions until happy, the fact that you draw it several times also tend to make the lines smoother and often the profile ends up better looking.
You have complete freedom at this stage, but if wanting a basic starting point aim for a handle that is 12 cm long and a blade that is 2,5 wide and 10 cm long. A "scandi grind" will be easier to make yourself than a full flat grind with hand tools, and a smaller blade will be easier than a long blade. The more of the process you will do by hand, the more you may want to take this into consideration. The sides of a 10 x 2.5 cm blade with a scandi grind is going to be a lot easier to bevel and hand sand than a 20 cm x 3.5 blade with full flat grind. But this is your blade, so you decide :)
Draw the profile onto the steel and cut out with an angle grinder or hacksaw and hand files;
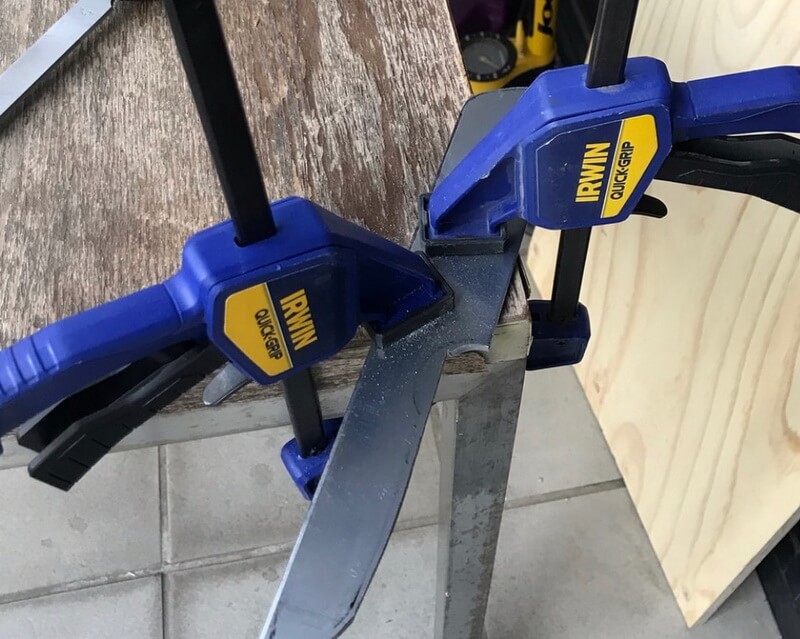
When buying knife steel, it is already annealed. This means it has been heated and cooled so slowly that the steel is as soft as it can be. This makes it a lot eaiser to work and it can be filed into shape by using hand tools. Using an angle grinder or other power grinder is faster, just don't go to close to your lines if using an angle grinder. In the image below the entire profiling job is done with coarse files.
Grinding in the bevels
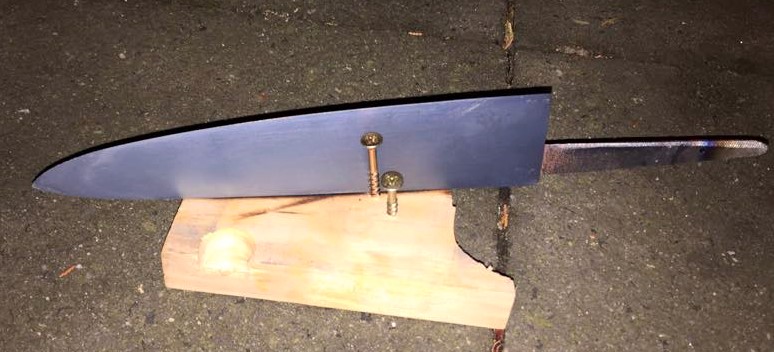
The bevels are the sides of the blade that thin towards the edge. There are different profiles for different purposes, the most common are either scandi grind where the bevels go only partially up the side of the blade, and full flatgrind where the bevels go all the way up to the spine. In the below image the bevels are filed in with the blade clamped to a piece of wood and using freehand. For an easier way to get even bevels using hand files, check out how to make a hand filing jig on youtube. It is a T of wood that uses an eyebolt to hold a file at a constant angle, making for nice even bevels. Because the file is clamped to a steel rod and threaded through the eye bolt, the angle is constant and you get even grind lines. Hand filing jig: https://www.youtube.com/watch?v=r9iNDRwwBQQ
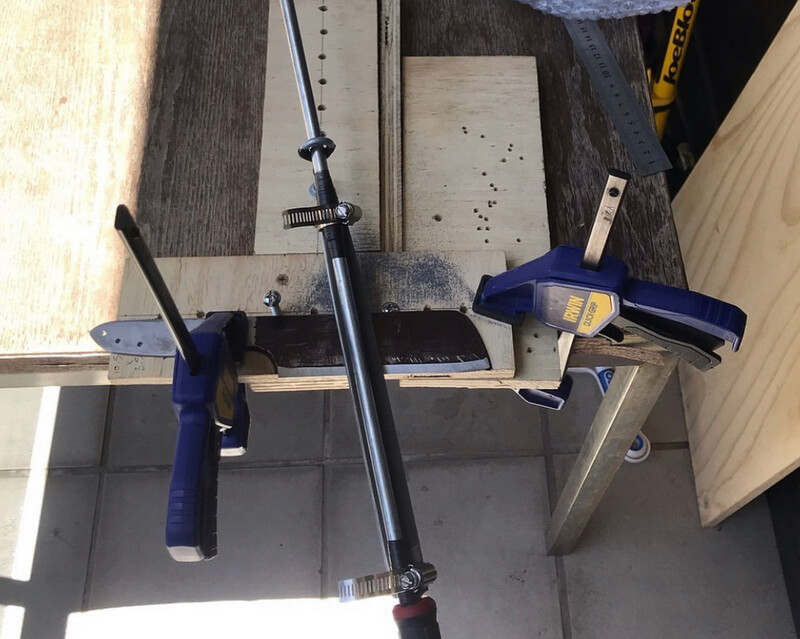
Leave the edge of the blade almost 1 mm thick, try not to go too thin. You want to leave enough steel to have something to grind off after hardening and leaving an edge too thin often warps the blade during the quench. It helps if filling the files with chalk, this stops them from filling up with small sharp pieces of steel which then scratch the blade. Brush off the steel pieces, add more chalk and file again. And again. And again. This is where deciding to make a chef knife without power tools will make for a lot of work, and a shorter blade with a scandi grind will be easier to complete.
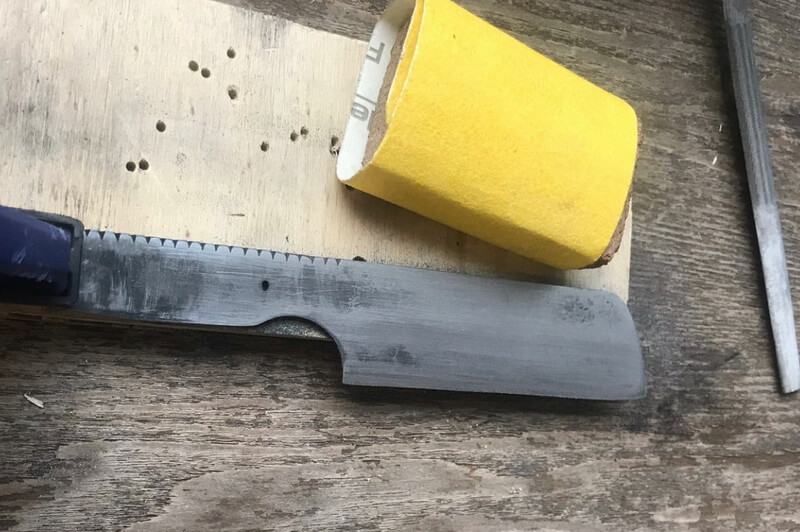
Hand sand the blade to get rid of scratches from the files. Wrap the sand paper around something hard, like a file and sand the blade. No need to go very fine, only until all scratches are gone.
Drilling pin holes:
We recommend using handle pins, this makes for a stronger handle and is easier to glue up than 2 scales sliding around on the epoxy with nothing holding them in place. Drill the holes matching your pin stock (1/8" or 1/4") BEFORE heat treatment.
Heat treatment:
Here comes the beauty of using a known steel, like 1084 which is probably the easiest steel to heat treat at home. Heat the steel any way you can until it is non-magnetic. A lot of other steels require higher temperature, soak times etc while 1084 you can heat and keep touching a magnet until it is no longer magnetic. Then heat again to that colour and quench in warmish canola oil. If using temperature control equipment, you are aiming for 815-820 C. Warmish canola oil (30-40C) cools better than cold canola oil, as the warmer oil will have lower viscosity and be more "liquid", helping to get close to the blade and draw out the heat.
This quenching step is the most critical step in making the blade. Get it to the right temperature, not too hot. Get it out and quench quickly. Then go straight to tempering. Tempering is the process of softening the blade up slightly, making it a usable tool and giving it the ability to flex back. Untempered the blade will be too hard, to fragile and can crack if dropped or even if just left overnight in some cases. Be gentle, you can snap the blade with your hands after quenching, before tempering. You only try to "quickly fix a bend" once, then you learn this :)
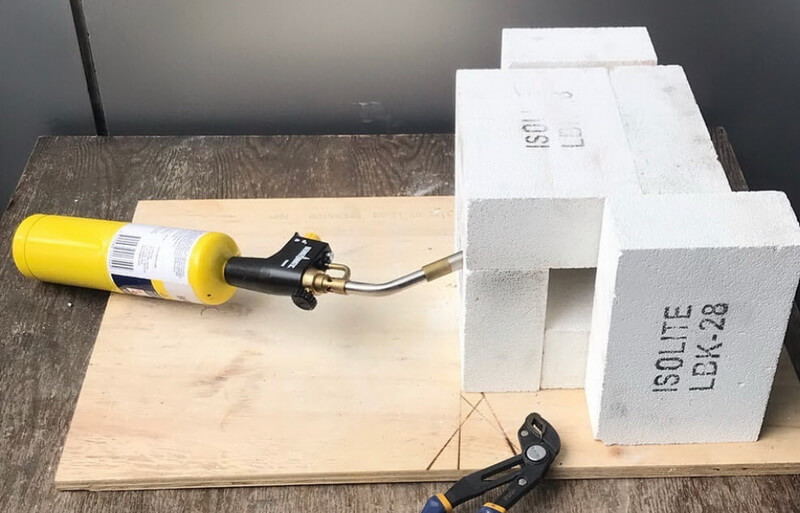
Temper the 1084 blade in a normal kitchen stove for 2 hours x 2 times, at 200 C. There is an amazing amount of theory on heat treatment, this summary skips most of the discussion, trying to focus on getting a blade from a known steel (1084 or 1075) hard and tempered as easily as possible.
Now it is time to grind in the bevels again, this time to zero (sharp). A Scandi grind meets in zero, a flat grind stop at about 0.1 mm or more and then a final sharpening leaves a sharp edge at the bottom part of the blade.
After heat treat it is common to file off a touch of the steel on the edge, to avoid any steel that lost carbon during the heating phase. Before adding the edge.
The below image shows the blade after the bevels are filed in and the blade is then hand sanded. Hand sand the blade by clamping it to a piece of wood and wrap sandpaper around something hard, like a file or piece of steel. The steel is now harder to sand than it was when it was annealed.
From here on out, it is standard knife making using a completed blade.
These instructions are for Fulltang blades, where handle scales are attached on each side of the blade.
For stick tang instructions, see this link: https://nordicedge.com.au/how-to-completing-a-scandi-knife-kit/

This is a rather lengthy article, for those wanting a bit of detail.
The short version is simple:
- glue fibre spacer material to the handle scales
- drill holes in scales for pins (optional step)
- glue scales and pins to blade
- grind/file scales to profile of blade
- shape handle, rounding the scales by file or belt sander
- hand sand with sand paper
- seal handle with oil (optional step)
Step 1: Cut spacer material to size of handle scales, make sure scales are flat. Often wooden scales are not quite flat, and need to be sanded or touched to a belt sander to become flat. The vulcanised fibre spacer material is optional, but recommended. It helps fill any gaps, having a slight amount of give in it. It also gives a clean, crisp contrast line between the steel and handle material. Wrap blade with tape, ro in cardboard to protect the blade from the belt sander, and fingers from the blade.

Step 2: Glue the spacer material to the handle material. 5 min epoxy and some baking paper is handy for this, clamp the scales to a table or similar. Gluing the spacer material to the scales is a lot simpler than having lots of moving parts when gluing everything together, as well as simplifies drilling holes for pins or corby bolts if using these.

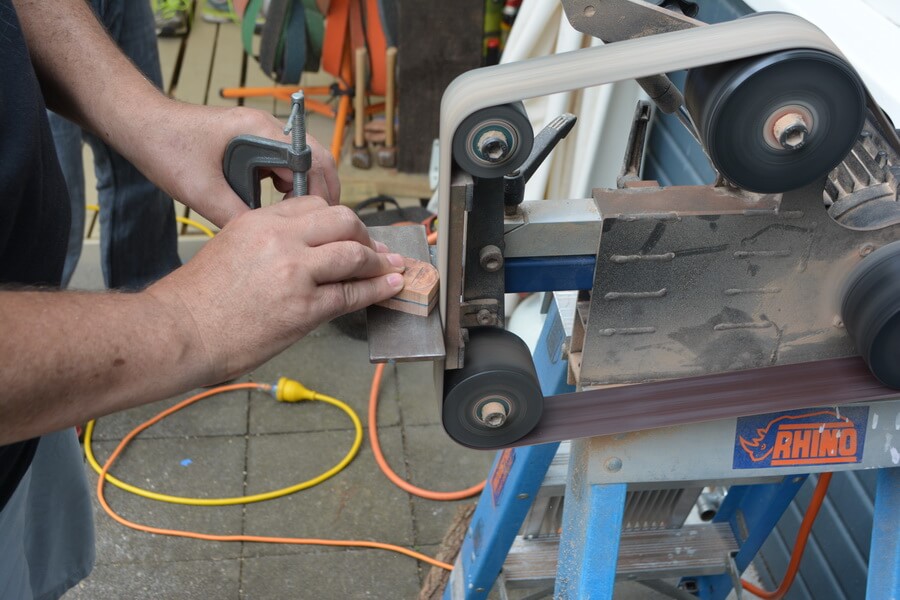
Step 3: Shape the front of the handle scales. It is much easier to clamp the scales to each other and shape the front bit before they are attached to the blade. Round them or square them, or whatever shape you prefer. The point is to make them symmetrical and help the later shaping by completing this side before gluing it all up. Lay the scales on the blade, decide where they will end and how the front should look. Using a coin or other round object is a simple way to get a round shape. Draw this on one scale and then shape them using a file, belt sander or similar.

Using a grinder to shape the front of the scales. Scales are clamped together to shape both scales at the same time and make it symmetrical. This could just as easily have been done by clamping the scales to a table and using a rasp or file.
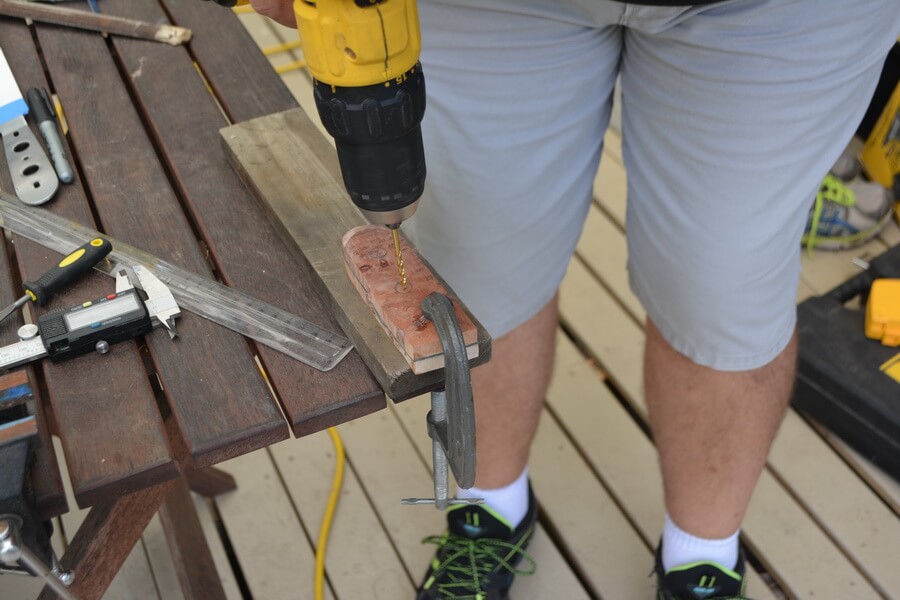
Steo 4: Drill holes for handle pins (optional step). Lay the scales underneath the blade and drill through where the corby bolts or handle pins will be. Note the steel/brass/copper pins are much simpler to use than the corby bolts, only requiring a hole and glue to use. The corby bolts need a more precise process to give a good fit.
On this particular blade the holes are quite large and were just drawn on the handle scales, then holes drilled at the centre of the marking holes. Using 1/8" pins, drill 1/8" holes. Here are stainless steel pins in 416 steel used, these are freely machinable and take a great finish but in reality anything can be used. A nail, piece of coat hanger or welding rod etc all will work, just avoid hardened steel unless thoroughly enjoying hand sanding.
Optional step if using pins: Measure the handle pin lengths required and cut these with a hacksaw, dremel or the corner of a file. To make sure the wooden scales do not split, often the length of pin is lightly touched on a belt grinder before cutting to make it an easier fit. As always, do not use a dremel without protective glasses. Those little cutting discs fracture the second sideways pressure is applied to them.

Step 5: Ready for gluing. Wipe all sides that will have glue with acetone to prepare for the gluing. Be ready with kitchen paper and more acetone for wiping glue off the blade. This is easier than waiting for it to harden and then use something softer than steel to scrape it off.

A simple build like this works well with 5-min epoxy. Spread glue on the bottom scale, add the blade and then glue to the blade and then the last scale. Then add some glue to the pins and insert these. Have a hammer and board within reach if needing to tap the pins through. Then clamp it all up and wait for it to completely dry.

This is another reason why it is so great to us handle pins: Note how the scales line up automatically. Without the handle pins, the scales can slide around on the glue and be hard to line up. Then when adding clamps, they again slide around. Handle pins not only look good but help getting everything lined up.

Step 6: Shape the scales to the profile of the knife tang. This can be done by clamping the blade to a table, in a vice or similar and then filing or rasping the scales to the handle shape.
Here Geoff is using a belt sander to quickly grind away the excess handle scale material. The idea is to grind away all the wooden scale material that sticks out over the tang, until there is solid steel the entire way around.

Step 7: Shape the handle. This can be done on a belt sander, grinder, a floor sander upside down in your lap, by wood rasp or even by whittling it to shape. Anyway you prefer to remove material. The general idea is to round the scales until comfortable to hold. Some prefer the handle to thin towards the end, others prefer the end of the handle to be thicker and thin the fornt piece. There is no right or wrong, only what feels right to you.
Some design guide lines: mark 5 mm or so all around the handle scales. Try to not grind any further down than this, and even 5 mm is probably a bit too thin. Stop often, spend more time looking at the handle than grinding it. Take breaks, have another couple of knives nearby and compare the handle sizes. How wide across the back do you like the handle to be? How tapered do you want the front? It is easy to take off material, harder to add back so take your time and have fun.

Step 8: Hand sand the handle. Clamp the covered blade to a table or similar. Cut strips of sand paper, cover the back of the sand paper with a layer or two of masking tape. This way the sand paper does not break while "shoe shining". Sand by grabbing the strip of sand paper between your thumbs and fore fingers and shoe shine across the side of the knife handle that is up. This motion evens out the handle, smoothing out cuts from the belt sander. Start with 180 grit sand paper and keep going until there are no scratches going any other way than the way you are sanding. This is pretty important and where it can be easy to give up.
Expect to spend more time on the first grit than the other grits combined, as you need to get the scratches out. If there are deep gushes, even go to 80 grit paper but be careful of how long you do this, as even 180 grit paper will remove quite a bit of wood in a minute of sanding.
You are looking for fine, white lines. These are scratches that the wood dust are gathering in and may not be very visible when the entire handle is at the same, coarse grit. But as the rest of the handle becomes shiny at the higher grits of sand paper, the scratch will be more and more visible as the contrast increases. There is no real way to get it out when you get to 800 grit paper and you may have to go back to the 180..
Let it take the time it will take, ending with an even, rounded handle. Do one side with one grit, then turn the knife over and do the other side with the same grit. Before leaving that grit, do the sides, unless you want the sharp ridge that is being created on the top and bottom of the handle.
Grits to use can for example be 180, 320 or 400, 600, 800, 1200 (all of these are often available at hardware stores like Bunnings. If wanting a real nice finish, get some high grit sand paper from ebay or similar. We often go to 3,000 grit. 1200 would be a minimum as this is where the wood grain starts to really pop out.

Hand sanding with a fairly coarse sand paper also shapes the handle, so it can be good to stop a little early and then smooth the shape with some shoe shining

The finished product! Australian Red Mallee Burl handle scales, sanded to 3,000 grit.

Another finished handle sanded to 3,000 grit. This one is in mango wood.

Optional step: Seal the handle with oil, wax or similar to protect it from moisture and retain the finish. This can be Danish/scandinavian oil for furniture, CCL oil specifically made for knife handles, tung oil, or similar. This is the mango wood handle finished with CCL oil, a great handle finish that dries hard and clear.


